cards · Christmas · copics · Lawn Fawn · One Layer Card · rubber stamps · Techniques · Winter

Lawn Fawn One Layer Card Challenge…


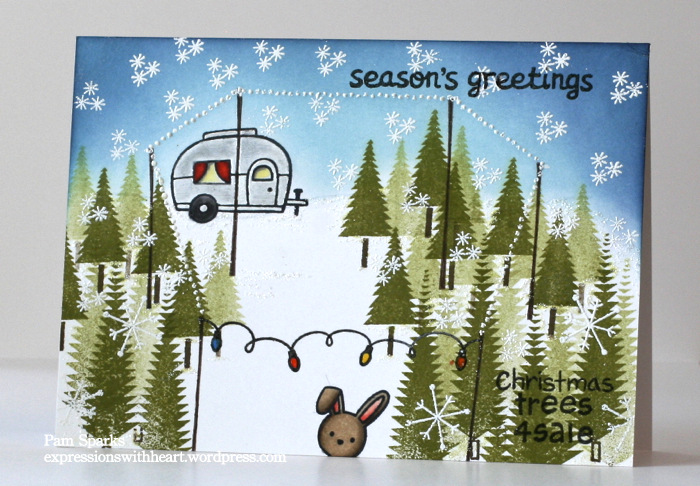
PamSparksLFTreeLotScene700

Sometimes I feel like a kid at Christmas… giddy with excitement!  I can hardly wait to share what I make! lol

If you lived across the street from me… I’d be over showing you… asking your opinion on this or that until I was done!  Well, then I’d probably be asking you if I should change this or that after the fact! ugh. lol

I had so much fun making this scene!  When I saw the Lawn Fawn Challenge was create a one layer card… I had a good idea what I wanted to do!   Here it is down to the wire but I’m getting it in before the deadline!

When our daughters were growing up we always went to a tree farm, picked out the tree and had it cut down.  Well, we didn’t keep doing that after they left home… haha.  We started going to Des Moines to a wonderful tree lot and sure enough…there is an Airstream camper there for you to go settle up and pay in.  So I had to put one in my scene!  Cute!

So here it is… the lighted Christmas tree lot!  I love it!  Silly me!


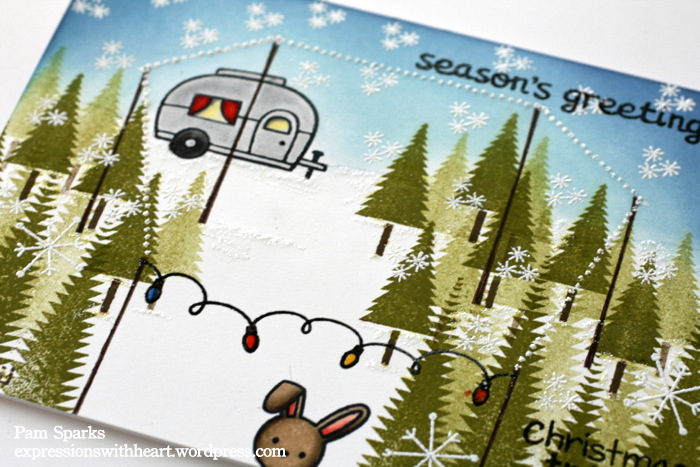
PamSparksLFTreeLotSceneClose

I will put links to all the sets I used below… I used Distress inks…peeled paint, tumbled glass, broken china, chipped sapphire.  I colored the camper and bunny with copics.  The silver on the camper is a metallic silver gel pen.  White embossing powder for the snowflakes and lights.  Frosted Lace stickles for the bit of sparkle.

It’s ALL one layer!  : )

Linking to…

Lawnscaping Challenge – one layer card

89


I won!!!!  So happy and delighted…thank you Lawnscaping team!

QOG


NBUS Challenge # 2 – Christmas

button aqua use this the


Simon Says Stamps, Work it Wednesday Challenge

workitwedbanner


Thanks for looking! Hope my card makes you smile! ttul!

Stamps and supplies I used to make this card…

Birthday · Blog Hop · cards · CAS · Lawn Fawn · Memory Box · MFT · Paper Smooches · Perfect Layers Tools · Printworks · rubber stamps · Techniques · Wedding

Perfect Paper Crafting and Xyron Blog Hop…

XyronHop

WELCOME!

So excited to share some cards with you, that I made using Perfect Paper Crafting and Xyron’s awesome products!

The Perfect Paper Crafting team is posting today but you can take all week to hop around and comment for a chance to win a fabulous prize!  $50 gift certificate! (winner to be announced the 25th on the PPC blog)

The Xyron team will be posting each day on the Xyron blog and giving away prizes every day!

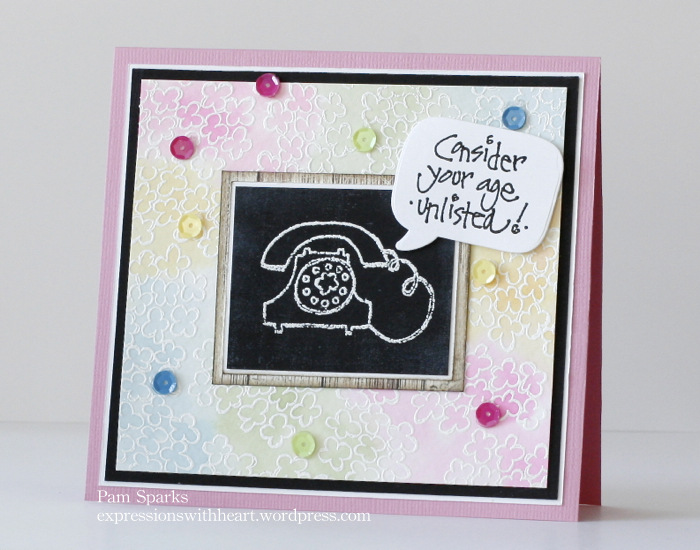
My first card for today will make you laugh…brrring brrring


PamSparksPWTelephone700


I do! lol

I love this sentiment from Printworks and use it anytime I use a telephone!  This adorable telephone image and the floral background stamp are NEW and also from Printworks.  I embossed the telephone and the flowers (multiple times) with white pigment ink and Tsukineko’s Imagine White Embossing Powder.  The sentiment is stamped with black pigment ink and embossed with Tsukineko’s Imagine Black Embossing Powder.  I die cut the sentiment with a die from Lawn Fawn.

I used Printworks stamp pads for watercoloring the white embossed flowers (watercolor paper).  Go back in time…the first CHA type show I went to was in 1995.  Printworks was there teaching Annette’s (the owner and artist) watercolor techniques.  She introduced using stamp pads for watercolor way back then! It’s stood the test of time for sure!

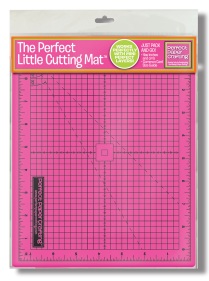
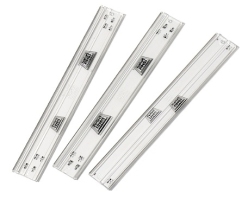
What can I say that I haven’t said a million times about the Perfect Paper Crafting Layering Tools!  They are the BEST!  I Love these tools!  I didn’t think there would be any room for improvement but I love the mini tools and mat more!  I’m glad I have both sets though because today I needed to use the one inch ruler that just comes in the long ruler size.

It’s so nice to get the professional look of even borders along with the charm of a handmade card.  Use Sparks 5% off at checkout to get 5% off your PPC order!  Thank you for clicking through my links.

MinisPkg__02217.1405333517.451.416   MatPckg__92234.1405333593.1280.1280layers__15229.1405333517.1280.1280


What did I use from Xyron?  Well, they have this awesome Mega Tape Runner… looks like this…

1_82605_FS

wow!  It’s great!  It dispenses permanent adhesive dots and is refillable.  So easy to operate too… not too big and not small either!  It just works!  YAY!  I used this to put most of my layers together.

I adhered the telephone panel to the white embossed panel with Xyron ¼ in. High Tack Double Sided Tape…

SBC_xy-100068.gif

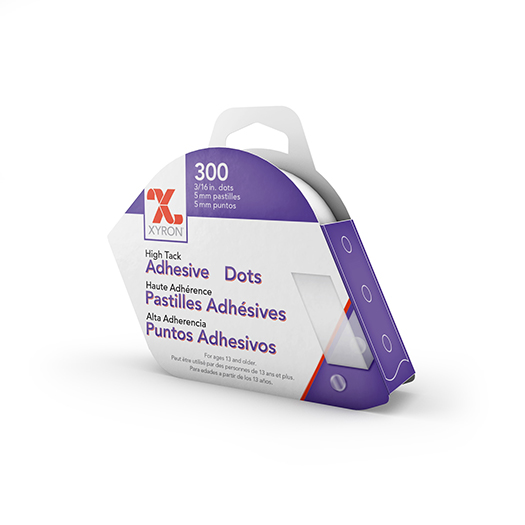
and the sequins with Xyron High Tack Adhesive Dots…perfect!

SBC_xy-100070.gif

My next two cards are wedding cards…


PamSparksPottyPPLWedding700


Here I used the Perfect Layers Mini Tools and Mat to cut my card base.  I scored and folded a sheet of 8.5×11 card-stock, then adhered my main panel to the folded card base with the Xyron Mega Tape Runner, then used my mini tool to cut the border on the other three sides.

I used the Xyron Mega Tape Runner to adhere the Studio Calico wood veneer potty people to the circle too!  Yep, they stick great!  I was able to rub away any excess before I stuck them down, so easy because it’s dot adhesive. (looks like the wood veneer potty people have been discontinued)

My inspiration for this card came from Maile Belles’ card HERE.

I partial die cut a circle and then die cut two complete circles for the layers.


PamSparksTwoLivesPottyPPL700

Another fun wedding card using a Memory Box border die, Printworks stamps, wood Potty People and a Doodlebug red heart embellishment.

Again I used my Perfect Layers tool to cut the three sides of my card base and the Xyron Mega Tape Runner to adhere the layers and the potty people.

Wonderful tools!  Wonderful adhesives!  Thank you PPC and Xyron!

Your next stop is Jenny’s blog! Enjoy the hop, be inspired and I hope you win!

Thanks for stopping by and hopping with us!  ttul!

I’m linking my first card up to the Seize the Birthday challenges – anything goes 

I’m linking my second card up to the Simon Says Monday Challenge – anything goes

I’m linking my third card up to the Clean & Simple Stamping  challenge 303 – sketch

Supplies I used on these cards…

cards · CAS · Die Piecing · Lawn Fawn · Memory Box · Perfect Layers Tools · Serendipity Stamps · Winter

New Memory Box meets Lawn Fawn…Serendipity Winter Scene…

NEW Memory Box and poppystamps dies…Spring 2014 release in stock @ Starlitstudio.net

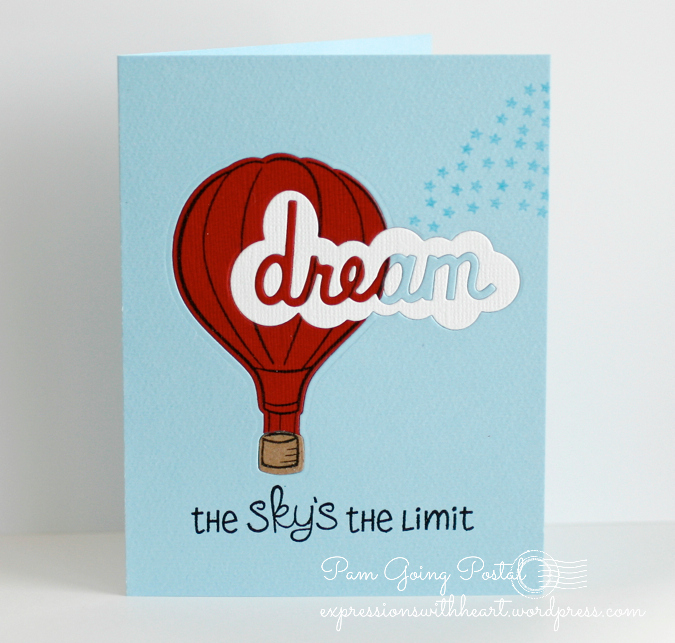
PamSparksLawnFawnBalloon:MBDreamCloud

Isn’t this going to be a fun congrats card or graduation card?!  I love it!  It’s so fun when what you imagined works out!  YAY for stamping and die cutting  FUN!  *grin*

a little bit of a side view…

PamSparksLawnFawnBalloonMBDreamCloudSide

You are looking at the NEW Dream Cloud die from Memory Box!  There’s a new happy cloud, birthday cloud and thanks cloud too!  I LOVE using the words by themselves too!  Cindy at Starlitstudio.net has them in stock!

The balloon stamp and die, sentiment and star stamps are from Lawn Fawn… link below in the supplies.

Linking up to CAS on Sunday – one layer wonder (yes this truly is one layer!)
Addicted To CAS – luck
Clean and Simple Stamping – sketch (upside down)
Sarah Hurley 365 – Speech Bubbles
Stempelgarten Challenge – one layer card
Sister Act Card Challenge – Anything Goes
Word Art Wednesday – Anything Goes
Addicted To Stamps – Anything Goes
7 Kids College Fund Challenge –  Anything Goes with a twist, Die cute

So here’s what I did…

1. cut an 8.5 x 11 pc. of card-stock in half,  score one half at 4.25.  Use the teflon bone folder to crease… LOVE the teflon bone folder (link below)…no glossy look where I rub after creasing!!!

2. cut the balloon out of the front of your card

3. cut the balloon out of red card-stock

4. cut the bottom of the balloon out of kraft card-stock

5. stamp the red and kraft pcs with the balloon stamp, then cut and piece them together

6. I used packing tape to cover behind the balloon cut out portion of the card front.  You want sticky in the opening to adhere your red and kraft balloon parts to it.   Go ahead and stick them in

7. Then position your dream cloud die face down to the right side of the card front over the stamped red balloon.

8. Tape the dream die in place with reposition-able tape, stick the tape to your clothes a couple times to make sure most of the sticky is removed.

9. Run it through the die cut machine.

10.  Keep the word dream because you will use that part

11.  Cut the dream cloud die from white card-stock, keeping the white centers of the letters.

12. Piece the die cuts into the card front and cover the back with packing tape to hold it in place or you can put the packing tape over the hole first and then piece in the cloud parts.

13. isn’t this fun?! : )

14. Stamp the little star from the balloon set multiple times with Tumbled Glass distress ink.

15. Stamp the sentiment from the set.

16. Back to the other half of the 8.5 x 11 piece of card-stock.  Cut it in half…well, a little less than half… 4 ⅛ in. x 5 ⅜ in.

17. Adhere that piece behind the card front to cover up the piecing and taping you did.

That’s it for this card!

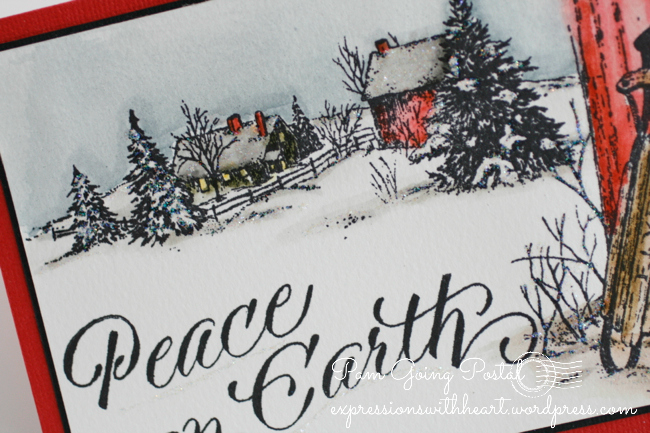
Now for the Winter scene I told you I was working on… colored it last Monday morning and finished it Friday morning!  Where does the time go!  It goes by me way too fast!

The stamps I used for this card are from Serendipity Stamps…wonderful images to color and create cards with.

PamSparksSerendipityWinterPeaceScene

I stamped with Ranger Archival Black ink on Canson watercolor paper and watercolored with Ranger Distress markers.  Stardust Stickles to give the snowy, Winter sparkle.

PamSparksSerendipityWinterPeaceSceneClose

I used the new Mini Perfect Layers Tools and the new Cutting mat… oh,  I do love them a lot!  Yes, I’m glad I have both sizes.

Stamps I used….Winter Farm HERE, Sled Here and Peace on Earth HERE.

How I paint with Distress Markers…post and Video HERE.

So happy to finally use these stamps I’ve had in my collection for years!  Some times just owning makes me happy!  I need to find a use your stash challenge to link to! lol

Linking my Winter Scene card to…
Christmas Stampin’ All Year Long – Sparkle and Shine
Virginia’s View Challenge – Watercoloring
Hiding in my Craft Room – Color It!
Completely Christmas – Anything Goes
QKR Stampede – Anything Goes
Stampin’ For the Weekend – Anything Goes
Word Art Wednesday – Anything Goes
Fusion Card Challenge – Sketch

I have two more Winter cards but I better save them for another day!  : )   Tomorrow I’ll be back with more NEW from Memory Box!

Thanks for stopping by!  We’ve got snow again… you know you’re in IOWA when you experience all four seasons in one week! lol  ttut!

Supplies I used for these two cards…

cards · Fall · Lawn Fawn · Memory Box · Perfect Layers Tools · rubber stamps

Memory Box and Lawn Fawn…

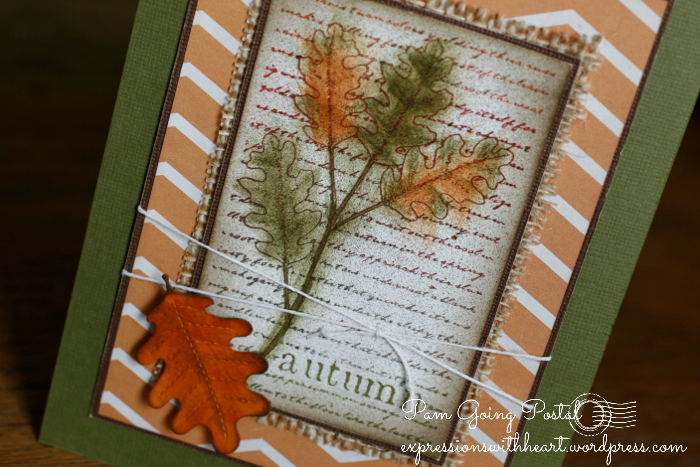
PamSparksAutumn725

I love this Autumn Leaf Collage stamp from Memory Box.  I had to add a little burlap (she’s out of what I used but you could try this) after I spritzed it with Walnut ink from Tsukeniko.  I love how the rustic look still works with the straight lines of the Perfect Layers Tools.  I kept the mats smallish using the 1/16th in ruler for matting because I just wanted a hint of the dark brown to make the layers pop!   I stamped with Memento Rich Cocoa ink and colored with Distress inks (fall colors) and the foam ink blending tools.  Messy looking but spraying with the Walnut ink helped me get used to the messy! lol

I matted with My Minds Eye 6×6 Happy Haunting paper pad and tied it up with hemp cord.

I scored and folded a piece of 8.5 x 11 Bazzill textured card-stock in half… glued the layers to this with ATG tape, measuring in ½ inch in on the fold side with my clear ruler… then cutting the margins with the ½ inch Perfect Layers ruler.

Oh, I did rough up the edges of the dark brown coredinations card-stock with the Tim Holtz  Sanding Grip.

PamSparksAutumnSide700

The leaf is from a Lawn Fawn Leaves die set.  I inked it good with Distress ink and the ink blending tool too! : )   Happy Autumn!

Thanks for stopping by!  I appreciate your visit and your comments!  You’re the best!

Supplies I used…

Birthday · Card Sketch · cards · Distress Ink coloring · Lawn Fawn · Magnolia · Quickutz · rubber stamps · Tilda's Town · Watercolor

Magnolia, Tilda’s Town Challenge…

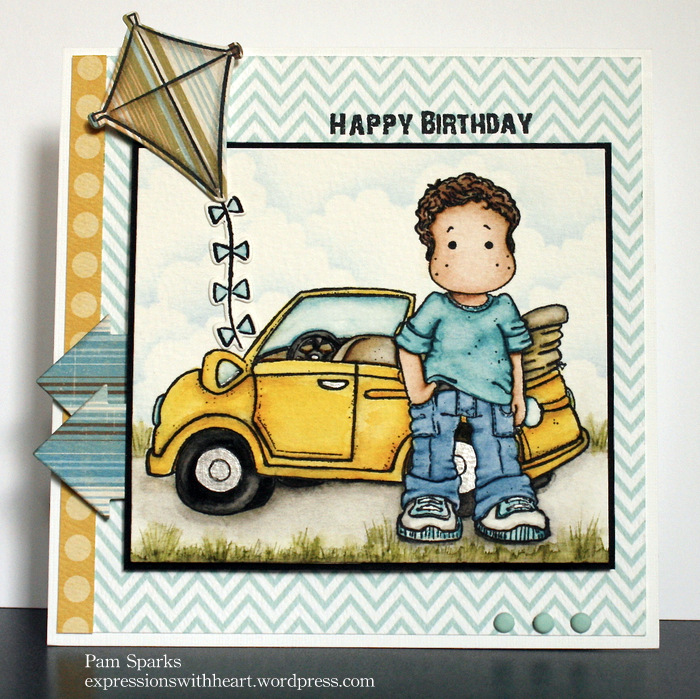
PamSparksCoolEdwin700

Time for Tilda’s Town’s weekly challenge…this week…’use a Magnolia background stamp’.   I used Tilda’s Summer Car with Cool Edwin from the Sweet Rainbow Collection and colored with Distress Ink Marker watercoloring. The Happy Birthday sentiment is from the You Are Special collection.

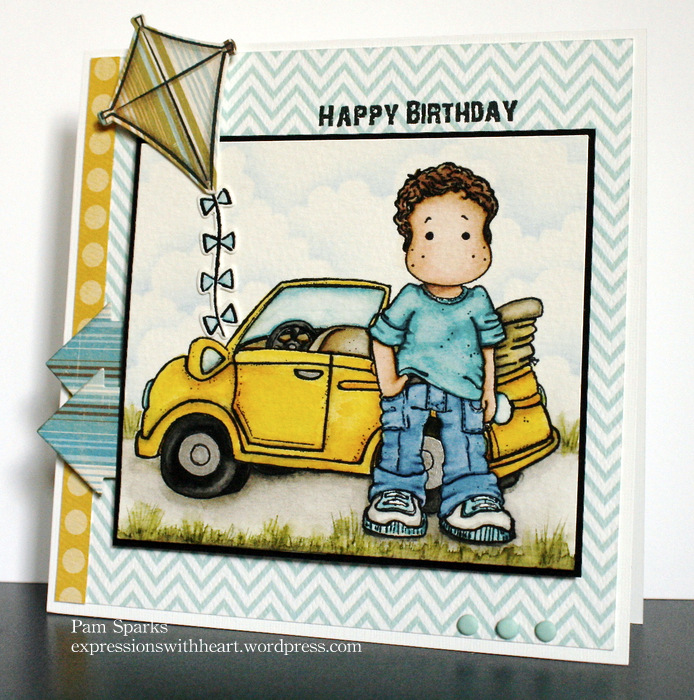
PamSparksCoolEdwin2_700

I used the Deconstructed Sketch #101 and will link to it, but my image was too big to cut into a circle.  I love fishtails but I didn’t have enough room, so I used an old Quickutz arrow die to mimic them and thought that went with the car.  It was definitely my inspiration but I did have to change it up to work for my image!

I’m linking to Midweek Magnolias Challenge … Birthday is the theme.

Simply Create TooAnything Goes

and Dutch Magnolia Lovers …Make a card inspired by a song… “let’s go fly a kite”

PamSparksCoolEdwinClose500

The cloud background is inked with Rosies Roadshow cloud stencil and Ranger Adirondack light blue ink.

The main image is matted using the Perfect Layers Tools… link on the right…

Click over to Tilda’s Town ChallengesHERE and enjoy the inspiration from the Design Team and enter the weekly challenge!  We’d love to have you!  Each week there is a random winner, chosen by Inlinkz, for a $10 gift certificate to Tilda’s Town.com!

logo1

Tilda’s Town is a most magical shop specializing in Magnolia Stamps. Over 1,100 stamps in stock at all times. Tilda’s Town offers FREE worldwide shipping on every order, every day. You can also save up to an additional 20% on your purchase by using one of the famous coupon codes. Shop at Tilda’s Town.com and live the magic.

Thanks for stopping by!  I love hearing from you and appreciate your friendship and comments!  I’ll be back Tuesday.

Links to the stamps and supplies I used…