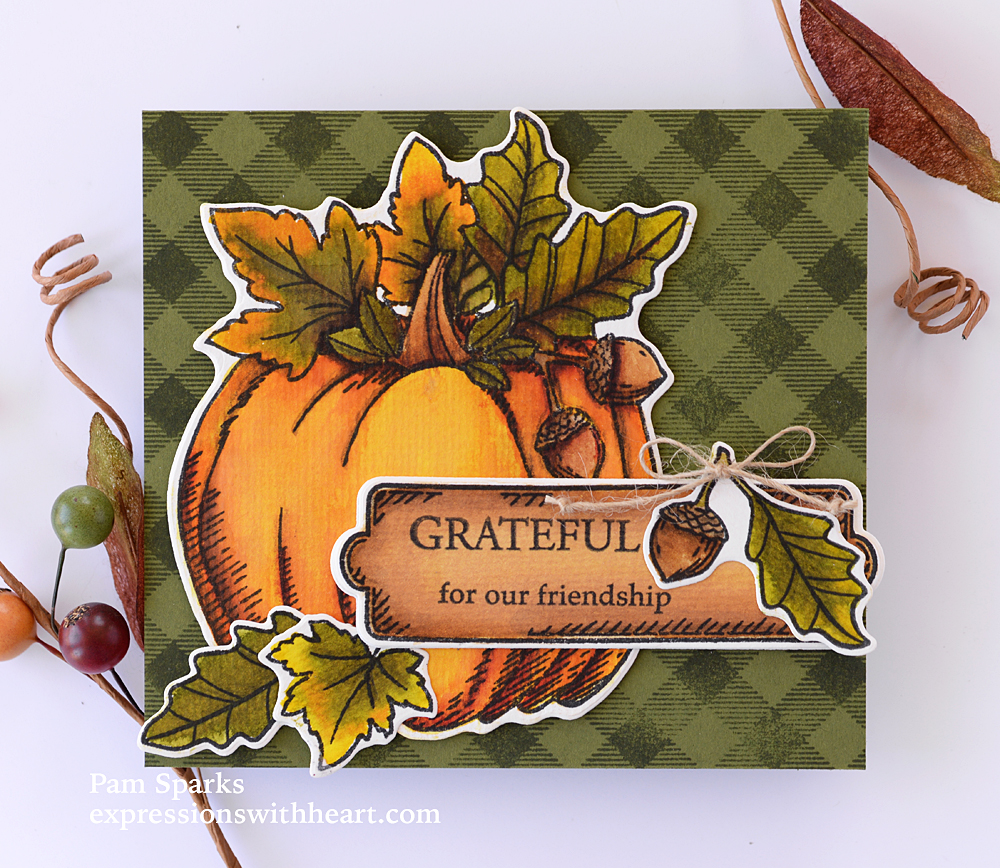
Hi everyone! A thinking of you card today using the NEW Berry Wreath stamp set and coordinating die set. It just made me think of bittersweet!
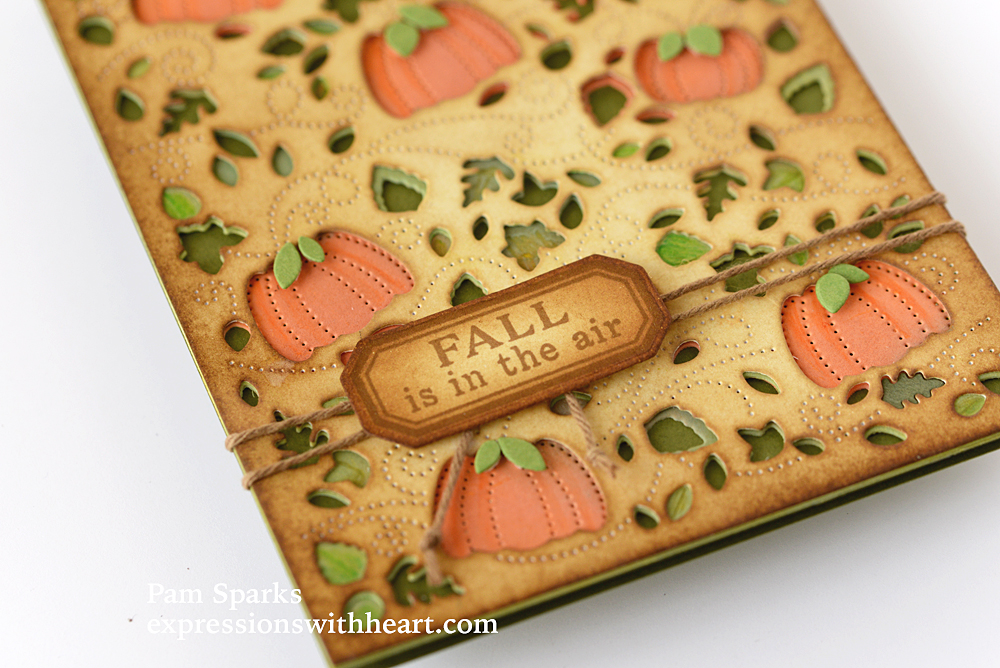
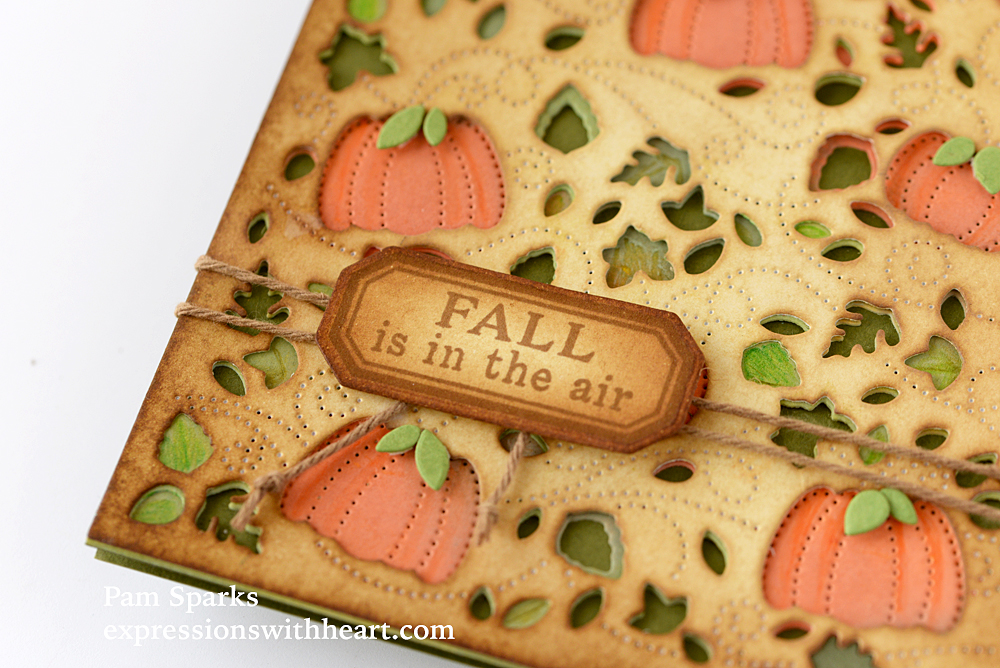
I stamped with Archival Coffee ink on Memory Box watercolor card, die cut the wreath and colored with Distress Ink Pad Reinkers. I have some palettes I made with the reinkers so I worked with oranges/reds, greens and Vintage Photo for the brown.

I made an A2 cardbase with Taylored Expressions Toffee cardstock and inked the edges with the foam ink blending tool and Gathered Twigs Distress Ink.
I mounted the wreath and sentiment with foam tape and tied on some thin jute to add that little bit extra!
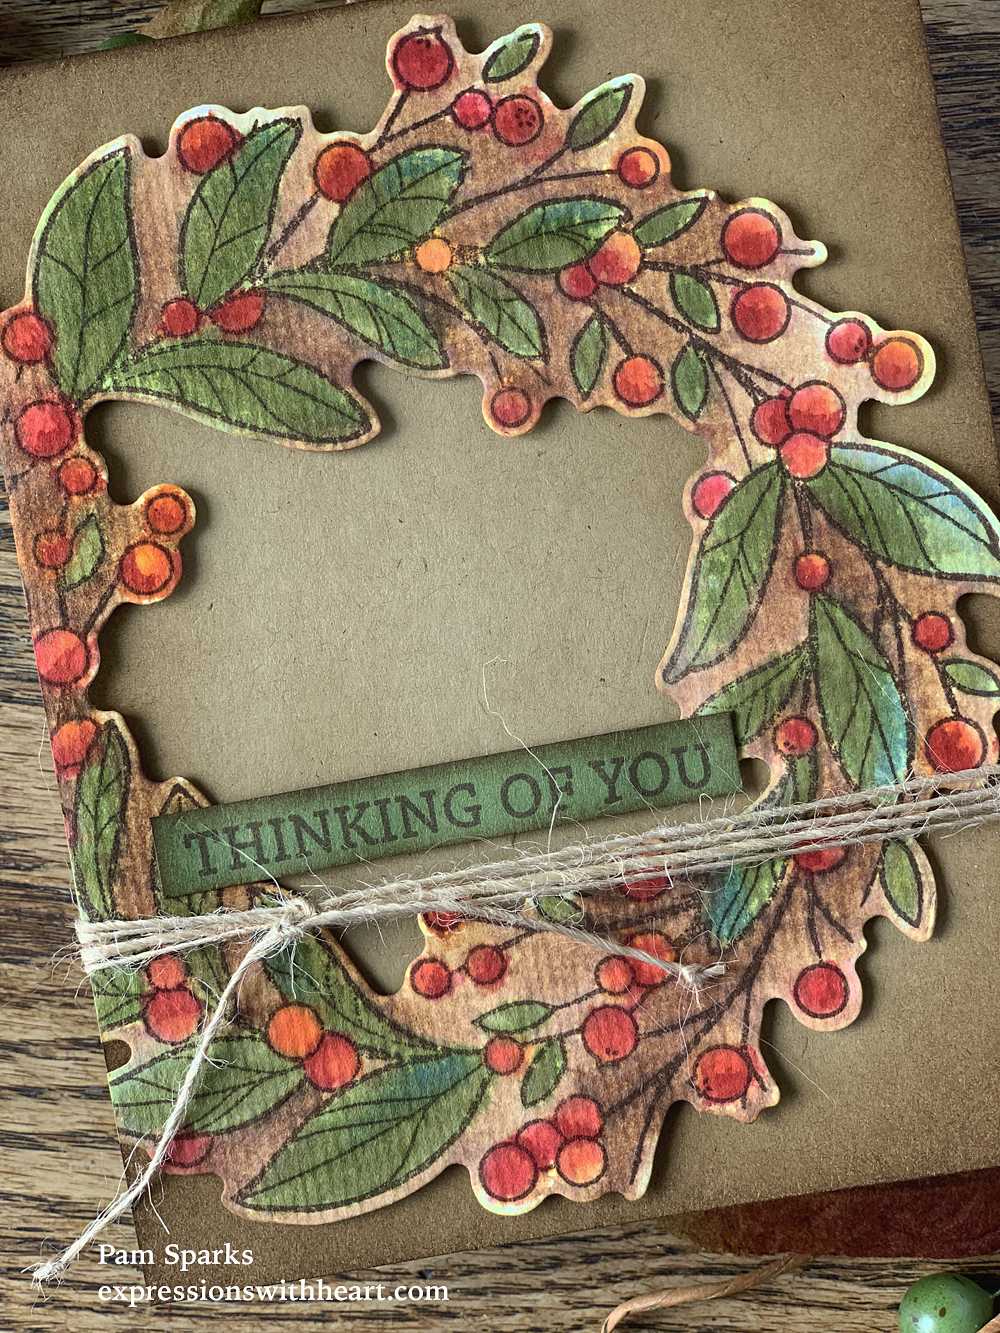
I wasn’t careful painting at all… as you can tell! lol I spritzed the wreath with water in an area, then added the ink from a brush, then moved on to the next area. I didn’t worry too much about going outside the lines.
It feels like Fall!
Thanks for clicking over to my blog today! We have three birthdays for grandkids this week so I’m working on birthday cards too. WOW! They grow up fast! ❤ I will try to share the cards here too!

The stamps and dies I used…
|