Birthday · Card Sketch · cards · Memory Box · Perfect Layers Tools · Reverse Confetti · Washi Tape · Winners

Birthday card, SFYTT and a winner!!!


Hi everyone!  Thank you all for your wonderful comments on the giveaway post! and all your comments all year long!!  So fun to hear from you all and I failed to get replies sent this time!  My computer has the craziest problem right now and I’ve been wasting too much time trying to figure it out on my own.  I think I better just take it to the store! ugh.  Of all things,  MUTE is stuck on!  So I can’t watch the videos of our grandkids or stamping videos!  My videos won’t work in iPhoto either! No sound at all!  Have any of you ever had this happen?


ok – now that I got the complaining out of the way….


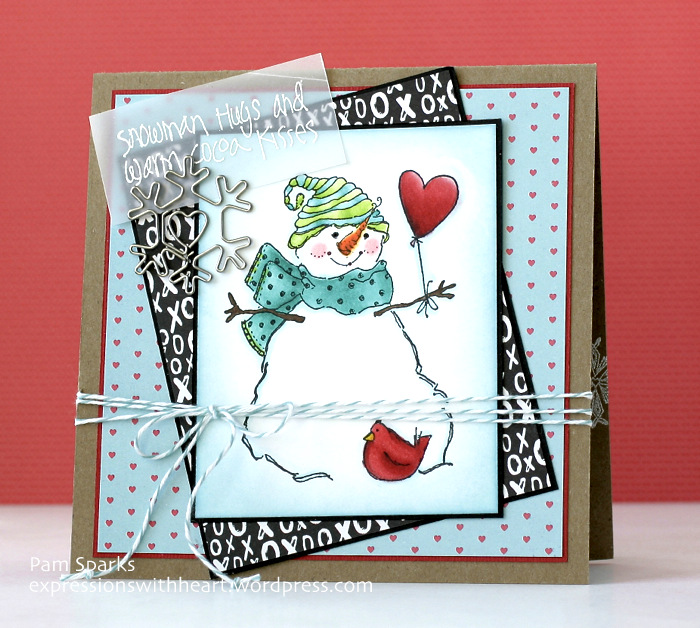
the WINNER of the Warm Wishes stamp set and die IS….


#36 Rannah Romps!!!!  

congratulations Rannah!

email me with your snail mail address!


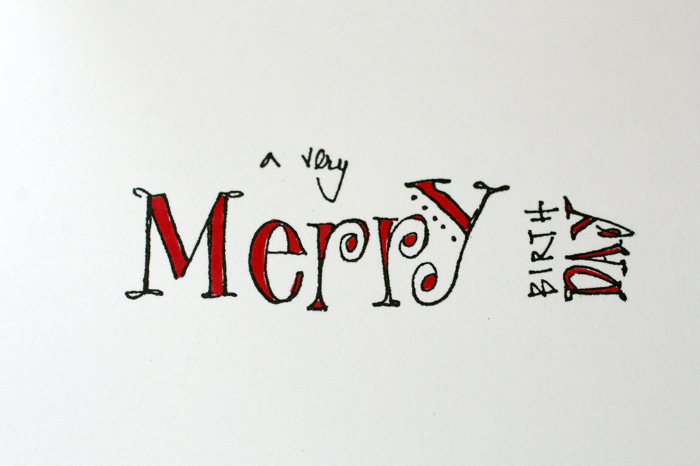
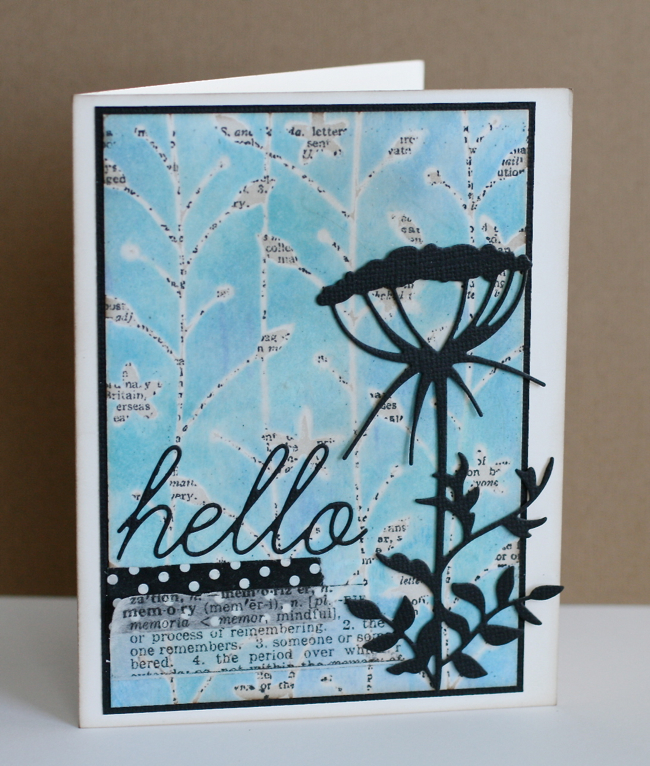
I’m sharing a birthday card today that I made with Reverse Confetti stamps and dies.


Every month Reverse Confetti has a Sketch For You To Try Challenge and I wanted to enter!

SFYTT21_Feb15


I really did make this card for the challenge – I had my computer open to the sketch, made the flowers and look where I ended up!  I’m still linking up though because I played!  : )


PamSparksRCPetalsNPosies700


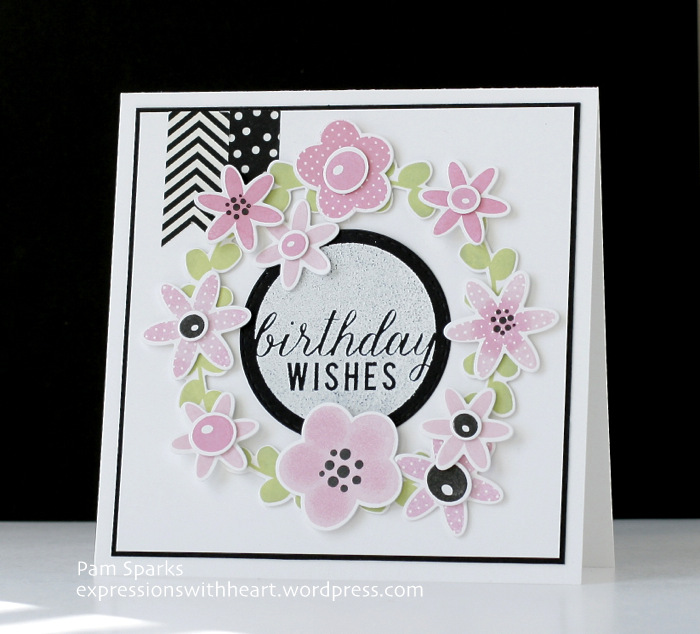
I used the Petals ‘N Posies stamp and die sets, Roundabout Additions stamp set, Memory Box stitched circle die and Perfect Layers Mini Rulers and Mat. (link in sidebar – be sure to use my code if you shop)


PamSparksRCPetalsNPosiesClose


I used Colorbox Chalk inks for the leaves and flowers, Pink Pastel, Rouge, Lime Pastel and Deep Green.  Black ink for the flower centers is Versafine Onyx Black.  I inked up the birthday wishes stamp with Versamark and embossed it with Ranger Detail Embossing powder.

The card is top folding and 5 1/2 inches square.

and Washi tape!  Two different black patterns.  The dot one is from K & Company, the smash book line and the other I don’t know the brand…sorry about that.

Thanks again for your support of Cindy’s store and my blog!  ‘preciate it so much!  Happy Friday and Happy weekend to you!

cards · Chameleon Markers · LOVE · Perfect Layers Tools · Printworks · rubber stamps · Snowman · Valentine · Washi Tape · Winter

Super cute Suzie Q from Printworks…


PamSparksSuzieQPW700


Hi everyone!  It seems like it’s been some time since I blogged a card!  eek!  It has been!  I’ve been making cards though and will have a Memory Box surprise to share with you soon!

This SUPER cute Suzie Q snow gal from Printworks has just been on the desk staring at me, waiting for me to ink and color her up since before Christmas!  She’s just in time for Valentines Day!

Have you heard about the NEW Chameleon Markers?  That’s what I colored with!  Very cool and my favorite thing today was how easy it was to color her cheeks!  I used the RED marker!  I know…crazy cool!

AND of course I used my Perfect Layers mini Rulers and cutting mat for layering up the papers!  Thee best things ever!  Truly are time saving in lining up and getting everything ‘perfect’!  Shop through my links and use my code to save 10%

Super cute new sentiments too… on the outside and on the inside!  One of the new snowflakes… AND Printworks is having a sale JUST TODAY!  I’ll add the details at the end of my post.  If you don’t make the sale today, shop anytime and use the code in my sidebar to save!


This is the inside of the card…

PamSparksSuzieQInside


lovin’ this MME Crush 6×6 paper pad too!  I haven’t purchased pattern paper since….fortunately my memory is bad! lol   and the snowflake paper clips?!  oh my, had to have them! 5 in a pack, so two packs please! lol

oops! Beware taking pictures of the inside with vellum sticking off the top of your card front. When you fold it back and crease it…well, you get a nice line that wasn’t there before!  Like I always say, “all of life is education”.  Applies to card making too! grrrr

Then I had to have something to hold the card up to photograph the inside cuz of course it STILL wouldn’t stand up even after creasing!  I’m proud of me.  I didn’t tear it apart and do it over! @@

Linking up to some challenges…

Curtain Call – Kissing Booth  kissing booth

Simon Says Stamp Wednesday Challenge – All Things Bright and Beautiful

Simon Says Stamp Monday Challenge – H is for… heart balloon in my case

Sweet Stampin’ Challenge – Add a heart

Our Creative Corner – Tic Tac Toe ( twine, stamps, embossing powder)

Paper Sweeties – Inspiration photo

{PIN}spiration Challenge – Inspiration photo

Cute Card Thursday – Crazy in Love

Loves Rubberstamps Challenge – Anything Goes

Have a wonderful weekend and hope you have sunshine today too!  If you get a chance to shop, here’s the Printworks info…


This Saturday we will be offering 10% off your entire order plus a free grab bag of some Vintage Printworks Product only found at our warehouse sale.
(Minimum Order of $25)
 
The Free Grab Bag will include: 
1 Large Stamp, 2 Medium Stamps, 3 Small Stamps, and Diecuts.
 
Use code WAREHOUSE2015 in the COMMENT section of our website to receive the special. The 10% discount will be deducted from your total when we ship the order.
Offer Valid Saturday, February 7th only. Minimum $25 Purchase Required.


Thanks for stopping by!  TTUL!

Stamps and Supplies I used…

Birthday · cards · Christmas · copics · Memory Box · Perfect Layers Tools · Poppystamps · Printworks · rubber stamps · Shopping · Simon Says Stamp · Washi Tape

Sales and Cards…

BlackFriday-03-600x599


YAY!  So fun to take it easy this a.m., today marks the beginning of the hustle and bustle!  Tim is out checking out the Christmas tree place.  If you don’t get there right when they open, the tall ones are gone!  I’m watching for stamp sales online…I wanted to share this one right away!


and this one for Blick Art Materials… love their Copic prices and great place for watercolor paper, color pencils etc.


112814_CYBERWEEKND-r1


Then I wanted to share that Printworks has a Limited Edition Snowman again this year and NEW STAMPS!


Visit our sample gallery for additional samples from this brand new release!


Printworks Collection.com 

TODAY (11/28/14) ONLY use code BLACKFRIDAY2014


Insert the code BLACKFRIDAY2014 into the coupon code section on our website and receive the following:


printworks_blackfridayspecial


  • 10% off your entire order
  • FREE shipping
  • The gift picture above (5 chunky tags, E3123, and A3124)


printworks_blackfridaytease


Nicole says,

“Also, be sure to like us on Facebook. Starting Thanksgiving and running through the weekend we will be offering a special gift exclusively to our Facebook followers. The only way to get the gift is to look for the code on our page!
Everyone here at Printworks is very excited for our biggest specials of the year…we hope you are, too!”


Here’s a few cards using Printworks stamps!


PamSparksPWSantaBag700


and on the inside…


PamSparksPWMerryB-dayInside


and some good advice…


PamSparksPWMerryOnInside


For the times you need a birthday card at Christmas…Printworks has awesome images and sentiments just right for the occasion!


and even a California Christmas of sorts!  hehe


PamSparksPWBeach700


Perfect Layers Rulers and Mat to layer the scene to the white card.  Enter code Psparks for 10% off your entire order! You’ll love them!!!  Free cutting mat through the end of November!


PamSparksPWBeachJeep


Stamps and supplies I used…
washi tape (K & co. smash book)
3mm red glitter domes (Mark Richards)
Linking up the Santa and Beach card to…


Thanks for checking in today!  Happy weekend to you!

cards · Hero Arts · Memory Box · Stencils · Washi Tape

Prim Poppy Goes Postal…

PamSparksPrimPoppyAirmail650

Hello!  My ‘Day 4’ card for the Stenciled Online Class.

I dry embossed using Mister Huey’s Chevron Stencil…ran it through the Big Shot like this… multi purpose platform tab 1, cutting plate, stencil, card-stock, tan mat, 3 to 5 pieces of 65# card-stock for shimming then another cutting plate on top… run it through.   One thing I do if my spray bottle is right there… I spritz with water so it embosses a tad bit more.  Then inked the panel with Walnut Stain Distress ink using the Ink Blending Tool.

Some Little B airmail Washi Tape, an airmail mini envelope from Impress Rubber Stamps.com, some airmail twine, Memory Box Prim Poppy die cut from green and red then pieced together and an old Hero Arts hello stamp!  I used the Tiny Attacher to staple on the sentiment piece.

Linking to the Daring Cardmakers Challenge – Stripes

I hope to make some more from the inspiration shared in this class.  Thanks for stopping by!

Supplies I used…

cards · Memory Box · Perfect Layers Tools · rubber stamps · Stencils · Techniques · Tutorials · Washi Tape

Memory Box Garden Flora Stencil and Flower Dies…

PamSparksGardenFlora650

The NEW Garden Flora Stencil from Memory Box…

On this card, I laid the stencil on top of a piece of white cardstock and taped it down with removable tape.

Using the Colorbox pigment Queue called Surfs Up, I applied the ink, all the colors, randomly, all over.

I removed the stencil and heat embossed with clear embossing powder.

Using the rubber stamp Mail Definitions,  Ranger Archival Black ink and a Stamp a ma jig, I stamped   the panel, starting at the top and moving down, inking and stamping three times.

Heat up your craft iron. Lay the heat embossed and stamped panel face down onto scrap paper, I use a piece of newsprint folded in half, and iron off the embossing.  Be sure to protect your work surface from the heat.

PamSparksGardenFloralHelloClose

I used some Antique Linen Distress ink and the ink blending tool to add some color to the white areas.  The areas that were heat embossed, still pretty much resist the ink.

Mat the panel with black card-stock and the Perfect Layers Tools, add your die cuts, washi tape and mount to a Parchment notecard.  I used the Kylie Stem and hello script dies.

I’m linking up my hello card  to the CASology Challenge – Contrast

This next card I used the same Garden Flora Stencil and Mail Definitions stamp but the text is in the background instead of on the flowers and stems.

PamSparksGardenFloraStencilSide

I taped the stencil to the white piece of card-stock.

Inked it all with Tumbled Glass Distress ink and the ink blending tool.

Stamped it three times with Ranger Archival Black ink and the Stamp a ma jig.

Then removed the stencil.

I spritzed the panel with Glimmer Mist Dazzling Diamonds Spray.  I wish it showed up in the photos but it’s really pretty, shimmery IRL!

I die cut the NEW Zinnia Bouquet and Zinnia Bouquet Background dies from white cardstock.  I inked the three background pieces with Tumbled Glass Distress ink and the ink blending tool.

Glue the background pieces to the Outline piece.

PamSparksGardenFloraClose

Adhere the flower to the card with mounting squares.

Tie on Hemp cord.

Add the sentiment ‘FLOWERS’ from the April Showers Bring May Flowers stamp by mounting it to a piece of the Contempo Circle Border die.

Mat the panel with Black card-stock,  the Perfect Layers Tools and adhere it to a Kraft notecard.

There are so many techniques to try with the NEW Stencils and dies!  Can’t wait to see what you all come up with too!

Thanks for stopping by and enjoy stenciling!   I’m linking up to the Online Card Classes Stenciled that just started today.

STN_participant

Supplies I used for my cards…