4 Bar · cards · Christmas · Die Piecing · Distress Ink coloring · Memory Box · Poppystamps · Shabby Chic · Techniques

poppystamps Basic Junk Journal Set…

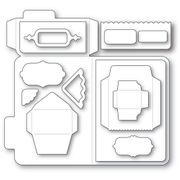
Hi everyone!  I know!  I know!  You came expecting Easter!  I’ve been thinking about this die set and what I would make with it….then I walked by this little stack of Santas that I’d printed before Christmas and didn’t use and thought one would be adorable with the Journal set!

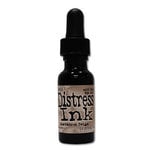
So I die cut the journal in watercolor paper and did some ink smooshing with Distress Ink Gathered Twigs ink refill and water. I didn’t wait for it to dry on it’s own.  I dried it with the heat tool.

Here’s a video of it… it might be low resolution at first until it completely downloads…even though it’s only 27 seconds!  See it HERE on Instagram…

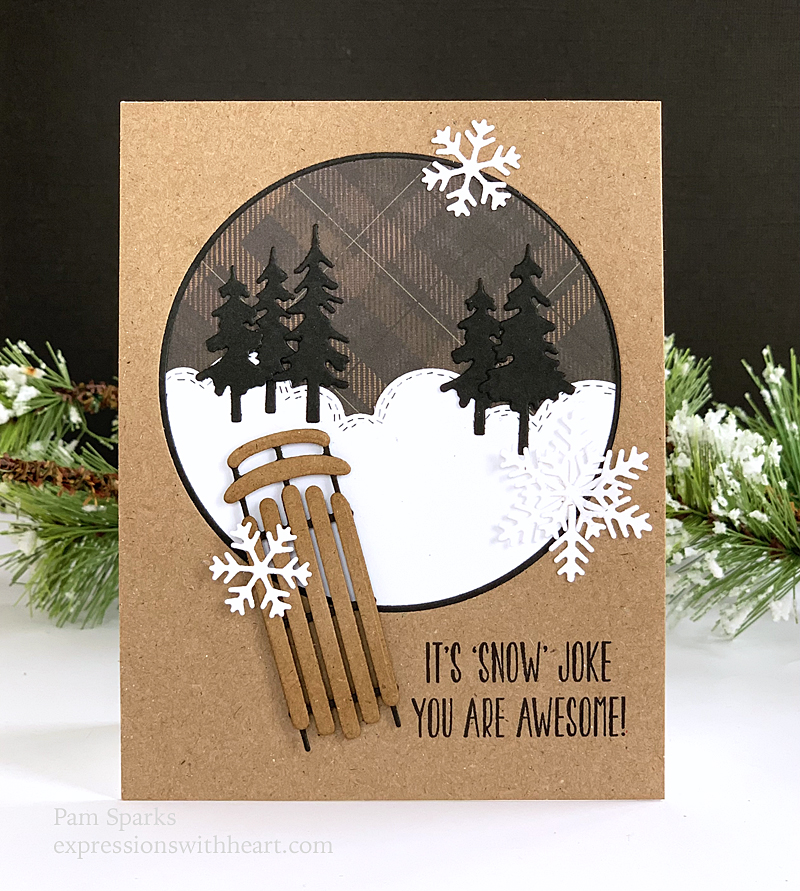
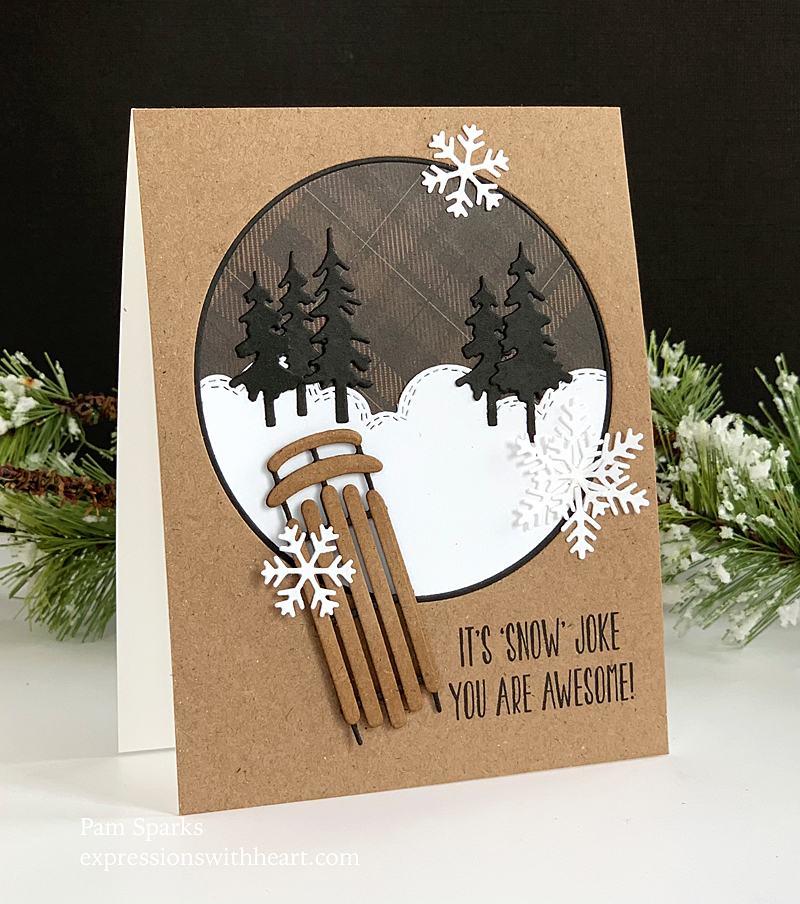
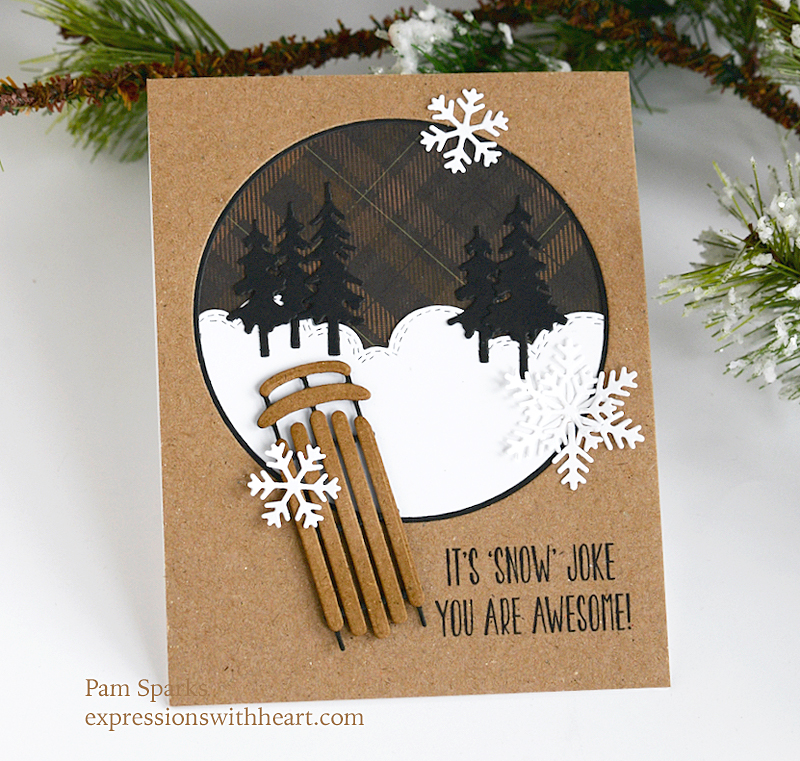
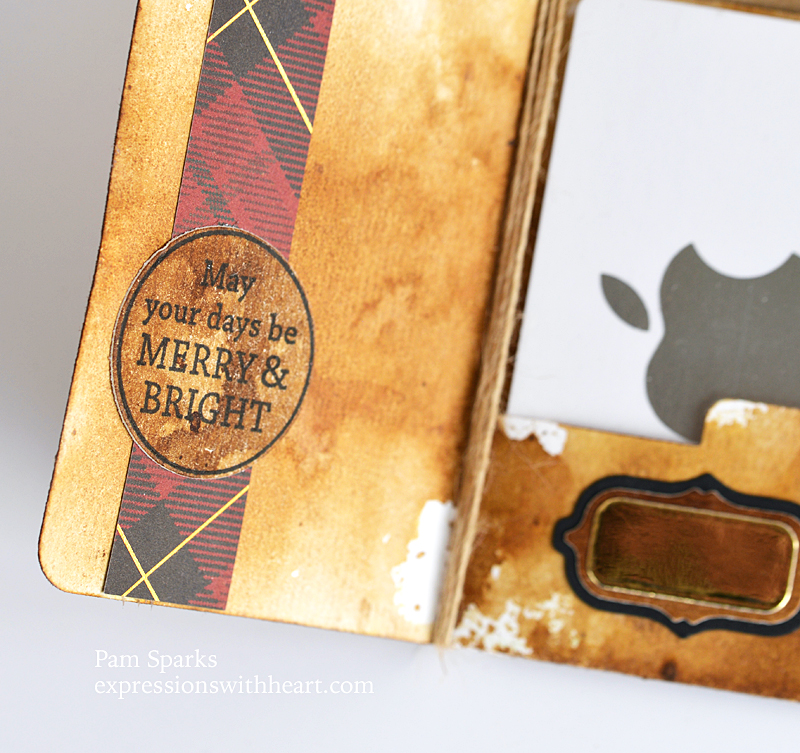
I had some scraps/strips that I kept of plaid from the Memory Box Jolly Christmas 6×6 pad and I love how they worked out on the front and on the inside!

You can tell what the size of this folder is because there’s a gift card inside.

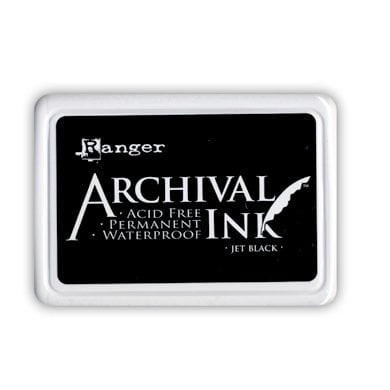
You could stamp or write in permanent ink on the mirror gold little labels.

close up of the inside circle label…

the back….

And now I’m thinking what a cute tag this would make on an Easter basket!  There’s several dies in the set I didn’t even use!

Linking to some challenges…

Peace on Earth Christmas – anything goes Christmas

The Holly and Ivy Christmas Challenge – anything goes Christmas

AAA Cards – inspired by a song….Up on the House Top!


I’ll link up what I used below.

Thank you so much for stopping by.  I always appreciate your encouraging words and that you come back to visit!


Poppystamps – 2451 Basic Junk Journal…
[ STR | SSS ]
Poppystamps – CB496 Christmas Quotes…
[ STR ]
Memory Box/Open Studio – 30087 Circle…
[ STR | SSS ]
Memory Box – CL5261-D Spirit of…
[ STR | SSS ]
Memory Box – PP1019 Christmas Jolly…
[ STR | SSS ]
double-sided tape holder – holds…
[ STR ]
Scor-Tape; Scor Tape
[ STR | SSS ]
Linen Thread – 40 yds – by the spool
[ STR ]
May Arts NATURAL Twine String Burlap…
[ SSS ]
Bazzill Foil Cardstock – Gold 12×12
[ STR ]
Memory Box – WP101 Watercolor Paper
[ STR ]
Ranger Ink – Tim Holtz – Distress Ink…
[ SBC | SSS ]
Ranger Ink Jet Black Archival Ink Pad
[ SBC | SSS ]
Tombow Mono Multi Liquid Glue
[ STR | SSS | ACH ]
Sizzix – White and Gray – Big Shot…
[ SBC ]


Birthday · cards · copics · Die Piecing · Poppystamps · Step card

poppystamps Whittle Panda Pickup Kit Step Card…

Hi everyone! How do birthdays look at your house?  Pretty much Panda-monium around here! lol  Look at this adorable shiny black pickup and friends though! So cute! I think I’m going to have to save this for my husband’s next birthday. 

I started with a 5 ½ in x 11 in piece of cardstock.  Then it’s just a simple cut and some score lines to create the fold.  Email me if you want me to post a how to… I used to make these a lot!

Here it is flat… send in a square envelope or the catalog size envelope that is rectangle.

A close up of the panda on the right step.

I die cut the pandas in white cardstock and colored them with a black copic marker. The details die cut into the images and you can stick a piece of scrap paper to help protect the white areas.  slick!

A Fineliner pen for their eyes. 

Panda on the left will hold something so I put in a heart and he’s holding a balloon. 

I had to cut the pickup out of Memory Box Glossy Black cardstock and silver mirror cardstock for the wheels and bumpers. 

A piece of acetate I hand cut to place behind the window.  

I used the poppystamps Whittle Cloud Border for the clouds.

I used the poppystamps Word Balloons for the sentiment that comes with the Whittle Panda Pickup kit. 

This is all I’ve gotten made this week.  Sometimes I can be so slow!  Well, I was just playing and having fun! lol

I also pieced the pandas from white and black cardstock and that worked great too.  If you do that, use a fine sanding block or the Tombow sander that looks like an eraser to smooth your scissor cut areas.  It works great!

ok – I’ll stop talking now and get busy on my next card!  I was inspired by a flower card in the new Birch Press Design look book!

Have a great rest of the week and see you here again soon!  Thank you so much for stopping by!

Here’s the products I used to make this card…

Poppy Stamps Whittle Panda Pickup Kit…
[ SSS | STR ]
Poppystamps – 2380 Word Balloons…
[ STR | SSS ]
Poppystamps – 2318 Whittle Cloud…
[ STR ]
Memory Box – SH44004 Black Glossy…
[ STR | SSS ]
Hammermill WHITE 100 LB SMOOTH…
[ SSS ]
TE Premium Cardstock
[ TE ]
Bazzill Foil Cardstock – Silver 12×12
[ STR ]
Scrapbook Adhesives Crafty Foam Tape…
[ STR ]
Fiskars Non-Stick Titanium Softgrip…
[ STR ]
Scor-Tape; Scor Tape
[ STR ]
double-sided tape holder – holds…
[ STR ]
Gutermann Extra-Strong Thread – 110…
[ STR ]


Birthday · cards · Die Piecing · Flowers · Memory Box · Mini Slim Card · Poppystamps

poppystamps Birthday Floral Mini Slimline Card…

Hi everyone!  It’s warming up a little here in Iowa…paper flowers making us think of Spring for sure!  Although I’m not good at growing flowers and the three hydrangea bushes we planted a few years ago are finnicky about giving me blooms! 

For the card front panel, mini slimline size card, 3 ½ inches x 6 inches, I cut strips of ½ inch white and black and just layered them on using ATG adhesive.

I created the sentiment with Poppystamps Modest Greetings 1 Hot Foil and Cut Die set and gold hot foil.

For my card today I used a bunch of NEW poppystamps dies!  It was fun to create a kind of wildflower bouquet on a card!

I started with Little Posie Layered Flowers in pink…then Lucky Layered Flowers in the pool color, Little Layered Asters in blue and pink, Layered Pointy Petals in orange and Teardrop Butterflies in blue and white!

The greenery is from the NEW poppystamps Floral Vase Pop Up Easel Set.   I used the bouquet stems from the set and cut two in green, put them end to end (I had to trim off some of the long stems),  so easy because where to put the greenery was already decided for me by using the die from the set!

I die cut one other die from the set that cuts four extra stems and I just stuck them in…no rhyme nor reason.

I figured out where I wanted the flowers, took a picture of it with my phone, then glued them all on the card with Tombow Mono Multi glue while looking at my phone picture!

Another card using up scraps!  The fun thing about die cutting!  I guess I used to do the same with punches but it’s hard to use small pieces of cardstock with punches!

Linking to some card challenges…

Papercraft Challenges – anything goes

The Flower Challenge – use your latest stamps or dies


NBUS challenge – Never-Before-Used-Schtuff

Thank you for clicking over!  I appreciate your visit!  Celebrate if it’s your birthday! lol 

ttul,

Here’s the products I used to make this card…

Poppystamps – 2560 Little Posie…
[ STR | SSS ]
Poppystamps – 2556 Little Layered…
[ STR | SSS ]
Poppystamps – 2554 Lucky Layered…
[ STR | SSS ]
Poppystamps – 2559 Layered Pointy…
[ STR | SSS ]
Poppystamps – 2561 Teardrop…
[ STR | SSS ]
Poppystamps – 2552 Floral Vase Pop Up…
[ STR | SSS ]
Poppystamps – PSF802 Modest Greetings…
[ STR | SSS ]
Scrapbook Adhesives Crafty Foam Tape…
[ STR ]
Tombow Mono Multi Liquid Glue
[ STR | SBC | SSS ]
Spellbinders – Glimmer Hot Foil -…
[ SBC | SPL ]
Hammermill WHITE 100 LB SMOOTH…
[ SSS ]
Bazzill Card Shoppe – Licorice Twist
[ STR ]
Spellbinders – Glimmer Hot Foil System
[ SBC ]
Sizzix – White and Gray – Big Shot…
[ SBC ]
Sizzix White Tool Caddy Big Shot…
[ SBC ]

cards · CAS · Die Piecing · Foiling · Hot Foiling · LOVE · Memory Box · Poppystamps · Valentine

poppystamps Sending Love Poe Script and Criss Cross Heart Foil Plate and Stencil…

Hi everyone!  Still in Valentine mode here…when I finished this card I thought, ‘watch out Hallmark’! lol  Because irl, it looks like a Hallmark card!  I’ve arrived!  hahahahahahahahaha

I really tried hard not to have reflections in the gorgeous gold mirror/foil cardstock.  Almost imporssible!

So this is why all the pictures in weird positions! lol

tada!  99.9% on this last one! lol

Very basic card…. clean and simple even!  I foiled a piece of A2 cardstock with the new poppystamps beautiful Criss Cross Heart Foil Plate…

It’s hard to see in my photos but I used the new poppystamps Criss Cross Heart Stencil to up the red on the hearts but it’s really hard to see in my pictures.  It’s very subtle, but I love it!

I die cut the next largest Memory Box Double Stitch Loving Heart Cut Out die in gold mirror/foil cardstock.  I love this stuff from Starlitstudio.

For the sentiment I die cut the new poppystamps Sending Love Poe Script die in Memory Box Black Glossy cardstock!  I know, I keep saying it but it’s awesome stuff too!

I layered the foiled heart panel on black gloggy too… so narrow but so classy!   I wish you could see this in real life! hehe

Linking to some challenges…

Simon Says Stamp – Love is in the air

Papercraft Challenges – anything goes

TicTacToe Challenges – top row across dies, gold, stencil

I think that’s it for this card… holler if you have any questions.  I’m going to go make bread and then die cut some poppystamps floral dies for cards!  Have a creative cardmaking weekend if you can!  ❤

Here’s what I used to make this card…

Poppystamps – PSF801 Criss Cross…
[ STR | SSS ]
Spellbinders – Glimmer Hot Foil -…
[ SBC | SPL ]
Poppystamps – T103 Criss Cross Heart…
[ STR | SSS ]
Poppystamps – 2555 Sending Love Poe…
[ STR | SSS ]
Memory Box – SH44004 Black Glossy…
[ STR | SSS ]
Memory Box – 94359 Double Stitch…
[ STR ]
Bazzill Foil Cardstock – Gold 12×12
[ STR ]
Tombow Mono Multi Liquid Glue
[ STR | SBC | SSS ]
Scrapbook Adhesives Crafty Foam Tape…
[ STR ]
Spellbinders – Glimmer Hot Foil System
[ SBC | SSS | SPL ]
Spellbinders – Platinum 6 – Die…
[ SBC ]
Glimmer Hot Foil 4 Rolls – Satin…
[ SPL ]

All Occasion · Birthday · cards · CAS · Die Piecing · Memory Box · Poppystamps · Winter · Your Next Stamp

Memory Box Plaid Winter Scene Birthday Card…

Hello to all, snow or no snow! The birthdays keep coming! 

I started with Memory Box Circle dies, cutting a smaller circle in black cardstock and using the panel, not the cut out circle.  Then I cut out a larger circle in a kraft A2 size panel with an eighth inch larger Memory Box die.  I’ll link the ones I used below.

I die cut the snow puffs with poppystamps Whittle Cloud Border die and white cardstock.

I used a square of Memory Box Woodsy Plaid paper to fit behind the circle panels.  I adhered everything together flat for mailing, except the sled.

Memory Box Little Trees dies cut from black cardstock and glued on flat.

Memory Box Feathery Snowflake Discs from white cardstock and glued on just in the centers.  (I just used the flakes)

For the sled I used Memory Box Vintage Sled #94495 from 2020.  Die cut in kraft and black cardstocks, then glued together and mounted to the card with the very thin mounting tape I’m always raving that I love!

The sentiment on the front is from Your Next Stamp set called Silly Monsters Chill Out.  At first I was going to use the images from the set and color but then I changed my mind and went with the sled.   

On the inside is a happy birthday sentiment.

It turned out CAS but I was happy with it!  I hope it inspires you to create something Winter-ish! 

Linking to the The CARD CONCEPT Challenge – Winter Snow

Cut it Up Challenge – anything goes with a die cut

Once Upon A Time Challenge – The Snowy Day

Shopping Our Stash – Winter Fun

Thank you for stopping by!


Here’s what I used to make this card…

Memory Box – 94677 Little Trees craft…
[ STR | SSS ]
Memory Box – 94495 Vintage Sled craft…
[ STR ]
Memory Box – 94681 Feathery Snowflake…
[ STR | SSS ]
Poppystamps – 2318 Whittle Cloud…
[ STR ]
Memory Box – PP1018 Woodsy Plaid 6×6…
[ STR ]
Scrapbook Adhesives Crafty Foam Tape…
[ STR ]
Tombow Mono Multi Liquid Glue
[ STR | SBC | SSS ]
Memory Box/Open Studio – 30087 Circle…
[ STR ]
Hammermill WHITE 100 LB SMOOTH…
[ SSS ]
Bazzill Card Shoppe – Licorice Twist
[ STR | SSS ]
Kraft Extra Heavy Weight Cardstock…
[ HBL ]
Ranger Ink Jet Black Archival Ink Pad
[ SBC | SSS ]