cards · Christmas · Fall · Memory Box · Poppystamps · rubber stamps · Winter

Memory Box for Starlitstudio… Horse Country


Hello and welcome to my blog today! I’m sharing two cards I created with Starlitstudio’s exclusive new die from Memory Box, called Horse Country.


A Fall card…

PamSparksHorseCountryFall700


inside…

PamSparksHorseCountryFallInside


and a Winter card…

PamSparksHorseCountry700


inside…

PamSparksHorseCountryWinterInside

I used the Memory Box Golf Club Landscape border die in the background on both cards. (I cut off the flag)

On the Fall card I added the small leaf from the Memory Box Marvelous Maple die, poppystamps new Fancy hello die, Trotting Pony die and Country Fence die. On the inside I used the Memory Box Give Thanks Combo stamp (leaves and sentiment) and Memory Box A-2 Notecards in Sky and Kraft.

On the Winter card I used Memory Box A-2 Notecards in Sapphire and White, Ho Ho Holly Leaves die and poppystamps new Vintage Seasons die. I just used the Greetings part on the front and on the inside, I cut the ‘s’ from the end of Season’s and stamped the words ‘of the’ from the Memory Box Wonderful Time Combo stamp.

The Christmas, Winter Horse Country scene card is spattered with white spray ink and then sprayed with Imagine Crafts Sparkle Spray.

All of these dies and stamps are available for purchase @ starlitstudio.net

I will be making Horse Country up in Spring and Summer versions too!  Thanks for visiting today and Season’s Greetings to you!  THANK YOU for your encouraging comments too!  I appreciate it so much!


Birthday · cards · CAS · Christmas · Die Piecing · Embedded Die Cuts · Memory Box · One Layer Card · Perfect Layers Tools · Poppystamps · Video · Winter

NEW poppystamps dies, Video and Horse Country exclusive die…

PamSparksBirthdayStackRed:kraft700


Hi everyone!  Isn’t this a neat die?  love it and the fancy thanks too!  I have several things to share with you today.  I don’t mean to have long posts but it seems like it always turns out that way!

Here’s a video of the NEW poppystamps ‘poppy’ dies and Starlitstudio’s exclusive die!

Click on the gear to see in high definition… or the frame to see larger.  Sorry about the blurry ‘fancy Merry Christmas’ die.  I have not idea why! ugh.

I used the Perfect Layers Tools to cut the ⅛ inch border on each side of the main panel.

Linking my first card to the Festive Friday Challenge – inspiration photo

Simon Says Stamp Wednesday Challenge – Anything Goes

Here’s the Birthday Stack die again…


PamSparksBirthdayStackPool700

I used the Embedded Die Cut technique I show in a video… pull down the video tab under the blog header.

Here’s the tags I show in the video…


PamSparkspoppystampsGiftTags700

and the NEW Vintage Merry Christmas and Celestial Star Border.


PamSparksCelestialStars700
Lots of NEW to play with!

The NEW exclusive die for Starlitstudio.net is gorgeous!  Horse Country and you can make it up for all four seasons!

memory-box-die-horse-country-new-exclusive-die-for-starlitstudio-3.gif
Holler if you have any questions… ‘preciate you stopping by. Have a creative weekend!

Supplies I used to make these cards and tags…

cards · Christmas · Class · Classes · Embedded Die Cuts · Memory Box · Perfect Layers Tools · Poppystamps · rubber stamps · Techniques · Winter

Snowy Tree and Class Photos…

PamSparksSnowyTree700


Today I’m sharing a card I made with the technique I introduced in my last video, Embedded Die Cuts, HERE and the beautiful new Snowy Tree dieLove it!

I also used the Beloved Snowflakes die and placed it at the bottom of the card. When you die cut it, there are extra snowflakes!  I used the extras, dots from the waste and a piece that I cut off to create the snowy background.

The swag like snowflakes toward the top of the tree are cut from the inside of the Sparkling Tree Tile die and glued on. So instead of strings of lights… you have a few strings of snowflakes!

It was fun to put unusual colors together.  I used Memory Box White, Sage and Sky A-2 Notecards.

I used the 1/16th inch Perfect Layers Ruler to cut the white mat for the Sage layer… love these rulers!  Link in the sidebar… be sure to use the coupon code if you order!


PamSparksSnowyTreeClose


I’m linking my Snowy Tree card to some challenges…

ABC Christmas Challenge – uncolored image

Merry Monday Christmas Challenge – non-traditional colors

Addicted To Stamps Challenge – Holiday

Simon Says Stamp Monday Challenge – Anything Goes


Over on the Memory Box blog there is a Blog Blitz that started yesterday, Monday the 20th and will go through Friday. You have until 11:00 p.m. EST on Sunday, October 26th, to leave comments on all the posts. The winners will be randomly drawn and announced on Monday, October 27th. Good Luck!  

I also wanted to share some photos from two classes I taught on Sunday at Scrapmania in Cedar Rapids, Iowa.

The morning class – Winter Wonderland…with 15 ladies creating the cards in the photo below.

PamSparksWinterWonderlandClass


10730914_386023374879938_1389526919788698531_n


The afternoon class – The Night Before Christmas…with 10 ladies creating the cards in the photo below.

PamSparksNight Before Christmas

(I do have two of the afternoon class kits to sell… $25 plus $5 flat rate shipping in the USA.  International we’d have to figure out)

Here’s Jo Ann working on her Fireplace card…

MB3


We had a great time!  Stacy has an awesome store and awesome customers!  Thank you so much for having me!  I’m still smiling!

I’ll be teaching two classes at The Scrapbooking Studio in Moline, IL Nov. 8th.  For class info, scroll down on the class page HERE. We’d love to have you come!

Thanks for stopping by! Good to be back!

ttul,

cards · Christmas · Die Piecing · Embedded Die Cuts · Memory Box · Perfect Layers Tools · Poppystamps · rubber stamps · Techniques · Tutorials · Video

Adhering Intricate Dies Video…


Embedded Diecuts


I did take this in high definition so after you click play,  you can click the gear for a better picture and click the frame to see it large!

Here’s my technique for making your die cuts into stickers for perfect placement.  I’m really pleased with how it works… so many of the fine line dies from Memory Box are easy to pull out of shape.  After trying several things, this is what I came up with! I hope you’ll try it too!

One thing I didn’t show in the video is changing the color of the petals.  It’s really easy though… just cut the die in the color card-stock you want the petals and adhere them over the top after the process I show in the video.

On my candle card, I added the black pieces over the white after using the technique I show in the video.

  1. glue the musicality background die cut to the card base (little dots of  Tombow Mono Multi behind the notes)
  2. die cut the tall taper die just like I did the plush poinsettia in the video
  3. while still in the die, (after removing the waste) lay it right over the top of the musicality background piece, run it through the Big Shot just like I did in the video
  4. remove the die
  5. die cut the contrasting tall taper parts that you want a different color and glue on (or make them a sticker too)


PamSparksFFblackKraftWhiteCandleMusic700
The holly is from the Cabrini Ornament die. Die cut and then trim the holly away from the ornament with scissors.

Thanks for stopping by today!  ttul!

Dies and supplies I used…

cards · CAS · Christmas · Die Piecing · Memory Box · Perfect Layers Tools · Poppystamps · rubber stamps · Techniques · Winter

Memory Box and poppystamps for challenges…

PamsparksFFblackKraftWhiteTree700

My cards that I’m linking up today were totally inspired by the inspiration photo from Festive Friday Challenge blog.  Oh what fun!  I always enjoy FF designer Ardyth’s CAS/graphic cards and I love following her because my mom’s name was Ardyth!  Funny story for you…I remember so well coming home from school and saying to my mom, “what is your name again?”  lol  I could never remember her name and the beginning of every year we had to fill out a form with our parents names on it! lol  My dad always called her mom, so it was rare that I heard her name as a grade schooler.  Evidently they couldn’t remember her name either cuz I was the 7th of 8 kids to come through that grade school!  You’d think by #7, they would’ve know all about us Bryants!  lol

And it is a WINNER!  Thank you Festive Friday Challenge Blog ladies! You made my day!


Winner Badge


PamsparksFFblackKraftWhiteTreeClose

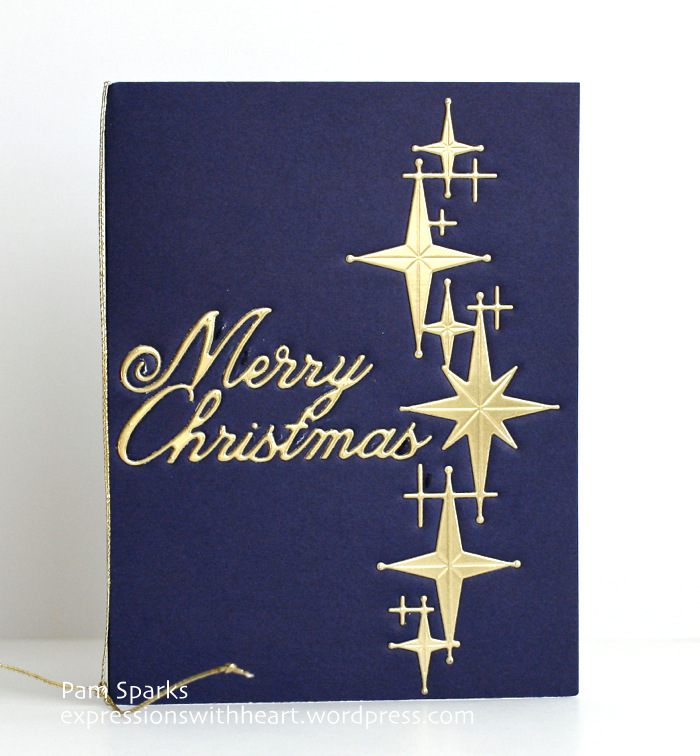
This is a 5 ½ inch square card… kraft card base…poppystamps Merry Christmas Background die cut in black card-stock…Memory Box Snowy Tree Border die cut in white card-stock.

Very straight forward CAS card!  YAY!  love it!

First pass through the Big Shot to cut the Snowy Tree…then back through with the tan mat and shims to emboss the snow detail…leave the cut in the die…turn it over… dauber on Tsukineko’s glue pad through the holes in the die…burnish on the Art Glittering System’s Winter White glitter.

Strips of white card-stock glued behind a couple of the words…

Also linking this card up to some other challenges…

Addicted to Stamps Challenge – CAS

Friday Mashup Challenge – die cuts

ABC Christmas Challenge – Q for quick and easy  – my card was in the top 3!  Thank you ladies!

Top 3

Simon Says Stamp Monday Challenge – kraft

Winter Wonderland Challenge – anything goes


My next card was the second card I made but it kinda backfired on me…. ugh…every time I try to put white, ink, paint or even gesso over black card-stock, it turns blue!!!!  grrrrr  *sigh*   Oh well,  I’m posting this anyway.  : )


PamSparksFFblackKraftWhiteFrozenC-mas700


Pretty much the same as the card above except the card is 6 inches square and I used the poppystamps Frozen Flakes Border die.
My last card was the first I started with the Festive Friday inspiration photo colors in mind…


PamSparksFFblackKraftWhiteCandleMusic700


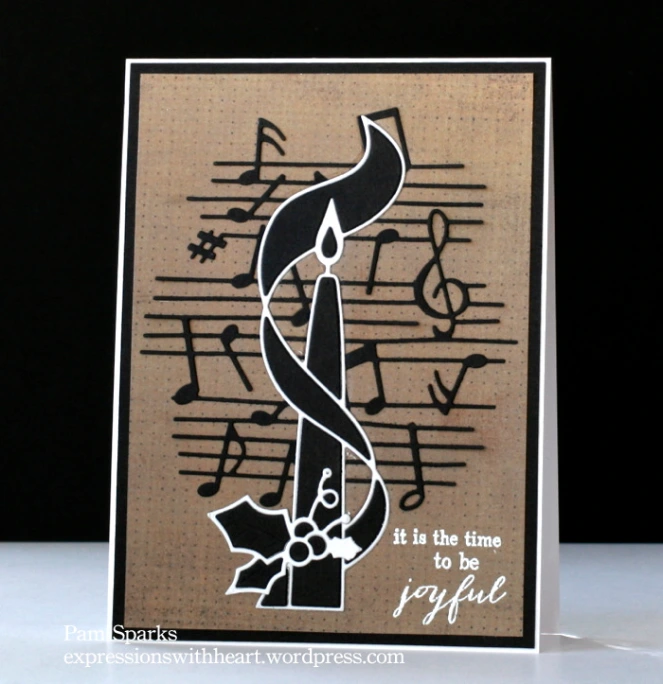
I did some experimenting here too, so it’s not perfect! hehe  I’ll do a video soon on gluing and tell about it then.

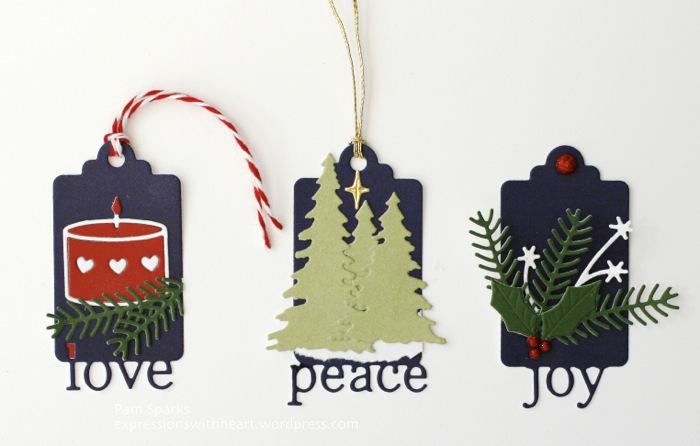
Memory Box Musicality die, Tall Taper Candle and Joyful combo rubber stamp.  The background paper is from an older Basic Grey Kraft 6×6 paper pad.

I used my mini Perfect Layers Tools and mat with black and then to cut the three sides of the card.  Link in the sidebar and below in the links too.  Be sure to use my code to get 5% off when you shop!

Linking this card to…

Catered Crop Challenge – musical expression

Festive Friday Challenge – photo inspiration

The Friday Mashup – die cuts

Simon Says Stamp Monday Challenge – kraft


That’s it for today!  Thanks for all the wonderful comments about my last two cards!  You are all awesome!

Take care and TFL!

Supplies and dies I used on these cards…