cards · Die Piecing · Distress Ink coloring · Embossing Folders · Fall · Memory Box · Oxide Inks

Memory Box Happy Fall Gypsy Oak Leaves Card…

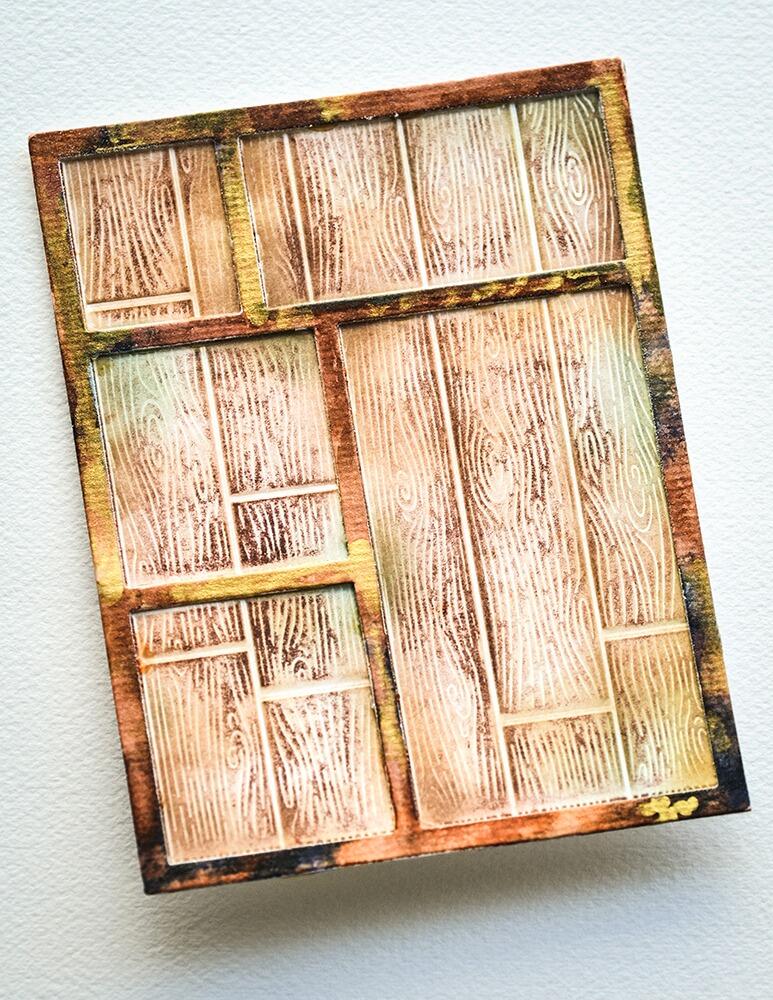
Happy Fall y’all!  I’m back today with some more NEW Memory Box products!  Look at this neat embossing folder!  It’s called Vintage Tray and comes with a cutting die that cuts a frame.

I die cut the embossing folder in white cardstock and swiped the Gathered Twigs Distress ink pad over the top of it a bunch of times until I liked the coverage.

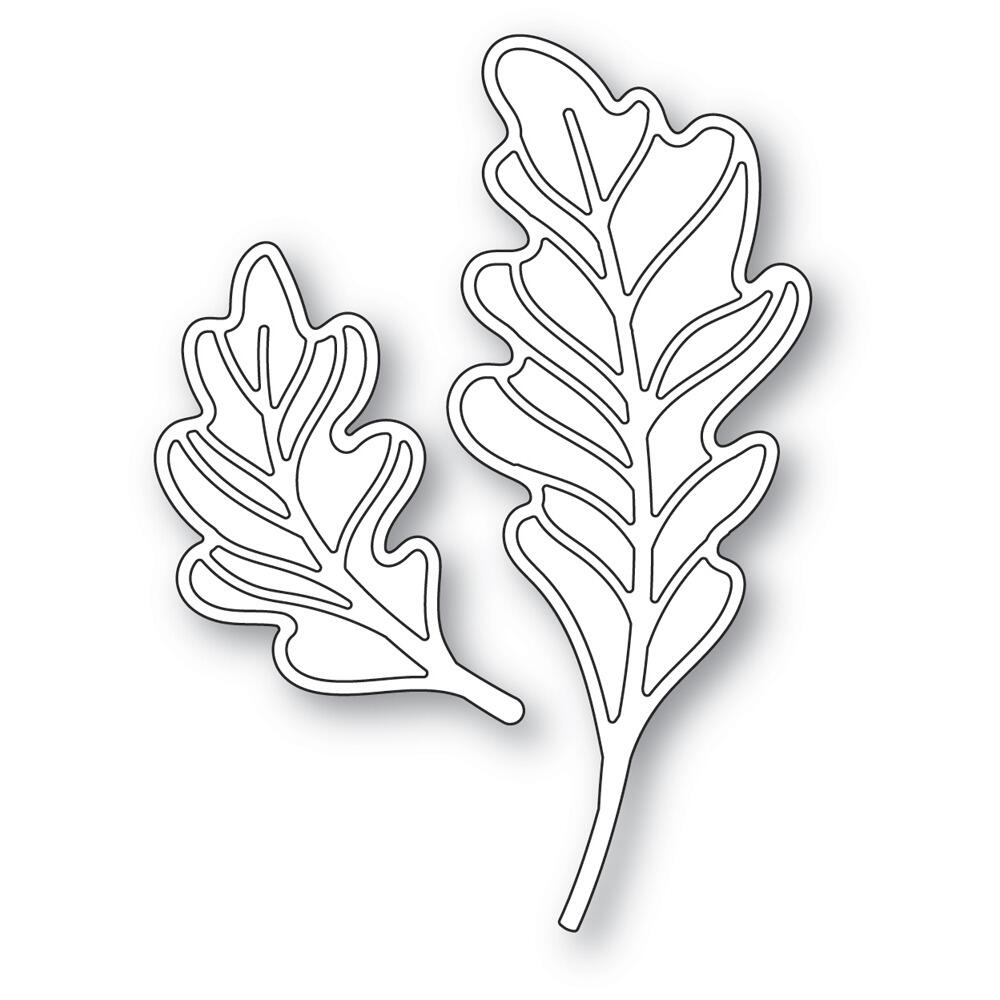
I die cut the NEW Gypsy Oak Leaves dies and NEW Happy Fall Posh Script dies in white Neenah also and inked them with Distress Oxide inks and ink blending brushes. Fossilized Amber, Carved Pumpkin, Peeled Paint and Seedless Preserves are the colors I used.  On the outline die cuts I inked with Vintage Photo Distress Oxide ink.

I die cut a couple extra of the leaves and sentiments to layer them up for height on the card.

I stamped the words from the Harvest Love and Kindness Stamp set on a TE Candy Corn cardstock strip in the MISTI.  I hope this set is still available.  I’ll link below if it is.

I mounted the A2 size panel to an A2 size Seedless Preserves color cardbase.

I wasn’t sure I liked it while I was making it but when I finally landed on a design with my pieces I really like it!   It seems like I’m like that a lot in my cardmaking! ugh!  I just keep going and hope for the best! hohohaha Wish I could show it to you IRL!

Linking to some challenges…

Inspired By Challenge – Inspired by Acorns

Addicted To Stamps and More – Any Occasion

Sisterhood of Crafters – die cuts/anything goes

Three birthdays this week!  These grandkids keep getting older!  Three in a row this week!  Today, Friday and Saturday! What to make, what to make!

Thanks again for visiting my blog!  You know I appreciate it so much!  Thank you thank you!

Links below to what I used to make this card…click/tap on the abbreviations in brackets to go to Starlitstudio.net, Simon Says Stamp, Scrapbook.com or Taylored Expressions.

Memory Box – 94747 Happy Fall Posh…
[ STR | SSS ]
Memory Box – 94744 Gypsy Oak Leaves…
[ STR | SSS ]
Memory Box – EF1040 Vintage Tray 3D…
[ STR | SSS ]
Memory Box – CL5262-D Harvest Love…
[ STR ]
Ranger Wendy Vecchi Archival POTTING…
[ SSS ]
TE Premium Cardstock – Candy Corn -…
[ TE ]
Tim Holtz Distress Oxide Ink Pad…
[ SSS | SBC ]
Tim Holtz Distress Oxide Ink Pad…
[ SSS ]
Tim Holtz Distress Oxide Ink Pad…
[ SSS | SBC ]
Tim Holtz Distress Oxide Ink Pad…
[ SSS | SBC ]
Tim Holtz Distress Oxide Ink Pad…
[ SSS ]
Tim Holtz Distress Ink Pad GATHERED…
[ SSS | SBC ]
Simon Says Stamp Blending Brush SET…
[ SSS ]
May Arts NATURAL Twine String Burlap
[ SSS | TE ]
Neenah Cardstock Classic Crest Ultra…
[ SSS ]

All Occasion · Birthday · cards · Die Piecing · Fall · Memory Box · Poppystamps · Thinking of You

poppystamps Whittle Napping Cat Hello Fall Card…

Hello with a cat going postal today!  I love the Memory Box double sided plaid papers so I started there with this card die cutting the poppystamps Large Stitched Envelope and Postage.  Kinda unusual colors for Fall  but I tried! lol

This piece of plaid is from the Jolly Christmas 6×6 pad.

I die cut the Leafy Vine Corner die by poppystamps from kraft and light green cardstock.  I just clipped the kraft apart with a scissors at the corner for the stems coming out of the envelope and cut the leaves off the light green die cut and glued them to the kraft cardstock stems.

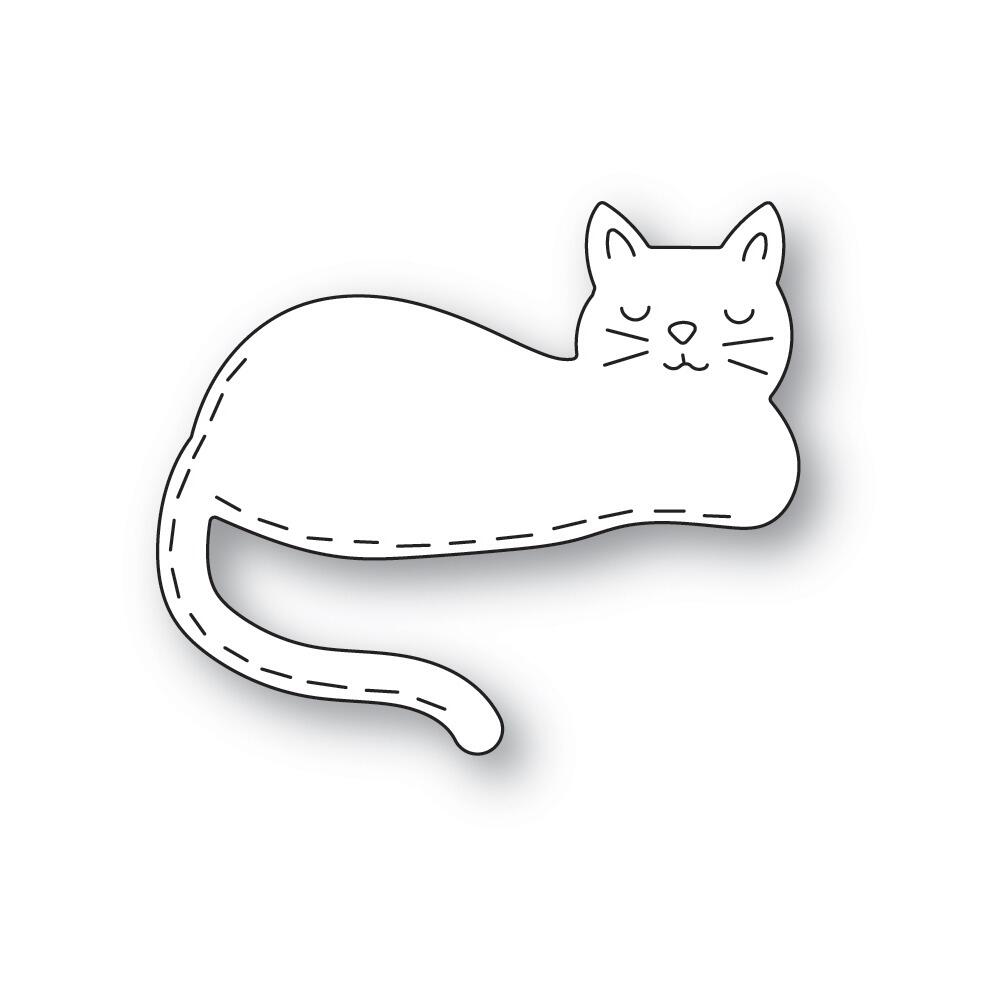
The Whittle Napping Cat is die cut in kraft and inked with Gathered Twigs Distress Ink and the mini ink blending tool. I glued a little square of black cardstock behind the nose.

It’s a top folding A2 size cardbase using TE cardstock.  A rectangle panel glued on, kraft color cord tied around and knotted.

I mounted the envelope with the thin foam mounting tape I love so well.  I use the scissors linked below to cut it.  It’s sticky but so great for adhering and mailing!

I die cut the two postage stamps from the TE cardstock also.  Scribble a little black on them…

That’s pretty much it!  I can see this envelope used in so many ways!  I almost started over but thought, I’ll use it again later for another occasion!

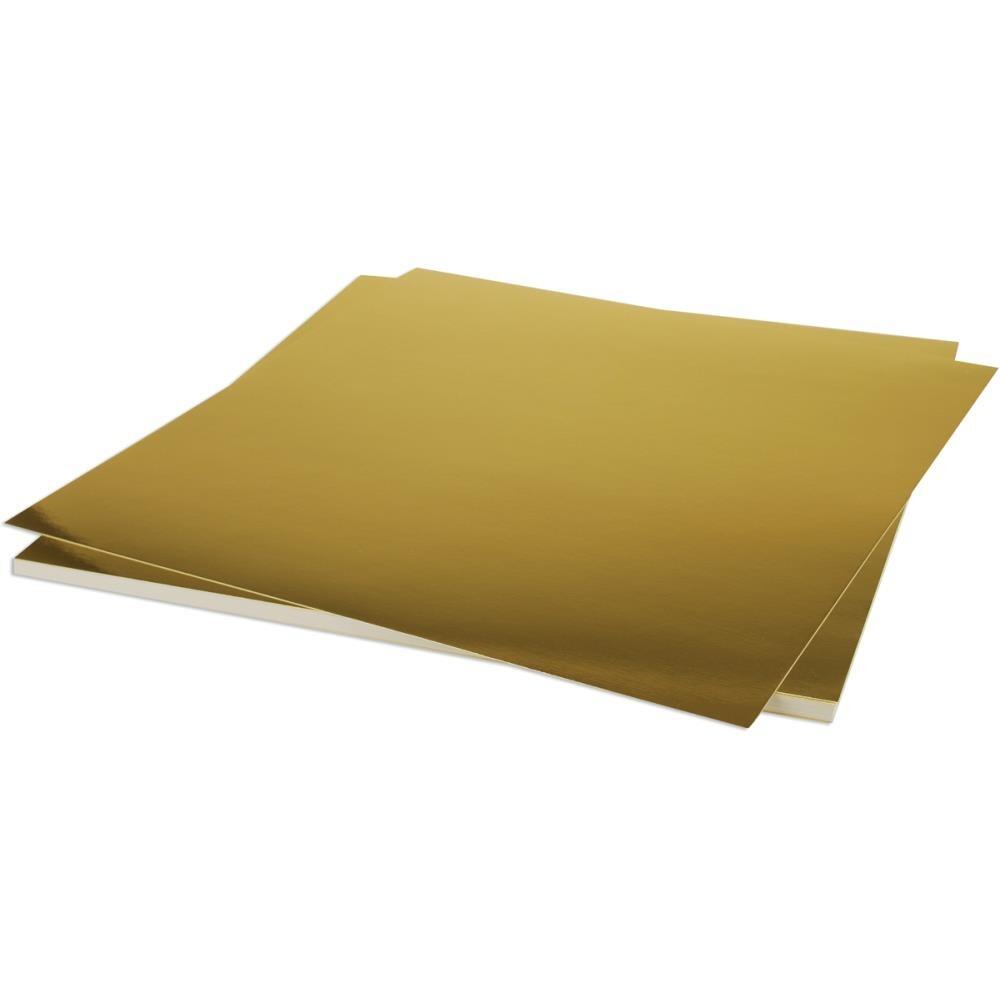
Oh… I used the outline part of the Hello Moonlight Script die set for the sentiment.  Die cut in gold foil cardstock.  Love that stuff!

Thanks for coming over to see what I’ve been up to!  Well, I didn’t post that I rearranged my kitchen counter this morning! lol  Do you do this too when you get a new appliance?  My thoughts are what can I get rid of! haha  Big old house but small kitchen, which I’m glad it’s small until all the family is home for Christmas! lol  We manage!

talk to you again soon!  Lots of NEW coming!  Suspense!  It’s good!!!!

Dies and supplies I used to make this card…

Poppystamps – 2530 Large Stitched…
[ STR | SSS ]
Poppystamps – 2544 Whittle Napping…
[ STR | SSS ]
Poppystamps – 2511 Leafy Vine Corner…
[ STR | SSS ]
Poppystamps – 2509 Hello Moonlight…
[ STR | SSS ]
Memory Box – PP1019 Jolly Christmas…
[ STR | SSS ]
Bazzill FOIL Cardstock – matte and shiny
[ STR ]
TE Premium Cardstock – Spearmint -…
[ TE ]
TE Premium Cardstock – Salt Water…
[ TE ]
TE Premium Cardstock – Toffee -…
[ TE ]
Scrapbook Adhesives Crafty Foam Tape…
[ STR ]
Fiskars Non-Stick Titanium Softgrip…
[ STR ]
Tombow Mono Multi Liquid Glue
[ STR | SSS | SBC ]
Scor-Pal MINI SCOR-BUDDY Scoring…
[ SSS | SBC ]

https://linkdeli.com/widget.js?id=f5e8378456858c916708

cards · copics · Die Piecing · Fall · Halloween · Memory Box · Poppystamps · Shape Cards

poppystamps Neighborhood Home Card…

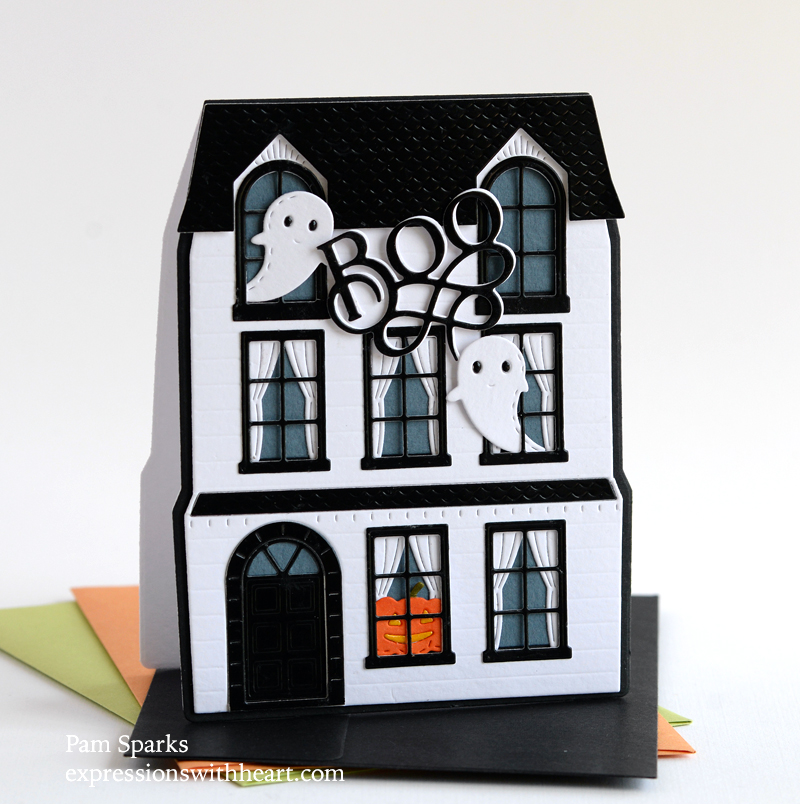
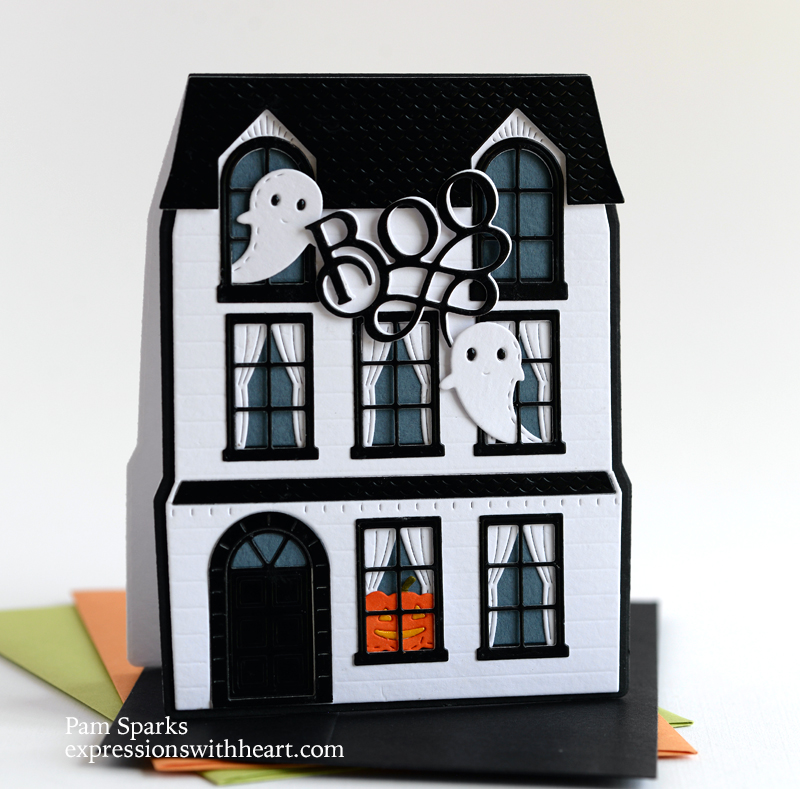
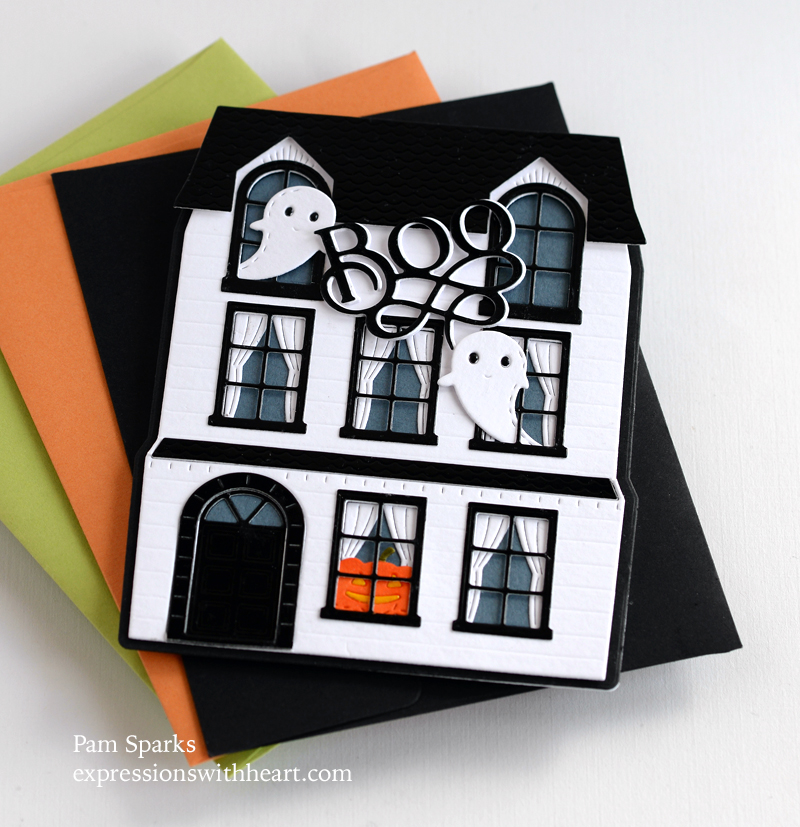
Hi everyone! Cute card warning! This NEW poppystamps Neighborhood Home Pop Up Easel Set can be used for so many occasions.  I was thinking Congrats on your new house but ended up using the NEW poppystamps Whittle Scary Guys!  I’m glad they aren’t really scary.  (I’m not a big Halloween person)

I didn’t use the Easel part of the die set this time.  I used the house layer die to die cut a top folding card. I made a 4 ½ in. x 5 ½ in. cardbase and just kept the fold below the top cut line when I ran it through the Big Shot.

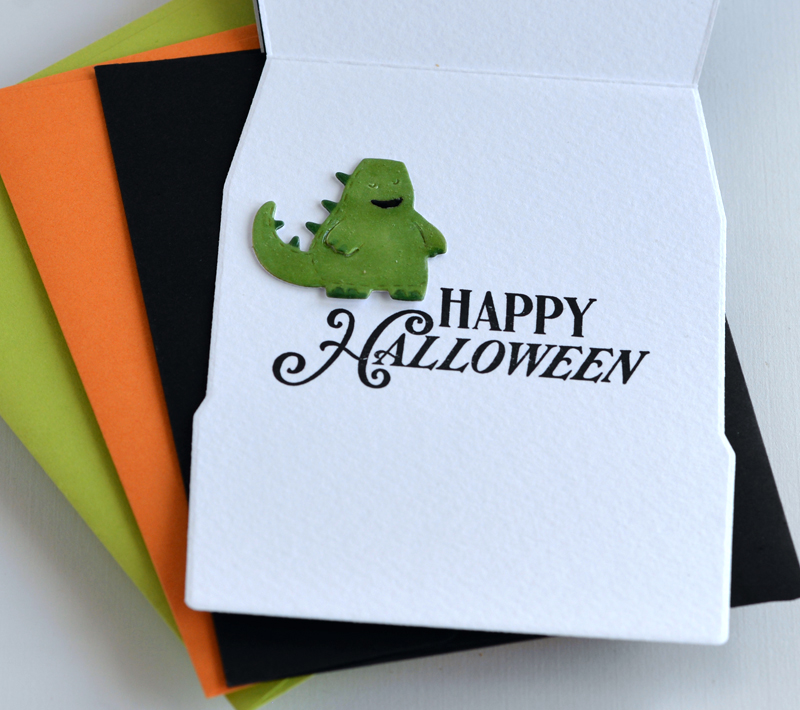
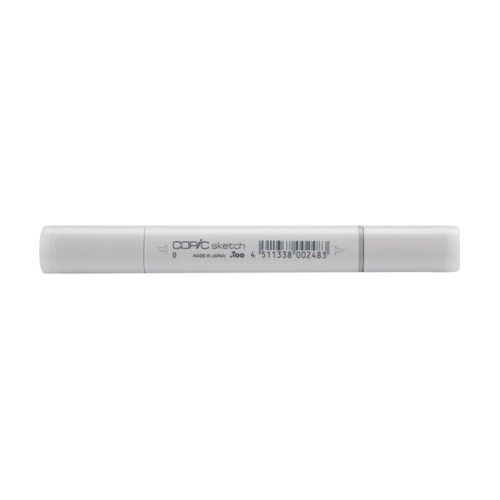
I colored the ‘guys’ with Copic Sketch Markers and covered them with glossy accents.  I put the pumpkin behind a window and the ghosts flying out of windows.  I love the curtains so I had to add them. lol

I stamped Happy Halloween on the inside from the Halloween Pumpkin stamp and die set.

I die cut the Boo Poe Script twice from white cardstock and once from Black Glossy cardstock.  Glued them together a little off so you can see the white behind the black.

Straight forward….cutting and gluing and an A2 size card!

I can’t wait to see what everyone else does with this die set.  I think it needs decorated for Christmas!

I still have some card kits for sale…info at the bottom of the post HERE.

Thank you so much for visiting my blog today.  I hope you’re enjoying some pretty almost Fall days! I can’t believe it!

Shopping links to what I used to make this card…

Poppystamps – 2375 Neighborhood Home…
[ STR | SSS ]
Poppystamps – 2545 Whittle Scary Guys…
[ STR | SSS ]
Poppystamps – 2473 Boo Poe Script…
[ STR | SSS ]
Memory Box – CL5264-D Halloween…
[ STR ]
Memory Box – SH44004 Black Glossy…
[ STR | SSS ]
copic sketch markers at Simon Says…
[ SSS | TE | BLIC ]
Mini Glossy Accents – .5 ounce
[ STR | SSS ]
Ranger Ink – Glossy Accents – Clear…
[ SBC | SSS ]
Sakura BLACK GLAZE Gel Pen sk38395
[ SSS | BLIC ]
Sizzix – Big Shot Plus Machine -…
[ SBC ]
Sizzix – Big Shot Switch Plus Machine…
[ SBC ]
Scrapbook Adhesives Crafty Foam Tape…
[ STR ]
Fiskars Non-Stick Titanium Softgrip…
[ STR ]
Tombow Mono Multi Liquid Glue
[ STR | SBC | SSS ]
Teardrop and Round Pearl Pins – 24/pkg
[ STR ]

birch press design · cards · CAS · Christmas · Die Piecing · Fall · Memory Box · Poppystamps · Winter · Wreath Building

Memory Box NEW Fanciful Gilded Frame Two Ways…

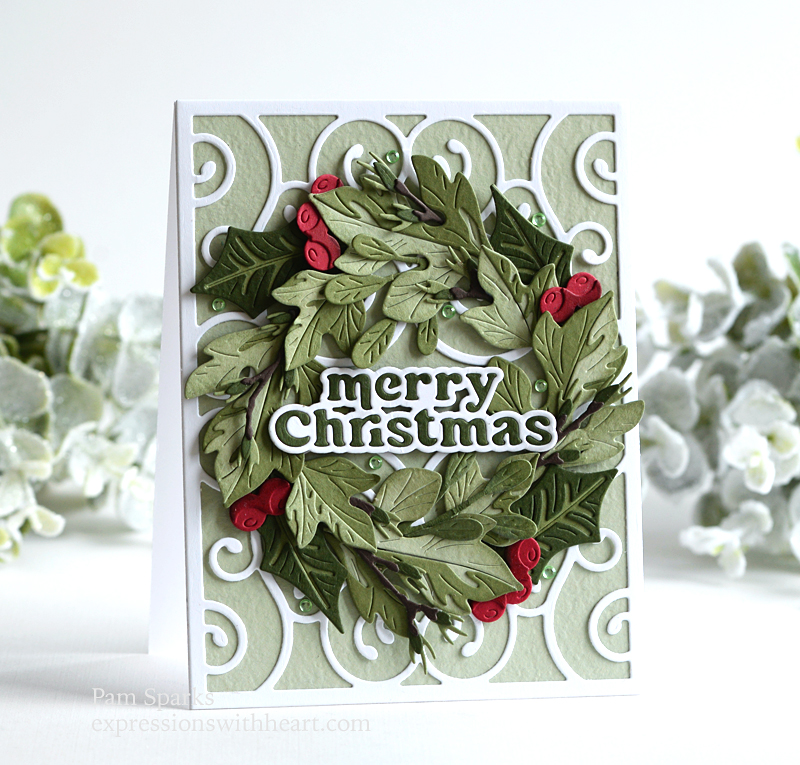
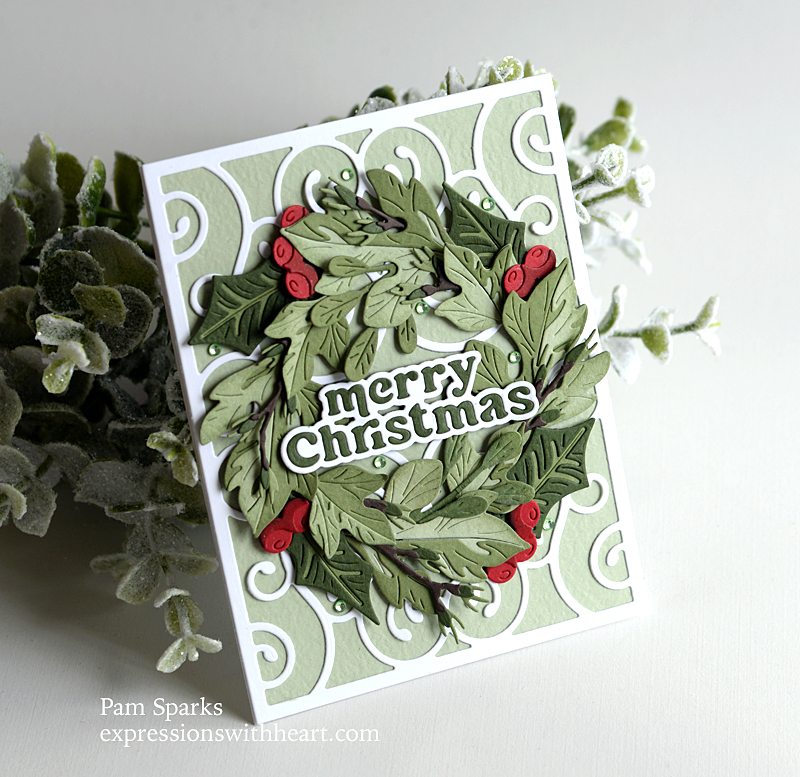
Hi everyone!  Second card with the parts I glued up with the NEW Birch Press Design dies.  This time I used a NEW Memory Box die for the background.  Fanciful Gilded Frame.

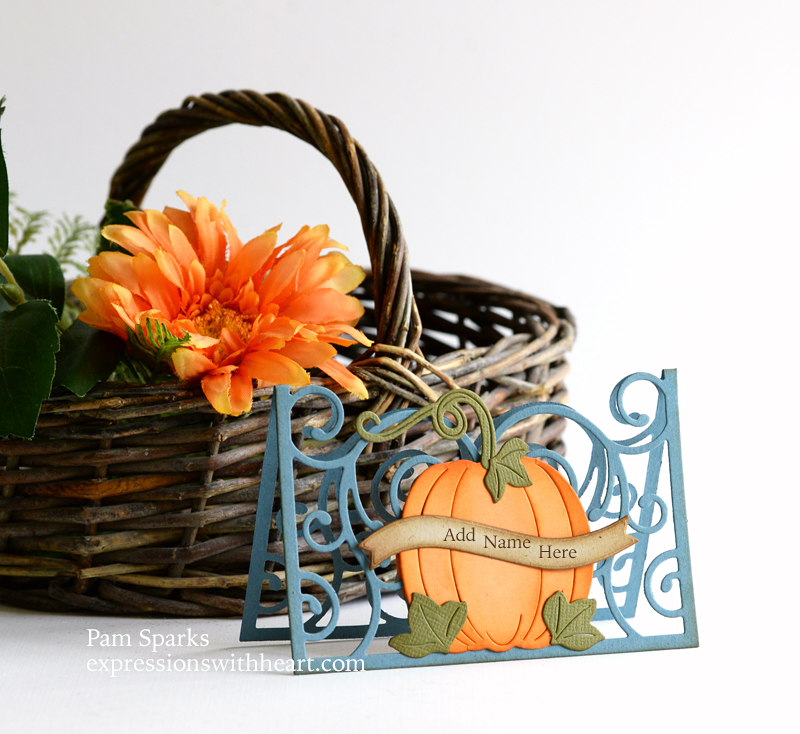
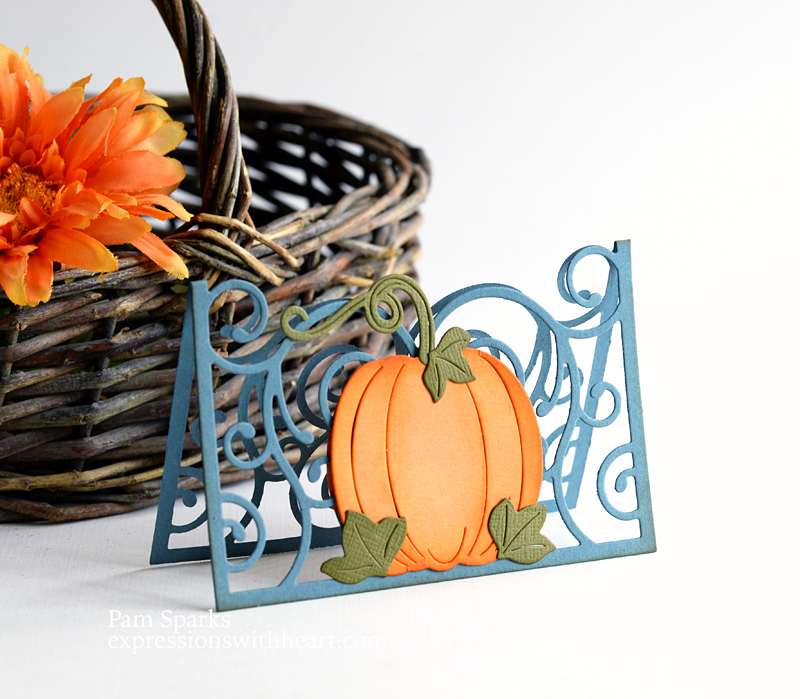
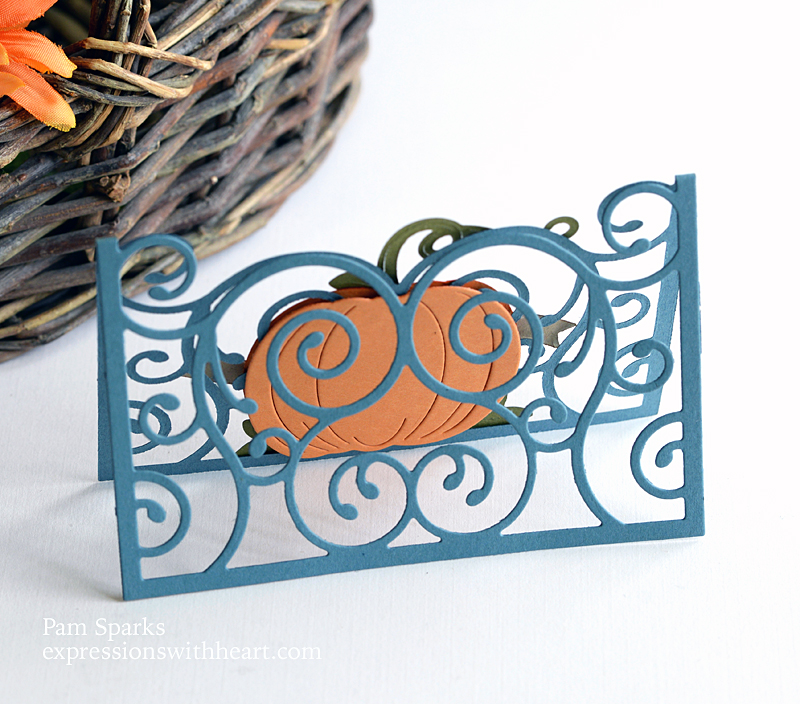
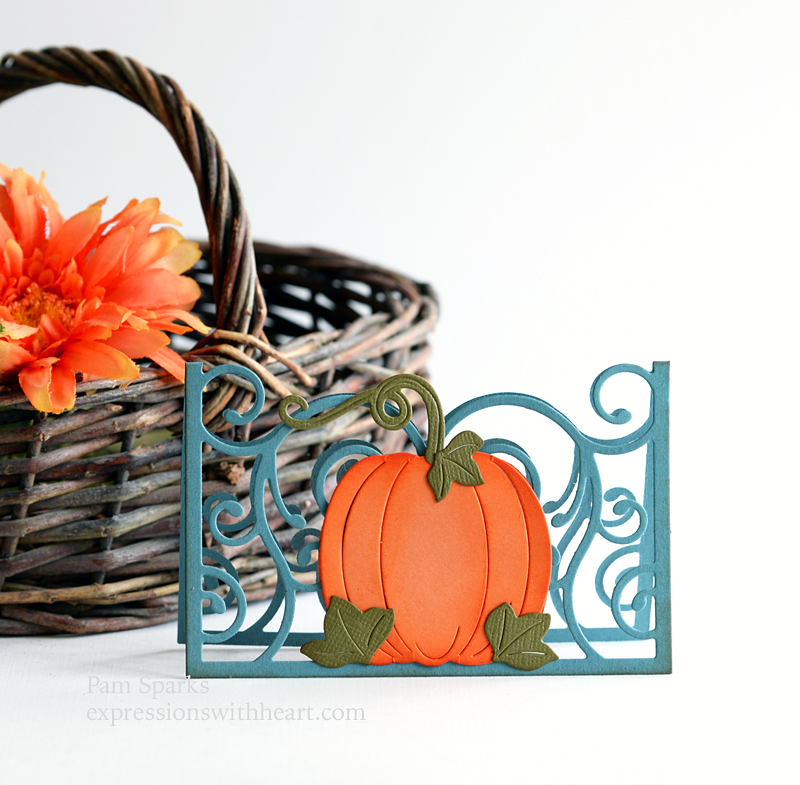
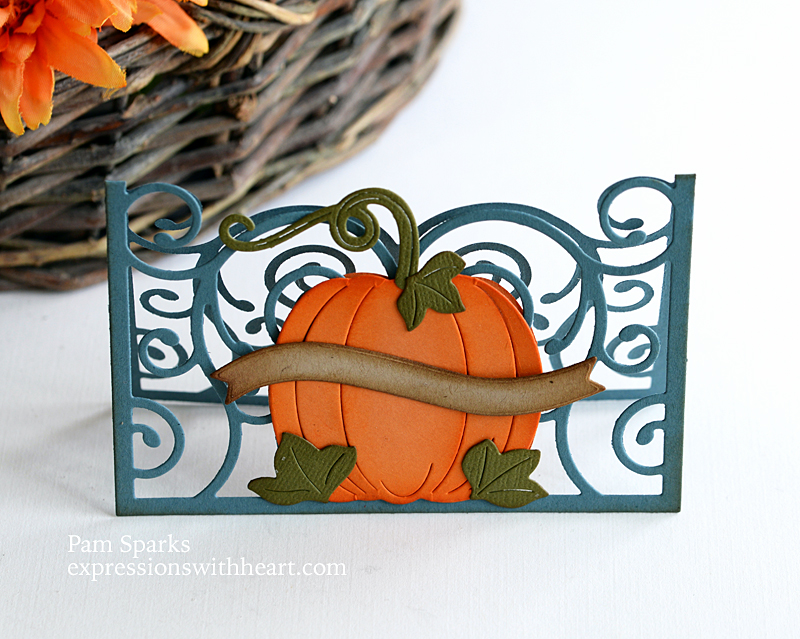
The first thing I made with the frame though was this place card!  I looked at the die and thought, this could be folded in half and used for table decorations!

I made this in 15 minutes!  That’s a record make for me time wise!

Back to the top card…

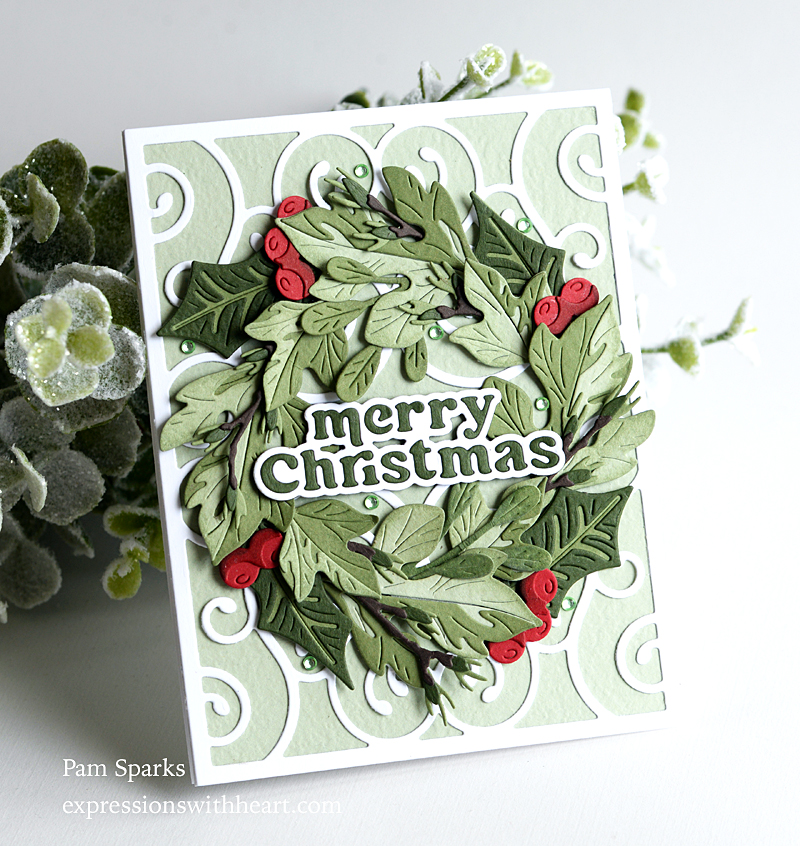
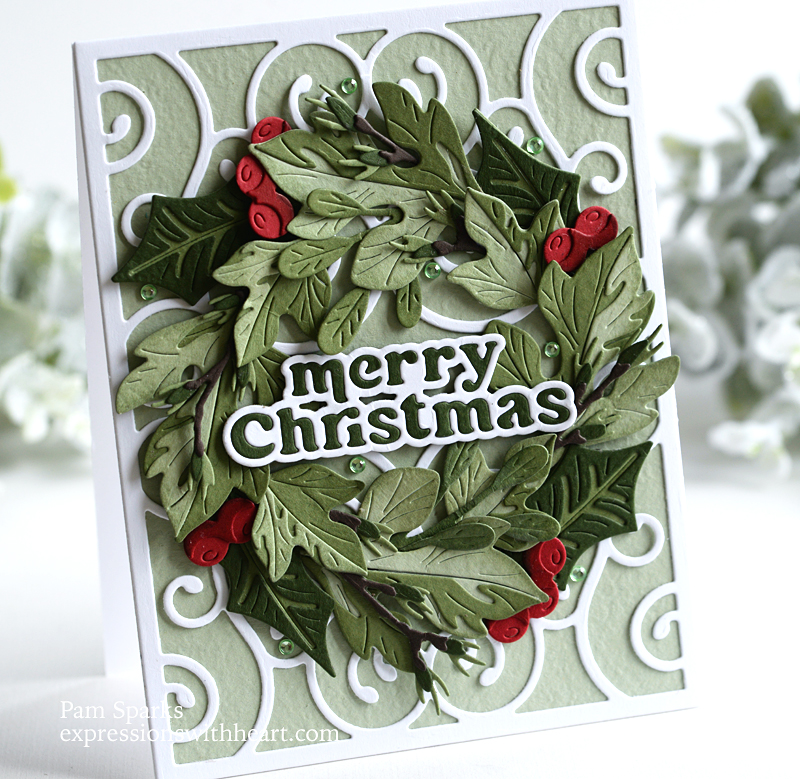
I started the wreath by laying out the four large leaves I’d made from the Forest Leaf and Berries Contour Layers dies, top, bottom and both sides.

Then I added four of the Jolly Holly Contour Layers dies.

Then I went back to the Forest set and put in the four small dies, pretty much beside the holly.

Then I added the berries from the Jolly Holly dies.

I only had two of the small branches from the Oval Leaf Brances Contour Layer so I added them on the inside of the wreath top and bottom.

I cut up the Budding Twigs Contour Layers dies and inserted them here and there.

It looks complicated to me but laying it out like this, it went together fast! YAY!

It really turned out pretty if I do say so myself! lol  I never know! lol

I added some Memory Box Pastel Fairy Jewels in the light green color….matchy! lol

It’s an A2 size card and will go through the mail fine with one stamp! YAY!

Back to the pumpkin…

Do you do name cards?  We don’t because…big family!  I took pictures of this design without the banner too because I would more than likely use it more for a decorative piece here and there or maybe to put in front of a dish to tell what it is!

I love this pretty NEW Autumn Pumpkin from Memory Box.  The details are ‘built in’… die cut and it’s ready to go!  I did add a little Spiced Marmalade Distress ink with an ink blending brush but you wouldn’t have to!

I quick cut an extra pumpkin to back the pumpkin. View from the back….

I had this denim looking cardstock still out on the desk so I used it but you could use any Autumn color you like!

Here it is with the banner again.  I used the banner die from a poppystamps foil and cut die set, Modest Banner Greetings.

Both designs are festive and fun!  YAY for holidays!

One more thing….I made some kits for stamp club this month and I have three left.  Everything is die cut/included to make one card!   $15 includes the postage to you in the USA.  This is the card for the kit.   OH, I did use a white glaze pen on the icing, eyes and buttons and some blush on the ginger’s cheeks. That is not included in the kit.

Email or comment if you want one!

Thank you for visiting my blog today!  It’s so hot here this week, we had a couple really nice weeks, now it’s back to real Summer!  I hope to get a lot done in my stamp room where it’s nice and cool!

Here’s what I used for these projects…holler if you have any questions!

Memory Box – 94660 Fanciful Gilded…
[ STR | SSS ]
Birch Press Design – 57514 Forest…
[ STR | SSS ]
Birch Press Design – 57512 Jolly…
[ STR | SSS ]
Birch Press Design – 57538 Merry…
[ STR | SSS ]
Memory Box – 94690 Autumn Pumpkin…
[ STR | SSS ]
Memory Box Fairy Drops • Jewels •…
[ STR | SSS ]
Birch Press Design – 57525 Oval Leaf…
[ STR | SSS ]
Birch Press Design – 57529 Budding…
[ STR | SSS ]
Poppystamps – PSF806 Modest Banner…
[ STR | SSS ]
Hammermill WHITE 100 LB SMOOTH…
[ SSS ]
Scrapbook Adhesives Crafty Foam Tape…
[ STR ]
Tombow Mono Multi Liquid Glue
[ STR | SBC | SSS ]
Tim Holtz Distress Ink Pad SPICED…
[ SSS ]
Waffle Flower Crafts – Blending Brushes
[ SBC | SSS ]
Sizzix – White and Gray – Big Shot…
[ SBC ]
Bazzill Card Shoppe
[ STR ]
TE Premium Cardstock – Cherry Pop -…
[ TE ]
TE Premium Cardstock – Candy Corn -…
[ TE ]

cards · CAS · Die Piecing · Fall · Halloween · Memory Box · Poppystamps

poppystamps Halloween Assemblage and Rickety House Cards and a chance to win!

Boo!  Happy Saturday! Two more cute halloween cards to share today then it’s on to the NEW Christmas releases from Memory Box and poppystamps!  I hope you’re enjoying and creating with all the new releases! hehe

Here’s the Memory Box Black Glossy cardstock out to play again!  I used white glossy on the Boo but it’s hard to tell it in the pictures.  I should’ve used it on the ghost and cobweb too! lol

A2 size card…. links below to the dies I used.

Next up, some more purple and orange goodness!

Oxide inks came out to play… two purples and two oranges blended on white cardstock.  Then a cloud stencil with white pigment ink brushed on over the top of the purples and oranges.

Spatter on some black and white watercolor inks.

Die cut the ink blended panel with Wrapped Stitch Rectangles die before inking.

The ghost on this card is from the NEW Whittle Creatures die. (in my previous post also)

Sentiment is from Memory Box clear stamp set Halloween Pumpkin.

A2 size card.

I hope you enjoyed this little mini series from me for halloween!  Here’s my other two posts with cards from this Memory Box and poppystamps release…. HERE and HERE.

Thank you for stopping by!

I have a couple halloween dies to giveaway!  Comment for a chance to win!


Shopping links to what I used to make these two cards…click on the blue store abbreviations to see.

Poppystamps – 2495 Halloween…
[ STR | SSS ]
Poppystamps – 2491 Leafy Branch Oval…
[ STR | SSS ]
Poppystamps – 2473 Boo Poe Script…
[ STR | SSS ]
Memory Box – SH44004 Black Glossy…
[ STR | SSS ]
Simon Says Stamp Cardstock WHITE…
[ SSS ]
TE Premium Cardstock
[ TE ]
Memory Box – 94632 Rickety House…
[ STR | SSS ]
Poppystamps – 2498 Whittle Creatures…
[ STR | SSS ]
Memory Box – 30094 Wrapped Stitch…
[ STR | SSS ]
Memory Box – CL5264-D Halloween…
[ STR ]
New MISTI Stamping Tool – The Most…
[ SBC | SSS | TE ]
Mini MISTI – Most Incredible Stamp…
[ SBC | TE | SSS ]
Ranger Ink Jet Black Archival Ink Pad
[ SBC | SSS ]
Sizzix – Tim Holtz – Big Shot Switch…
[ SBC ]
Scrapbook Adhesives Crafty Foam Tape…
[ STR ]