cards · Christmas · Die Piecing · Embossing Folders · Spellbinders dies · Winter

Spellbinders….Our Fave 2023 Club Products Blog Hop

Hi everyone and welcome! Today I’m participating in the Fave 2023 Club Product Blog Hop! We are  featuring projects using any of our 2023 Club products. All past Club products still in stock can be found HERE.

Scrolling through my blog I landed in July and my favorites!  It was Christmas in July!  I know, I know, you’re not surprised! lol

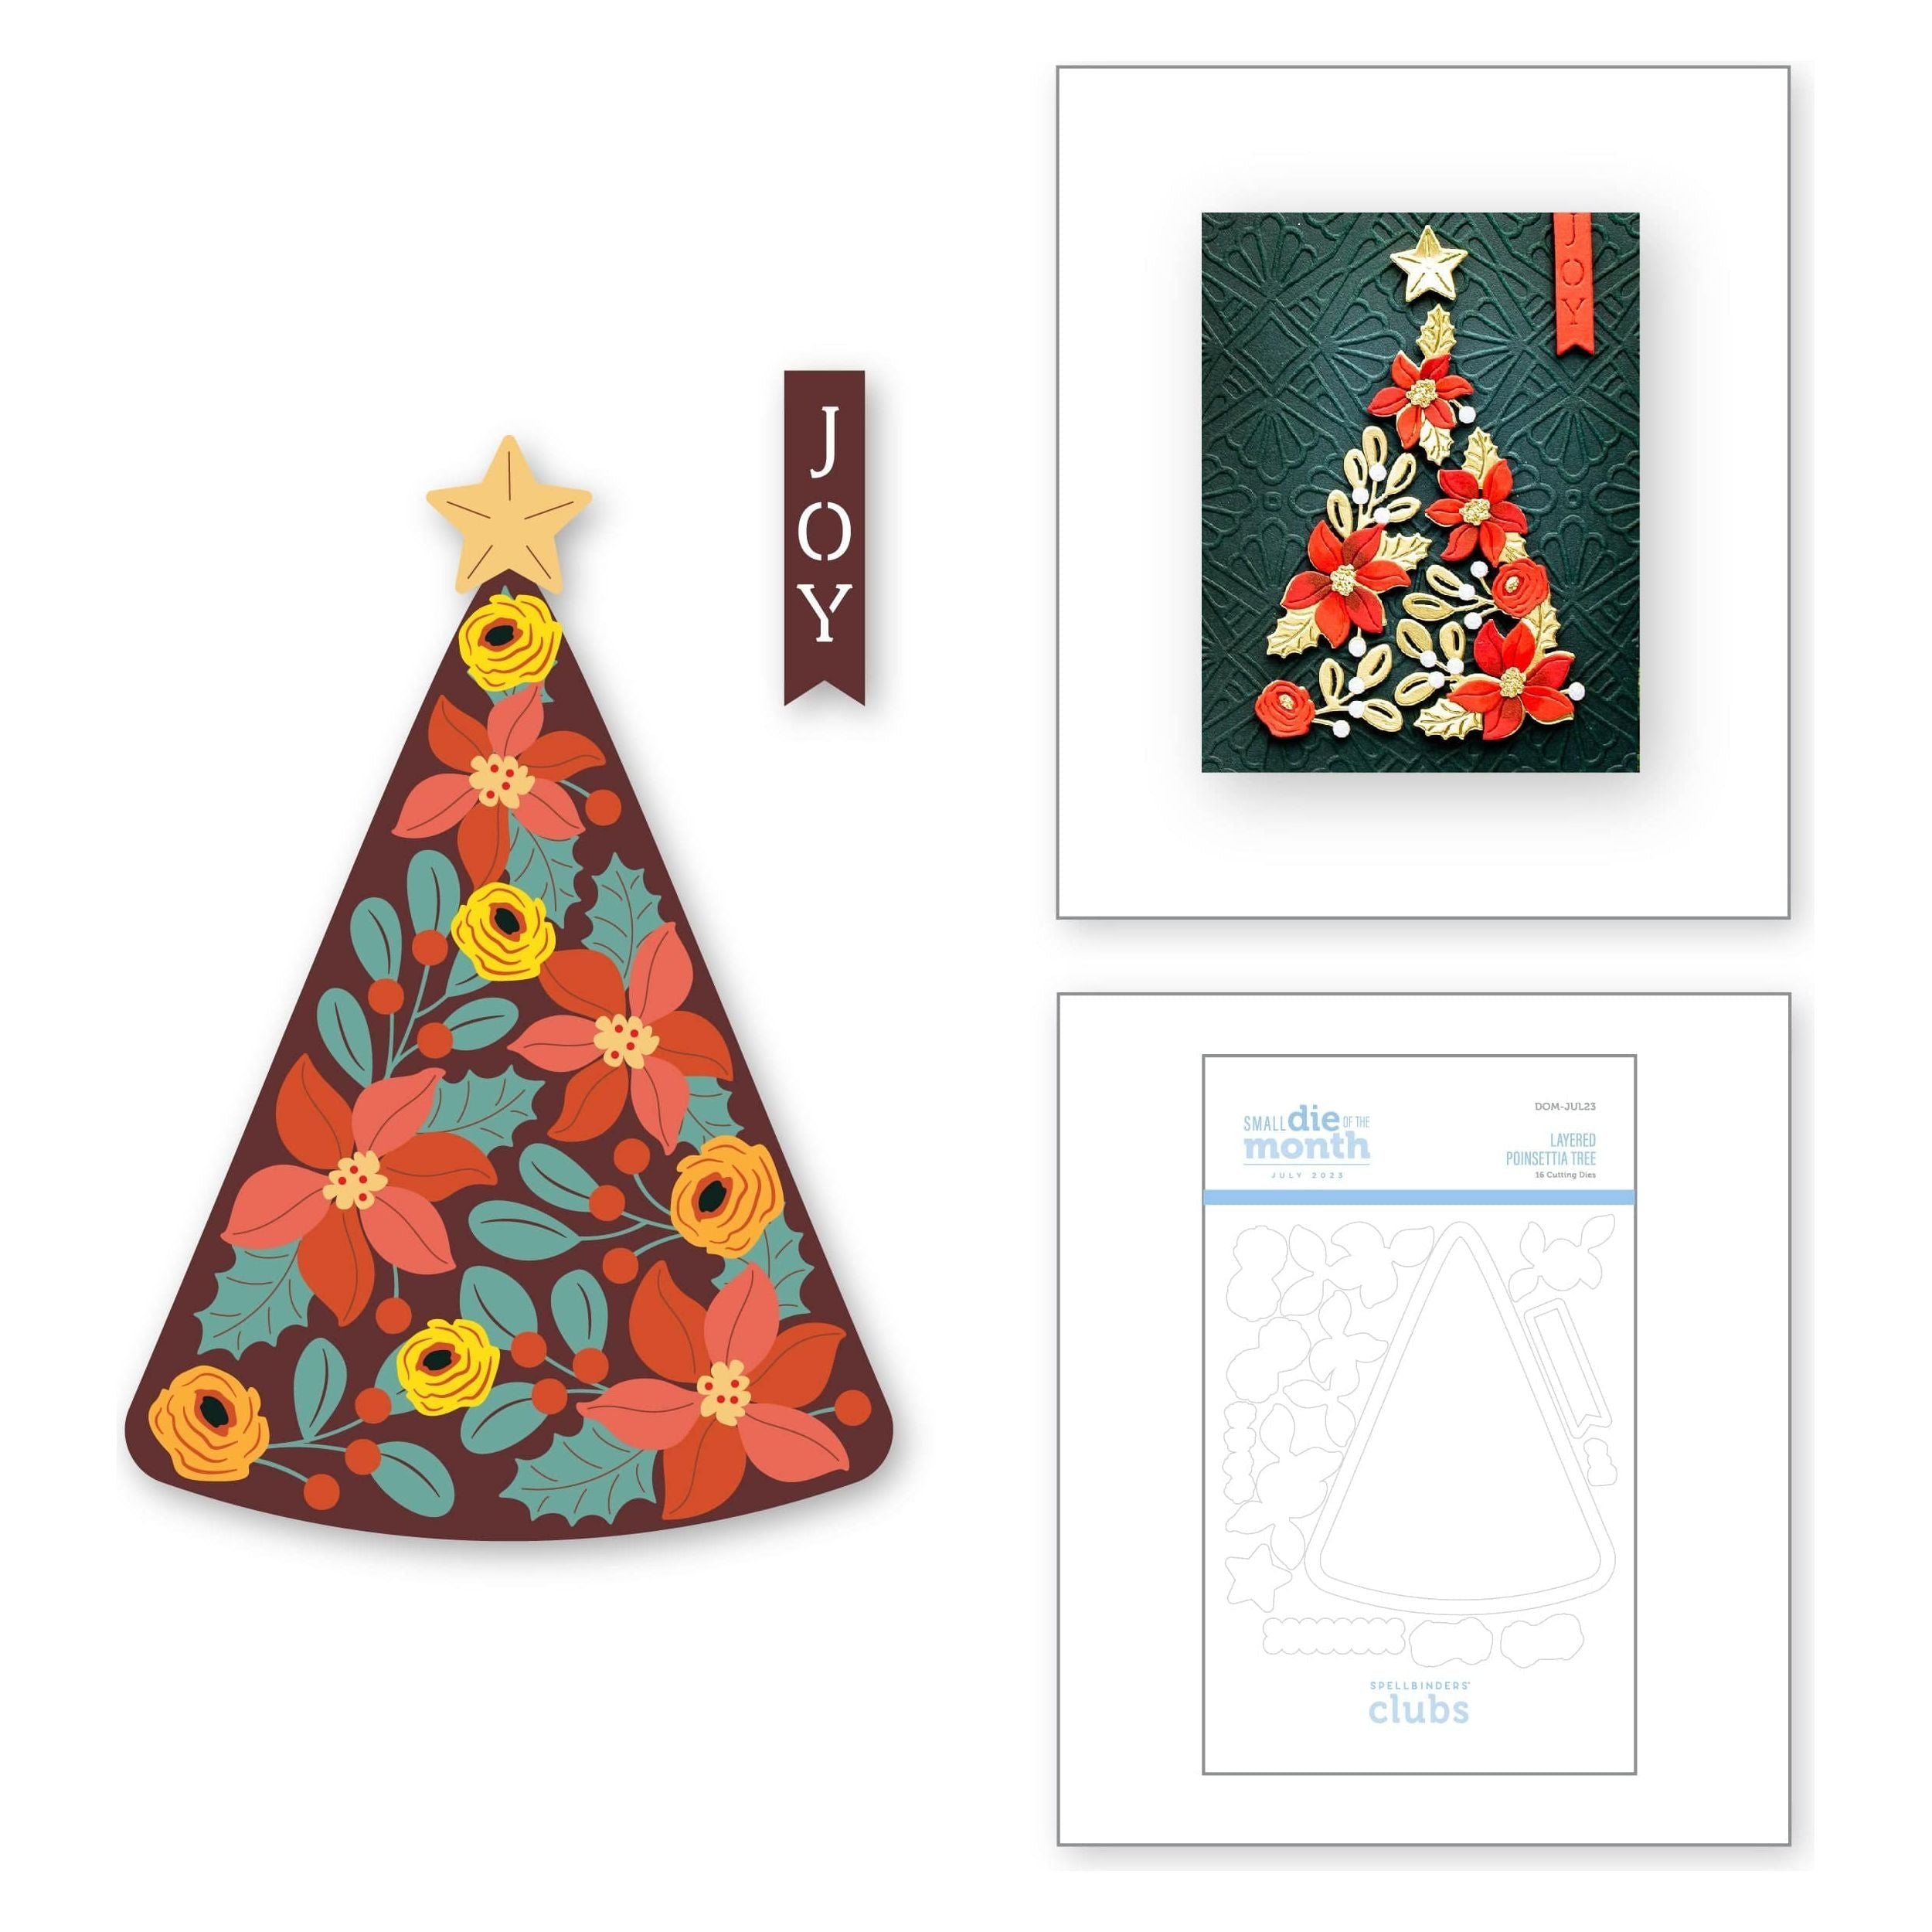
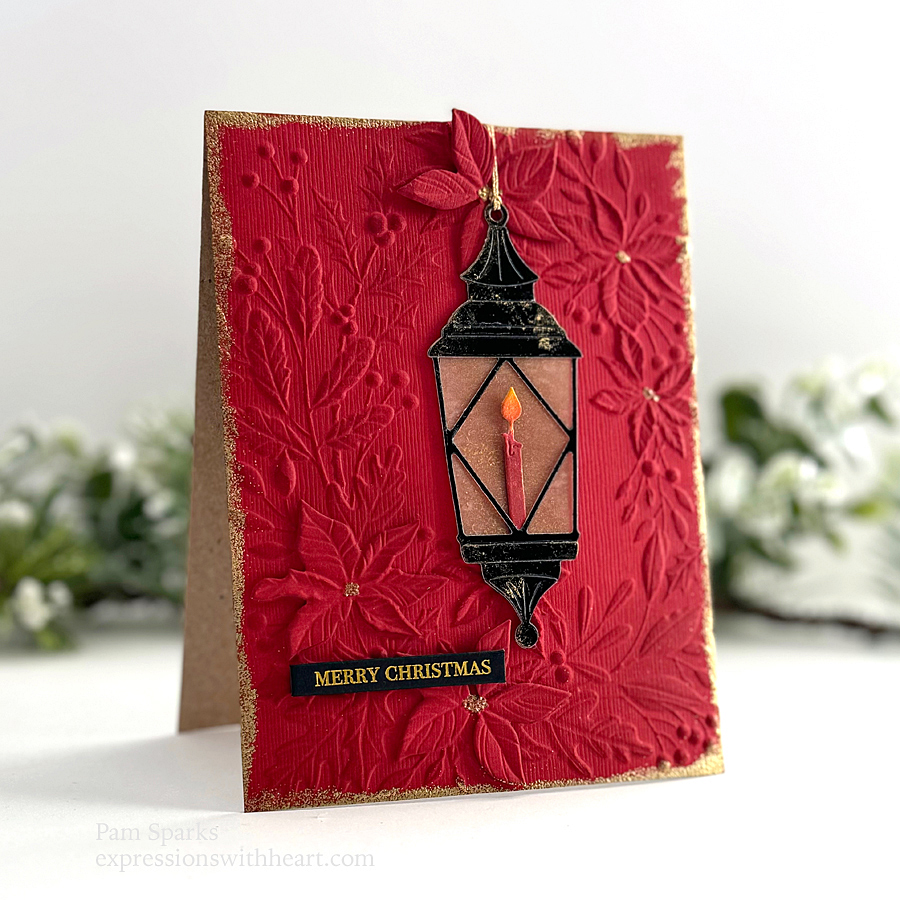
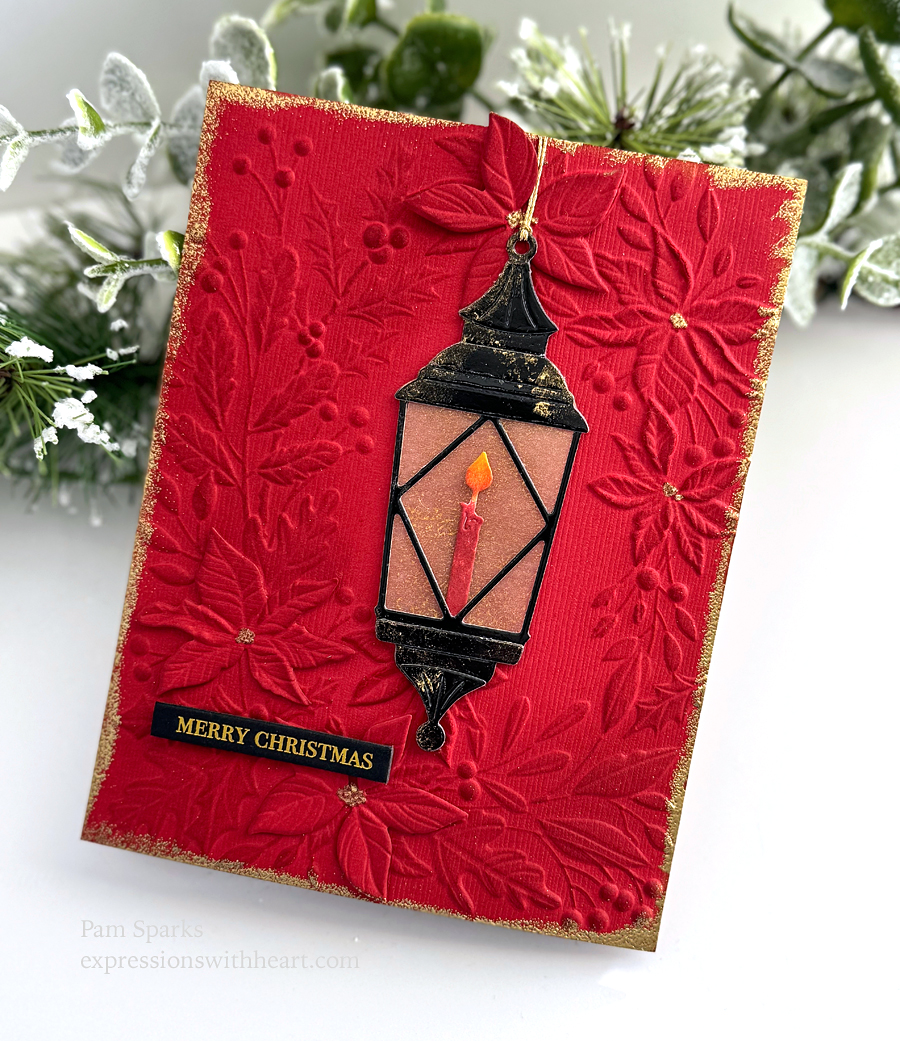
I’m going to start with the card I made for July Small Die of the Month club. My post about it is HERE.

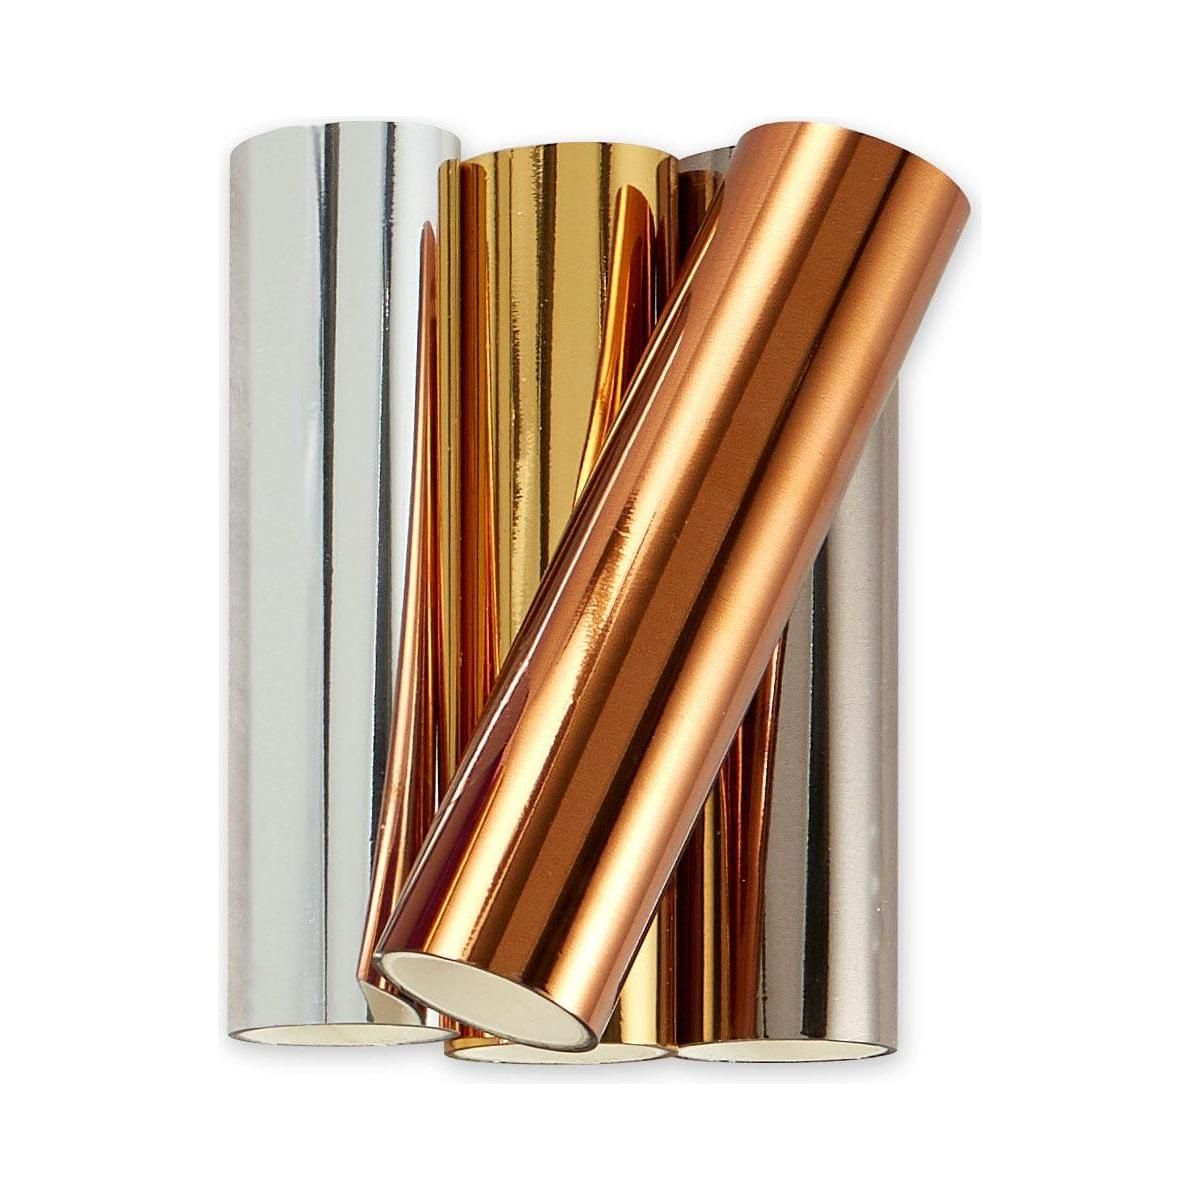
I love the somewhat traditional colors and classic look of this card!

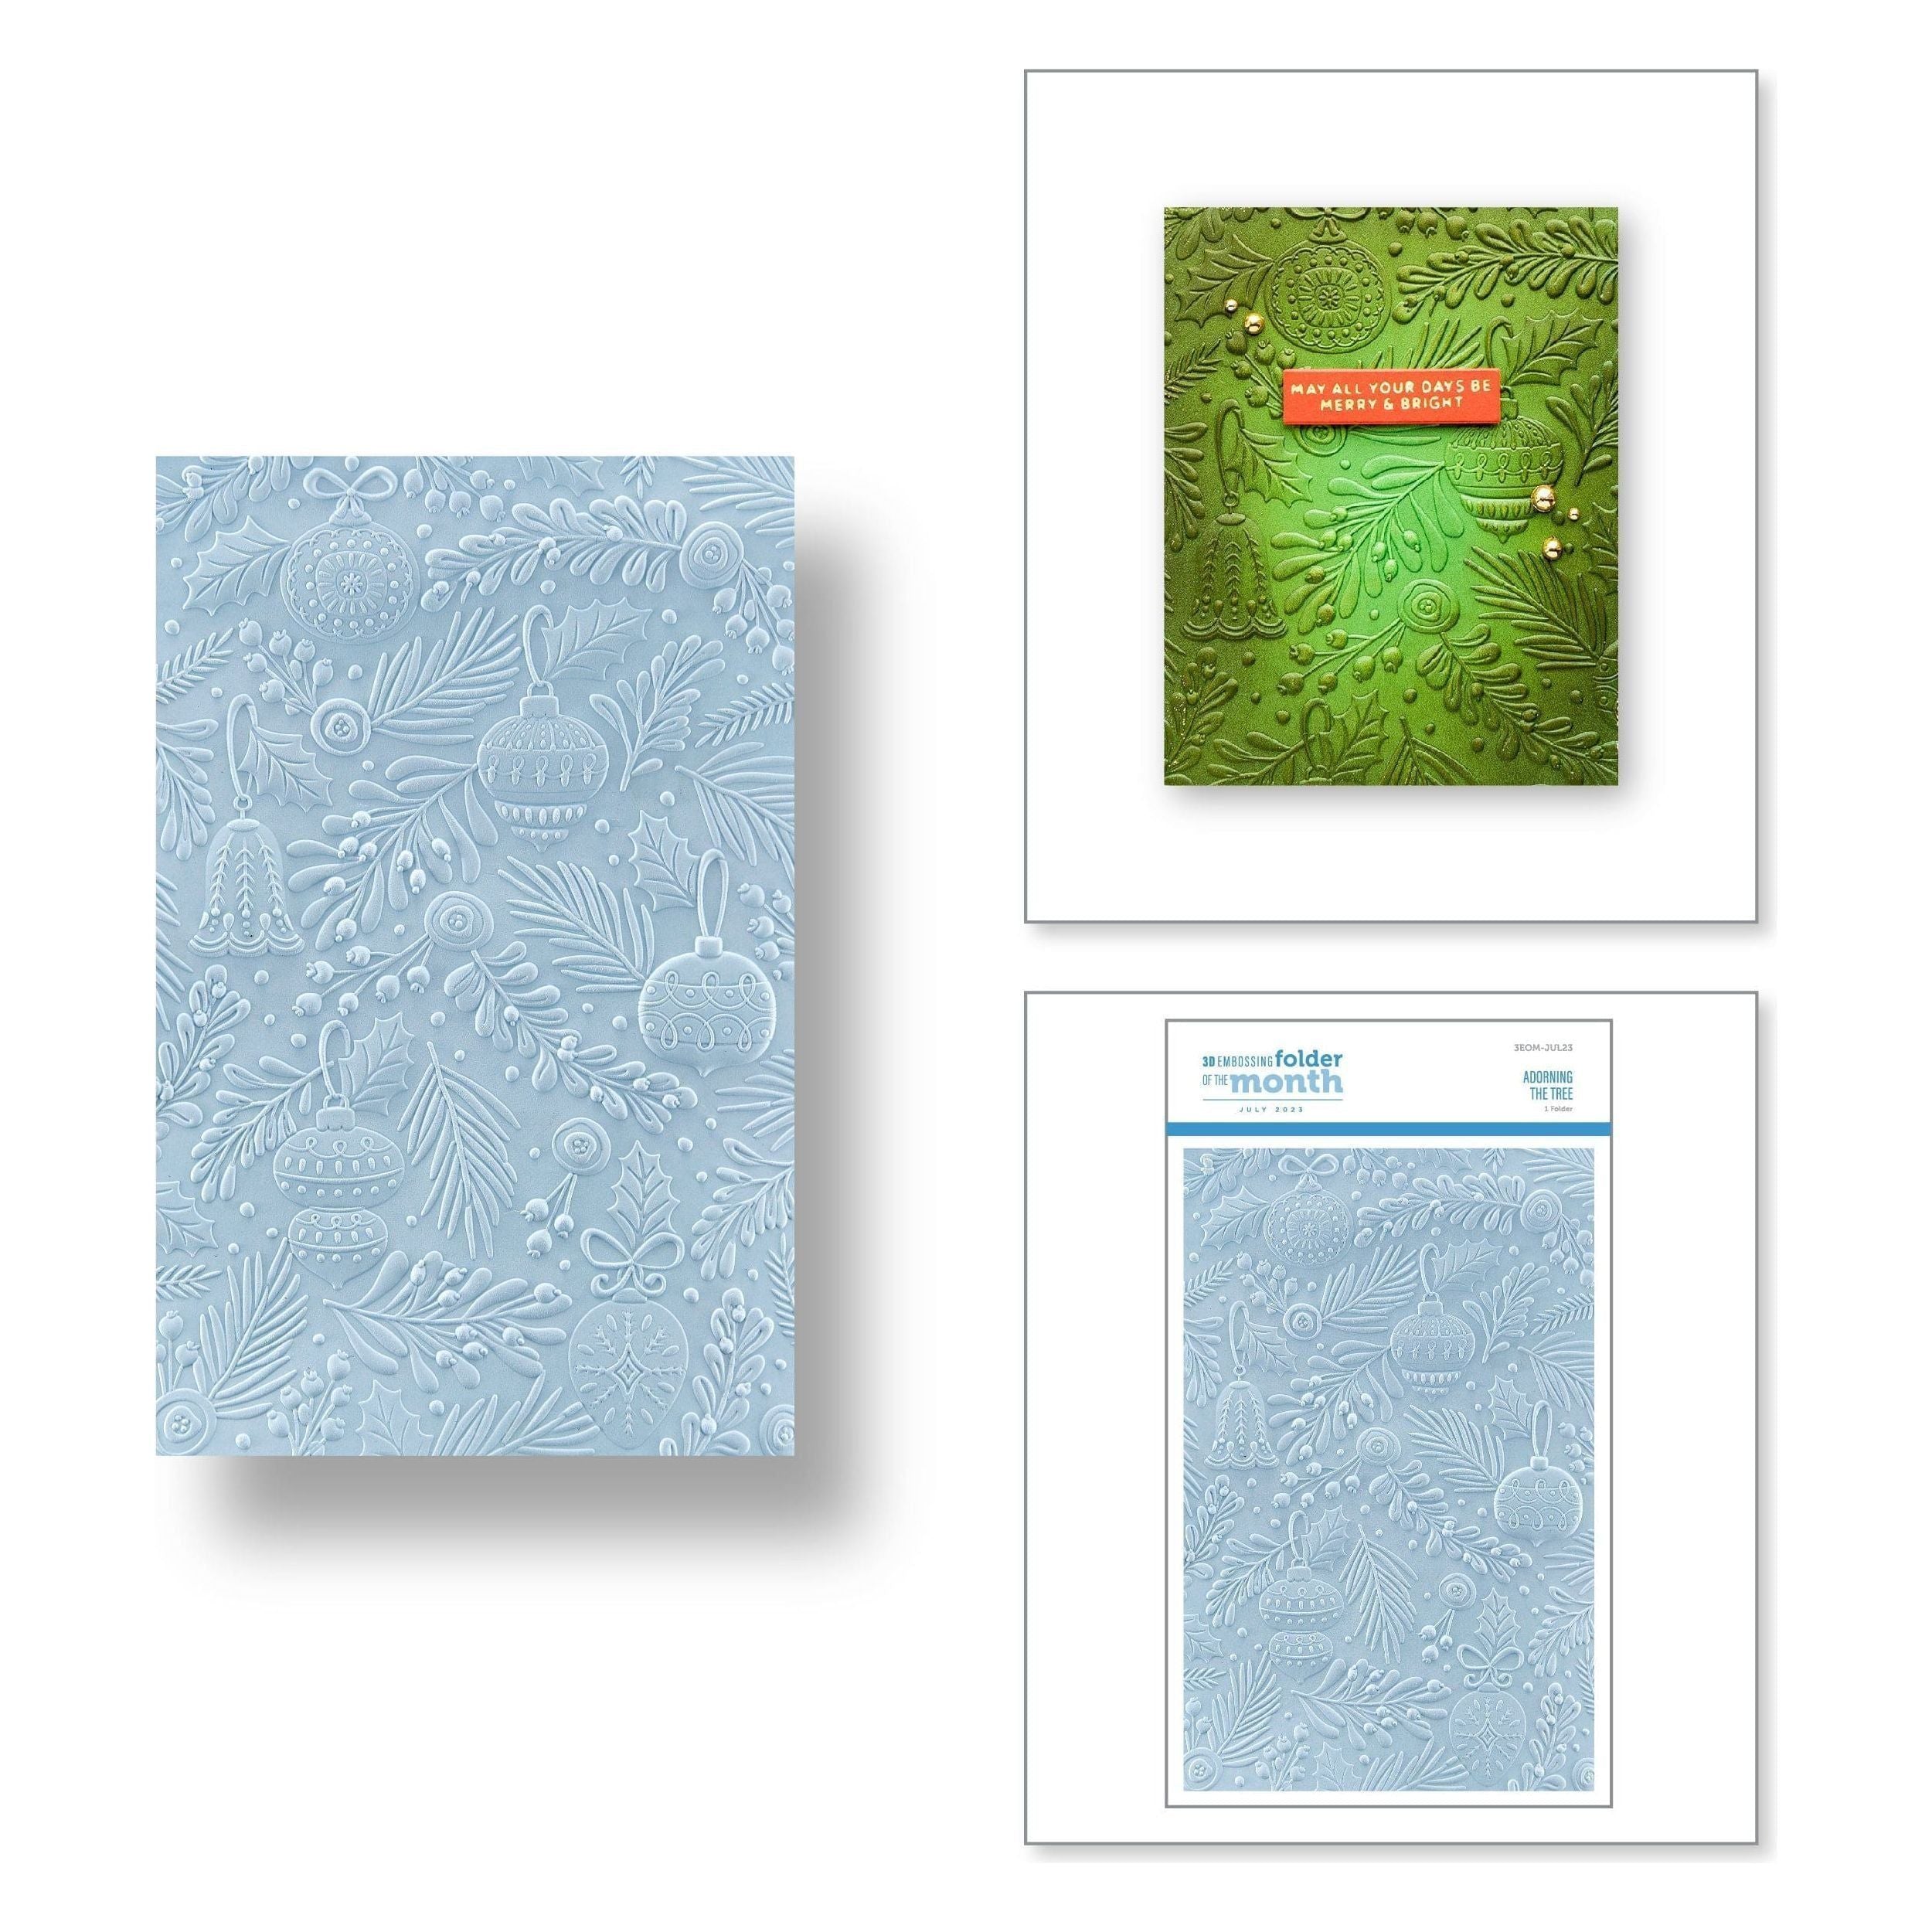
A completely different look with the July 3D Embossing Folder of the Month Club. My post about it is HERE.

From traditional colors to totally not traditional colors!  So many things you can do with embossing folders!

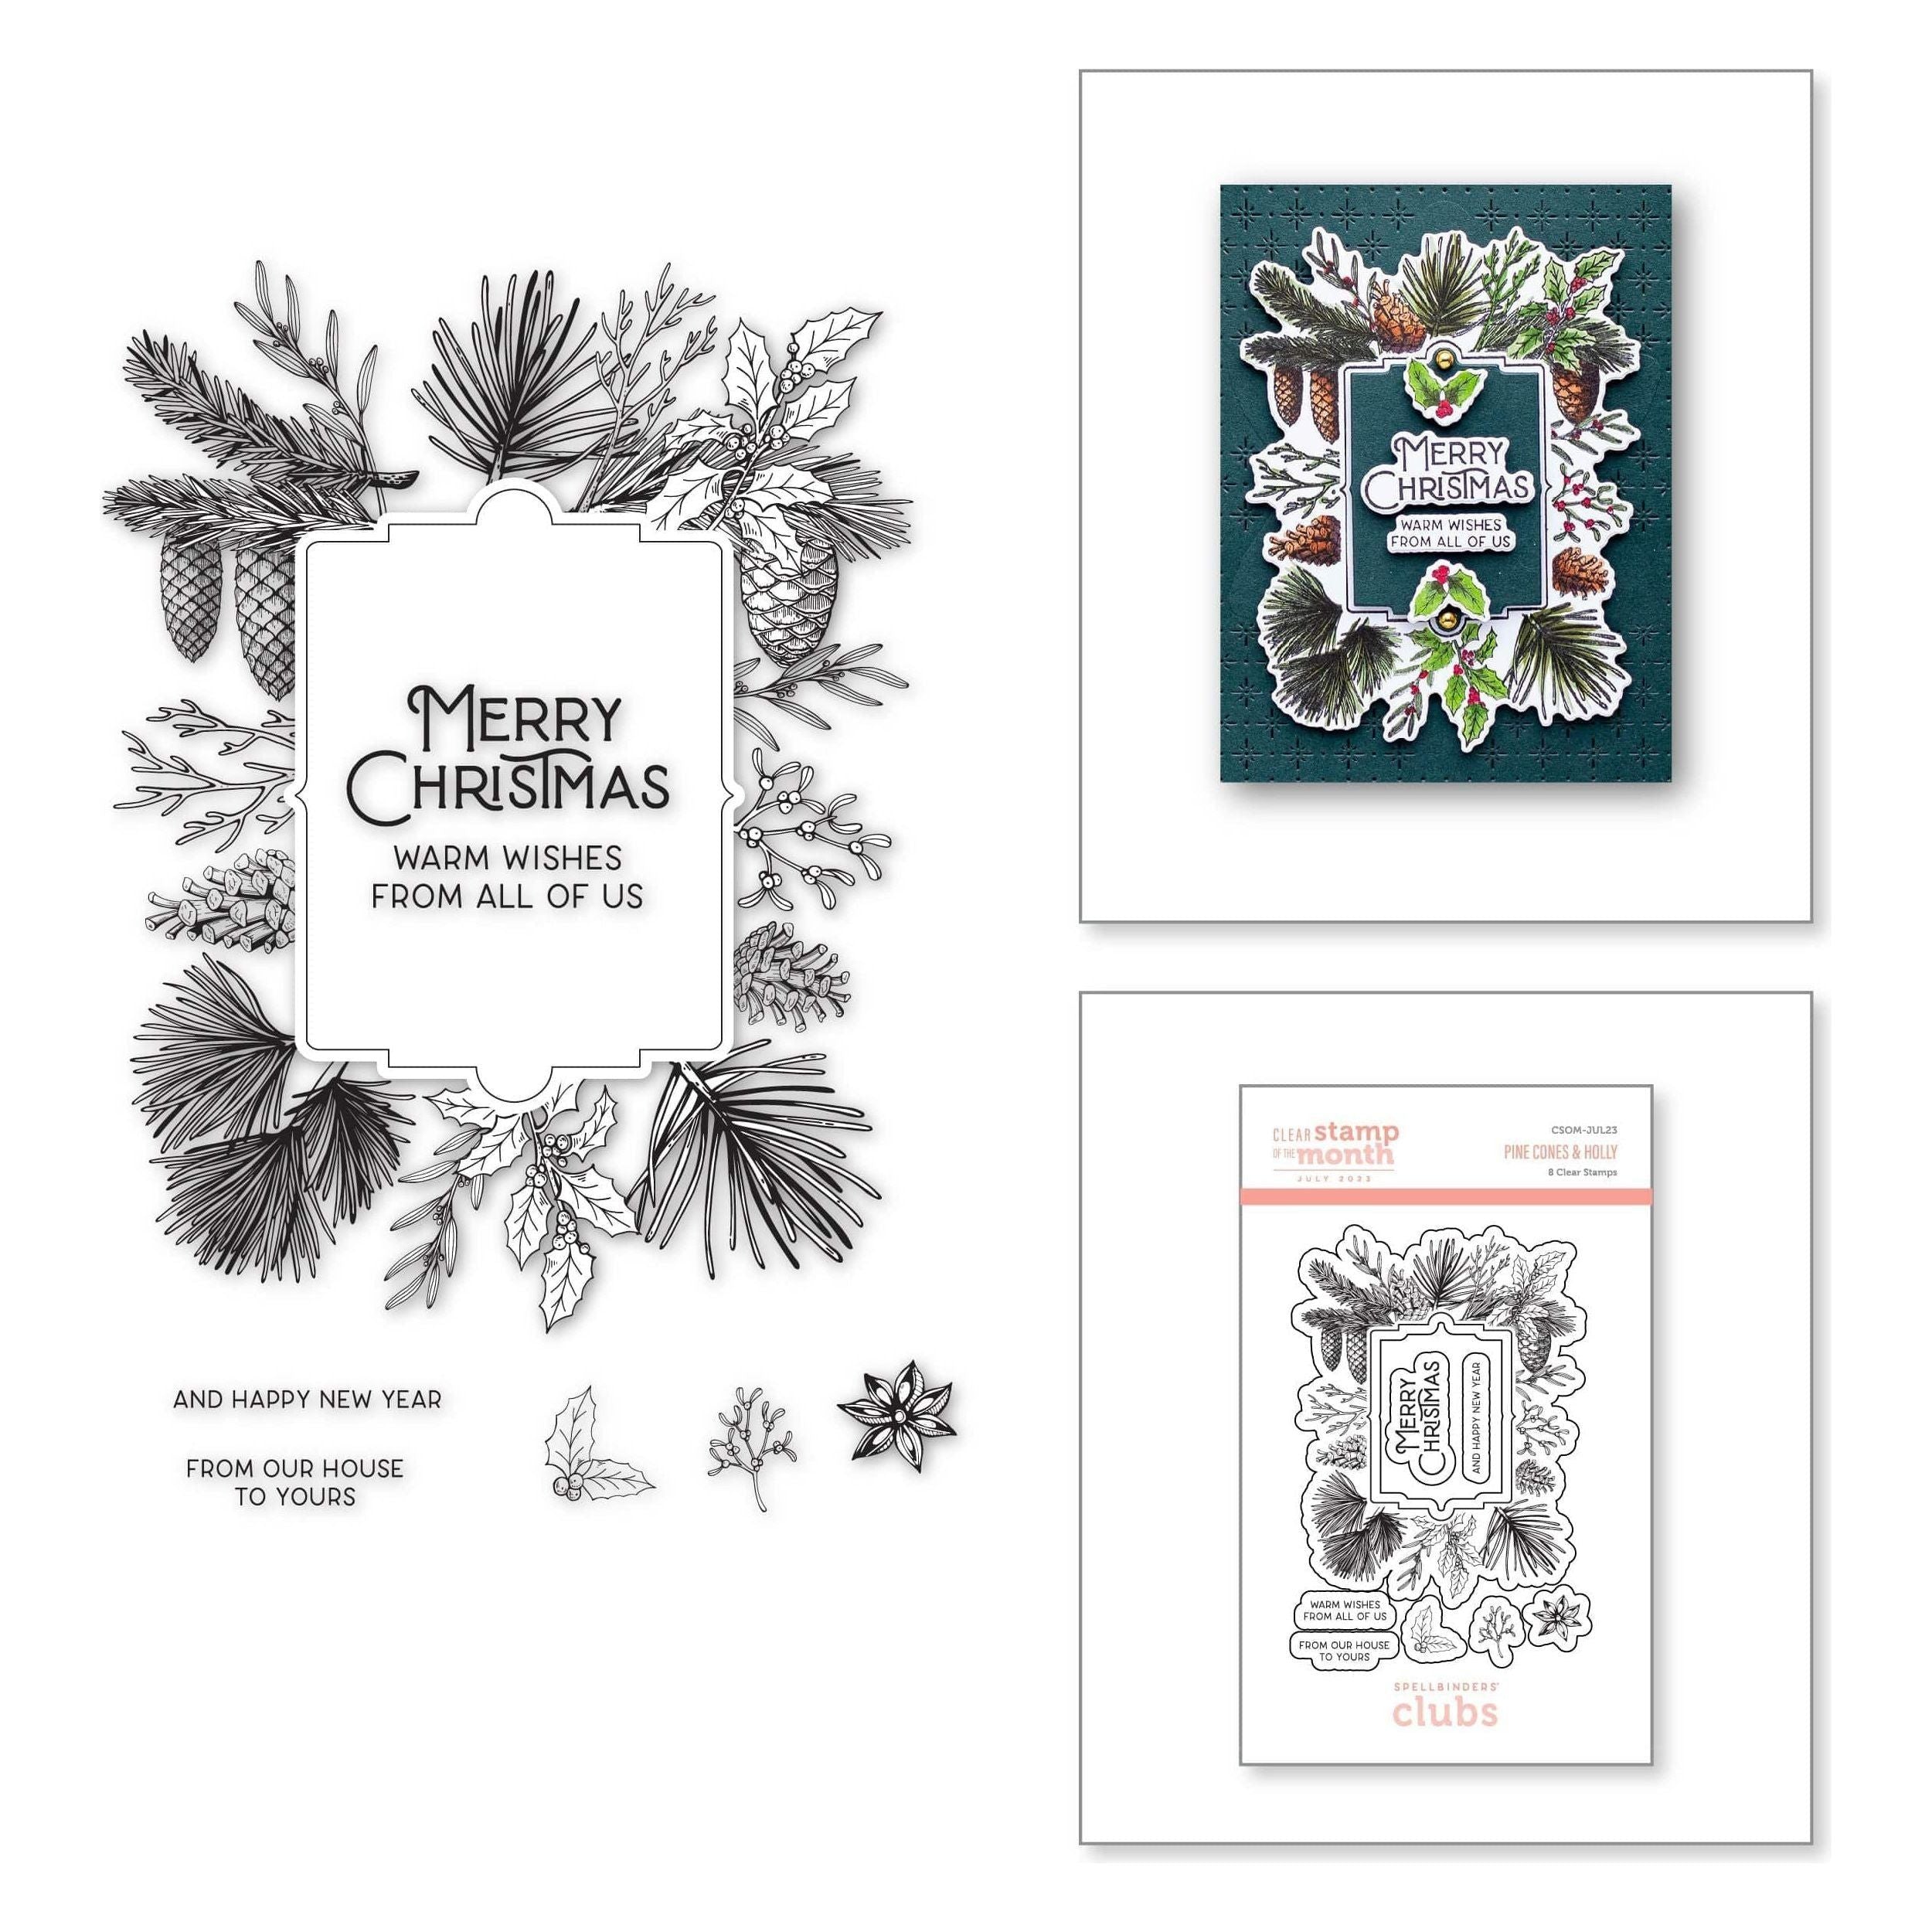
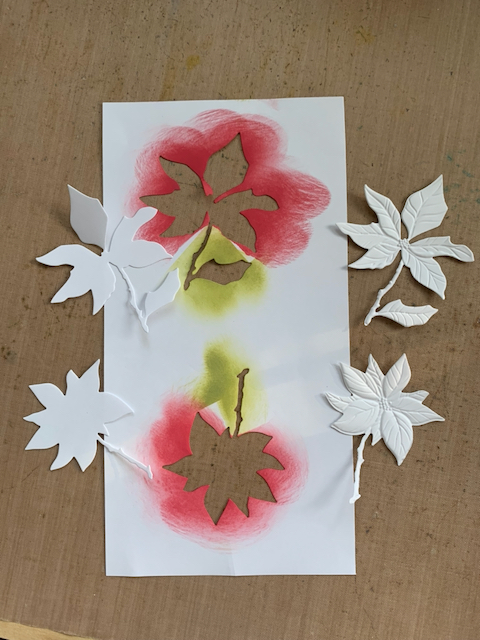
From glamorous to vintage for this next card!  Using the July Clear Stamp and Die Club of the Month I made this botanical card.  You can find my post about it HERE.

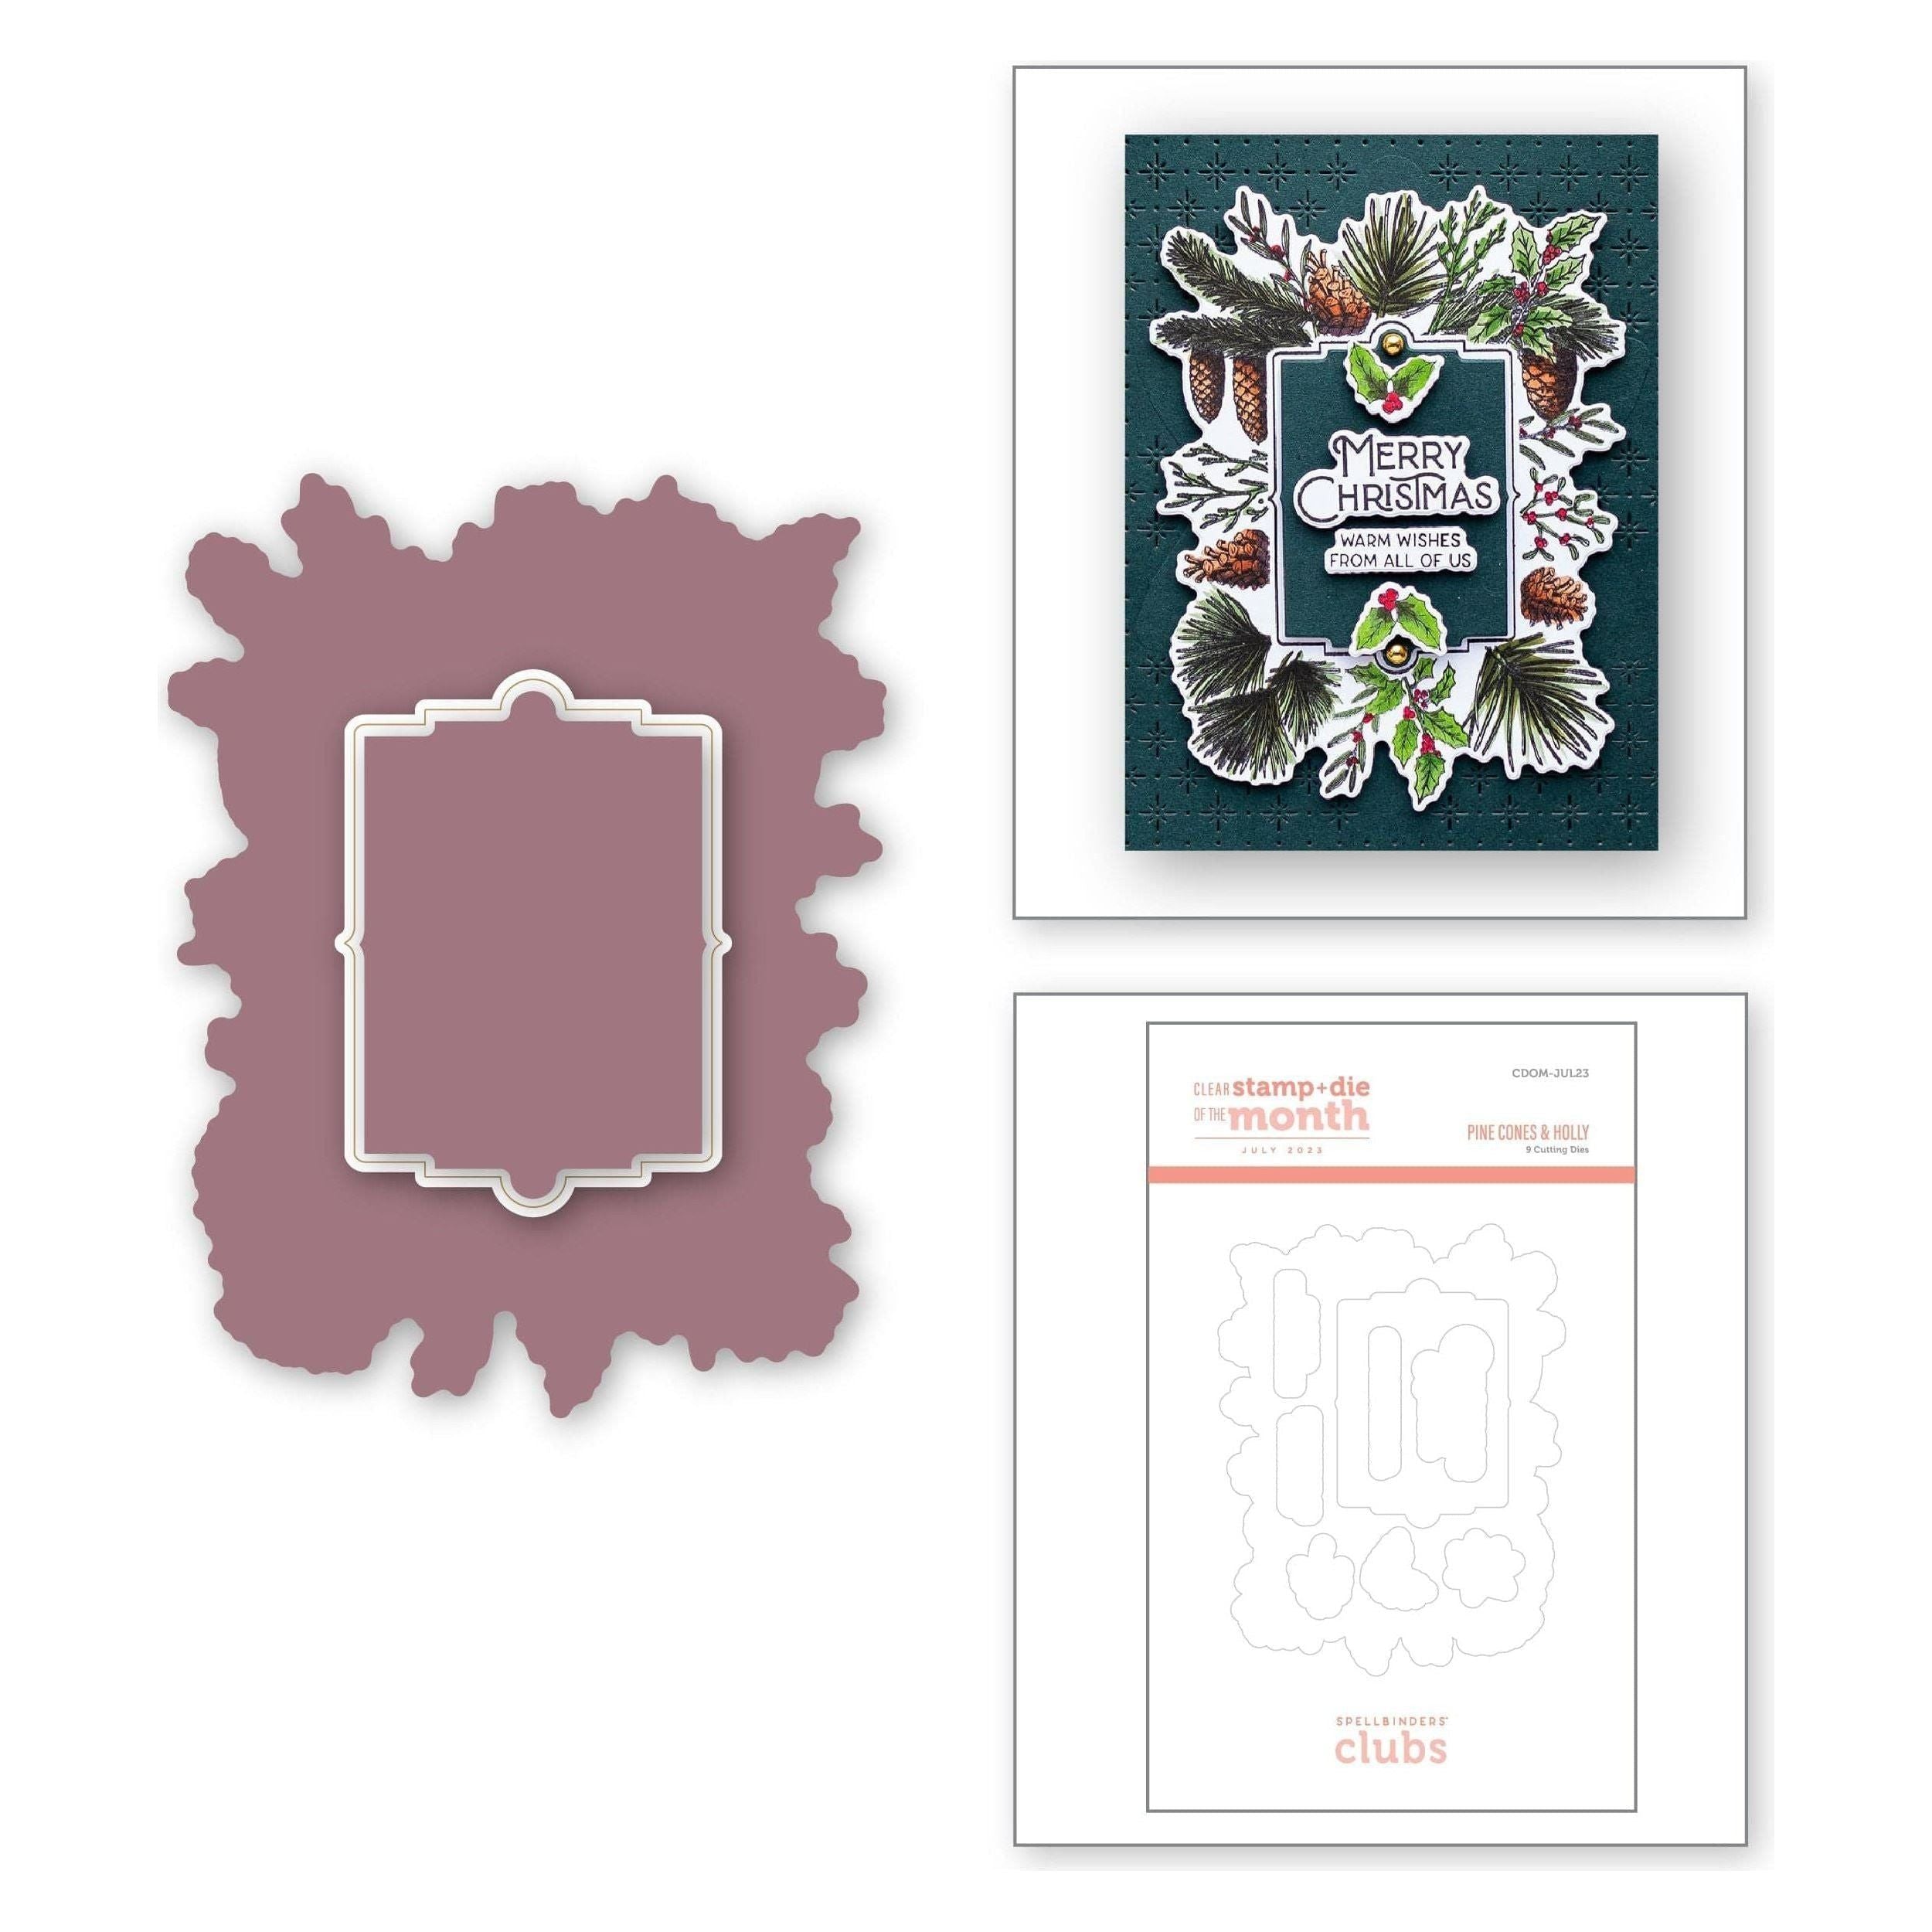
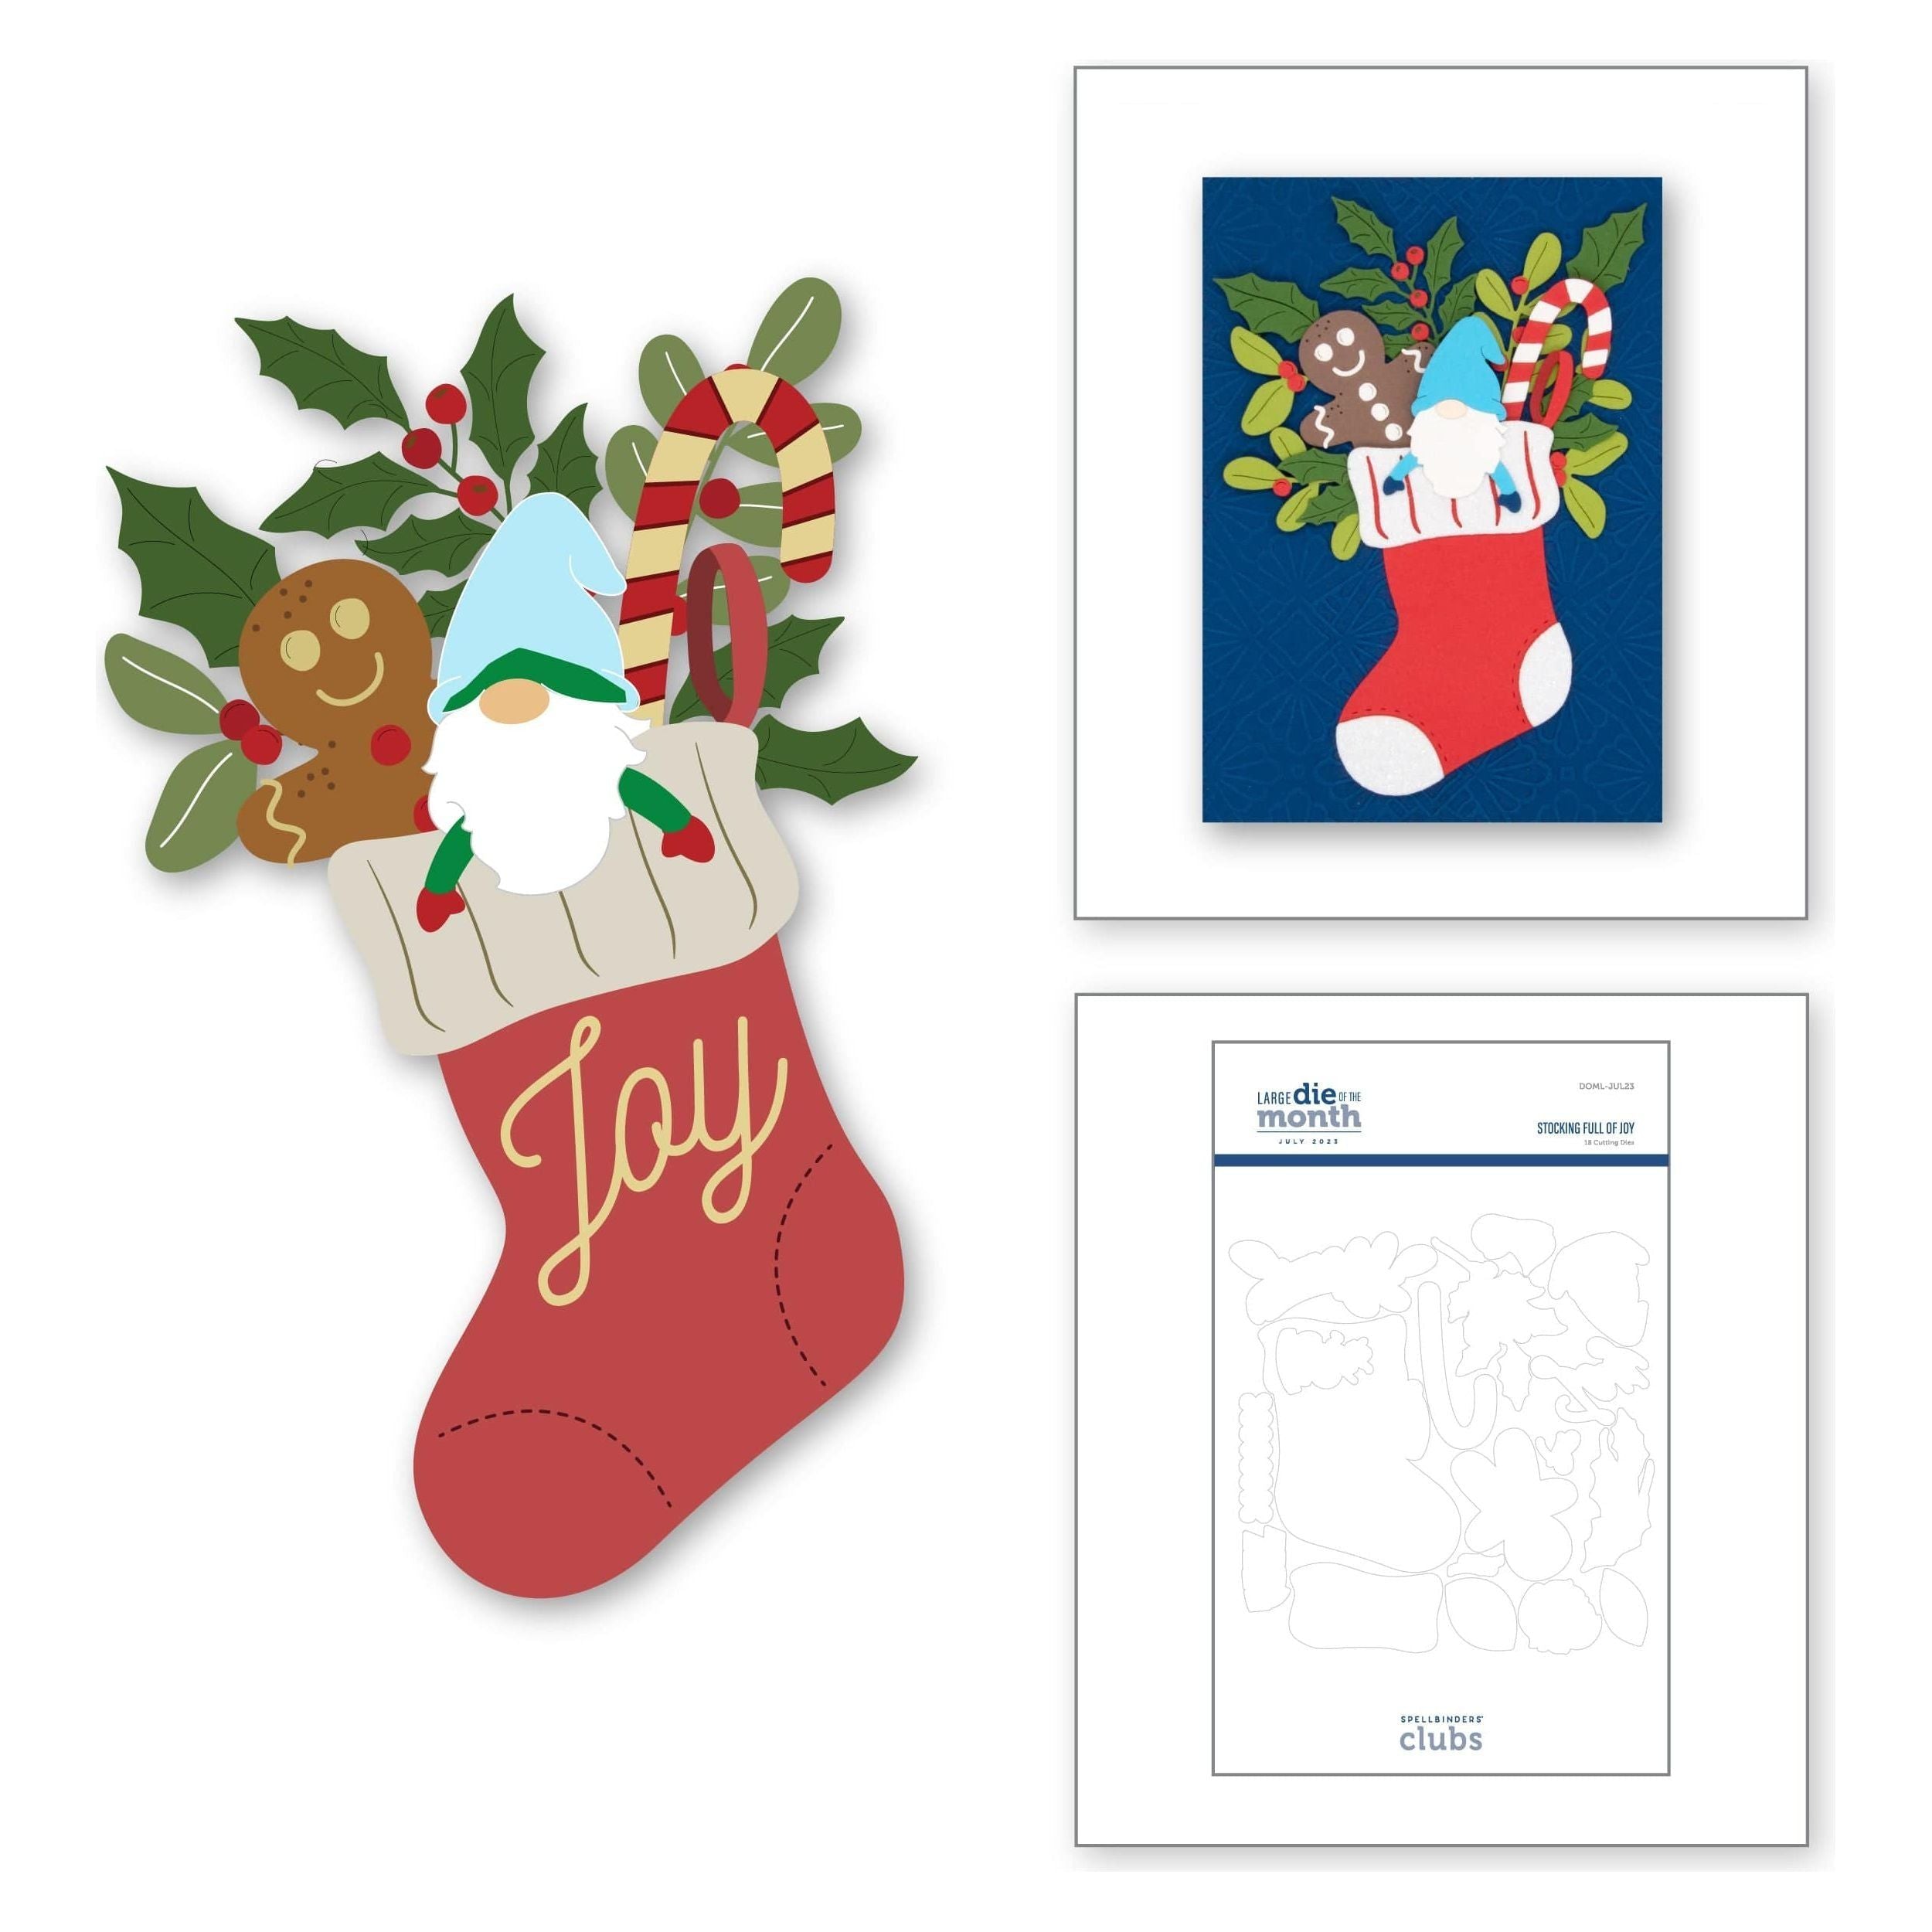
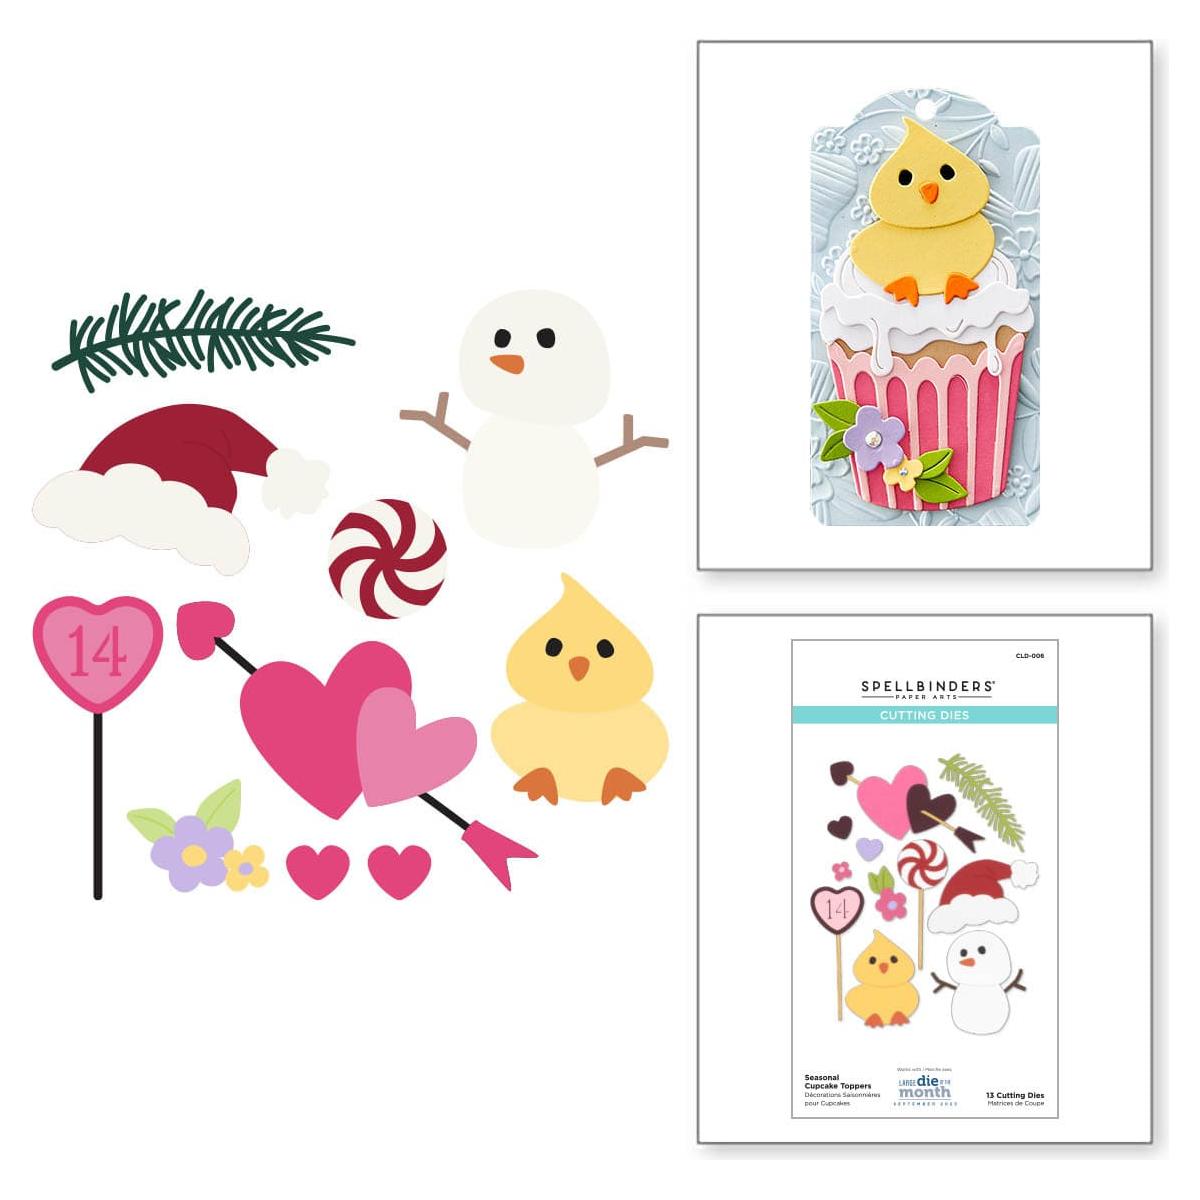
Now for the GRAND FINALE of my club faves of 2023……..the July Large Die of the Month Club! Can you say CUTE!  My post about my card is HERE.

I hope you enjoyed this rewind post…it was fun for me to go back and see what I’ve made.

You can’t have a blog hop without a giveaway so here’s the details…

Giveaway:
To celebrate this release, we are giving away a $25 gift certificate to 3 lucky blog readers – selected from the comments on the SB blog. Giveaway closes on Sunday, December 10th, 11:59 pm MST. The winner will be announced in this blog hop post the following Wednesday. The winner is responsible for shipping costs, duties, and taxes.

Prepare to be inspired!!!  Here’s the blog hop list!

 Spellbinders Blog
Jackie Pasko
Michelle Woerner
Lin Brandyberry
Alanna Moses
Rebecca Keppel
Teri Duncan
Carrie Rhoades
Jill Hilliard
Pam SparksYou are here…
Rachel Alvarado
Erin Thompson
Cassie Trask
Deborah Jenkins
Melody Rupple
Lauren Taylor
Ilina Crouse
Vera Yates

Thank you so much for hopping to my blog.  ❤  I appreciate it and your comments!  I’ll link below to the clubs I shared in this post.

ttul!

Layered Poinsettia Tree – Small Die…
[ SPL ]
Adorning the Tree – 3D Embossing…
[ SPL ]
Pine Cones & Holly – Clear Stamp of…
[ SPL ]
Pine Cones & Holly Die Set – (Dies…
[ SPL ]
Stocking Full of Joy – Large Die of…
[ SPL ]
Mix & Match Holiday Greetings |…
[ SPL ]
In the Pines Embossing Folder from…
[ SPL ]
Christmas Magic Glimmer Hot Foil…
[ SPL ]
New & Improved Platinum SIX Machine…
[ SPL ]
Glimmer Hot Foil System Platinum |…
[ SPL ]
Fashion Gold Embellishments -…
[ SPL ]
Glimmer Hot Foil 4 Rolls – Essential…
[ SPL ]


cards · Christmas · Die Piecing · Embossing Folders · Flowers · Memory Box · Winter

Memory Box Poinsettia Corner 3D and Vintage Lantern Card…

Hi everyone!  Hopping back on the blogging train after some time with family and attempting to get started on Christmas decor around the house!

I had this NEW Memory Box 3D folder laying out to do next and thought maybe the lantern would be fun in the empty space.

I die cut the NEW Memory Box Vintage Lantern in MB glossy black cardstock, dabbed on a little gold acrylic paint to the black and a piece of vellum.  I hand cut the vellum to go behind the lantern.  When I turned the vellum over to blend on some gathered twigs distress ink on the back of the vellum, it made the acrylic ink go kinda mottled.  I was like, I’m ok with that but how will I describe it! lol

I die cut the two dies twice, that come with the 3D folder and embossed them in the folder but I only used three of them on the finished card.

After I embossed the panel, I went over it with Fired Brick Distress ink and the mini ink blending tool.

Then I got out the Delicata gold ink pad and ink blended a little around the edges, then decided to add gold embossing powder to the edges and heat embossed it!

I used one of the NEW Memory Box Merry Christmas Foil Greetings Black Tab Strips.

I painted Gold Calligraphy ink on the poinsettia centers.

I colored the candle with distress inks too.

I’m linking my card to some challenges…

Can You Handle The Pressure – anything goes with Christmas twist

Die Cut Divas – flowers

Peace on Earth #53 – anything goes Christmas

Merry Little Christmas #53 – always anything goes Christmas

NBUS #57 – never before used stuff

Fun…I love making Christmas cards and tags.  Back to the crafting board!  Lots to do!

Here’s the products I used if you want to shop…no extra cost to you to click through my links!  Thank you so much!

Memory Box – 94743 Vintage Lantern…
[ STR | SSS ]
Memory Box – EF1038 Poinsettia Corner…
[ STR | SSS ]
Memory Box – ST003 Merry Christmas…
[ STR | SSS ]
Memory Box – SH44004 Black Glossy…
[ STR | SSS ]
Tsukineko GOLDEN GLITZ Delicata Ink…
[ SSS ]
Ranger Ink – Tim Holtz – Mini Ink…
[ SBC ]
Tim Holtz Distress Ink Pad Fired…
[ SSS | SBC ]
Ranger Embossing Powder SUPER FINE…
[ SSS | SBC ]
Winsor & Newton Drawing Ink – Gold,…
[ BLIC ]


cards · CAS · Christmas · Die Piecing · Embossing Folders · Memory Box · Poppystamps · Spellbinders dies

A Pine Wreath with Snowflakes and JOY card…

I just added a picture and I wanted to tell you that I finally got a person at wordpress that knew how to fix a couple problems I’ve reported to them about my blog.  I’m happy to say my photos are clickable again if you want to see them full size!  YAY!


Hi everyone!  This card is so frosty beautiful!  Christmas JOY is coming!

I saw a card on Instagram that I don’t have the supplies for so I used what I have.  I will give her credit for inspiring me over there.

Spellbinders Ski Lodge Embossing Folder for the background panel.  So pretty!  Embossing folders are all the rage this year and it’s because they are beautiful and add so much texture to the finished card.

AND I have GREAT NEWS!  Ski Lodge is half price with the SALE at Spellbinders that just started today!  HERE! I will link it below too if you want to finish the post before you go…

I used poppystamps Shasta Twigs for the wreath,  Memory Box Alpine Snowflakes and Brilliant Joy finish out the card.  Oh, I did use one of the NEW poppystamps Simple Rings dies for the wreath base.

I figured out the placement of the pine branches and then it glued together easily.  I only put glue on the ends of the branches and I used the small one from the die set.

I have way too many pictures today.  Messing around with lights and editing when I should’ve been doing other things! lol  Like making more cards! hoho

I die cut and embossed using Hammermill Color Copy Cover 100# cardstock and Gold Foil cardstock.  I’ll link everything below.

I love this Brilliant JOY die so much.  I probably should do a minute video on how I put it together so there’s no small gluing the letters in!  Love that!

First I die cut the base in white cardstock,  then the detail JOY top layer in white and gold cardstocks.

On the base layer, I lightly scribble Tombow mono multi glue over all of the base.

Then stick on the white outer outline from the detail JOY cut.

Then take the gold letters out of the gold detail cut and stick them in.  The glue is already there! Boom!

It’s an A2 size card.

I trimmed the embossed panel down to 4 x 5 ¼ before I adhered it to the cardbase with the super thin mounting tape I love.

Now I see this Pine Branch set isn’t available anymore.  Sorry about that.  Search it by name or shop your stash!

Linking to some challenges…

Can You Handle the Pressure? – anything goes (optional twist is turkey/thanksgiving but you don’t have to)

Peace on Earth #51 – anything Christmas goes

Die Cut Divas – It’s all about the holidays

HLS November Christmas – anything goes

Holler if you have any questions!  I’ll be here working! lol   I can’t believe Thanksgiving is next week!  ❤

It’s fun to see some sales before the holiday.  I never have time the holiday weekend!  Have FUN!

ttul!

Spellbinders Black Friday Sale!

Links to the Dies and Supplies I used to make this card…

$7 off code at Simon Says Stamp with code ‘WRAP23’ Expires 12/31/23

Ski Lodge Embossing Folder |…
[ SPL | SSS | SBC ]
Memory Box – 94759 Brilliant Joy…
[ STR | SSS ]
Memory Box – 94680 Alpine Snowflakes…
[ STR | SSS ]
Poppystamps – 2575 Simple Rings craft…
[ STR | SSS ]
Tiny Pearl Embellishments – flat…
[ STR ]
Bazzill FOIL Cardstock – matte and shiny
[ STR ]
Hammermill WHITE 100 LB SMOOTH…
[ SSS ]
Tombow Mono Multi Liquid Glue
[ STR | SSS | SBC ]
Scrapbook Adhesives Crafty Foam Tape…
[ STR ]

Christmas · copics · Die Piecing · Embossing Folders · Memory Box · Oxide Inks · Winter

Two Cards with Memory Box Perfect Poinsettias 3D Embossing Folder and Brilliant Joy…

Hi everyone! It’s a two card Thursday here and I wanted to go back and make a third but I got sidetracked!

I started with this NEW Memory Box Perfect Poinsettias 3D embossing folder embossed in white and left it white. I used the two coordinating dies that come with the set and die cut them in white cardstock, then placed them in the folder to emboss them also.  (I used removable tape to keep them in place)  I inked the embossed die cut poinsettias with my red and green Distress Oxide brushes.  I didn’t add more ink.

This picture is really light but I wanted to include it because it’s more the color of what the poinsettias are IRL. Editing enhances the color.

Which is fine…it’s pretty darker also!

I die cut the NEW Memory Box Brilliant JOY dies in white and inked up the outline letters with the red brush also, then removed them from the background and glued them to the matting layer.

Then I decided I wanted to try another method with the folder.

I brayered the folder with the Stormy Sky Distress Oxide ink pad.

Then I colored the poinsettias and greenery with Copic Sketch Markers.  When I finished coloring I ran it back through the folder….I kinda wish I hadn’t done that because it shifted a hair.  A little detail is lost in coloring with a wet medium so I wanted to get it back. oops.

Still beautiful though!  I’m probably bias after coloring it! lol

Sorry about so many pictures this time.  I was messing around with pictures using light from a different window.  Oh eek!  A photographer I am not!  Even after all these years!  I keep trying though!  I think it’s just trying to please ‘my eye’ really and drive myself crazy! haha!

Holler if you have any questions!

oh, I wanted to show you this too.  I did have another embossed piece I messed around with but it wasn’t something I could finish without starting over.  Ignore the die cut flowers…see the mask with red and green inking?  It’s a piece of copy paper that I die cut to use as a mask.

On an embossed panel you can mask these two poinsettias off and ink the flowers without using the die cuts.  The only drawback is there is a third flower.  I solved that by putting the die cut sentiment JOY over the flower that doesn’t have a die!  Cool!  Sorry I don’t have a card to show doing this yet.

Linking my cards to some challenges…

Simon Says Stamp Wednesday Challenge – Christmas

Krafty Chicks Challenge – Christmas

The Flower Challenge #85 – anything goes

Thank you so much for stopping by!  Have a fun rest of the week and weekend creating! Talk to you again soon!

Dies and Supplies I used to make this card…

Memory Box – EF1037 Perfect…
[ STR | SSS ]
Memory Box – 94759 Brilliant Joy…
[ STR | SSS ]
Memory Box – CL5285 Shining Star…
[ STR | SSS ]
Winsor & Newton Drawing Ink – Gold,…
[ BLIC ]
Copic Sketch Markers and Sets | BLICK…
[ BLIC | SSS ]
Tombow Mono Multi Liquid Glue
[ STR | SSS | SBC ]
Scrapbook Adhesives Crafty Foam Tape…
[ STR ]
Waffle Flower Crafts – Blending Brushes
[ SBC | SSS ]
Tim Holtz Distress Oxide Ink Pad…
[ SSS | SBC ]
Ranger Ink Tim Holtz Peeled Paint…
[ SBC | SSS ]
Sizzix Big Shot Die Cutting Machine…
[ SBC | SSS ]
Sizzix White Tool Caddy Big Shot…
[ SBC | BLIC ]
American Crafts – Sticky Thumb…
[ SBC ]
Ranger Ink – Tim Holtz – 2.25 Inch…
[ SBC | SSS | SSS ]
Neenah Cardstock Classic Crest Ultra…
[ SSS ]

cards · Die Embossing · Die Piecing · Embossing Folders · Fall · Flowers · Spellbinders dies

Spellbinders September Large Die of the Month Club…

Hi everyone!  Do you have your Spellbinders September Large Die of the Month club yet? I have a card using it to share with you today.  I haven’t used the Seasonal Cupcake Toppers yet but I’m excited about using all the options for Christmas, Valentines Day and Spring!  So fun!

I’m just die cutting crazy lately!

I was able to use a couple of my leftover flowers from the Small Die Club of the Month on this card also.

I used the September release Monoline Start Embossing Folder for the background panel.  A little bit of Gathered Twigs inking on the edges and also on the die cut leaves etc.

Spellbinders has wonderful two Tone enamel Dots…here I used the teal package.  The look of dimension but not a problem mailing at all!

Holler if you have any questions.

This is a 5×7 card…not sure why I thought I needed three cupcakes on it! lol  I like it!

ok – Back to die cutting!  Thank you so much for visiting my blog. Hope you enjoyed my Fall frolic-y card!

Shopping links for the products I used on my card today.  I’ll come back and add the club sets when they’re available in the store again.

Seasonal Cupcake Toppers -…
[ SPL ]
Monoline Stars Embossing Folder from…
[ SPL | SSS | SBC ]
Dimensional Two Tone Teal Enamel Dots…
[ SPL | SSS | SBC ]
New & Improved Platinum SIX Machine…
[ SPL | SSS ]
Scrapbook Adhesives Crafty Foam Tape…
[ STR ]
Tombow Mono Multi Liquid Glue
[ STR | SSS | SBC ]