cards · Christmas · copics · Memory Box · Printworks · rubber stamps · Snowman · Winter

Printworks 2015 Christmas release stamps…


Pam Sparks Big Bow Bertie


Meet Big Bow Bertie … some serious personality for a snowman!  I love this happy guy!  I mean, how many guys would wear a big festive bow like this?!   I stamped him on Hobby Lobby watercolor paper and colored with Zig Clean Color Brush Paint markers. Spritzed with Pearl spray…


Pam Sparks Big Bow Bertie Close


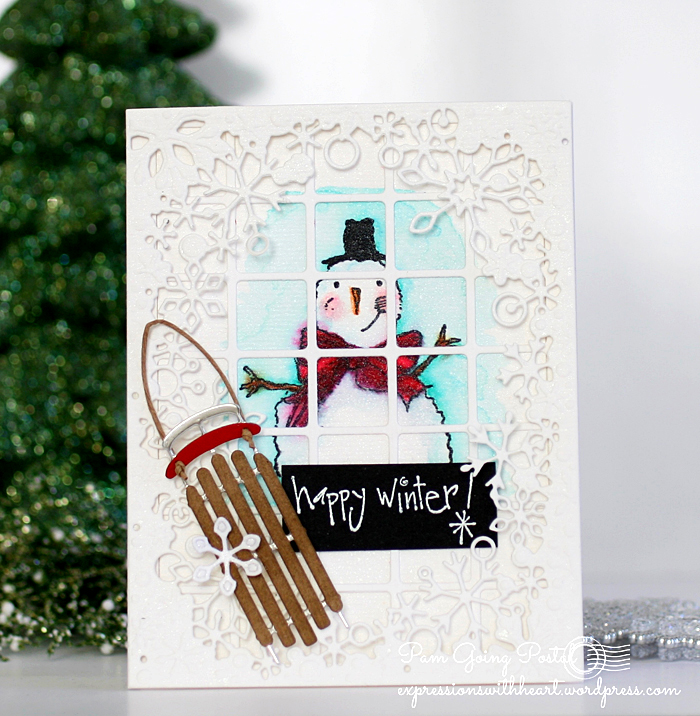
The happy winter sentiment is from Printworks too.

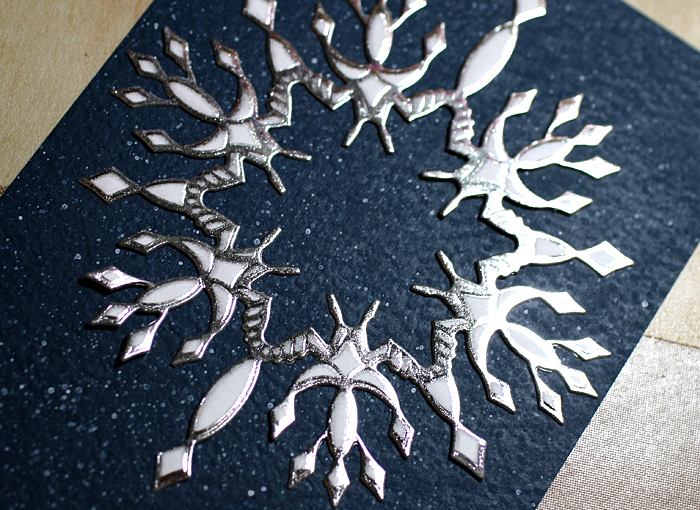
I used four dies from Memory Box, Modern Tile Background for the window look, Dancing Snowflake Frame and the Small Winter sled.  I die cut the sled from three cardstocks.  Silver for the base, red for the curved guide bar and woodgrain for the slats.  I left the silver whole, trimmed off the red bar, trimmed the woodgrain down and used a silver gel pen between the slats so it’d look like the base showing through. Easy and it looks like one of those Jolee stickers!  The snowflake is from the Wintry Snowflake BundleOh, I did use an ⅛ inch hole punch to put the paper cord through on the red guide bar.


Pam Sparks Fairy Snow Queen


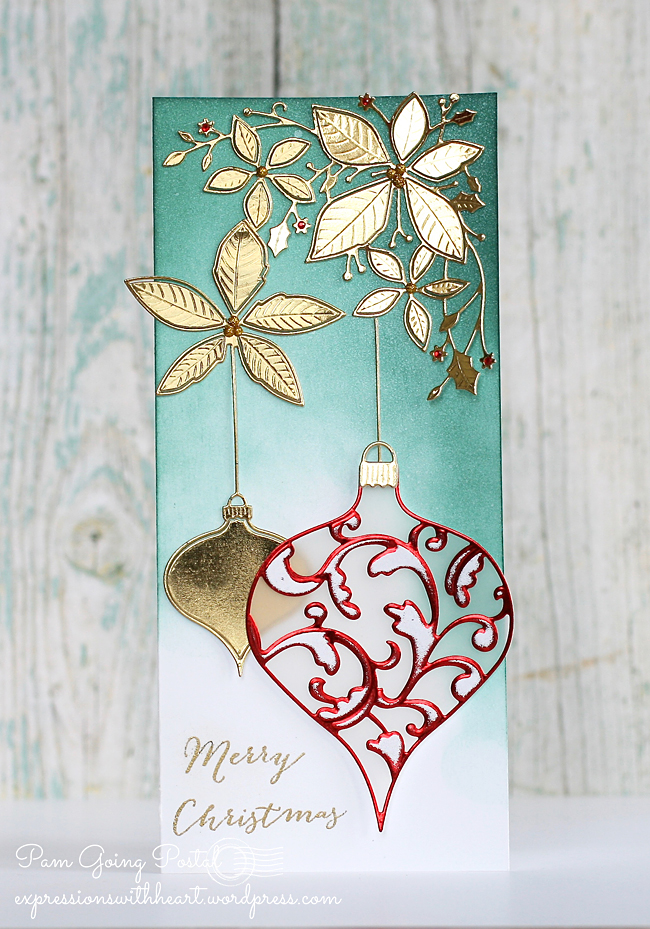
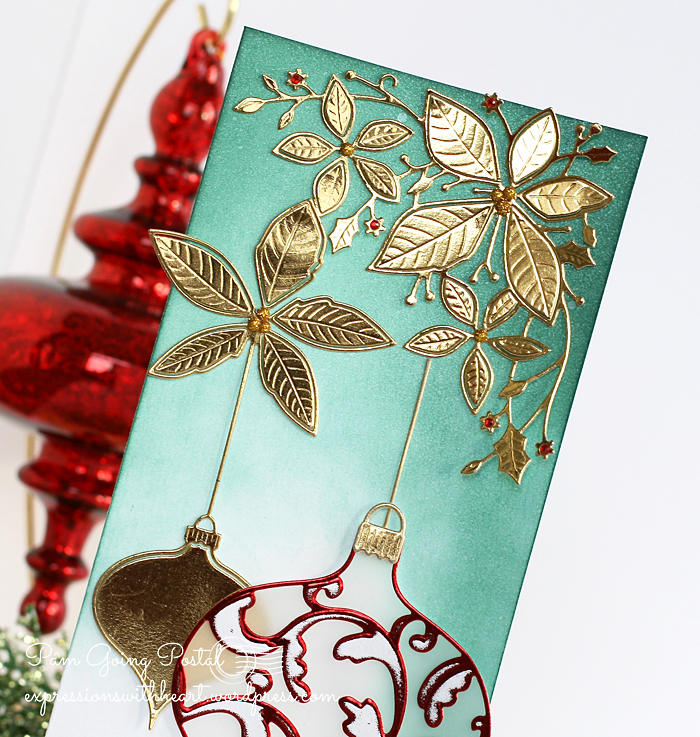
Next –  This delightful creature is this year’s Limited Edition Snowman!  Isn’t she gorgeous?!  Fairy Snow Queen is her name! I softly watercolored her, then painted Frosted Lace Stickles over her.  Heart of Gold Prills on her crown.

The sentiment is new, Magical Winterheat embossed on vellum with Judikins Silver Twinkle embossing powder.  She’s mounted to a piece of American Crafts Glitter cardstock.


Pam Sparks Fairy Snow Queen Close


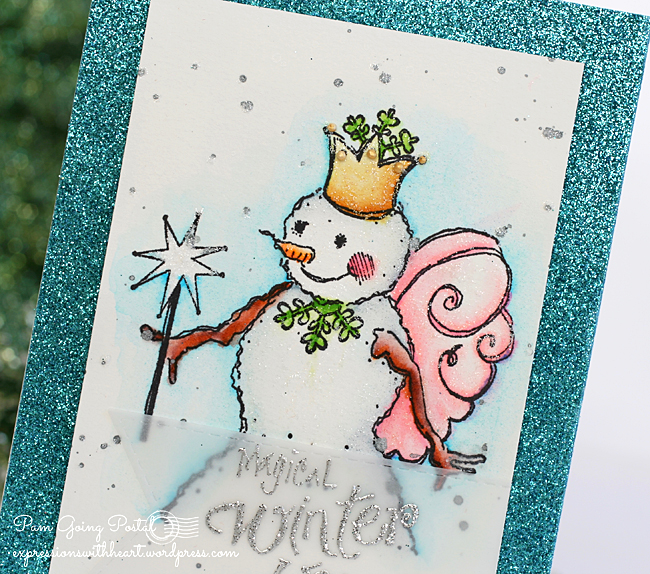
I think she’ll be a hit with the granddaughters!
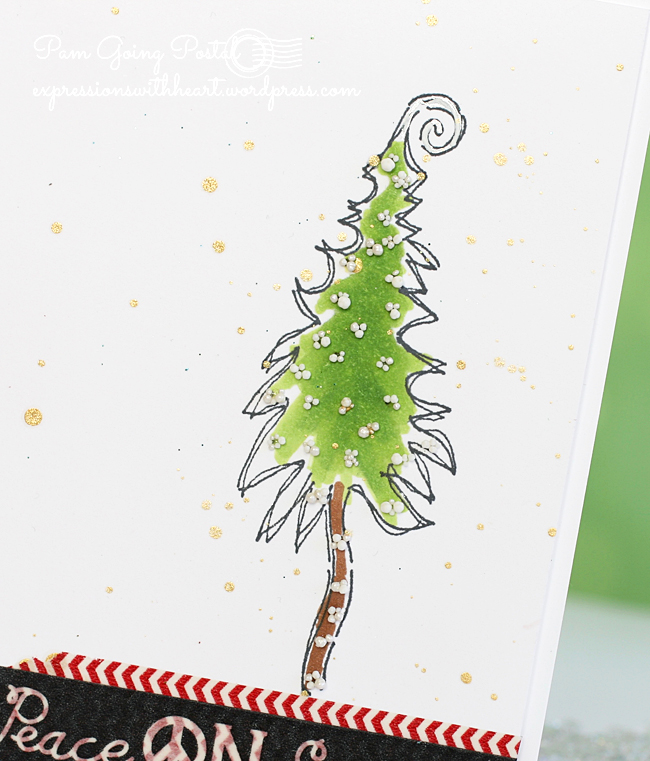


Pam Sparks Grinchmas Tree


Last for today… the Grinchmas TreeI love it!  Stamped in Memento Tuxedo Black ink and colored sloppily with two green Copic sketch markers!  Oh and a couple browns.  Some Heidi Swapp Gold splatters… some more Prills…Minnie Pearls this time.


Some Washi tape… one of the faster cards I’ve ever made!


Pam Sparks Grinchmas Tree Close


So many wonderful stamps in this release and in all the past releases too!  Be sure to check them out at Printworks Collection.com

Thanks for stopping by!  ttut!

Christmas · Felt · Memory Box

Memory Box Plush Holly Stocking die…


Pam Sparks Plush Stocking Red Turquoise


The BIG day approaches! lol  I have some new sweaters anyway! lol I just couldn’t resist photographing this felt stocking ornament with my pile!

Do you purchase your own Christmas presents?  Come on…tell me true! lol  I am really bad about either purchasing myself or doing a lot of coaching! lol

Red is my favorite color, so it’s no wonder I love Christmas so much!

This stocking die though… oh my… I LOVE it!

Look at the close up below….brilliant idea came to me!  French Knots on the berries!  Be still my heart… so cute! hehe


Pam Sparks Plush Stocking Red Turquoise Close


I wish the photo showed them better… grrrr… so much for a macro lens…guess I don’t know how to use it!  Photography is Rocket Science to me! I am not going to let it take me to bah humbug land though!  Imagine darling French Knots and insert eating dark mint chocolate!

ok – I used the Memory Box Plush Holly Stocking die…awesome… cuts the holes you sew in…’sew’ fabulous!!!  I didn’t use the holly that came in the set but you sure could!  I used the Memory Box Plush Holly Leaves and Berries die

The white twine in this Doodlebug Twine set… I love this twine… gonna have to ask Cindy if I can just get a spool of white!  She carries their chunky twine in white but it might be too heavy… I want some of it anyway. lol

The felt comes from Taylored ExpressionsIt is gorgeous felt…beautiful colors!  I used Red Hot, Grass Green and Robin’s Egg.

I like to back stitch when sewing this look.  I use a long enough tapestry needle so I can get in two holes at a time.  It’s so easy.  I love it… and if you forget to add the patches like I did and have to take some out, it comes out really easy too!  : )


Thanks for stopping by today and holler if you have any questions!

I appreciate so much, those of you that shop through my links!  I don’t now who you are but it helps me keep working/blogging!  THANK YOU!

I LOVE comments too!  Thank you blog friends for always encouraging!  So thankful for you!!!

Cards with Printworks Collection new release coming next, then Thursday is Taylored Expressions release day!  yay!


cards · Christmas · Foiling · Memory Box · Minc · Winter

Memory Box, Foiling and the Minc…


Pam Sparks Elliana Ornament with Poinsettia Corner


Happy Thanksgiving week! I know, I should be posting something with pilgrims on it!  I did love studying about Pilgrims and all they endured to come to American!  Amazing! I don’t know that I could’ve been that strong a person.  Thankful they were!

Here’s a fun, festive card using dies again… I did something different with them though.  I foiled everything!  A couple months ago, I needed a new printer so I went ahead and got an HP laser jet, so I could foil of course too! I ‘leaped’ into the beauty of foiling with the mini 6×6 Minc after a friend demoed her’s at stamp club.

Here’s the scoop. If you photocopy the back side of your dies with a laser printer, then run them through the Minc foiling machine, then die cut them, you get this neat edge like you see on this Elliana Ornament.  You’ll see it on the next card below too.  One trick I figured out though, you have to photocopy your die twice.  So when it spits out, just copy again, to get it black enough because the dies are silver… if you can’t figure out which way to put it back in, put a mark on your paper, you won’t use that part anyway.  I also found that smoother cardstock works the best.  I used Hammermill Color Copy Cover cardstock.  I use it a lot for coloring with Copics too.

I really love the look of foil and it really is easy!  😀  I used Heidi Swapp Red Foil on the Ornament… I die cut a piece of vellum with the Drop Ornaments die to put behind the Elliana Ornament die.


Pam Sparks Elliana Ornament and Poinsettia Close 2


and Heidi Swapp Gold on the Poinsettia Ornament and Plush Poinsettia Corner dies. Pine Needle Distress ink sponged on with the ink blending tool.  What a gorgeous color.  I need to use it more!


Pam Sparks Elliana Ornament and Poinsettia Close 1


Here’s a card I made with the Elliana Ornament last year and some posts with the Plush Poinsettia here.


Linking up to some challenges…
Simon Says Stamp – Anything Goes

SSS is also having a one day sale on their brand!  YAY! 

thanksgiving


The Challenge #52 – Create a Christmas Card

Christmas Card Challenges – Anything Goes


Then how about a silver foiled snowflake! This is the Limoges Snowflake die and Lindeman Snowflake dieI photocopied both for foiling.


Pam Sparks Limoges Foiled


Can you see how the silver is just on the edges of the cut?  That’s because there are holes in the die, so the holes leaves white when you photocopy it.  cool.  My photos don’t do it justice.  Here’s a couple pictures of the parts, photo taken under the ott lite.


IMG_4870


I did run these back through the Big Shot to get the embossing too.


IMG_4871


I layered the Modern Tile Backgound die cut from white cardstock to a piece of navy cardstock that I’d spattered with white ink and the Ink splatter tool and then to a white top folded A2 card base.  The snowflake was mounted with thin mounting squares cut to fit and the center flake mounted with regular thickness mounting squares.  The Lindeman snowflake is stuck on with a dot of glue in the center.

Crazy but fun seeing what you come up with!  : )


I used the Limoges Snowflake die on a couple cards last year too… here and here. Three different looks between the three cards.


Thank you for stopping by today! I appreciate it! Happy Thanksgiving Day!


Dies and Supplies I used to make these cards… be sure to check out my links for the Big Shot and the Minc machine…great prices @ scrapbook.com. Thank You!

cards · CAS · Christmas · copics · Memory Box · PTI · rubber stamps · Winter

Merry Monday, Memory Box, Make It Monday – Motif, Papertrey Ink…


Pam Sparks Deer Snowglobe 1


Almost a last minute loo-loo here…. whew! I couldn’t just not play in the Merry Monday Challenge – use a reindeer!

So here’s my cutie little Memory Box ‘reindeer’ called Happy FawnI colored him with Copics and then built a scene for him to live in.

I die cut the Circle Forest die in white cardstock, recut it with a pinpoint circle layer die to make it the right size,  mounted a couple extra trees in the snow… die cut the frame first with the Pinpoint Circle Layers die, then recut it with the Shaker Circle Frames die That way I still had the little dots, although I think I would’ve liked it just as well with just the frame cut! : )

I used one of the Snowglobe Bases  dies, cut in woodgrain cardstock.  Adhered everything to a top folded A2 card base and stamped the sentiment from Into The Words clear stamp set. The holly leaves and berries are from the Mini Holly Leaves die set.

I’ll tell you how I made the sky sometime this week in another post.


Pam Sparks Deer Snowglobe Close 1


Then I watched the Papertrey Ink Video Monday on motif building…well…I’ve been thinking about it most of the week! ugh!  I just don’t have enough of their stamps for the center motif, so being me, I used dies so I’m linking up!  I hope it counts! lol  CAS!


Pam Sparks PTI Sled Motif


Yes, we’ve got snow!  All of the dies I used are from Papertrey Ink.  I cut the word snow away from one of the dies that says Let It Snow.

In the Meadow
I think the snowflake center and flakes are from the Tinsel and Tags set, can’t remember for sure.
Christmas Cheer 


Here’s another shot…


Pam Sparks PTI Sled Motif Close


Thanks for stopping by!  Here’s some snow from Iowa for all my friends that went south or live in warm states! : ) I took this when I got up yesterday a.m. The city had already been out making all kinds of racket. grrr  They can’t just leave it pretty, they have to plow it a million times and make it look dirty.  boo.   This is one of the churches across from us…we live on a corner.  Sympathy for ppl that live on the corner please?! lol


IMG_4947 (2)


ttul!  TFL!


Christmas · Memory Box · Snowman · Stitching · Winter

Memory Box Plush Frosty Mitten and Plush Sheldon…


I just couldn’t WAIT to show you this project!!!  So melt your heart cute!  Meet Sheldon. irresistibly CUTE!


Pam Sparks Plush Frosty Mitten and Sheldon


Blanket Stitch again… with Carribean twine from the Twinery and the white on Sheldon is from Doodlebug, the holiday Twine set that I linked to in my last post… links at the bottom.  oh man!  Just linking him up to SLS and I see I did him upside down to the picture on the package!!! ugh.  His head is supposed to be bigger than his body!  Figures. *sigh*  Oh well, I still LOVE this!!!  I will have to make another with a BIG head! lol


Pam Sparks Plush Frosty Mitten and Sheldon Close


The felt I used is from Taylored Expressions… Tiffany, Avocado, Marshmallow, Charcoal and Black.  I colored a scrap of Marshmallow with an orange copic sketch marker and then trimmed out a teeny carrot nose and glued the eyes, nose, scarf and buttons on with Tombow Mono Multi glue.  (green lids)


The candy cane is an organic, no artificial food dye, candy cane that I get at Christmas time at Whole Foods or through one of the online stores.  : )


One more look and holler if you have any questions…


Pam Sparks Plush Frosty Mitten and Sheldon 2


Linking to some challenges…
Simon Says Stamp Wednesday Challenge – Christmas
Sparkles Christmas Challenge – Christmas Decoration


I’m working on cards!!!  Can’t wait to post what I’ve been working on for cards too!  : )

Happy Thursday!  The sun is shining today! Hurrah!  Thanks for stopping by and checking out UPSIDE DOWN Sheldon! lol


Shopping links for the Dies and Supplies I used to make this ornament…