cards · CAS · Christmas · Distress Ink coloring · Memory Box · Poppystamps

Memory Box, poppystamps Traditional Christmas Wreath…

Pam Sparks Freida Wreath Christmas

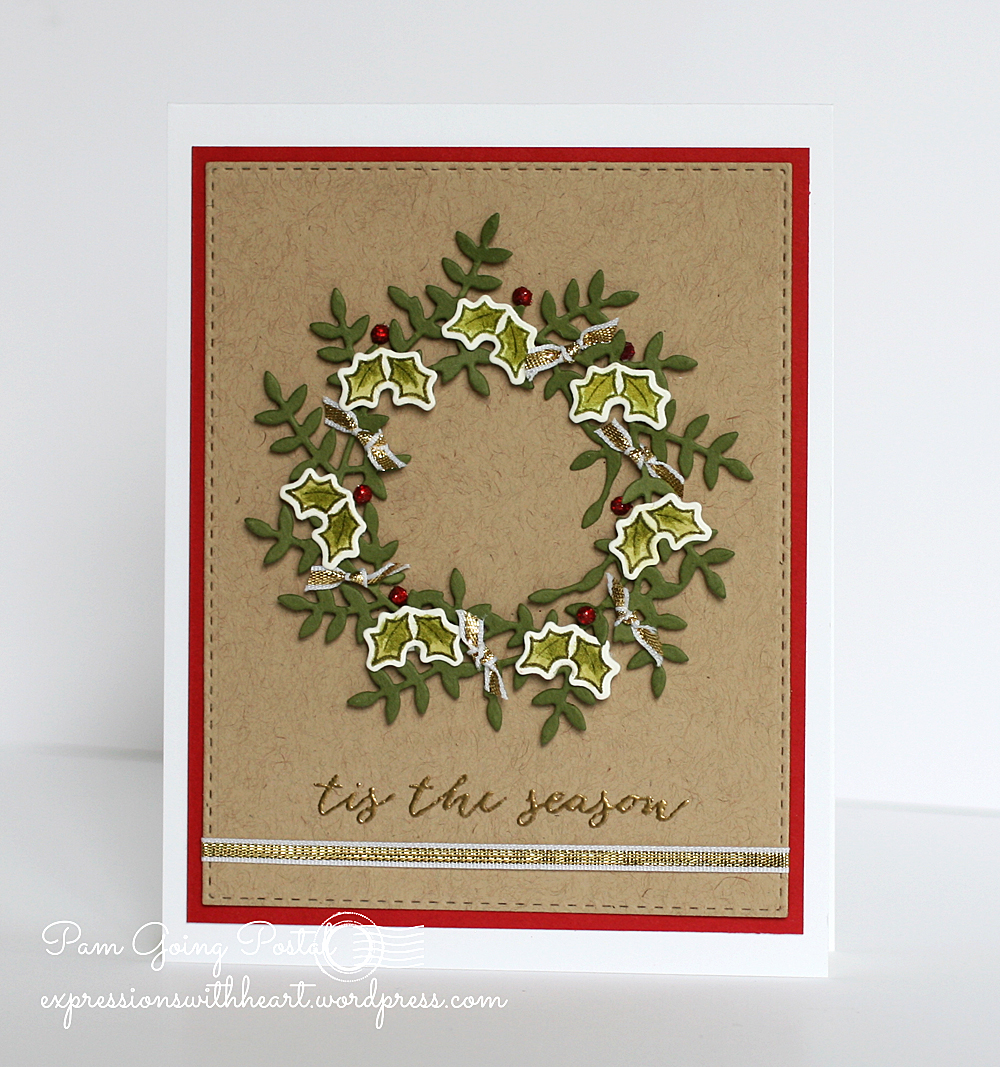
I just had to stop class prep and make a couple cards yesterday! I was going through withdrawal! lol A simple card that took me a few hours. lol  I tried a couple other things but came back to this traditional layered up card!  At least we have stitched rectangle dies now to dress up the layers! lol

I love this little holly duo stamp and die from the NEW Purrfect Holidays stamp set  and Purrfect Holidays die setI stamped and painted 7 of them with Peeled Paint Distress ink and the water brush , die cut them (using the On the Edge Cutting plates because they are smaller and faster to run through small things) and glued them to the wreath with Tombow Mono Multi glue.

Pam Sparks Freida Wreath Christmas Close

Now for the fun part… A TIP... in case you haven’t already thought of this.  Because I glued the holly to the Freida Wreath die cut already, I can turn the wreath over and put ½  squares of mounting foam tape on the back behind each of the holly, making the whole wreath popped up from the card base when I stick it on then! No gluing a few wreaths together to get dimension!  YAY!

I embossed the sentiment from the NEW Christmas Botanicals stamp set with Embossing ink and gold embossing powder.  I love this stamp set!  I plan to use it some more soon!

I used some skinny ribbon to make little bows tied on to the wreath here and there and then a piece along the bottom to finish it up!

Challenges…

Happy Little Stampers – Anything Goes with Dies
Muse: Christmas Visions – photo inspiration (the wreath)

Merry Monday Christmas – Christmas in Summer Link up

Thanks for clicking over to my blog today!  ‘preciate it so much!

If you are anywhere near the MLPS, MN area, I’ll be at Crafter’s Haven teaching 4 classes, Aug. 19th – 21st!  I’d love to meet you!  

ttul!

P.S. A great time to buy a Big Shot, MISTI, Scor-Pal 8ths, trimmers…eek!  What a great sale!

HEADER-choose-a-coupon-august-2016

cards · Christmas · Distress Ink coloring · Memory Box · Poppystamps · Winter

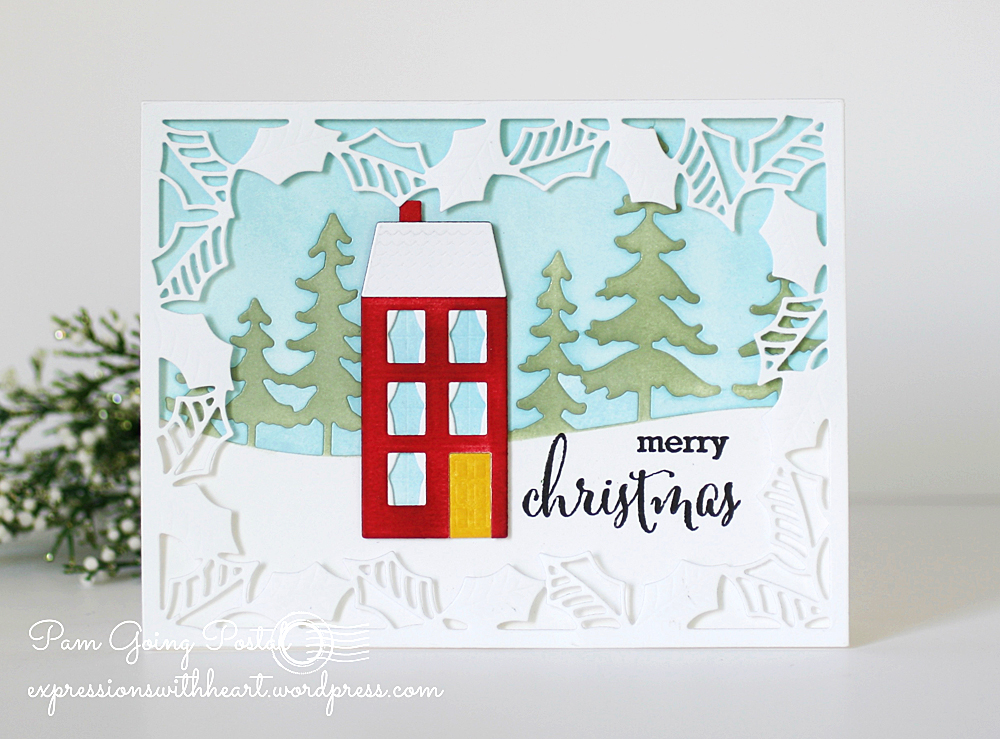
Memory Box and poppystamps Delicate Holly Frame, Fresh Pine Landscape and Ardmore House…

Pam Sparks Delicate Holly Frame Ardmore Landscape

Hi everyone! What color is your front door? Mine is boring but this Mustard Distress ink colored one is so inviting! lol  I die cut in white card-stock and colored the dies and background with Distress inks and the ink blending tools.

Merry Christmas is from the Christmas Botanicals stamp set.

Pam Sparks Delicate Holly Frame Ardmore Landscape Close

I am having so much fun creating with this new release!  I wish I could show you everything!  I have a lot to share though so keep watching! hehe

Soon… after classes I’ll be able to post the six cards the gals will make in the classes coming up August 6th at Scrapmania in Cedar Rapids, IA and the weekend of August 19th at Crafter’s Haven in Minneapolis, MN.  I’d love to meet you if you’re anywhere near these stores!!!

This is an A2 size card…
die cut the Fresh Pine Landscape in white, ink with Tumbled Glass and Peeled Paint Distress inks and the ink blending tool…
die cut the Ardmore House in white, ink with Festive Berries, Tumbled Glass and Mustard Distress inks and the ink blending tool…
stamp the sentiment with Versafine Onyx Black ink and the MISTI…
die cut the Delicate Holly Frame from white card-stock…

Linking up to some challenges…

Addicted To Stamps and more – Holiday

The Christmas Challenge – just punched or die cut, not stamped

top3glory

AAA Cards Challenge – One Stash Favorite (dies)

#69

Christmas Card Challenges – color challenge

July+17

my card made the top three!  Thank you CCC!

Top+3+Winner+NEW+GRAPHIC

Merry Monday Christmas Challenge – Summer Link up

I think that’s it!  Holler if you have any questions.  Always love hearing from you!  Thanks for stopping by!

Birthday · cards · copics · Die Piecing · Distress Ink coloring · Memory Box · Poppystamps · Techniques

Memory Box Chrysanthemum Bouquet…

Pam Sparks Chrysanthemum Bouquet 3

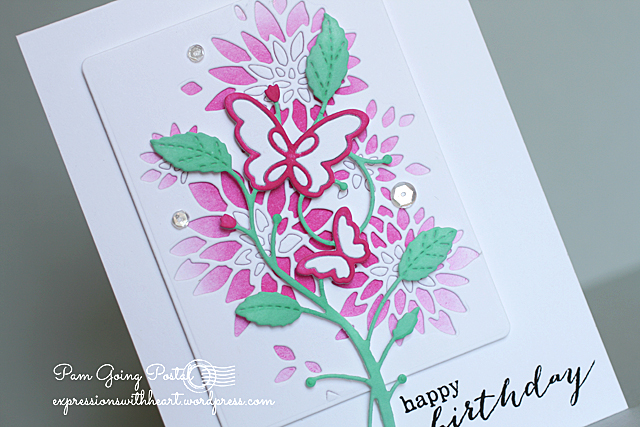
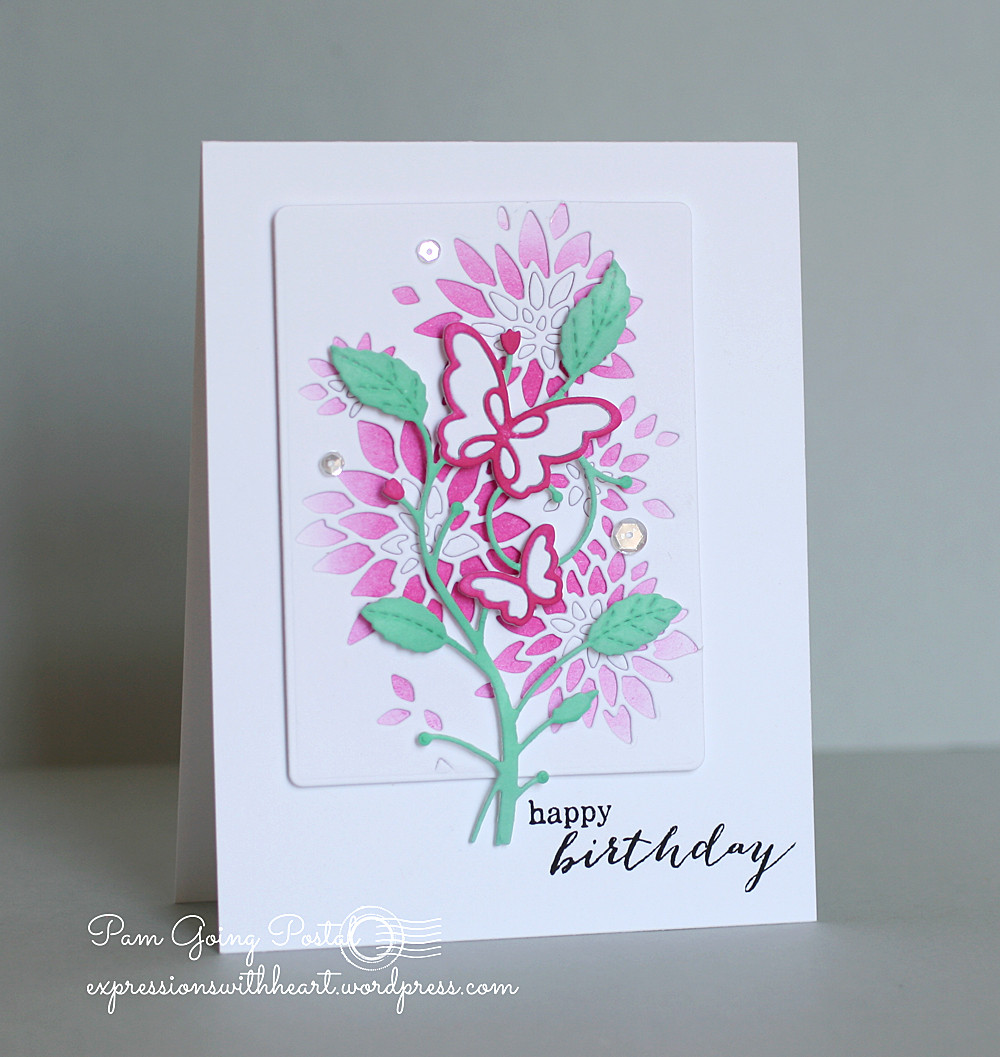
Hi everyone – today and tomorrow I have some Chrysanthemum cards to show you.

I die cut the Memory Box Chrysanthemum Bouquet  in metallic silver cardstock and in white cardstock. I die pieced the silver cut into the negative space left from cutting the white cut, adding scotch tape to the back side, then die cut it with the Stitched Rectangle Layers die. 

I die cut another flower piece in white to get the flower petals and background outline flowers.

I was happy the white cut all stayed intact when it came out of the die so I could lay it back in the negative waste piece and ink blend it with Shaded Lilac, Wilted Violet, Dusty Concord Distress inks and the mini ink blending tool.  (Putting it back in the waste piece just makes it stay in one place easier while inking.)

I was able to lay the inked flower cut over the silver flower cut and push the flower petals into place.  The scotch tape on the back of the rectangle holds the petals in place.

I used the leftover inked flower border for decorating the background.

Stamp the sentiment from the Ornamental Butterflies stamp set on the bottom of the card-base before mounting the stitched rectangle piece to the card. (I used the MISTI to stamp)

Pam Sparks Chrysanthemum Bouquet Close

After I had the card put together I added some Copic Sketch marker coloring to the petals but I wouldn’t have really needed to. hehe  Sometimes you just need a little color book therapy  a long with die cutting therapy. lol

I hope this makes sense. I know, a video would be nice but it’s hard to stop and make a video when you want to just make more cards!  Insert smiling face.

Holler if you have questions though. It’s just fun to play around and see what you end up with. There are a couple cards I’m NOT going to show you! hehe  But I do have two more using the other Chrysanthemum dies that I’ll post tomorrow.

See you again soon!  Thanks for all your encouraging comments!  I love them and appreciate you taking the time to write them! ❤

Heads up!  Die cutting sale – I have to check out this Big Shot accessory caddy!

HEADER-7-sizzling-days-4-DIE-CUTTING

Shopping Links for the products I used on my card today…

cards · Distress Ink coloring · Memory Box · Poppystamps · Spring · Techniques · Watercolor

Memory Box Harrington Butterflies and more…

Pam Sparks Harrington Asti

So happy with how soft and sweet this card turned out. Sometimes you just need a soft, sweet, thinking of you card.

I die cut the Harrington Butterflies die in black cardstock and in watercolor cardstock.

To get the solid butterfly and body parts, I used the Asti Butterfly Wings die. (body cut in black)  The Asti Butterfly Wings die cut stays attached to the card at the body but you can easily clip them out or cut them in a piece of cardstock, positioning it each time so that it comes out directly in the negative space left from cutting out the Harrington Butterflies.  (do the die cut template thing)  I know, I should make a video of it! hehe

On the Memory Box Co. website it says the Harrington Butterflies die works with the Darla Butterfly die.

Pam Sparks Harrington Asti Close

I love how this card turned out.  A little Distress ink watercoloring…Tumbled Glass on the base panel, Squeezed Lemonade and Picked Raspberry on the butterfly wings.  Where the two meet, it kinda makes an orangish/coral like color.

The sentiment is from the Springtime Bunnies stamp set.  I glued on 3 Pretty Pink Posh clear sequins.

The next card is the same Harrington Butterflies die combined with a few others.

Pam Sparks Harrington Zimmer Calla

I started building on an A2 kraft color card-base, added a 4.25 in. x 5.5 in. white panel that I die cut with the Zimmer Oval Background dietopped with the Calla Oval Wreath die and Harrington Butterflies dieI used the Asti Butterfly Wings die again cut in watercolor and black cardstock.

Pam Sparks Harrington Zimmer Calla Close

This time I watercolored the butterfly wings with Picked Raspberry and Shaded Lilac Distress inks and a waterbrush.  I sprayed out some pearl shimmer spray on my craft mat and painted it on the wings after the watercoloring dried. Carefully because it will remove color.

I die cut the Calla Oval Wreath in white cardstock, left the cut in the die and embossed it through the Big Shot.  Leaving the cut oval in the die still, I turned it over to the back side of the die and added Distress inks through the holes in the die, coloring the flowers.

I embossed the sentiment from the Ornamental Butterflies Stamp set on vellum with Versamark ink and Detail White Embossing powder.  I added some baby pearls to the flower centers. A flower garden! lol

Linking both my cards to some challenges…

Dies R Us Challenge – Butterflies

CAS Mix Up Card Challenge – stamping + die cuts + your choice

Thanks for stopping by today!  It was fun to work with some Memory Box/poppystamps products again. More to come…

Birthday · cards · Distress Ink coloring · Memory Box · Poppystamps · rubber stamps · Spring · Watercolor

Memory Box, poppystamps, Quiet Bird Sash two ways…

Pam Sparks Quiet Bird Sash Flat

Hello! Have you seen the new dies from poppystamps called sashes.  This one stays connected to the card piece on both ends of the branch when you die cut it. Then you slide another piece, in this case the largest Memory Box Stitched Rectangle, under the die cut branch and bird. HERE are the other new sash dies.

Pam Sparks Quiet Bird Sash Fawn

I die cut everything in watercolor paper and watercolored with distress inks and a water brush.  I smooshed the stamp pad on my craft mat, picked up the ink with the water brush and painted. Salty Ocean, Mowed Lawn, Forest Moss, Gathered Twigs, Ripe Persimmon, Rusty Hinge and Dusty Concord ink pads and/or reinkers.

I edged the fawn with Gathered Twigs Distress ink and the mini ink blending tool.

Pam Sparks Quiet Bird Sash Close 2

The sentiment is from Memory Box (inked with Versafine Black Onyx ink)  and so is the Wildflower Landscape die.

The Quiet Bird Sash and Woodlawn Fawn are from poppystamps.

There’s a little ‘dew’ in the air.. hehe. Distress ink spatters and some White Linen spray that I unscrewed and hit the cap with my finger to get some white spatters.

Here’s another version… a quick ‘just a note’ from the sweet birdie!

Pam Sparks Quiet Bird Sash Teal5

a little closer so you can see how the sash works…

Pam Sparks Quiet Bird Sash Close

I think that’s everything… THANK YOU so much for clicking over! Have fun splashing some ink around!  It’s been raining here and everything is so green!  Gotta love Spring! I better get outside and enjoy the sunshine, I heard it could rain again today! ttul!

Shopping links…click to see the products I used. I was just looking over the tools page at Starlitstudio and it’s amazing all the cool stuff there!  Check out the new Tacky Roller Tool!  YES! 

p.s. I have to tell you, I LOVE how good the stamp shammy cleans off Versafine ink. Just get it wet, ring it out and clean away. No baby wipe fibers on the stamp! Hip Hip hooray!  It cleans other inks too but you know how tough Versafine is… well…not anymore! yay!