cards · Christmas · Die Piecing · Memory Box · Poppystamps · rubber stamps · Winter

Memory Box Christmas cards…

PamSparksPineNeedleBorderBlkGoldSilver675

I like challenges!  I created this card for the Cutting Edge Challenge – Kay Miller’s card for inspiration (I turned it) and for the Merry Monday Christmas Challenge – use black, gold and silver!  Yay! Such fun!

I’m also linking both my cards in this post to the Cutting Edge Blog Hop.

cuttingedge


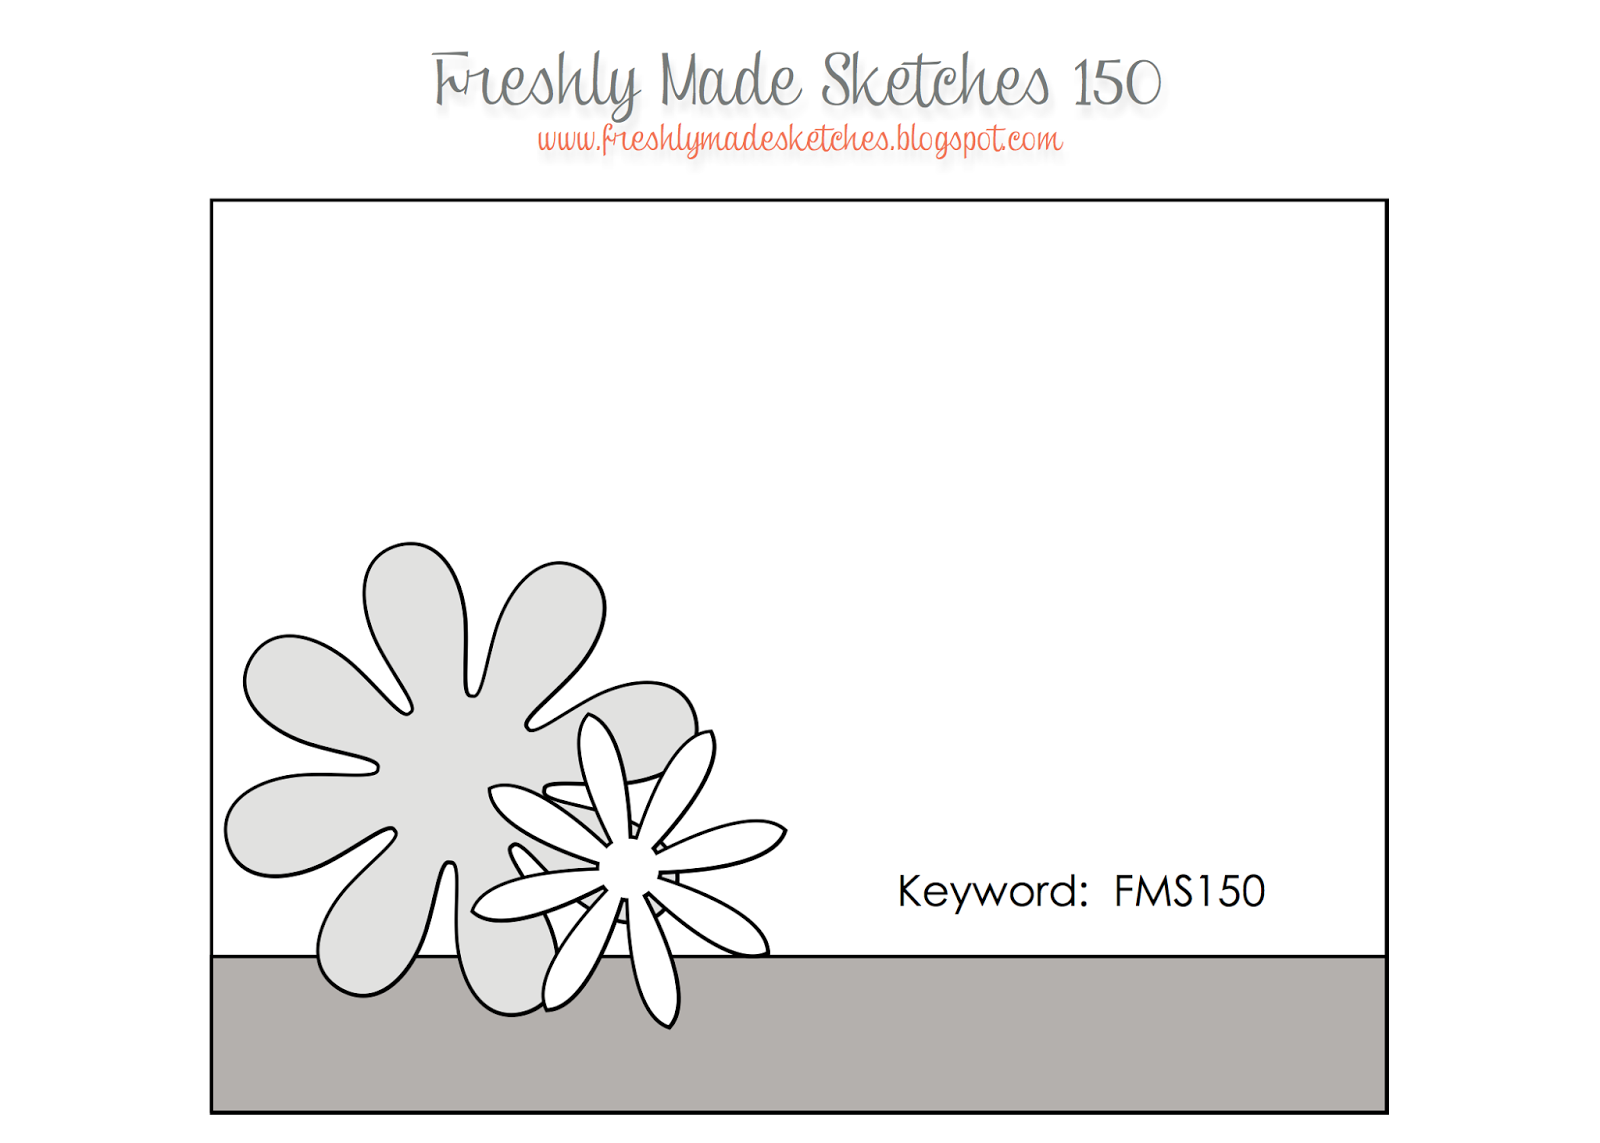
and to Freshly Made Sketches Challenge – Sketch 150  (I flipped the sketch)

FMS Final 150-001

This is an A2, white, side fold card…the black layer is glossy card-stock cut to 3 3/4 in. x 5 in.

I die cut the Pine Needle border die in Metallic Silver card-stock, taped it to the black layer and then rounded all four corners with the EK Sucess Medium size corner rounder punch.


PamSparksPineNeedleBorderBlkGoldSilverClose

Look at all the awesome detail!  YES!  That’s Memory Box for you! : )

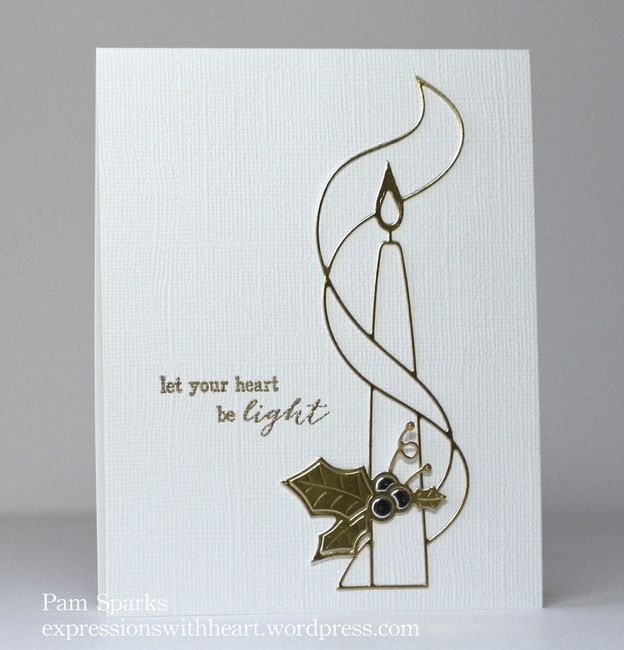
I heat embossed the sentiment stamp, Wonderful Time Combo with detail Gold embossing powder.

I die cut the Plush Poinsettia die in Metallic Gold and Silver card-stocks.  Glued them together, then layered it on with mounting squares.

Love it!  Wish you could see it IRL!  It makes me smile!  Always love it when cards work out how you want them to! Doesn’t take much to make me happy! lol

Well, you know me!  I couldn’t just stop there… this card evolved from other things I was trying! lol


PamSparksJoyeuxNoelPoinsettiaCorner675

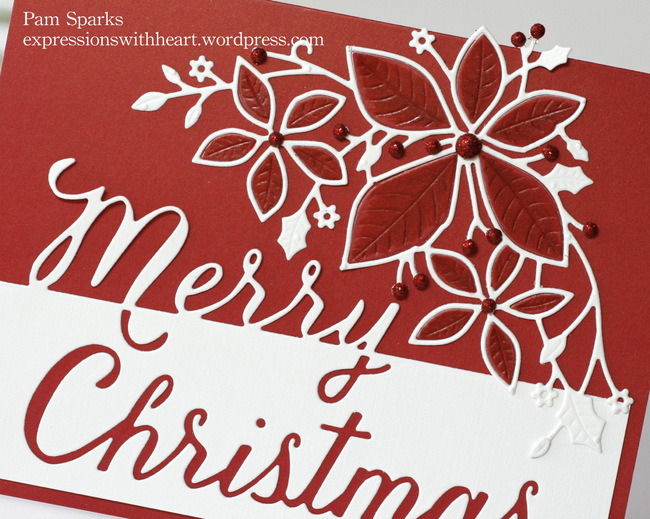
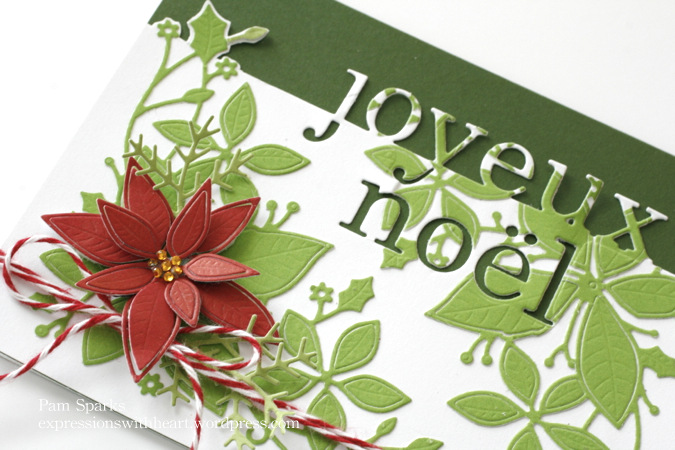
I die cut two of the Plush Poinsettia die and adhered them to the top and bottom corners of my A-2 size card panel.

Then I die cut the Grand Joyeus Noël die in that panel.  I had to trim the left side with a scissors.

I love how the design shows in the letters!  more FUN!


PamSparksJoyeuxNoelPoinsettiaCornerClose

Then I used the Poinsettia Bloom die over the bottom corner and added some twine.


PamSparksJoyeuxNoelPoinsettiaCornerCloseTop

I’m linking my Joyeux Noël card to the Papercrafts Connection Link Party – Holiday Cards  and to the Winter Wonderland Christmas Challenge – anything goes

That’s it from me today!  I had fun and I hope you’re having fun with this new collection from Memory Box too!  Holler if you have any questions and thanks for commenting!  Nothing like encouraging a gal to keep die cutting and inking!

‘preciate it so much! Take care!

ttul,

Supplies and dies I used to make these two cards…

FYI for Starlitstudio… We are currently closed (family vacation). Orders placed after 9am EST Saturday, August 23rd will ship Monday, September 1st. Please be aware of this delay should you place your order today. Thank you!

cards · CAS · Christmas · copics · Die Piecing · Memory Box · Perfect Layers Tools · rubber stamps

More Christmas in July…

PamSparksCandleLight-001


Three white CAS cards in a row!  At least I got the white part of the holiday weekend in!  I think everyone else is getting ready for the 4th of July and here I am making Christmas cards like crazy!

I’m thinking you want to see the NEW stuff made up though so I’ll just keep making.  Although I think tomorrow is going to be clean out the garage day. ugh.  I’d rather make cards!!! lol

I cut the NEW Tall Taper Candle die out of gold metallic card-stock then again for just the berries out of a scrap of silver metallic card-stock.

I glued this with Tombow Mono Multi glue, green caps, directly to a top folding A-2 size card base. Teeny dots where the lines meet and there is a tad bit bigger area to leave a teeny dot of glue.

*Tip*  Always keep the tip of your glue clean and it won’t clog up on you.

*Tip* and the most important one… always keep your glue laying down. If you keep your glue upside down, it will come out uncontrollable!  eep!

(I did try die cutting this with double sided tape on the back. It didn’t work well for me…too sticky and didn’t hold it’s shape)

Isn’t this Taper Candle die gorgeous?!  Can you just see it made up to look like stained glass?!  awesome!  Can’t wait to do that next!

The holly and berries are from the NEW Cabrini Ornament die.  Three little snips with the scissors and you have the perfect embellishment for the candle!  : )

Did you notice the sentiment?  NEW rubber stamps!!!!  YAY!  This is the NEW Let Your Heart combo rubber stamp.


PamSparksScriptMerryPoinsettiaCorner-001

WOW is right!  LOVE the NEW Grand Merry Christmas Script die!  It’s a beauty!  I paired it with the NEW Plush Poinsettia Corner die. Another beauty!

PamSparksScriptMerryPoinsettiaClose-001

The Grand Merry Christmas is cut from white card-stock and the Plush Poinsettia Corner is cut from white and cranberry card-stock.  The cranberry petals I colored with Copic markers after I glued them in place.  A gal can only go so long without a little colorbook therapy! : )

Several red glitter domes on the berries and this A-2 size card was done.

My last card for today is colorful and picks up the chalkboard trend that has been so popular.

PamSparksHollyJolly-002

Isn’t it fun?!  I love it!  This is the NEW Have a Jolly Christmas die!  FABULOUS!  First I die cut it in white and it was great…but I just had to try some retro-ish colors.  I know…even though I’ve been on a white kick!

So here you have Lagoon, Sage, Cranberry, Licorice and White Memory Box card-stock or notecard colors.

I used my Perfect Layers Mini Tools and Cutting Mat to layer.  The ⅛ th inch ruler for the white mat and the ½ inch ruler on three sides of the card base.  Click HERE. Be sure to use the code Sparks5% at checkout.  The rulers are so awesome!  They save me so much time!  You will love them too!


PamSparksHollyJollyClose-001

See that poinsettia at the bottom?  That is a NEW die too! It’s the smallest flower from the NEW Poinsettia Bloom Trio die.  YAY!  More of everything I love!

Well, this is a lot today…holler if you have any questions!

I’m linking up to some challenges…

Virginia’s View Challenge # 5 – Die Cut

Wonderful Words Challenge – Word Dies

Keep it Simple – lots of turquoise

Thanks for looking, enjoy the holiday weekend and keep coming back to see more NEW * NEW * NEW!!!

Baby · cards · CAS · Christmas · Die Piecing · Memory Box

Christmas in July with Memory Box and Baby!

PamSparksChristmasRibbonOrnaments2


HO HO HO Merry Christmas!  I know, I know… it’s early!  Still…it’ll be nice to have a stash of cards and ideas before the last minute!

Here’s the NEW Memory Box Christmas Ribbon Ornaments die…soon to be HERE!

I broke out the glitter… haha… the Clear Rock Candy Distress Glitter HERE works great for this!  It’s not getting all over everything after!  YAY!  THIS would work also… pretty!

I die cut the ornaments with Scor Tape HERE on the right side of the Memory Box card-stocks.  Peeled off the release paper, dumped on glitter, dumped it off and burnished it on with a bone folder (place a piece of scrap paper on top of the glittered piece and rub).  All without getting it all over me!!!

After you have your pieces cut and glittered,  I lay the main piece right side down on the table, then place the pieces in right side down.   I used Scotch tape this time but you could easy use ⅛ th or ¼ th inch scor tape too.

If you’re mounting it with mounting squares like I did,  the scotch tape works because you don’t need the double stick.

If you are adhering the design directly to the card, scor tape would work great instead of scotch tape.

Linking to the Christmas All Year Round Challenge, non-traditional colors
Craftyhazelnut’s Christmas challenge extra – anything goes
Dies R Us Challenge, Christmas in July
Holly Jolly Christmas Challenge – Glitter
Papertake Weekly – Anything Goes, Make it Christmas-ey

❤ ❤ ❤ ❤ ❤

Here’s a couple Baby cards.  We welcomed Leo to our family in December and Rogan the 1st of June!

PamSparksSweetPeaLeo

I LOVE the Winnie and Walter clear stamp sets HERE!   For this card I used the Big, Bold and the Happy set. I stamped with Versafine Black Ink.

PamSparksSweetPeaLeoClose

Just darling! lol  I love the gingham pea!  I used  Memory Box A Pea in the Pod die HEREGeneva Vine die HEREUrban Upper and Lower Alphabets HERE and HERE and the poppystamps Classic Ribbons die HERE.

PamSparksSweetPeaRogan

Now to finish up the insides and get them mailed!  eek,  I am so bad about that!   So tickled with how these two cards turned out… Cute!  Don’t you love it when you’re happy with what you make?! lol   Memory Box and poppystamps…a great combo!  Win, win!

My baby cards were in the Favorites this week at Splitcoast Stampers!  Thank you ladies!

Weekly-Favorite

Linking my baby cards to… Tuesday Throwdown Challenge – Anything Goes
Papertake Weekly – Anything Goes
Cardz For Guyz – Baby Boy
Lady Bugs Crafts Ink Challenge – Anything Goes
Sweet and Sassy Stamps New Release Challenge – Anything Goes
The Card Concepts – Baby, Freestyle Collage – Winner!  Thank you Kay for choosing my Sweet Pea cards!

Challenge Winner

You know I love Copics too!  Here’s a deal if you’re in the market!

SALE – Simon Says Stamp Copic Sale

1_123

Back to cutting and pasting!   So happy you stopped by!  More Christmas coming at you soon!


cards · CAS · Die Piecing · Memory Box · Shopping · Spring · Stencils · Summer · Techniques

More New Memory Box and SALES!!!


First up…the SALES!!! 

I use my Perfect Layers tools all the time!  Perfect Paper Crafting is offering an awesome deal!  If you haven’t gotten yours yet…don’t miss this opportunity to get a deal on the new set of Mini Rulers and the mat!  You will not be sorry!  LOVE them!   If you already have them, maybe you want another set or what an awesome gift for a stamper friend!
Click the box below to check it out!

2422News__60202.1401665389.451.416

I have admired and been tempted to buy for some time the New stamp and die sets from Simon Says Stamp.  I still don’t have any but if I have time to shop tomorrow, I want to but where to start!   In case you didn’t know and want to shop too… here’s the deal and a link to the sale. 

1_121

thanks for shopping through my links! 

❤❤❤


PamSparksButterflies

Cards! Here’s another card using the NEW Summer 2014 Memory Box release. I started with the Floating Butterflies die cut out of a Memory Box white notecard. Next I cut out two of the inner lines with a scissors so I would have one complete butterfly.  Here’s a picture of the die so you can see the lines I cut off.

6a00d83454a17469e201a3fd197a36970b-800wi


I cut the Floating Butterflies Background die from a Memory Box Sweetcorn notecard. Using the Butterfly Vine stencil, I inked up the complete butterfly first, with Wild Honey Distress ink and the mini round ink blending tool.  Then moved the stencil to fit over the other two butterflies, making sure not to ink into the complete butterfly I stenciled first.

I die cut the Bursting Berry Vine and Blushing Flower Branch from a Memory Box Kraft notecard. I inked them with Gathered Twigs Distress ink and the mini ink blending tool and then colored the leaves with YG Copics.

Cut the Blushing Flower Branch again with little pieces of Memory Box Lavender notecard placed over the flowers, emboss them with a stylus or run it back through the Big Shot with a tan mat and shims.  Leaving the flowers in the die, flip it over and ink through the die with Dusty Concord Distress ink and an ink blending tool.


PamSparksButterfliesClose


Using a variety of Memory Box butterfly dies… cut some butterfly bodies in lavender card…ink them a little with Dusty Concord Distress ink too.

The word ‘fly’ is cut from the Library Alphabet Tags set.

I glued with Tombow Mono Multi, Scrapbook Adhesives mounting squares and the ATG gun.

A2 size card…

Linking up to the NBUS Challenge HERE…  all of the dies have never been used!

button aqua

❤❤❤

Over on the Memory Box  facebook page this a.m., I posted the Floating Butterflies card and a gal said she wanted to see something with the Curling Cloud die.  So I took the challenge for this afternoon!

I inlaid the Mini Hot Air Balloon and Beautiful Balloon dies with the Curling Cloud, cut the Memory Box initials with the Classic Uppercase Alphabet dies, cut summer with the Alphabet Soup die and fun with Parker Lowercase Alphabet dies.


PamSparksMBSummerFun650


Another Curling Cloud glued on top of the card to finish it off.

It’s an A2 size card – Memory Box Lagoon notecard for the card base, white, cranberry and meadow for the cuts.


PamSparksMBSummerFunClose


So when it’s hot and humid… I stay in the house and keep cool!  How about you?  So my Summer fun is not in the air but on the ground, in the house playing with Memory dies, stencils and stamps!

I still have 3 class cards to post next week, some new Printworks stamps to play with and it’s time to color again!

TFL! and happy weekend…hope you get to make something too!

Here’s what I used to make these cards…


Birthday · cards · CAS · Class · Classes · Die Piecing · Memory Box · Poppystamps · rubber stamps

Memory Box and poppystamps Sunflower Card…

PamSparksPSsunflower

I really had a lot of fun creating this card!  I LOVE the poppystamps Bountiful Sunflower die!  I used it here with the Memory Box Toulouse Background die (trimmed off the flower head), the Memory Box Honey Comb Stencil, the Memory Box Happy Birthday Combo stamp and the poppystamps Bountiful Sunflower Background die.

I inked the front of a Memory Box Jack o Lantern A2 Notecard with the Honey Comb stencil, Wild Honey Distress ink and the mini Round Ink Blending tool.


PamSparksPSsunflowerClose

Remember this card and video?

I took the background piece and put it in the outline die, ran it through the Big Shot to emboss the detail into the background piece, that’s what I did here too… LOVE this look!

Then I inked the edges a little with Wild Honey Distress ink and the new mini Round Ink Blending Tool.

There is ONE big difference though… see it?

Instead of putting the background behind… I put it on top!

When I die cut the Bountiful Sunflower outline die in dark brown, I made sure to keep the seeds in the die and inked them with Walnut Stain Distress ink and the mini Round Ink Blending Tool.  TIP – to make sure the seeds stay in after you remove it from the die…tape them on the back side with scotch tape.

Then here is a card I made to show how you would normally think to cut this die and use it…

PamSparksBountifulSunflower

Only instead of lining up the background piece exactly, I decided to place it ‘off’!  I like it a lot this way!  YAY!

PamSparksBountifulSunflowerClose

I inked the edges of the Memory Box Kraft A2 Notecard with Walnut Stain Distress ink, stamped the Journey Collage stamp in black and ended up with a CAS card I’m really happy with too!

New Grandson and Mama are doing great!  Thanks for stopping by!

Still time to link up to the give a way… scroll down…

Supplies I used for these cards…