All Occasion · cards · CAS · Die Piecing · LOVE · Memory Box · Poppystamps · Valentine

Memory Box Serene Bird and Branch Card…

Hi everyone! Enjoying some sunshine today and warmer temps! yay!  I decided to use this new Memory Box Serene Bird and Branch die to make a love card!  It’s that time of year!

I die cut the Memory Box Double Stitch Happy Heart Cut Out die in a white panel of cardstock. Then I ran it back through with the Memory Box Pinpoint Leaf Plate die.

I die cut a red heart with the Double Stitch Happy Heart also.

I used Memory Box 6×6 cardstock pads, Berry Red, Fresh Aqua and Lush Green.

For the sentiment I heat embossed the sentiment from the poppystamps Contempo Greetings stamp set in white on black cardstock and die cut it with the coordinating die.

I added a few Christmas Fairy Jewels.

I adhered the bird and the sentiment with mounting tape.

Thank you for stopping by today! I’ll be back again soon!

Here’s what I used to make this card…

Memory Box – 94620 Serene Bird and…
[ STR | SSS ]
Memory Box – 94381 Pinpoint Leaf…
[ STR | SSS ]
Memory Box – 94361 Double Stitch…
[ STR ]
Birch Press Design – 8160 Contempo…
[ STR | SSS ]
Memory Box – SP1001 Berry Red 6×6 pack
[ STR | SSS ]
Memory Box – SP1004 Fresh Aqua 6×6 pack
[ STR | SSS ]
Memory Box – SP1003 Lush Green 6×6 pack
[ STR | SSS ]
Memory Box/Open Studio – Fairy Jewels…
[ STR | SSS ]
Bazzill Card Shoppe – Licorice Twist
[ STR ]


cards · CAS · Distress Ink coloring · Memory Box · Oxide Inks · Simon Says Stamp · Stencils · Winter

Simon Says Stamp Mini Slimline Snowflake Window Stencil Card…

NEW Release from Simon Says Stamp! I received the NEW Snowflake Stencil and made a clean and simple mini slimline card. This one turned out to be 3 ¼ in x 6 ⅜ in. 

I sprayed the stencil with Pixie Spray glue, adhered it to Canson Smooth Bristol cardstock and inked with Distress Oxide stamp pads and blending brushes. Tumbled Glass, Peacock Feathers and Mermaid lagoon.

Let it Snow is a newer die from Memory Box, Let it Snow Posh Script, both layers cut from heavy white cardstock. I mounted it to the panel with pieces of mounting tape.

I embellished the snowflakes with Memory Box Clear, self adhesive Fairy Drops.

I love these pretty, sparkly, Winter colors!

I stamped the inside with a newer sentiment clear stamp set from poppystamps, Wintertime Sentiments with Peacock Feathers Distress Oxide ink. Some really fun sentiments in this set. “Thanks for Snow much fun”,  “Happy Winter Wishes to you”, Warm and cozy Winter greetings”, “You are One of a kind”, “Tis the Season to be freezin'”, “The world changes when it Snows”, and more!  

I’ll leave you with one more sentiment from this wonderful stamp set… “Friends warm even the coldest of days”.  I agree!  Thank you for stopping by!


Here’s what I used to make this card…(SSS code for $5 off – LVEYU842 –  ends 3/1)

Simon Says Stamp Stencil MINI…
[ SSS ]
Therm O Web PIXIE SPRAY Removable for…
[ SSS ]
Canson XL BRISTOL SMOOTH 9 x 12 Paper…
[ SSS ]
Memory Box LET IT SNOW POSH SCRIPT…
[ SSS ]
Poppy Stamps Clear Stamps WINTERTIME…
[ SSS ]
Poppy Stamps WINTERTIME SENTIMENTS…
[ SSS ]
Waffle Flower BLENDING BRUSHES WFT021
[ SSS ]
Tim Holtz Distress Oxide Ink Pad…
[ SSS ]
Tim Holtz Distress Oxide Ink Pad…
[ SSS ]
Tim Holtz Distress Oxide Ink Pad…
[ SSS ]
Memory Box CLEAR Fairy Drops cld101
[ SSS ]
Scrapbook Adhesives MICRO WHITE 3D…
[ SSS ]

Alexandra Renke · cards · CAS · Christmas · Memory Box · Winter

Alexandra Renke Holly Branch Die CAS card…

Hi everyone! Glad tidings to you and your kin!  A clean and simple card to share with you today.  I saw a wreath card on Instagram made up like this so I had to try it!

I used the beautiful, elegant Alexandra Renke Holly Branch die and beautiful Memory Box stamps for the sentiments inside and out.

I die cut the holly branch three times, glued them together.  I think I colored the top one before I glued together.  I don’t know that it’d matter.

My pictures aren’t the greatest, I didn’t have time to set up like normal but I wanted to share anyway.

I colored the berries with Copic Sketch Markers R24, 29 and 89.  The little dot is in the die and I just put a dot of white gel pen on it.

I heat embossed the sentiment in Ranger Detail Gold Embossing powder on a strip of red cardstock and die cut it with the long narrow die from the Birch Press Design Contempo Christmas set.

An A2 size card…

Thank you for stopping by today!  I always appreciate your visits and I want to wish you a blessed Christmas. So much to be thankful for.

I just remembered I might be back with the cards I made for the grandkids!  We’ll see how pictures go!  Down to the wire and I haven’t started wrapping yet!  eep!

ttul,

Here’s the die and stamp I used!  Click on the letters below the image to see…

Alexandra Renke craft dies – Holly…
[ STR ]
Memory Box – CL5273D Festive…
[ STR ]
Birch Press Design – 8162 Contempo…
[ STR ]
Memory Box – CL5274 Yuletide Moments
[ STR ]
Copic Sketch Markers and Sets
[ BLIC | SSS | TE ]

cards · CAS · Christmas · copics · Die Piecing · Memory Box · Poppystamps · Snowman · Winter

poppystamps Whittle Friendly Snowman and Double Joy Card…

Hi everyone!  I’m so happy with this card!  I probably could’ve added more and tried to bling it up but this time I just left him to say JOY to the world! ❤

This is a new poppystamps snowman die… so whimsical and fun!  Oh you know a little holly might’ve been nice… I always think of things after! lol

I put him on a bed of snow from the new poppystamps Layered House Globe die set.

He just melts your heart, doesn’t he?! ❤  Oh…a heart on his belly to represent the O for joy would’ve been super fun too!

I used a plaid paper from last Winter’s 6×6 plaid paper pad called Christmas Plaid!  I’m not finding it to link to anymore but I’ll link to this year’s pad that would work too! ugh.  Sorry about that.  I don’t know why I grabbed this one instead of the new one.

I die cut him from heavy white cardstock and colored his parts with Copic Sketch Markers.  I backed the circles with a smaller punch circle so I would have something to glue his eyes and carrot too.  Then I used mounting tape behind his top part, mounting tape behind the snow hill and mounting tape behind the top parts of the letters J and Y.

I die cut the plaid with the largest Memory Box Stitched Square Layers die. Then I matted it with black cardstock and adhered them to a 5 ½ x 5 ½ piece of green from the Memory Box 6×6  Lush Green cardstock pad. It matches perfectly with this plaid! yay!

‘To The World’ sentiment is from the new Memory Box Festive Christmas Greetings again… this is such a good set!

I love this new poppystamps Double Joy die too… you get so many options with the two dies included in the set!

Mr. Frosty is 5 ½ in. x 5 ½ in. square. So cute!  I need to make some more of these and vary them a little as I go! hehe

Thank you so much for stopping by and your comments and for shopping through my links!  I appreciate it!

ttul,

Here’s what I used to make Frosty!

Poppystamps – 2471 Whittle Friendly…
[ STR | SSS ]
Poppystamps – 2476 Double Joy craft die
[ STR | SSS ]
Poppystamps – 2488 Layered House…
[ STR | SSS ]
Memory Box STITCHED SQUARE LAYERS…
[ SSS ]
Memory Box – PP1018 Woodsy Plaid 6×6…
[ STR | SSS ]
Memory Box – CL5273D Festive…
[ STR | SSS ]
Memory Box Clear Stamps FESTIVE…
[ SSS ]
Bazzill Card Shoppe – Marshmallow
[ STR | SSS ]
TE Premium Cardstock
[ TE | STR ]
Leader 6 x 6 WHITE Square Envelopes…
[ SSS ]
Lawn Fawn WHITE Embossing Powder LF1537
[ SSS ]
VersaMark Watermark Stamp Pad – full…
[ STR | SBC | SSS ]

cards · CAS · Christmas · Die Piecing · Flowers · Memory Box · Slimline · Winter

Memory Box Layered Poinsettia, Slim Confetti Plate, Holly Bundle, Pine Needle Trio and Joy Posh Script Card…

Hello!  Hope you are having a beautiful Saturday! Here’s a little festive holiday in paper finally!  Where did this week go?! 

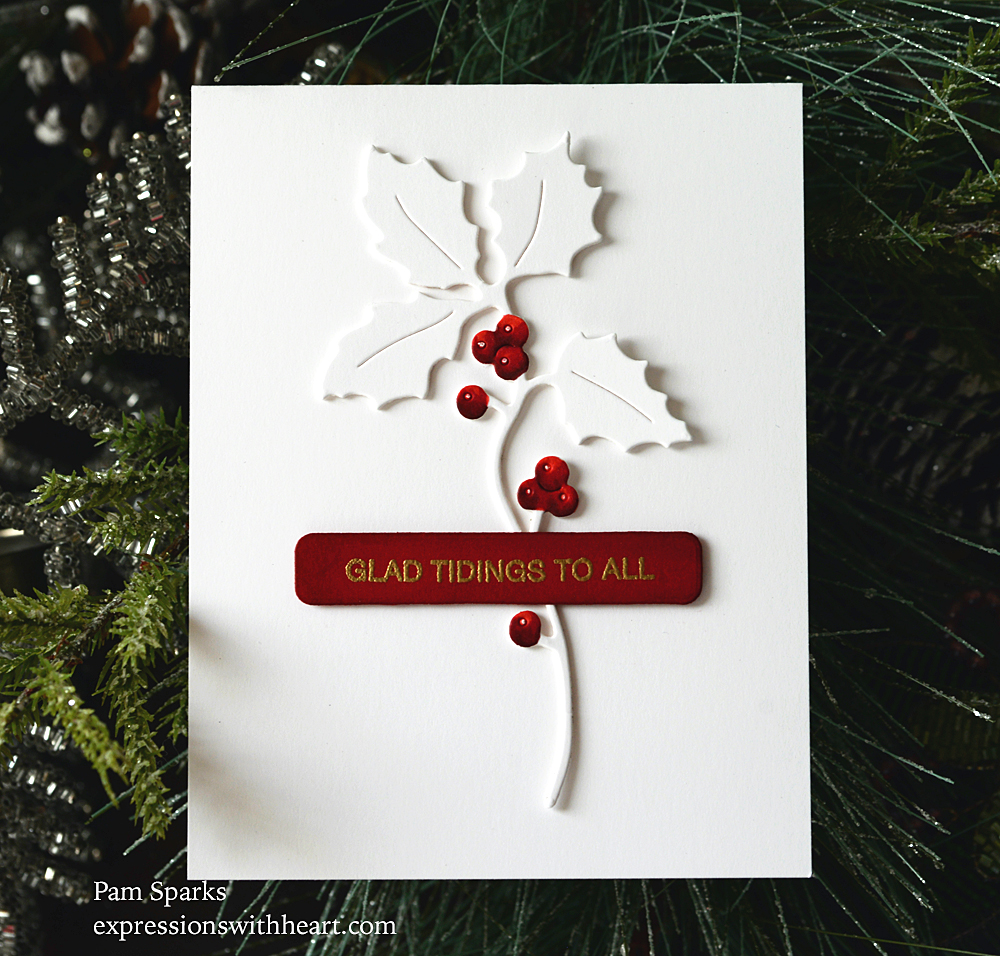
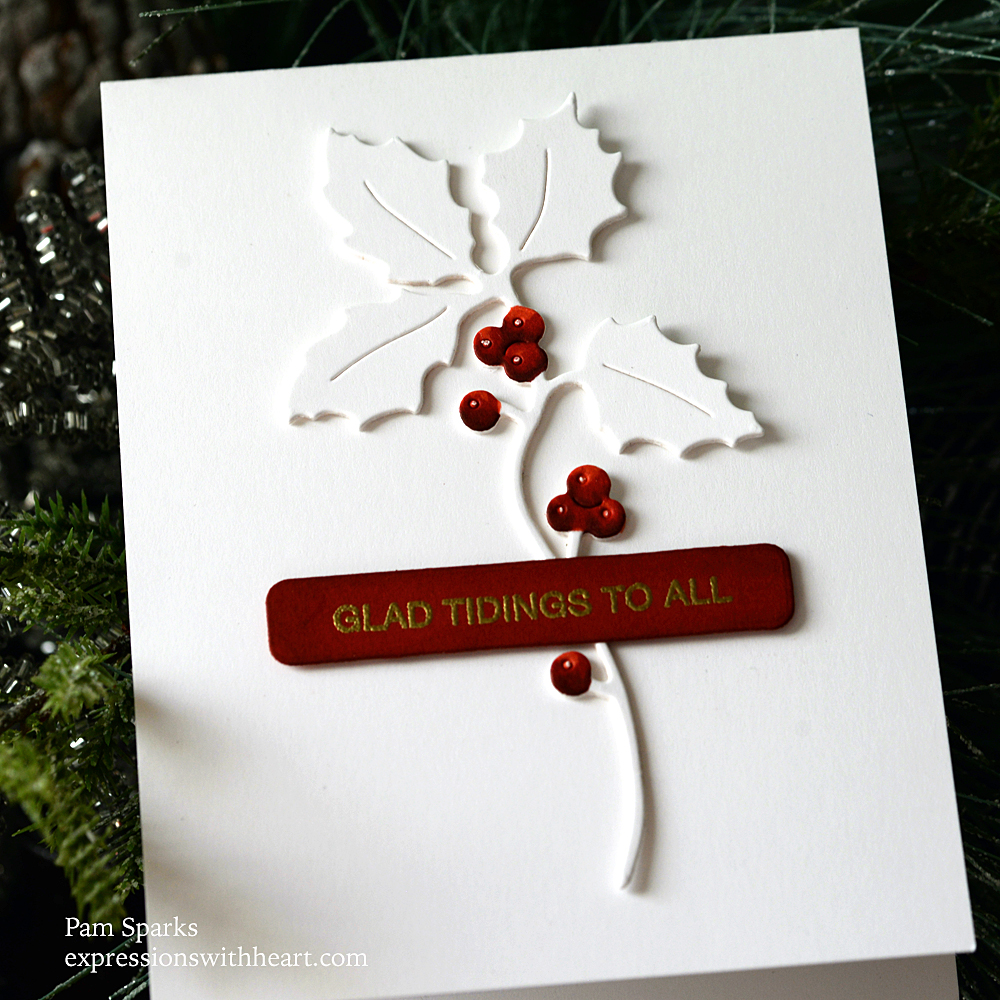
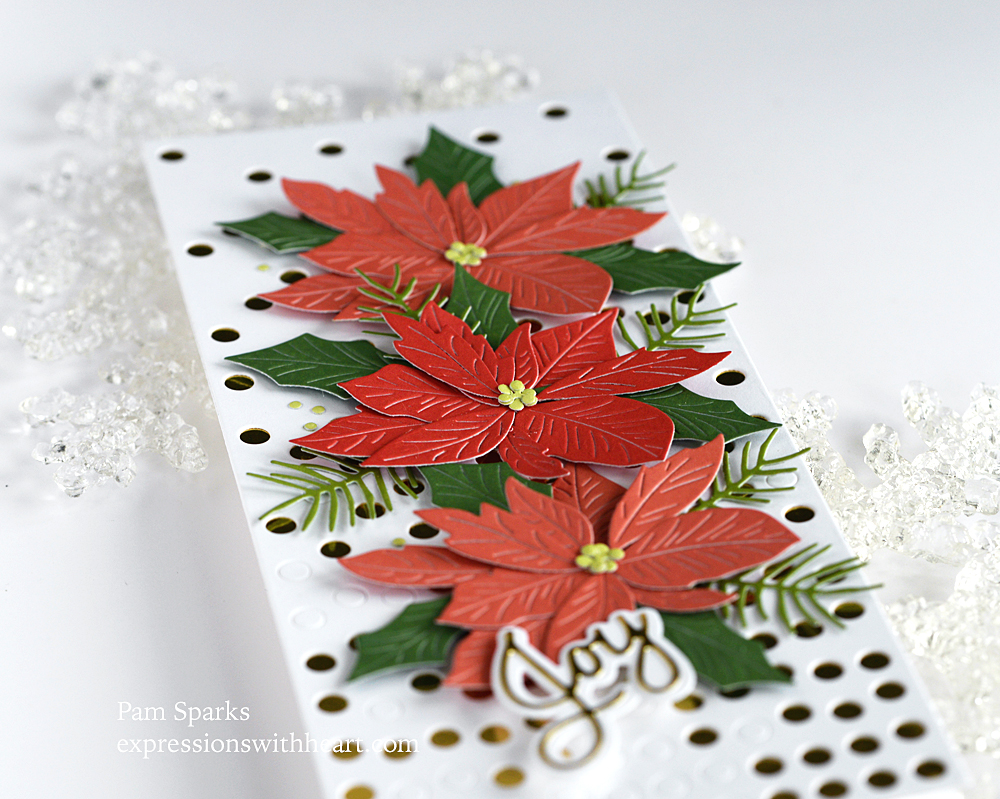
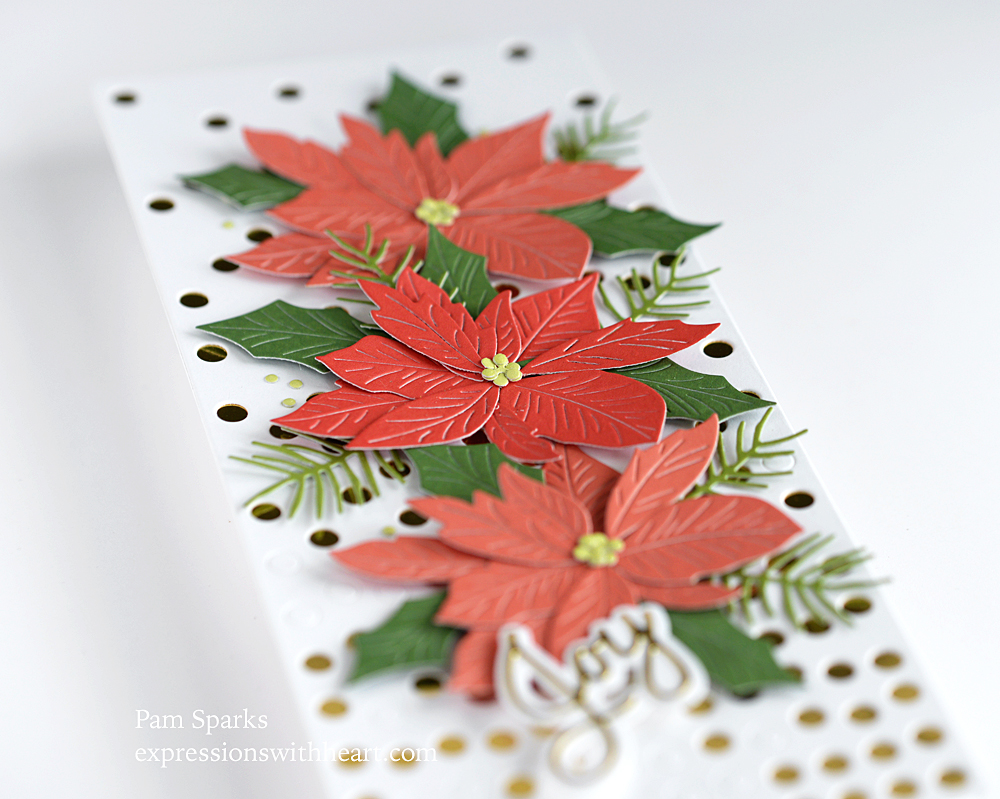
I used some of the Memory Box 6×6 cardstock pads for the poinsettias, pines and holly… I love having the different tones of reds to combine!  I didn’t add any inking to the petals but I think that would really take these petals up a notch!

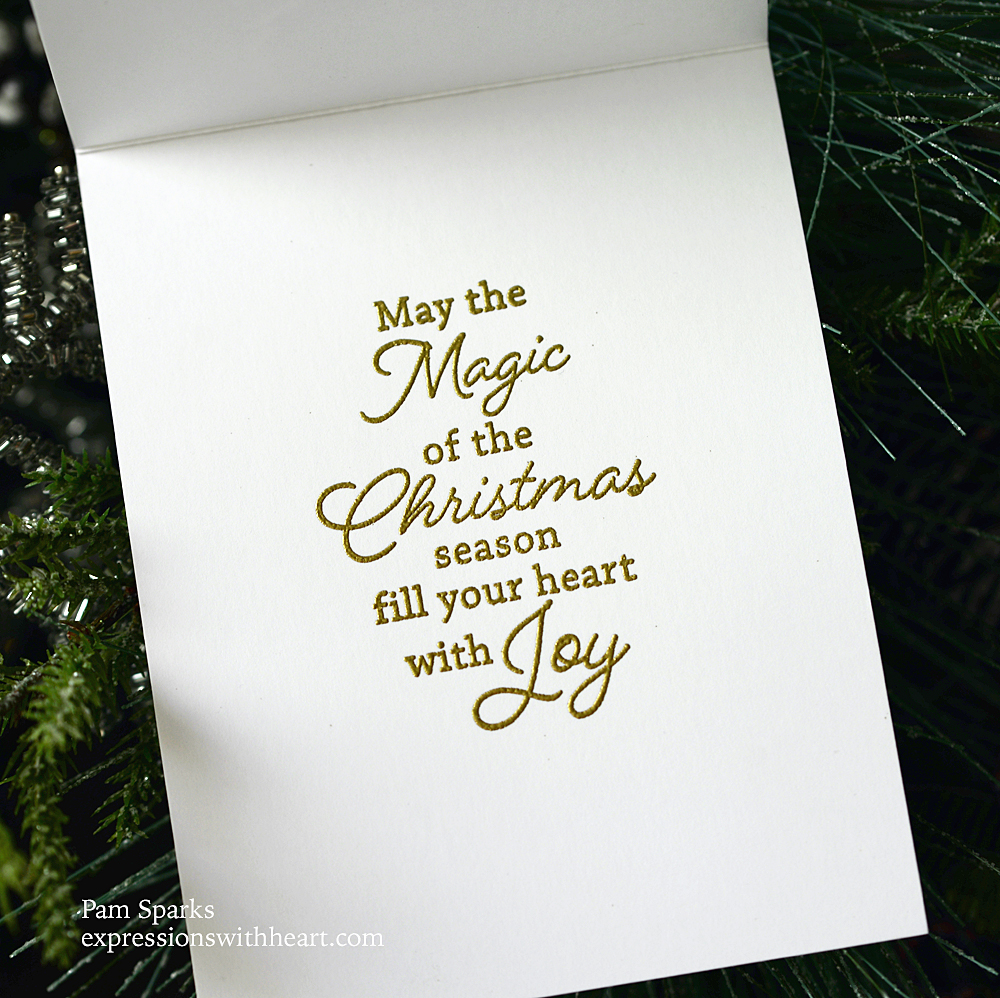
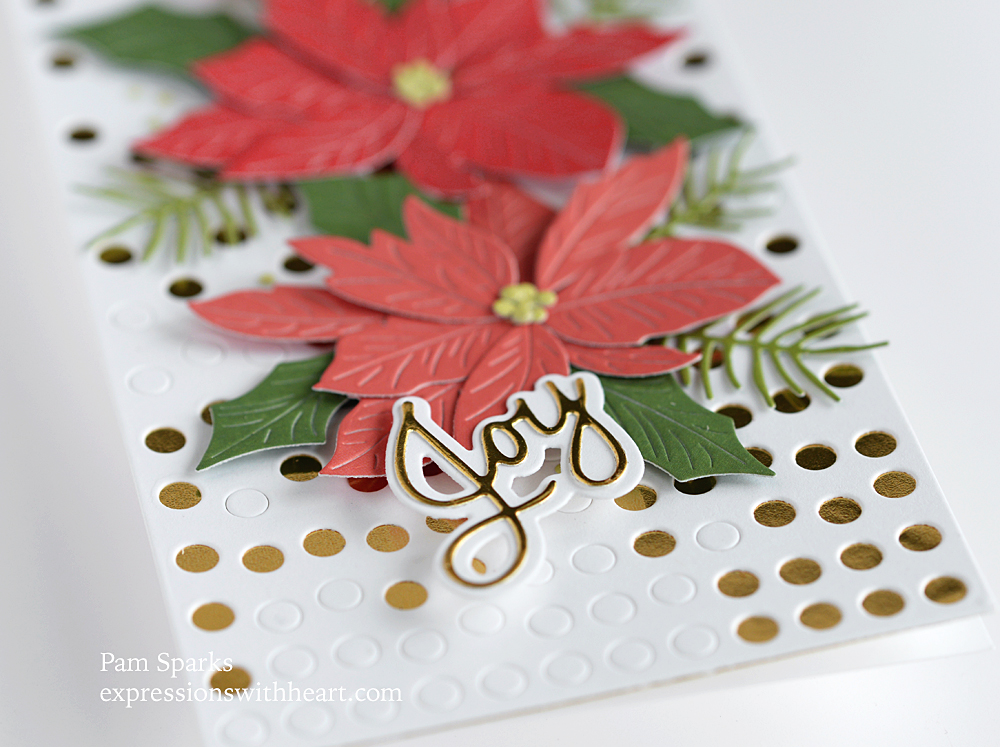
Isn’t this NEW Joy Posh Script die beautiful!  I love it in the foil gold cardstock!

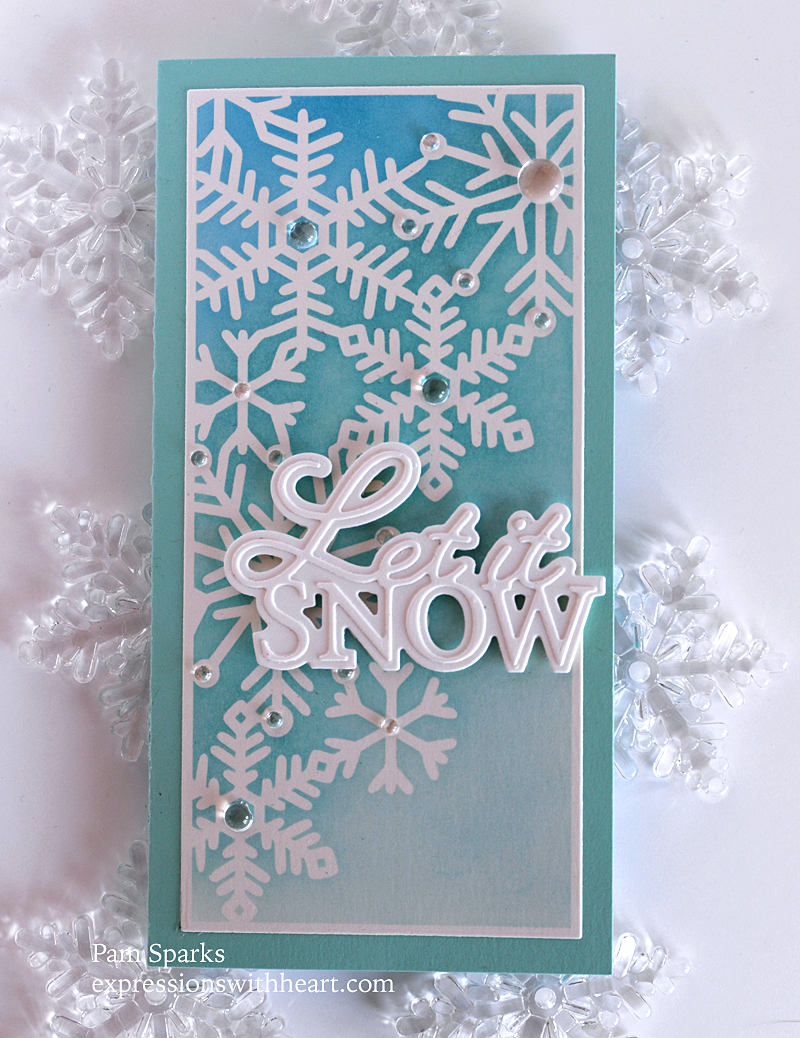
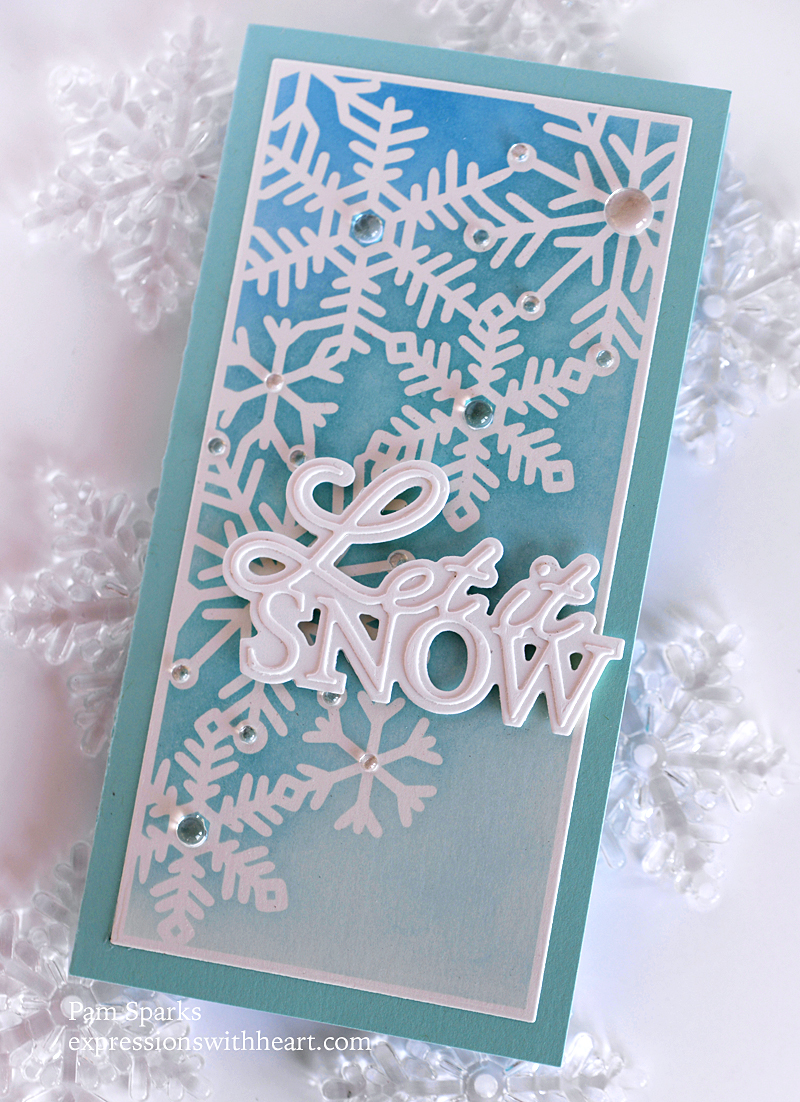
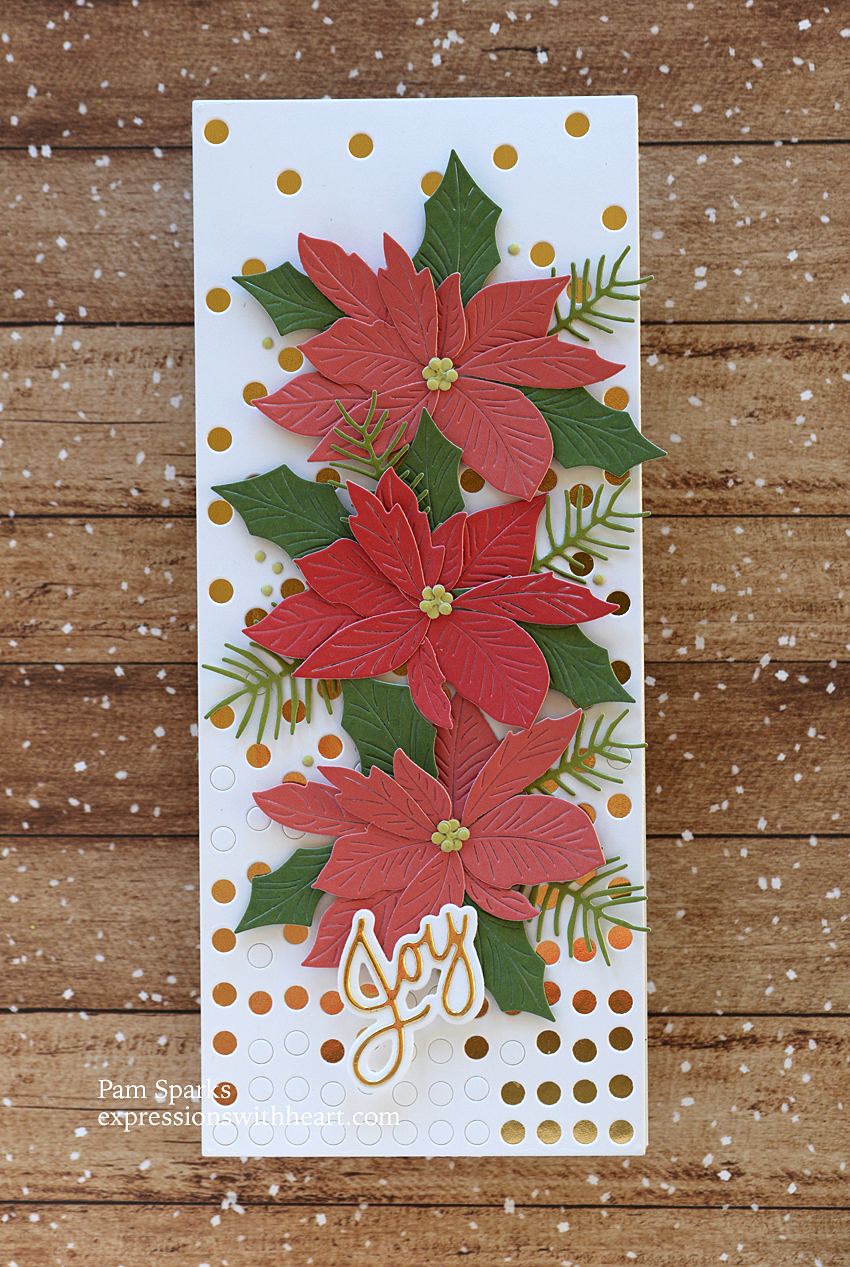
I die cut the NEW Slim Confetti Plate in heavyweight white cardstock and left some of the circles in place for fun!

I die cut a piece of gold cardstock with a Memory Box Slim Basic Rectangle die and layered it behind the Confetti panel.

I adhered both panels to a slim line cardbase.

I used pieces of foam mounting tape to adhere the poinsettias on first, making sure there was room to stick the holly and pine under the petals.  The Holly leaves are adhered with foam mounting tape also.  The Pine Needle Trio dies, I glued directly to the cardbase.

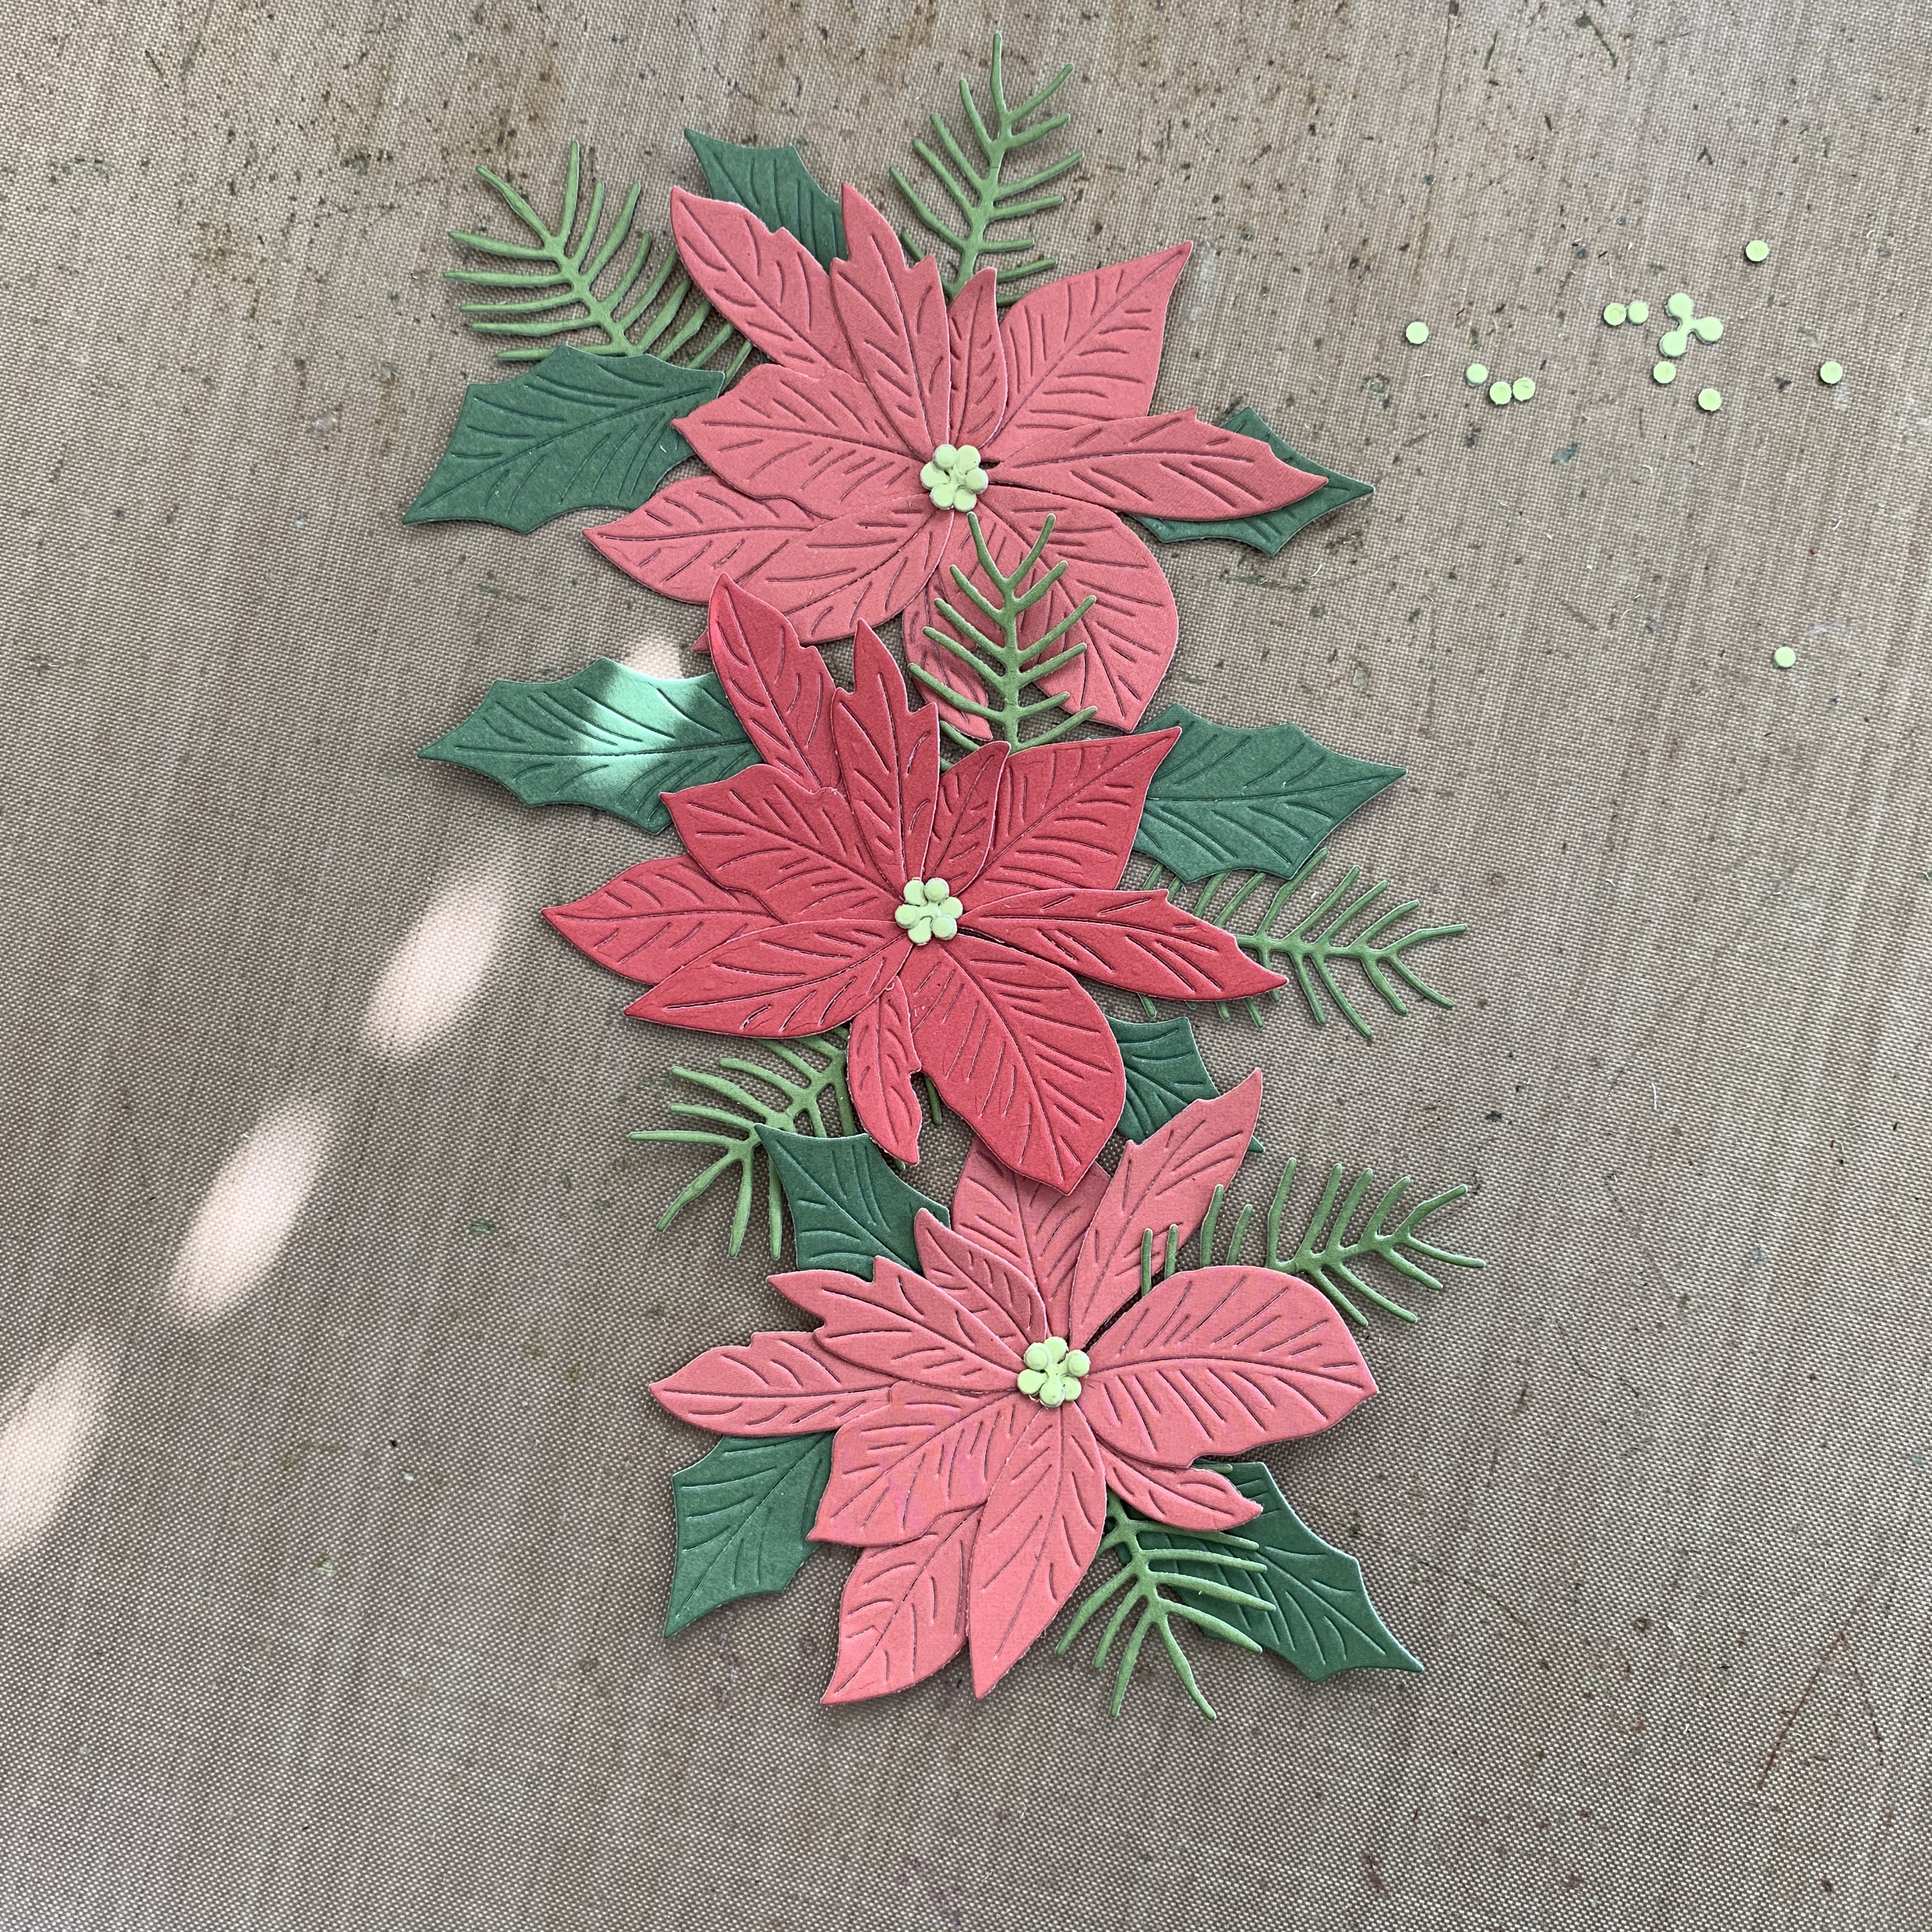
Here’s a couple more process photos…

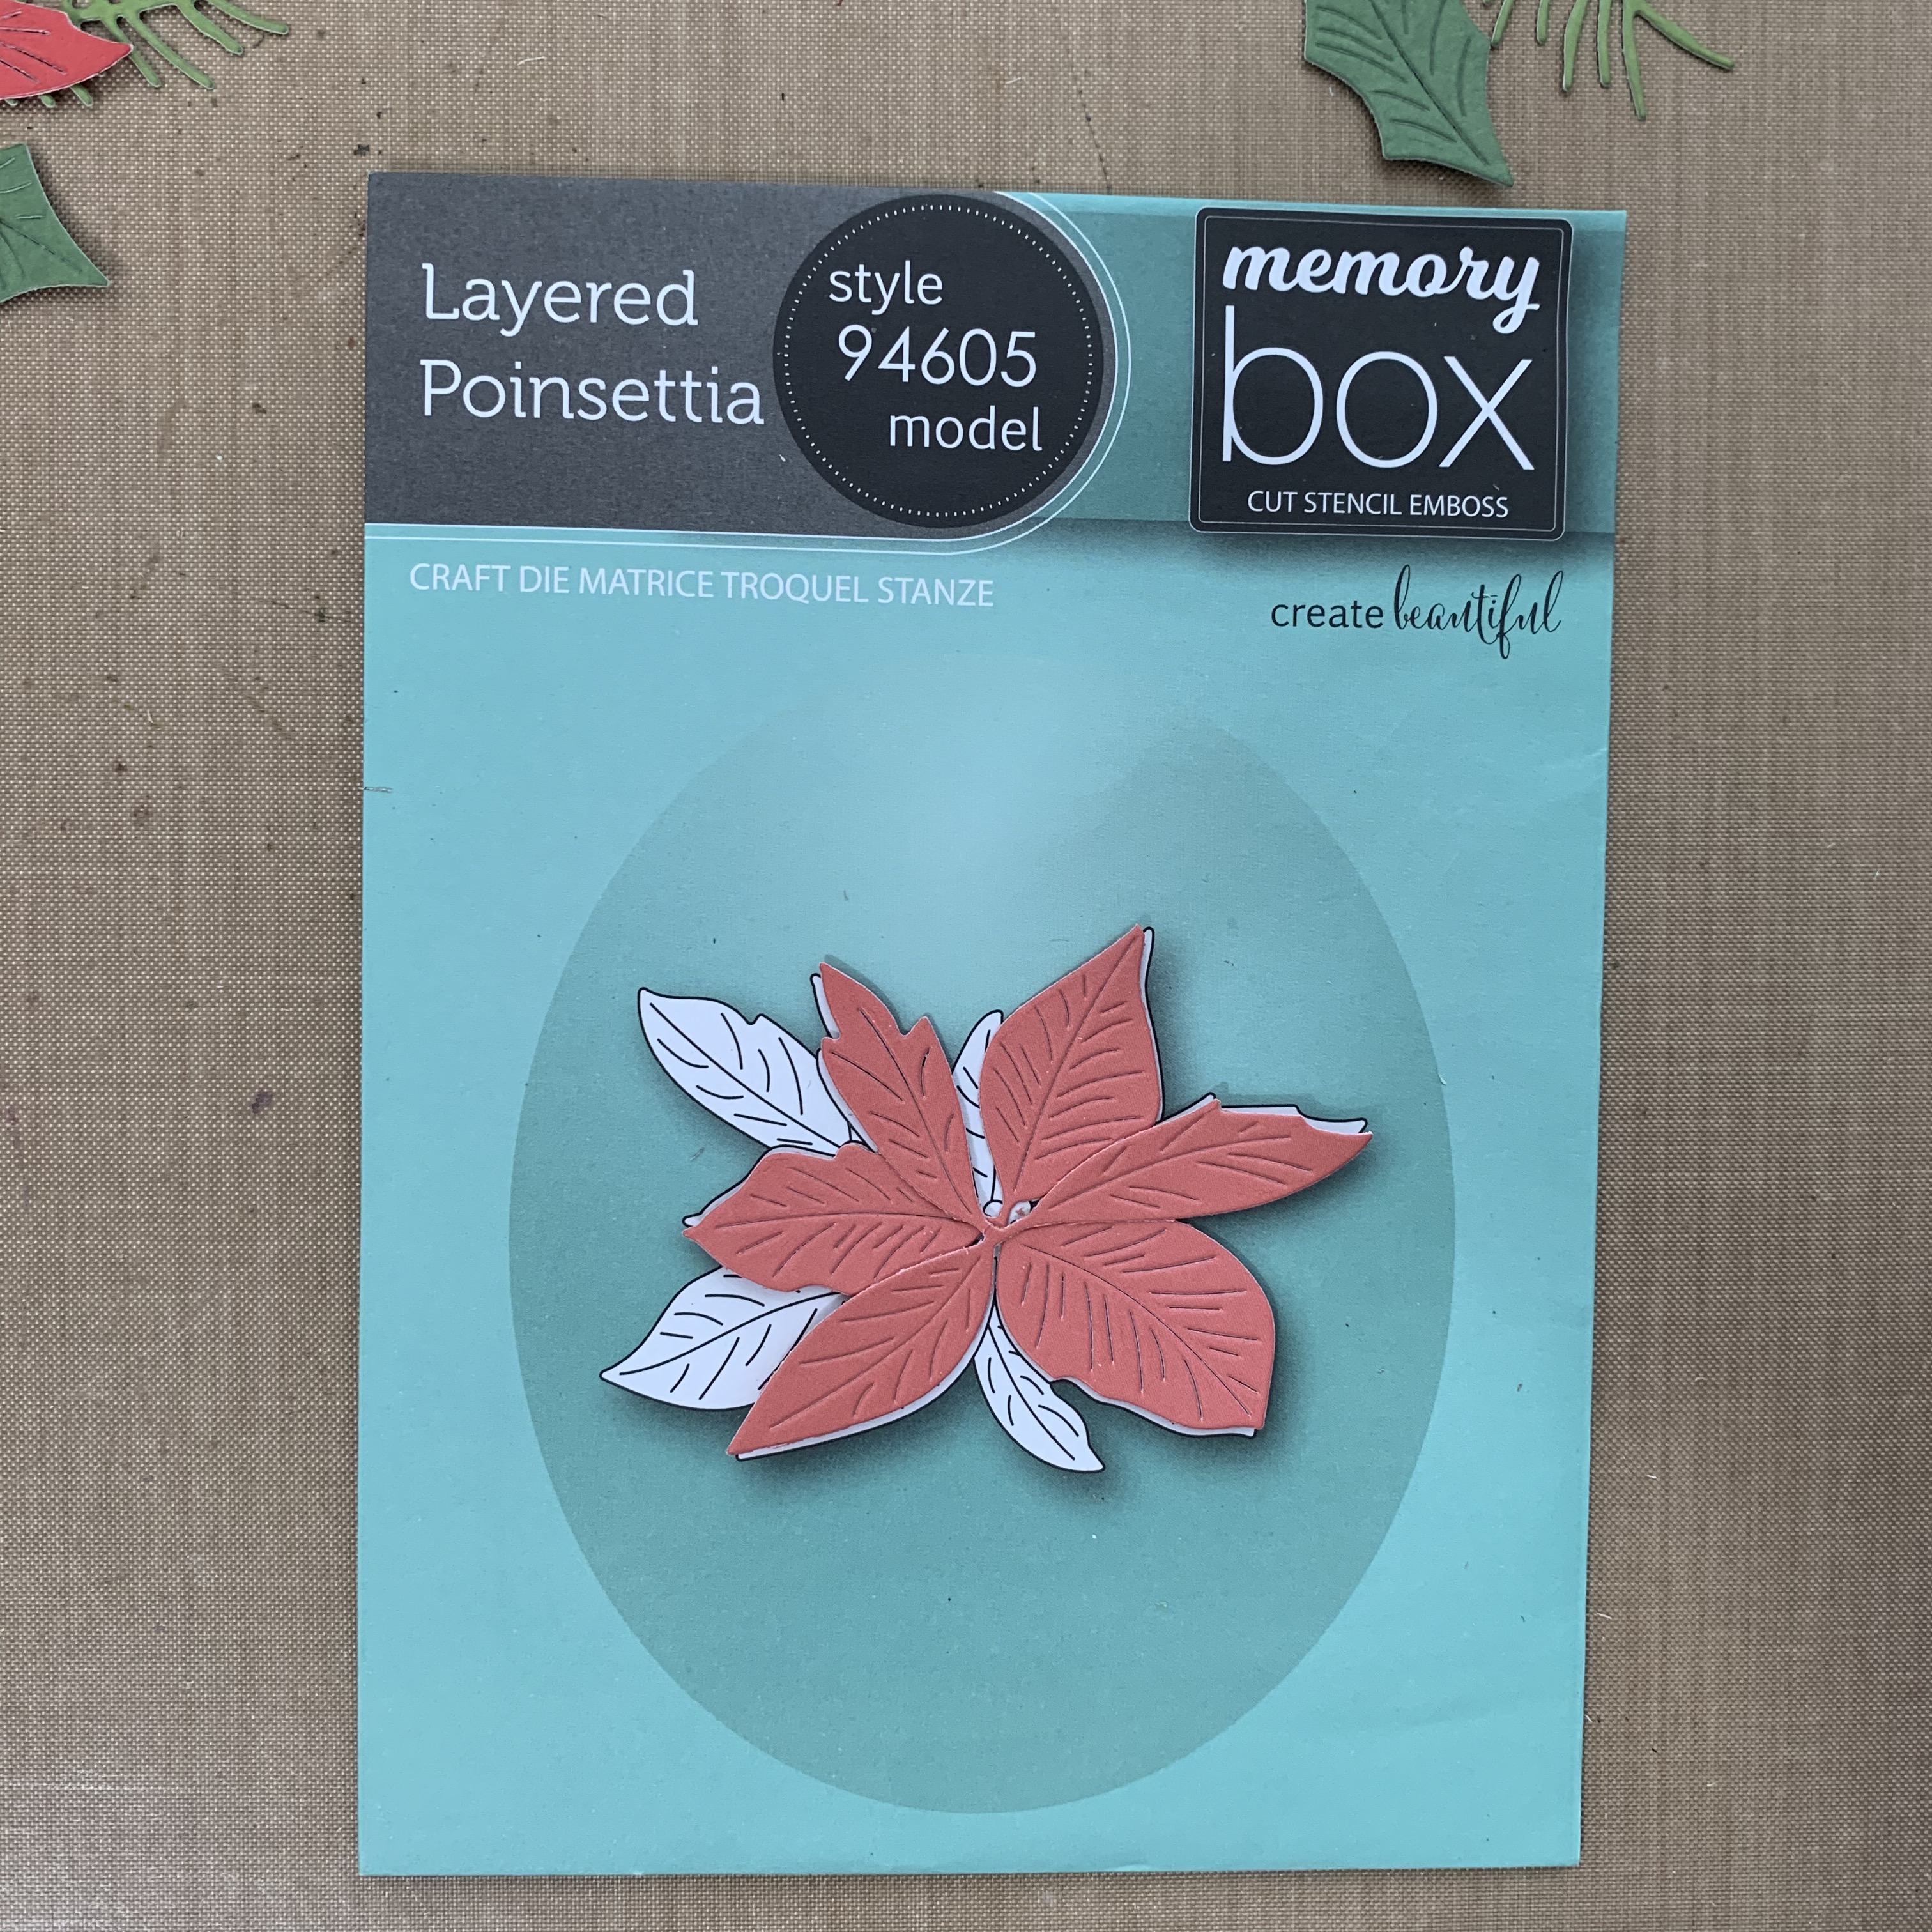
I used the die package for constructing the poinsettias. In the pictures you see the two main pieces, then you glue the three separate leaves on matching them up too… anyway, that’s what I did! lol

Then I played with placement a little and took a picture with my phone so I would know where to put them when I transferred to the cardbase! 

My pictures are all on different days!  Different weather conditions every day… so much for natural light! lol 

You know the dies are beautiful though because Memory Box dies make the prettiest Christmas cards!  You will have fun with these festive dies and they all cut beautifully!

I’m going to go out and enjoy some sunshine for a little while!  yay!  Take care and I’ll be back here soon! 

Here’s what I used to make this card….

Memory Box – 94605 Layered Poinsettia…
[ STR | SSS ]
Memory Box – 94551 Slim Confetti…
[ STR | SSS ]
Memory Box – 94556 Slim Basic…
[ STR | SSS ]
Memory Box – 94610 Holly Bundle craft…
[ STR | SSS ]
Memory Box – 94600 Pine Needle Trio…
[ STR | SSS ]
Memory Box – 94591 Joy Posh Script…
[ STR | SSS ]
Memory Box – SP1001 Berry Red 6×6 pack
[ STR | SSS ]
Memory Box – SP1003 Lush Green 6×6 pack
[ STR | SSS ]
Bazzill Foil Cardstock – Gold 12×12
[ STR ]