Techniques · Video · Watercolor

Splash Inks….Just for FUN post!

oh my!  Some enabling of a different kind from me today! After being enabled by my friend Jan!!! Thanks Jan! lol  Splash Inks!  Have you heard about these or watched the You Tubes?  I’ll put a link to where you can purchase them below but in the meantime… look at Karen’s videos on You Tube (links below)… what great Summer fun for the ‘kid in us’ and our kiddos and grand kiddos!

If you like/love to color….


More videos HERE,  HERE,  HERE, HERE and HERE

Thanks for stopping by!  Let me know what you think and if you’ve tried these yet!!!  I want to know!

hohoho – Merry Christmas in July to me… maybe! lol

Where to order…

cards · CAS · Die Piecing · Memory Box · Shopping · Spring · Stencils · Summer · Techniques

More New Memory Box and SALES!!!


First up…the SALES!!! 

I use my Perfect Layers tools all the time!  Perfect Paper Crafting is offering an awesome deal!  If you haven’t gotten yours yet…don’t miss this opportunity to get a deal on the new set of Mini Rulers and the mat!  You will not be sorry!  LOVE them!   If you already have them, maybe you want another set or what an awesome gift for a stamper friend!
Click the box below to check it out!

2422News__60202.1401665389.451.416

I have admired and been tempted to buy for some time the New stamp and die sets from Simon Says Stamp.  I still don’t have any but if I have time to shop tomorrow, I want to but where to start!   In case you didn’t know and want to shop too… here’s the deal and a link to the sale. 

1_121

thanks for shopping through my links! 

❤❤❤


PamSparksButterflies

Cards! Here’s another card using the NEW Summer 2014 Memory Box release. I started with the Floating Butterflies die cut out of a Memory Box white notecard. Next I cut out two of the inner lines with a scissors so I would have one complete butterfly.  Here’s a picture of the die so you can see the lines I cut off.

6a00d83454a17469e201a3fd197a36970b-800wi


I cut the Floating Butterflies Background die from a Memory Box Sweetcorn notecard. Using the Butterfly Vine stencil, I inked up the complete butterfly first, with Wild Honey Distress ink and the mini round ink blending tool.  Then moved the stencil to fit over the other two butterflies, making sure not to ink into the complete butterfly I stenciled first.

I die cut the Bursting Berry Vine and Blushing Flower Branch from a Memory Box Kraft notecard. I inked them with Gathered Twigs Distress ink and the mini ink blending tool and then colored the leaves with YG Copics.

Cut the Blushing Flower Branch again with little pieces of Memory Box Lavender notecard placed over the flowers, emboss them with a stylus or run it back through the Big Shot with a tan mat and shims.  Leaving the flowers in the die, flip it over and ink through the die with Dusty Concord Distress ink and an ink blending tool.


PamSparksButterfliesClose


Using a variety of Memory Box butterfly dies… cut some butterfly bodies in lavender card…ink them a little with Dusty Concord Distress ink too.

The word ‘fly’ is cut from the Library Alphabet Tags set.

I glued with Tombow Mono Multi, Scrapbook Adhesives mounting squares and the ATG gun.

A2 size card…

Linking up to the NBUS Challenge HERE…  all of the dies have never been used!

button aqua

❤❤❤

Over on the Memory Box  facebook page this a.m., I posted the Floating Butterflies card and a gal said she wanted to see something with the Curling Cloud die.  So I took the challenge for this afternoon!

I inlaid the Mini Hot Air Balloon and Beautiful Balloon dies with the Curling Cloud, cut the Memory Box initials with the Classic Uppercase Alphabet dies, cut summer with the Alphabet Soup die and fun with Parker Lowercase Alphabet dies.


PamSparksMBSummerFun650


Another Curling Cloud glued on top of the card to finish it off.

It’s an A2 size card – Memory Box Lagoon notecard for the card base, white, cranberry and meadow for the cuts.


PamSparksMBSummerFunClose


So when it’s hot and humid… I stay in the house and keep cool!  How about you?  So my Summer fun is not in the air but on the ground, in the house playing with Memory dies, stencils and stamps!

I still have 3 class cards to post next week, some new Printworks stamps to play with and it’s time to color again!

TFL! and happy weekend…hope you get to make something too!

Here’s what I used to make these cards…


cards · Distress Ink coloring · Distress Stains · Memory Box · Perfect Layers Tools · Poppystamps · rubber stamps · Spring · Stencils · Techniques

Memory Box Stencils and Dies…

Hi everyone!  There is a Stencil Blog Blitz going on over on the Memory Box Blog, HERE.  Every day there is a chance to win a stencil,  just by leaving a comment on the blog post each day.

ca615aa4-37f5-4221-8c4f-5bc3e18724b5


In today’s post, Laura is showing the Pop Dots Stencil.  I have a card made with it and the poppystamps Mod Flower Background die matches up with it perfectly!  I embossed the stencil by running a piece of card-stock through the big shot,  then laying the stencil back over the embossed piece as a mask,  I used several colors of Distress Stains to color the circles…Spun Sugar, Peeled Paint, Barn Door and Broken China.

PamSparksModFlowerDistressStains
Then I added a banner cut with poppystamps Classic Ribbons die,  I stamped on it with a Memory Box Washi Chevron stamp and  Wishing You a Happy Day stamps

PamSparksModFlowerClose
Some Doodlebug Sequins to embellish and then glued together with Tombow Mono Multi glue.

I posted a stencil card on the Memory Box Blog  for the Blog Blitz on Saturday, using the Texture, Line Up stencil, Delphinium and Stems mini stencils from the Garden collection.

PamSparksStencilFleur
I inked through the stencils with Distress Inks and the new Round Ink Blending Tools. (they are awesome by the way!)

Then I cut the Rhone Butterfly Wings die in the panel and layered Lagoon card-stock under it.

The Blooming Branch die is glued on behind the Classic Ribbons Banner and the word FLEUR is cut with the new Urban Uppercase Alphabet die set.

PamSparksStencilFleurClose2

And I have found that I LOVE to spatter!  Two colors of spray mist spattered on the panel.  Shake the mists side to side to mix, unscrew the cap and tap with your finger to spatter the ink off the tube.  Works great!

I used my Perfect Layers mini Rulers  and Cutting mat to cut the mat for the floral scene.  Link over on the right… love these rulers!

I have more cards to post and photos and cards from the Great Yosemite Stamp Escape too!  I’ll be back soon!

Thanks for stopping by, it’s good to be back. I have missed you ALL!

p.s. I still haven’t been able to get Google to recover my You Tube Channel.  It’s so discouraging. This is for sure one time when technology is not my friend.  boo.

There is one video on my blog Facebook page though.  I wish I’d loaded them all to FB!  Who’d a thunk!

Supplies I used on these cards…


Birthday · cards · CAS · Die Piecing · Impression Obsession · Memory Box · Perfect Layers Tools · rubber stamps · Techniques · Tutorials · Winter

NEW Memory Box Darling Poppies die and Impression Obsession dies…

PamSparksDarlingPoppies

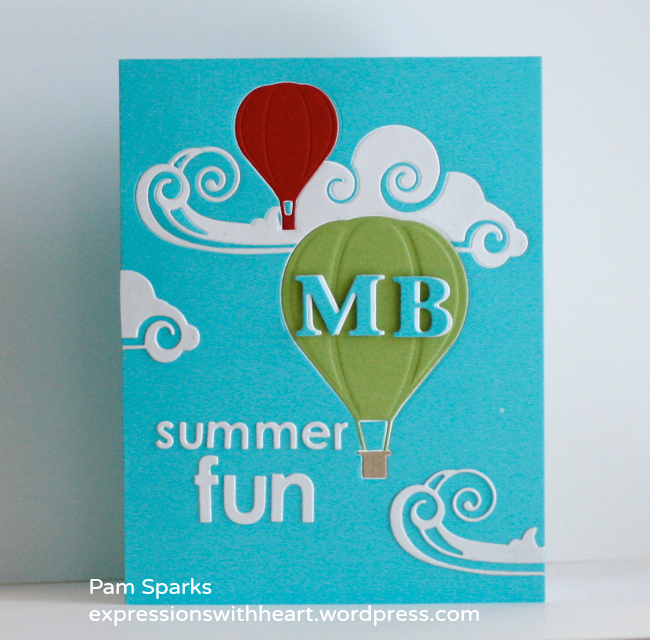
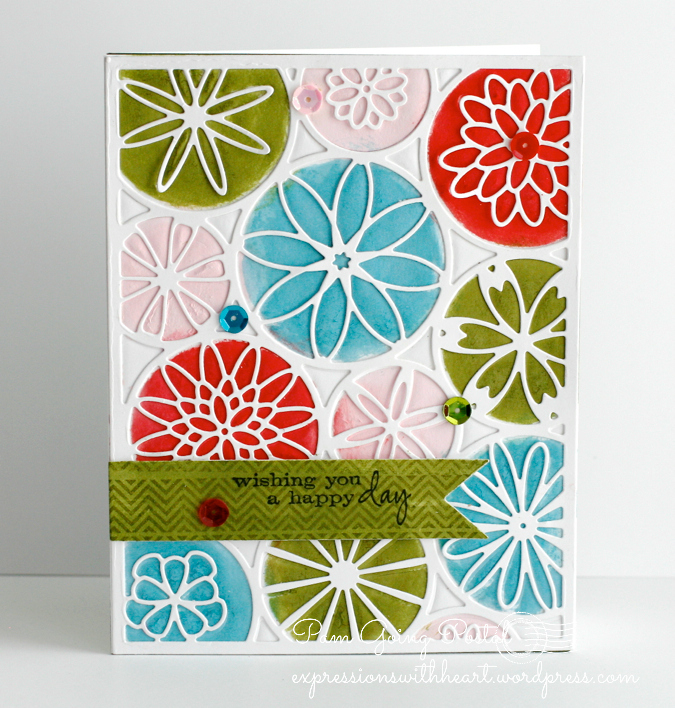
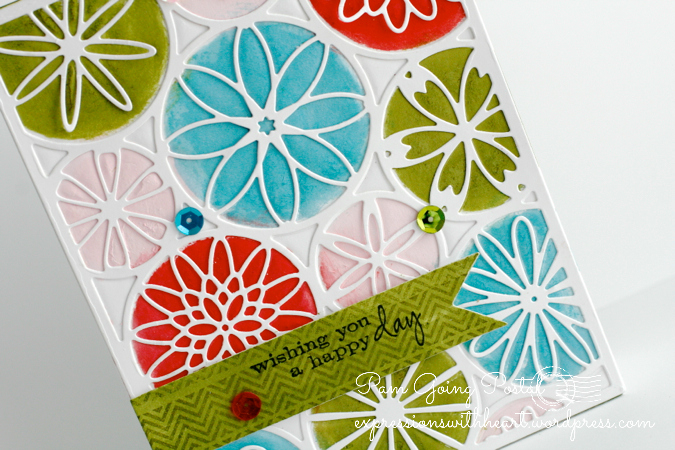
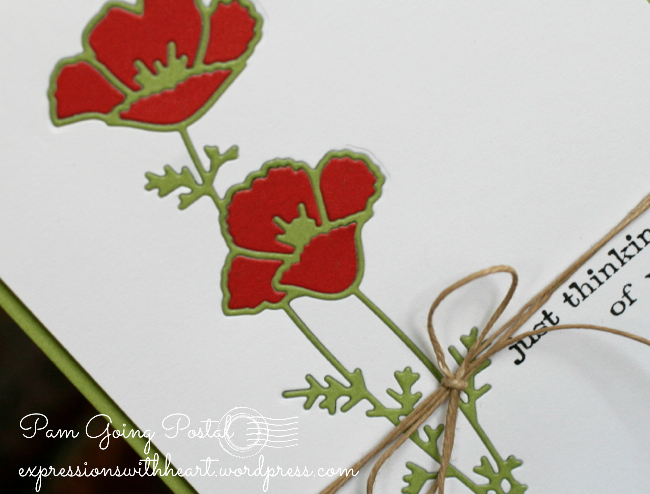
Another NEW die from the  Spring and Summer release, called Darling Poppies I love this sweet image and thought it’d make a great CAS just thinking of you today card.

PamSparksDarlingPoppiesClose

Here’s what I did…

Die cut the Darling Poppies die in the front of an A-2 size white notecard. You will need to keep a few of the white pieces to put back in.

Then die cut the Darling Poppies die two more times from Memory Box Meadow Green and Cranberry card-stock… by the way, die piecing is a great way to use up scraps!  YAY!

Turn the white card with the die cut hole over so the back side is facing up.

Place the green outline cut in the hole right side facing down.

Then put in the larger white piece that is between the stems, right side down.

Then using scotch tape or packing tape, tape over the back so there will be sticky on the front.

Turn the white card front, right side up.

Finish filling in the spaces with the flower petals and the three white teeny pieces.

End result…a lovely notecard to ‘snail’ mail!

*** Linking to…
The Paper Players Challenge – Clean and Simple Spring
Cards in Envy – Anything Goes with an A2 size card

❤ ❤ ❤ ❤ ❤

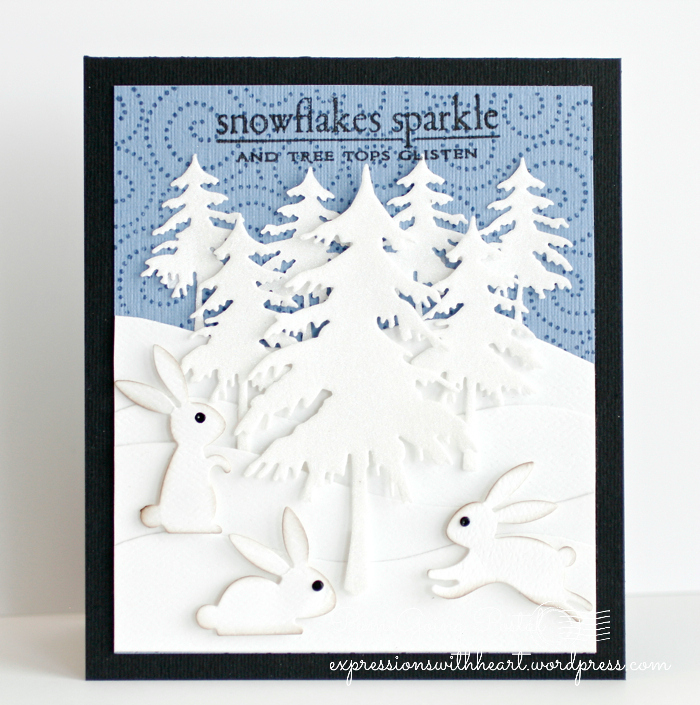
I’ve had these two Winter cards waiting for me to just glitter the trees and finish!!! ugh.  I don’t know why I procrastinate getting the glitter out!  I got all these trees glittered without making a terrible mess!  YAY!

Anyway,  I needed a Winter scene swap card for stamp club last Friday…our January swap theme was a Winter Scene card but we had to cancel our January meeting because of the below zero cold.  Then we had to cancel our February meeting because of snow!  March is our catch up month… so finally… the two dreaded glitter cards are done and it wasn’t so bad after-all!

What a bummer though… can you see the glitter in the photos even?????  grrrrr… lol

PamSparksSleddingIOTreesGlitterScene

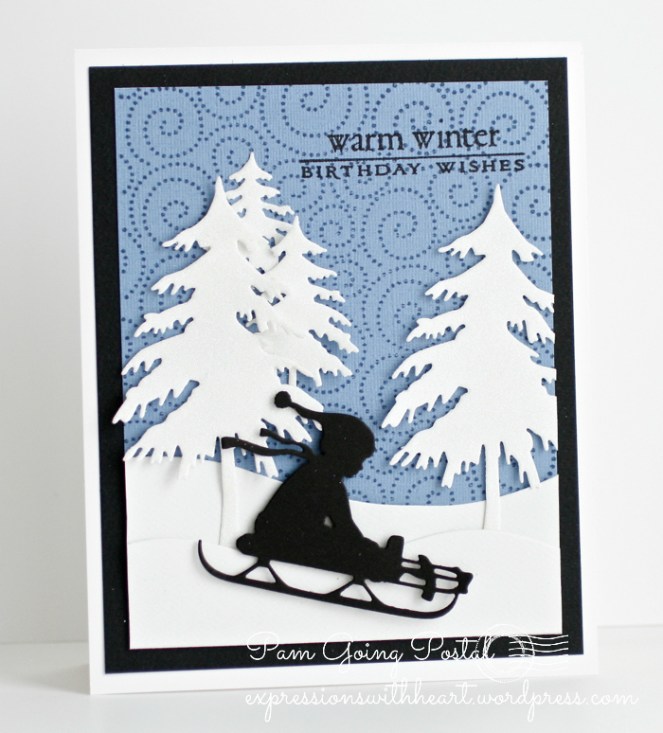
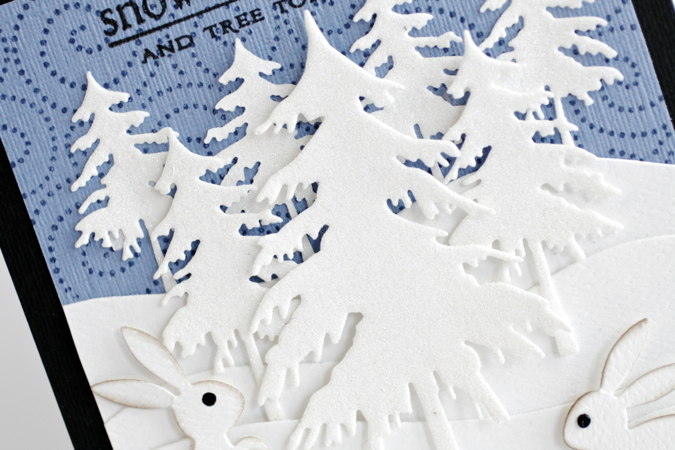
Love this sweet sledding die and snow laden tree dies … from Impression Obsession…links below in the supplies links.  Background stamp is from Hero Arts and the sentiment from Papertrey Ink.  Layers cut with my Perfect Layers Tools and Mat… links below or in the sidebar.  Videos about them under the header.

*** Linking to…
The Card Concept – Clean and Layering, Create a birthday card

❤ ❤ ❤ ❤ ❤

PamSparksIOWinterSceneFront

Same trees and stamps again and added the Impression Obsession bunnies.  Ranger Black enamel for the eyes.

PamSparksIOWinterSceneClose

The glitter I used is Winter White from the Art Institute Glittering System.  I put sheets of double sided adhesive on my card-stock before I die cut the trees.  After they were die cut, I peeled off the protective sheet, poured glitter on them, layed a scrap paper over the glitter and rubbed it in.  Shook off the extra glitter and put it back in the jar.  It’s a really fine, pretty glitter.

Oh, the hill die cuts are from Papertrey Ink.

*** Linking to…
Simon Says Wednesday Challenge – Glitter it!

Whew… back to flowers and Easter now! Thanks for stopping by and I’ll talk to you later!

Supplies I used on these cards…

Impression Obsession trees, sled and bunny dies are also in stock HERE at Dies R Us

Birthday · cards · CAS · Die Piecing · Masculine · Memory Box · rubber stamps · Spring · Techniques

NEW Memory Box!!!

PamSparksBeautifulBalloonHello2

Here’s the NEW Beautiful Balloon die pieced and inlaid with the Puffy Clouds dies… I just love this look and I had so much fun creating it!  After everything was pieced in, I stamped parts of the happy hello combo stamp with the Stamp a ma jig.  Love the embossing detail in the balloon!

Hello is die cut out of the card front also and another white hello die cut inserted.  Imagine the ‘hello’ as part of the cloud formation.  : )

Ribbon is from May Arts in stock at Starlitstudio.net
Memory Box Holly Berry Red & White A-2 Notecards

This truly is a one layer card.

PamSparksBeautifulBalloonHello2Close

And another card…

PamSparksWildflowerCornerAstiSwirlFront

*For this card I cut the Wildflower Corner two times.
*Glued one complete cut in the bottom left corner. (I use Tombow mono multi glue, little dots here and there)
*Glued the other corner in pieces to the top right corner, right side and top left corner.
*Die cut the thanks Cloud but just used the word.  I cut my thin mounting squares into narrow strips.

PamSparksWildflowerCornerAstiSwirlClose

*die cut the Asti Butterfly wings directly in the card front…it doesn’t cut completely…it stays connected at the body.
*die cut the Swirl Butterfly, glue on top of the Asti butterfly
*Memory Box White and Lagoon A-2 Notecards

A pretty CAS card that could be used for several occasions!

Here’s another take with the Wildflower Corner die cut in the front panel of the card twice… then cut again twice from white card-stock and inlaid into the holes  you cut in the front of the card.

Version 1…that I gave away…

PamSparksWildflowerCornerBirthday1

Version 2… I made it again this a.m. so I’d have one but I didn’t look at my photo first!  The corners are in different corners!  pout.

PamSparksWildflowerCornerBirthday2copy

I don’t think I’ll make it again today anyway but I like the corner placement on the first card the best. The second one I did a better job of keeping track of all the little center dots! lol

I have a few tips that make this go easier… thinking video… let me know if you get this die and need help… so hard to explain with words.

In the post before this one… I list the steps I used to inlaying die cuts.

Well back to the die cutting table and stamping desk!  Have a great week stamping friends and I’ll be back with something sometime! : )  Thanks for all your comments and encouraging words!  They always help me keep motivated! ttul!

Links to the Supplies I used…