All Occasion · cards · CAS · copics · Die Piecing · LOVE · Reverse Confetti

Reverse Confetti, Countdown to Confetti Day Two…

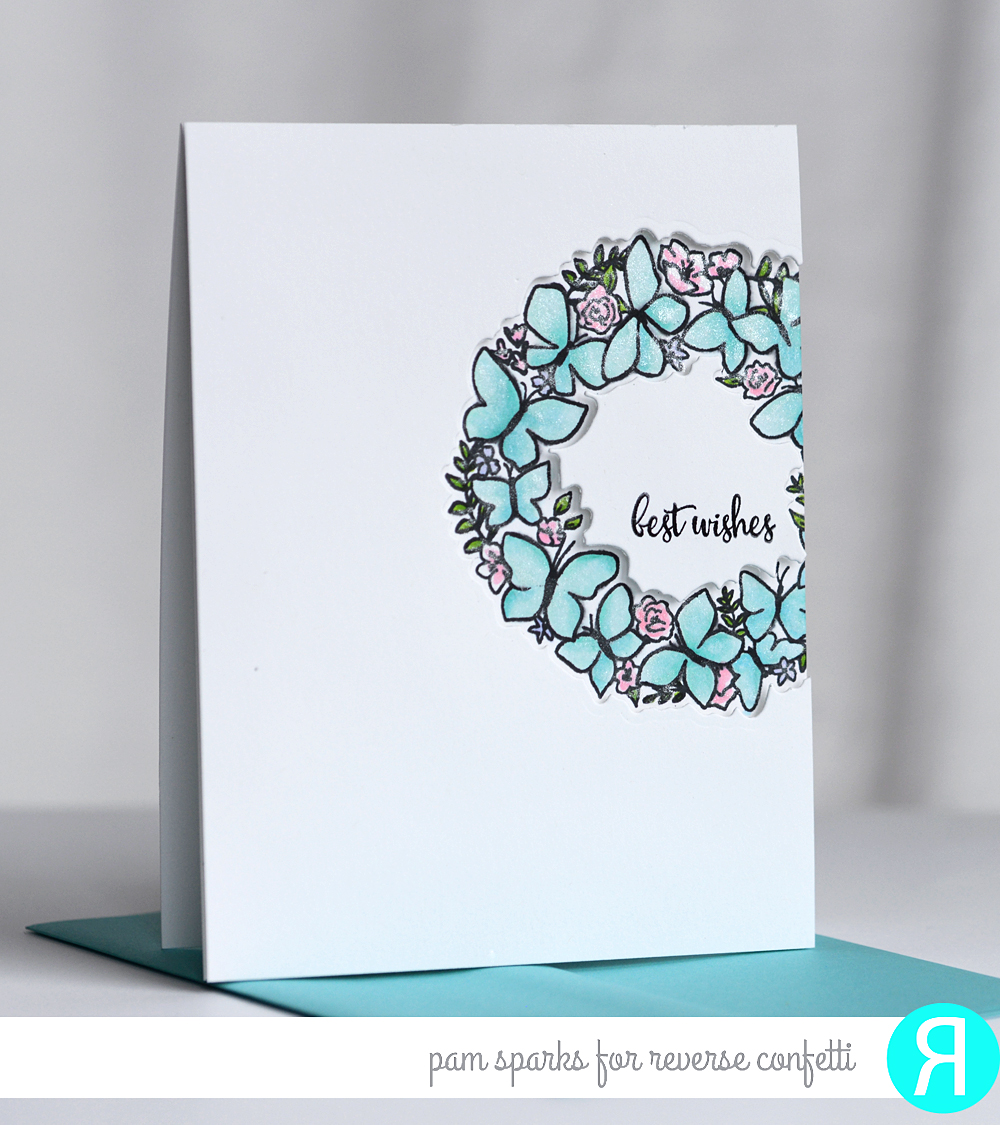
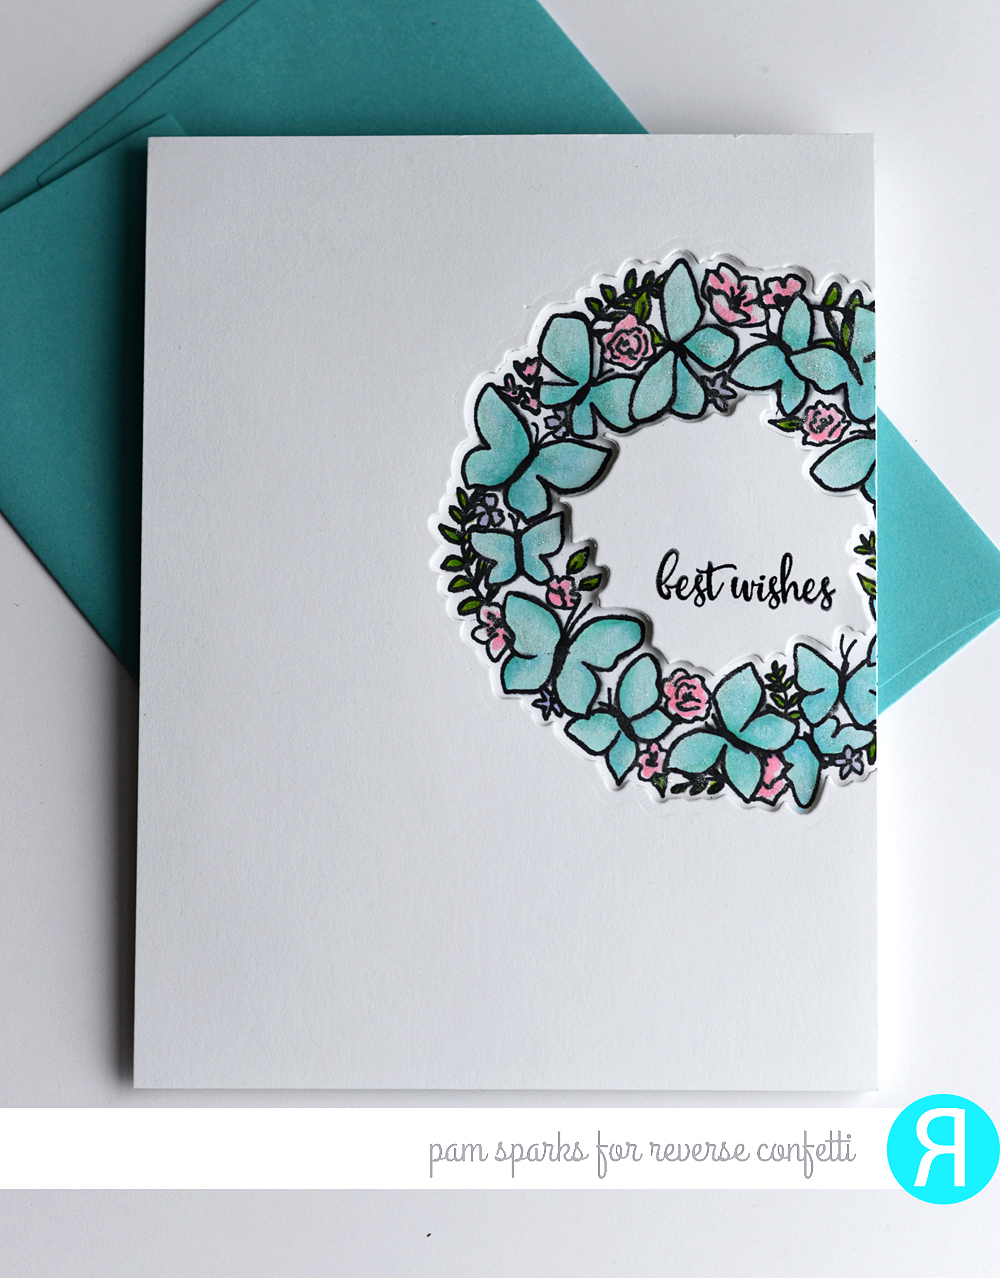
Welcome back to Day Two Sneek Peeks of the January Release for Reverse Confetti!  Today we are introducing the stamp set Butterfly Wreath and coordinating Confetti Cuts set.

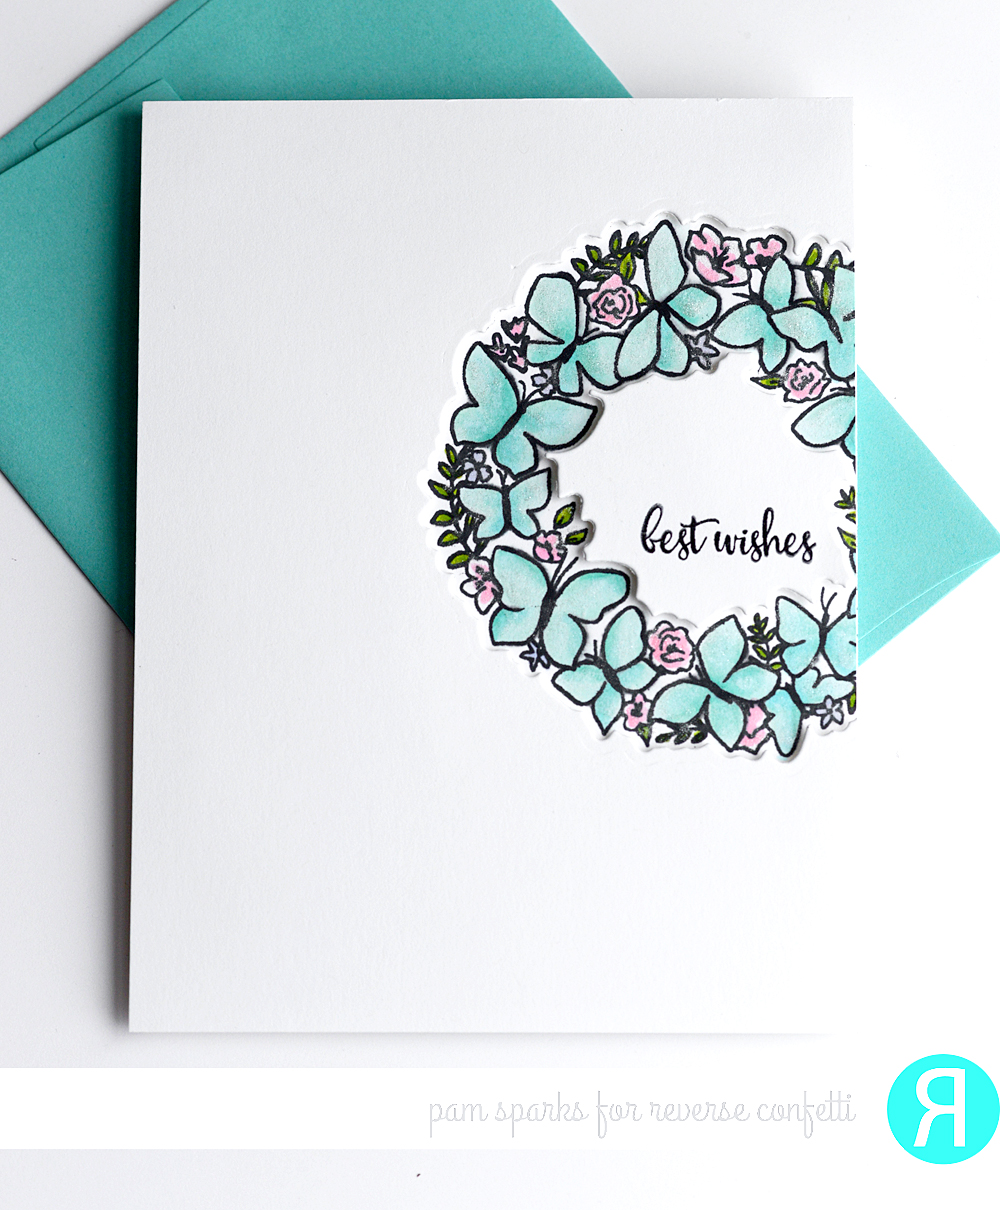
I made it up two ways… the first that I’m sharing today is a CAS card colored simply with Copics (BG10, 11, 13) and then with a shimmer pen. I’ll share my other card on release day Wednesday.

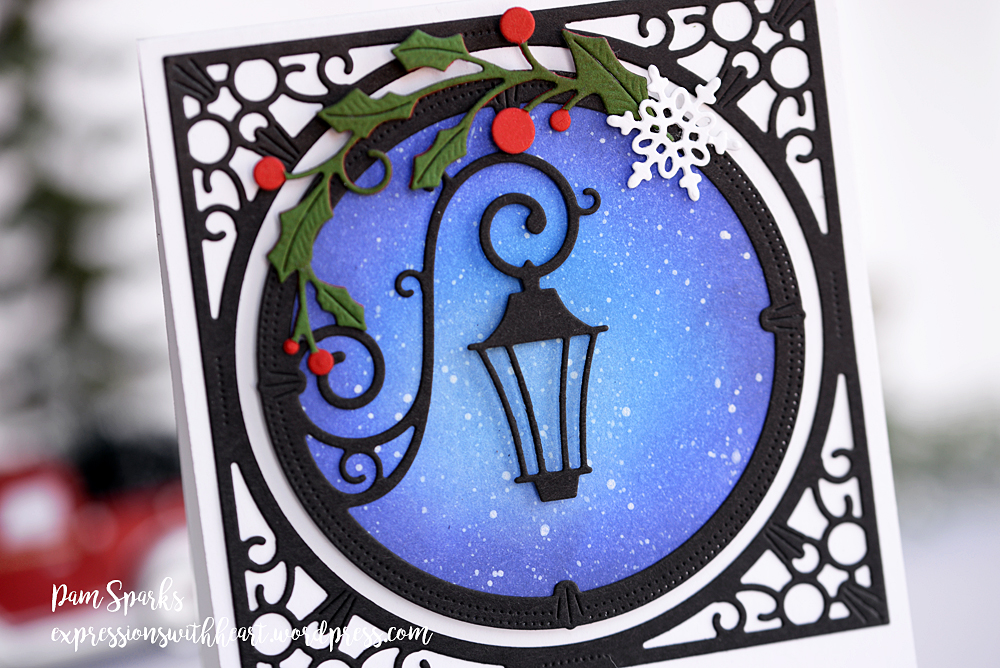
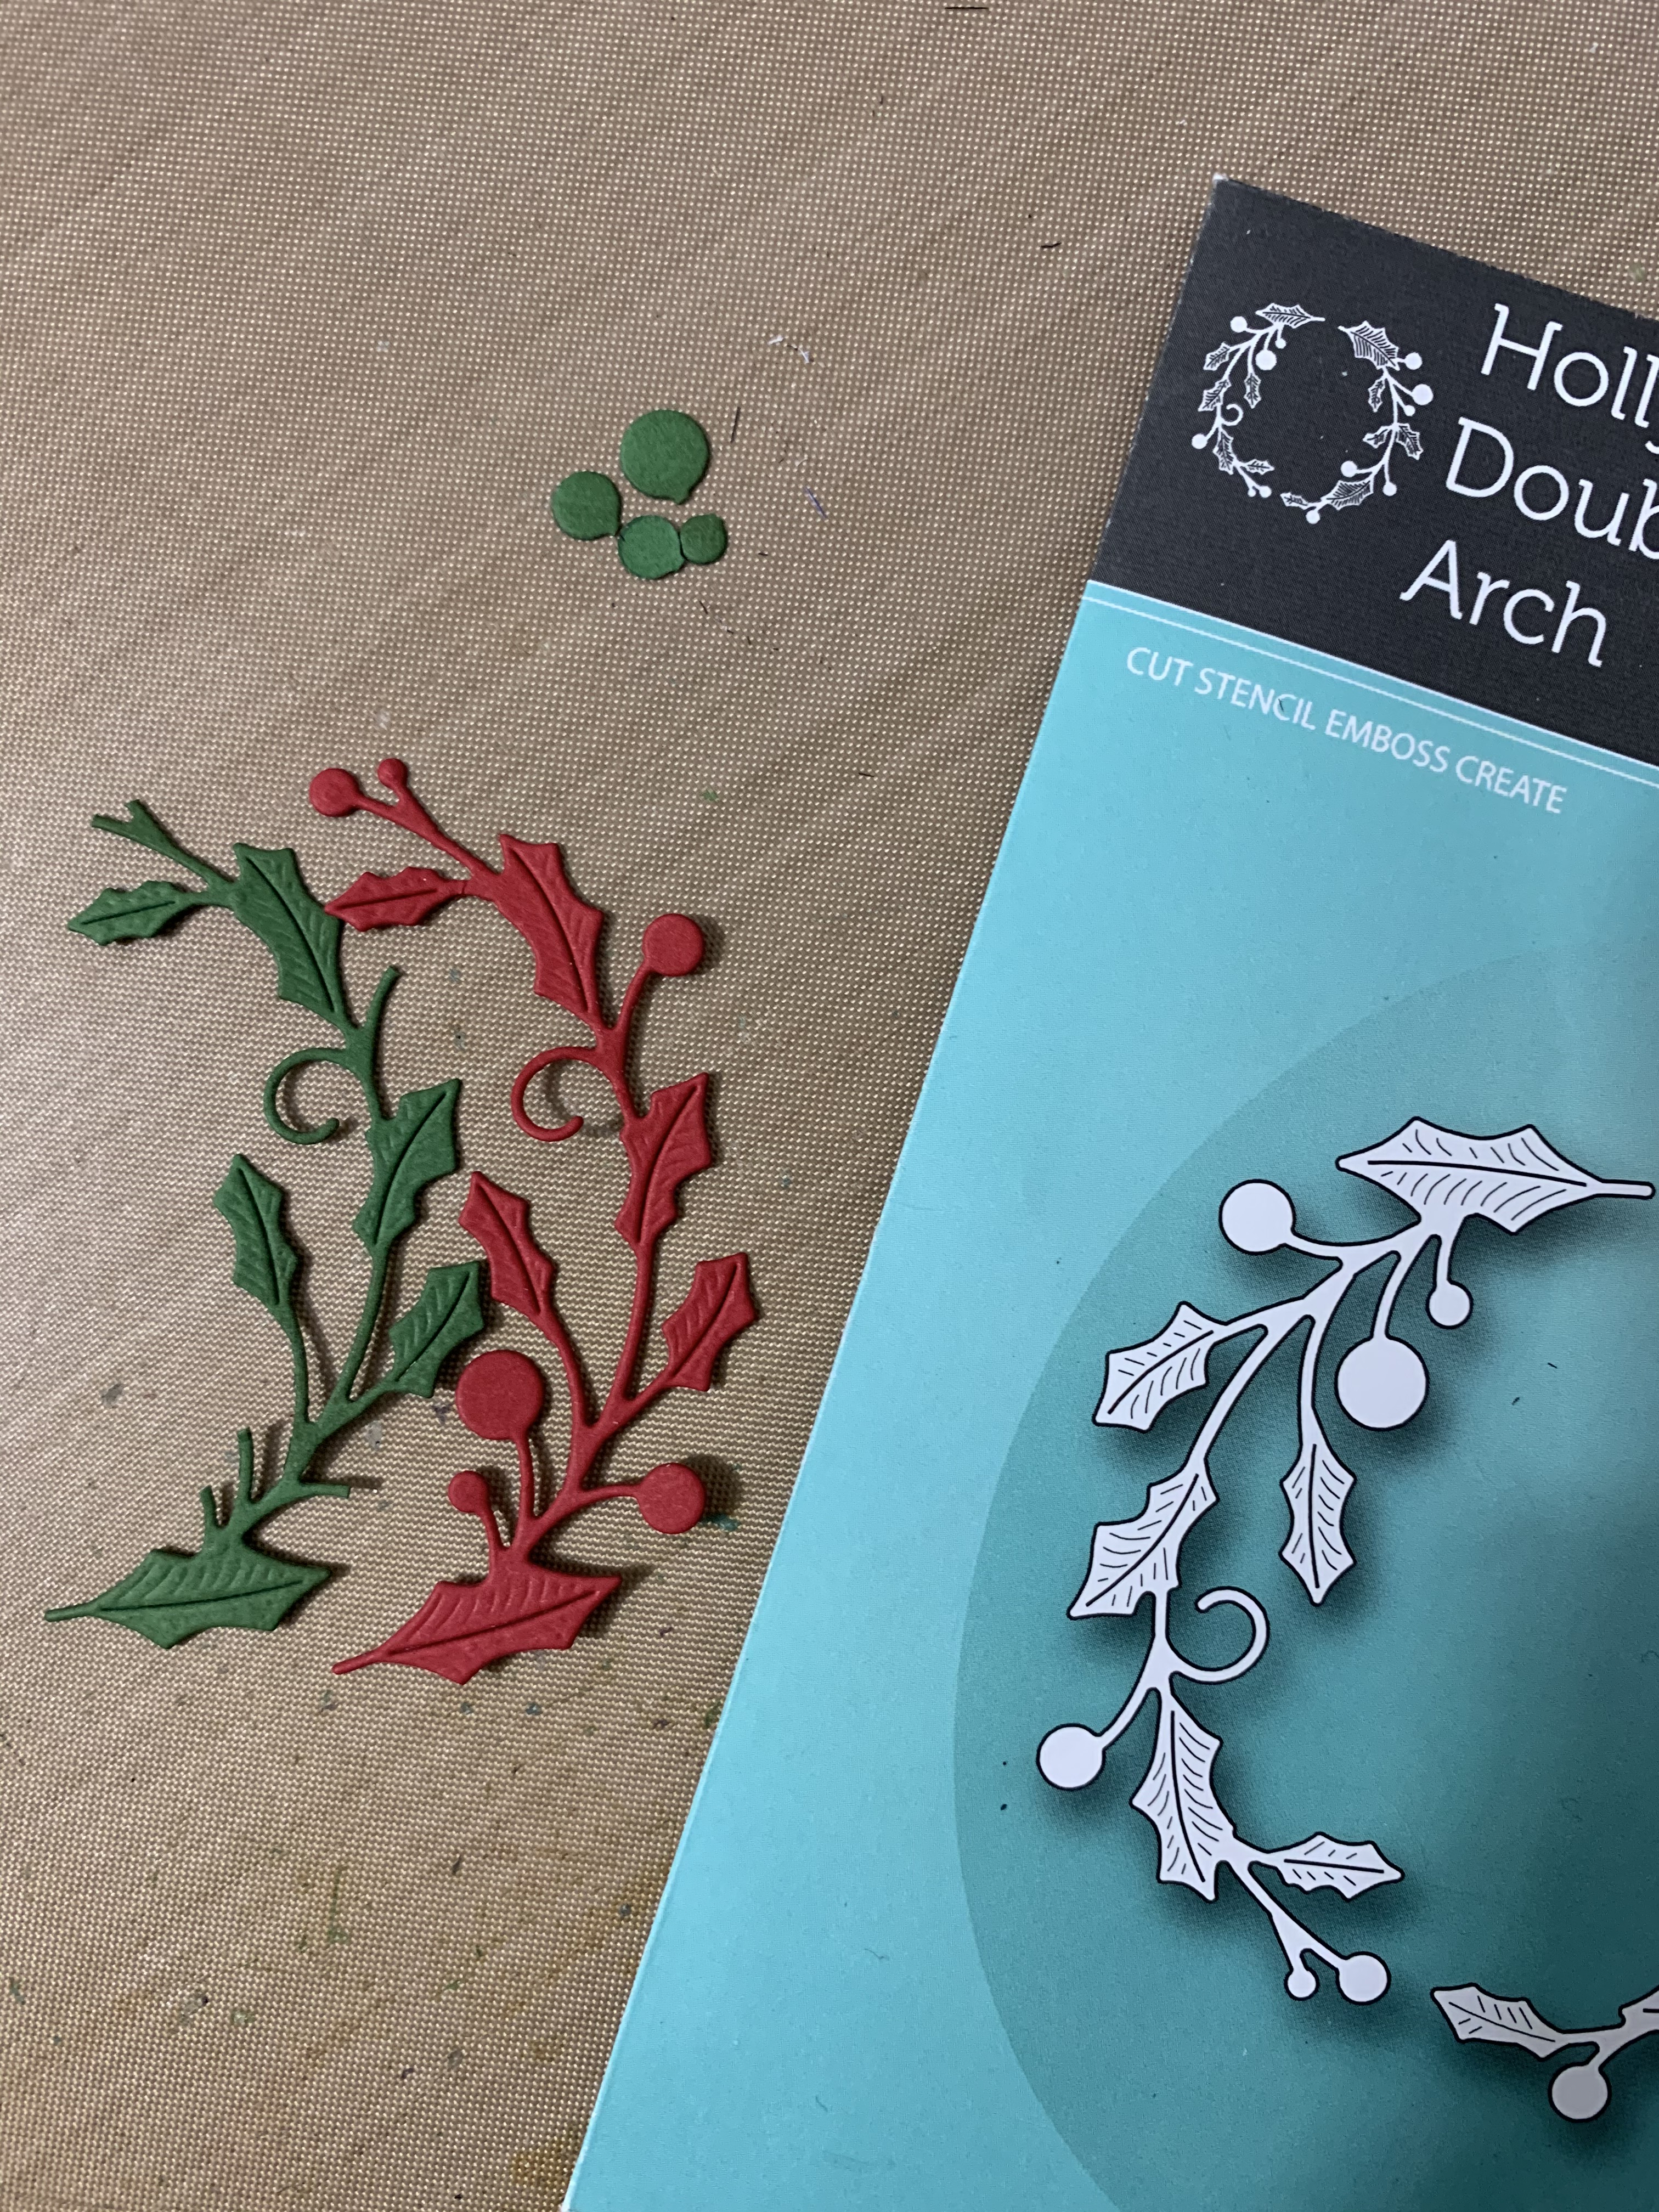
I die cut the wreath in an A2 size panel to overlay the stamped and colored image that I adhered to the cardbase after coloring because… yah… remember Copics soak through the cardstock.

This card could be used for so many occasions… well this set could be! Beautiful image and sentiments!  I especially love the one, ‘you’ve been on my mind’.  Come back Wednesday to see that one used on a card! ❤

Have fun clicking through the other designers posts…you’ll want to comment because there’s prizes involved! ❤  A $15 gift certificate to a blog commenter and a $15 gift certificate to a facebook commenter!  Comments will close at noon CST January 7th. The comment winners will be announced on the RC blog and FB page at 5 pm CST January 7th!

See you again tomorrow and Wednesday the 8th for RELEASE DAY and blog hop!

Reverse Confetti Blog

Amy Kolling

Tricia Barber

Kelly Lunceford

Lisa Henke

Heather Hoffman

Amy Tsuruta

Kathy Schweinfurth

Audrey Tokach

Jeanne Jachna

Deanne Kuntz

Michele Ferguson

Olga Moss

Olga Matyushevskaya 

Ali Farmer

Pam Sparks (me)

Thank you so much for stopping by!

cards · Congratulations · Die Piecing · LOVE · Reverse Confetti · Tags · Valentine

Reverse Confetti ‘fetti friend for January/February and it’s Countdown to Confetti Day One…


Hi everyone!  I didn’t realize how appropriate this card would be for my news today! The WOW. JUST WOW. part anyway! lol I was asked to be a guest for Reverse Confetti during January and February!  A super fun way to start the new year!

My first card is using one of the new stamp sets, omg and one of the dies from the new hearts confetti cuts. Swoon, I love this stripe heart! What else can I tuck in there?! ❤

I had fun heat embossing the sentiments in white on black cardstock (don’t they look like real dymo labels), then stapling them with the tiny attacher onto the die cut panel.

I ended up with a 5 ½ inch square card.

The small red hearts are dies from Heart Tag Toppers Confetti Cuts. ❤

My next card uses another new stamp set all the love and the coordinating die set, all the love confetti cuts.

You know I love hearts!  Yes my blog name… ❤  And by the way, in case you haven’t noticed, I did upgrade over the Christmas break to expressions with heart.com!  yay!  So you shouldn’t see any ads other than the ones I put on here to the ‘good’ stuff! hehe

You have to love the ‘confetti’ hearts I made with the new oh my heart cover panel confetti cuts die!  So colorful and sure to make the receiver smile!

I didn’t get all my wood slices used for Christmas!  That worked out great for me to have one ready to stamp and heat emboss with white powder with a couple of the other sentiments from the all the love set!  So fun to add to a gift for Valentines or hey, you don’t even have to have a reason to give!

Another close up of just the wood slice…

Thank you so much for stopping by…but wait!  There’s tons more for you to see today from the other ‘fetti friend and the regular design team!  Here’s the list and you’ll want to comment because there’s prizes involved! ❤  A $15 gift certificate to a blog commenter and a $15 gift certificate to a facebook commenter!  Comments will close at noon CST January 7th. The comment winners will be announced on the RC blog and FB page at 5 pm CST January 7th!

See you again tomorrow and Tuesday for more sneak peeks, then Wednesday the 8th for RELEASE DAY and blog hop!

Reverse Confetti Blog

Amy Kolling

Tricia Barber

Kelly Lunceford

Lisa Henke

Heather Hoffman

Amy Tsuruta

Kathy Schweinfurth

Audrey Tokach

Jeanne Jachna

Deanne Kuntz

Michele Ferguson

Olga Moss

Olga Matyushevskaya 

Ali Farmer

Pam Sparks (me)


cards · CAS · Die Piecing · LOVE · Memory Box · Valentine

Memory Box A Happy Heart Collage Card…

Hi everyone!  It’s good to be back sharing cards again!  I had a wonderful Christmas season with family and hope you did too!

Now, the second most popular holiday for making and sending cards is upon us!  No time to waste either! haha

I started by cutting ½ inch strips of three colors of cardstock from TE… I’ll link below.  Lollipop, Candy Corn and Strawberry Milkshake.

I covered an A2 white cardbase with ATG adhesive then started placing the strips on the diagonal.

Then I decided to use the sentiments from the NEW Memory Box Big and Little Valentine’s stamp set and stamped three of the sentiments in coordinating TE ink pad colors (same as the cardstocks).  ok – I love all that type on there! hehe

From the same sentiment set I stamped Happy Valentines Day on TE Oreo cardstock and embossed in white embossing powder.  I cut it out with the MISTI Cut Align Tool.

Now you need that NEW Memory Box Happy Heart Collage die!  I cut it out of an A2 size panel of white cardstock, then glued it directly to the strip covered cardbase.  Keeping it mailable today. haha  (I won’t go off on my PO rant)  I mounted the valentine’s Day pieces with mounting foam tape.

Sweet, cute and colorful!

    • My ‘I can’t make a card without this’ product today is…. the adhesive remover square!  I will link my favorite below!

Thank you so much for stopping by today to see my first Valentine of the year!

Products I used to make this card…

Memory Box – 94373 Happy Heart…
[ STR | SSS ]
Memory Box – CL5252 Big and Little…
[ STR | SSS ]
TE Premium Ink – Full Ink Pads
[ TE ]
TE Premium Cardstock
[ TE ]
Neenah Classic Crest 110 LB SMOOTH…
[ SSS ]
Sizzix – Big Shot Accessory – Tool…
[ SBC ]
Sizzix – Big Shot Machine – White and…
[ SBC | SZZ | SSS ]
Sizzix Cutting Pads – standard
[ STR | SBC | SSS ]
Sizzix – Accessory – Magnetic…
[ SBC ]
Simon Says Stamp SMALL TEFLON BONE…
[ SSS ]
Ranger Ink – Inkssentials – Clear…
[ SBC | SSS ]
EK Success POWDER TOOL Applicator…
[ SSS ]
Embossing Powder Prep Bag…
[ STR | SSS ]
NEW 2020 Wagner Precision Heat Tool…
[ SSS ]
EK Success HONEY BEE Non-Stick…
[ SSS ]
Tonic Studios Tim Holtz 8.5 Inch…
[ SBC | SSS ]
Tonic 12 INCH WIDE BASE GUILLOTINE…
[ SSS ]
Lawn Fawn – Stamp Shammy
[ SBC | SSS ]
Sizzix Big Shot Sticky Grid 5/Pkg,…
[ STR | SBC | SSS ]
Tonic Studios – Tim Holtz – Travel…
[ SBC | SSS ]
Mini MISTI – Most Incredible Stamp…
[ SBC | SSS ]
MISTI Stamping Tool – The Most…
[ SBC | SSS ]
Simon Says Accessories MISTI GRID…
[ SSS ]
Scor-Pal – Scor-Pal Eighths Measuring…
[ SBC ]
Scor-Pal MINI SCOR-BUDDY Scoring…
[ SSS ]
Scotch ATG – Adhesive Applicator Gun…
[ SBC | SSS ]
Scotch Adhesive Refill for Pink ATG…
[ SBC ]
Tombow Mono Multi Liquid Glue
[ STR | SBC | SSS | BLIC ]
adhesive pick-up square
[ STR | SBC ]
Scrapbook Adhesives 3D 217 WHITE FOAM…
[ SSS | JGG ]
Scrapbook Adhesives THIN 3D 217 WHITE…
[ SSS ]
Avery Elle Stamp & Die Storage…
[ STR | SSS ]
Tonic EASY CLEAN MAT 1514E
[ SSS ]

cards · Christmas · Die Piecing · Simon Says Stamp

Simon Says Stamp Diecember Shimmer Oval Die Card…

Hi everyone!  I hope you’re starting to receive some handmade cards!  I hope to get mine mailed out this weekend!

Today’s post is about this new die from Simon Says Stamp, Shimmer Oval.  This was so easy to make!

I die cut in 110# Neenah Classic Crest Solar White cardstock.  I do shim but I use copy paper, not the metal shim.  I just add a folded piece of copy paper on top of my top cutting plate and cut with the die blades up.  This one I used two folded pieces of copy paper, so 4 layers.

Then the oval white panel and the gold glitter panel I die cut with Memory Box Rectangle Basics dies.

I heat embossed the sentiment from SSS Inside Christmas Greetings clear stamp set on a piece of vellum with Ranger super fine detail gold embossing powder.

I die cut two of the mistletoe dies from the SSS Christmas Foliage die from Diecember Release also.  I added Ranger Gold glitter stickles to the berries.  I debated adding them but I gave myself a talking to.  I’m always wanting to leave things plain, so I had to ask myself why did I buy gold glitter stickles then?!  So I put them on the berries. ha!

I glued the gold glitter cardstock panel to the white A2 cardbase first.  Then I adhered the white oval panel with strips of foam mounting tape.  The white floral oval is glued flat on the inside of the popped up oval panel.

I prepared the vellum panel by creasing the folds on each end before I stuck the white panel down, making it easier to adhere after I placed the inside floral oval.

Then I just glued the ends of the mistletoe cuts.


I still have to stamp something on the inside.  In fact most of my cards that I need to get mailed still need stamped on the inside.  I am always sorry I don’t do that when I make the card. moan.  Oh well, I’ll set up the platforms and get them stamped!  hehe

Thanks for stopping by!  Happy stamping, shopping, whatever phase you’re in!  Relaxing would be nice! haha

Shopping links below…

Simon Says Stamp SHIMMER OVAL Wafer…
[ SSS ]
Simon Says Stamp CHRISTMAS FOLIAGE…
[ SSS ]
Simon Says Clear Stamps INSIDE…
[ SSS ]
Ranger Embossing Powder SUPER FINE…
[ SSS ]
WOW DUAL SPEED HEAT TOOL WZHT-USA
[ SSS | SSS ]
Tombow MONO MULTI Liquid Glue Two…
[ SSS ]

cards · Christmas · Die Piecing · Memory Box · Poppystamps · Winter

Memory Box Hanging Lantern and Holly Double Arch Card…

Hi everyone!  and on the inside it says “Celebrate the Season”  from the same stamp set by poppystamps, Art Deco Celebrate Christmas.  I hope you’ve been doing just that!

We have been here!  Our family is having so much fun this Christmas.  It was so nice last week I took grandkids shopping every afternoon except for one and that one I went with one of our daughters.  Then Monday we braved the bitter wind and cold temps to drive 25 miles to Hobby Lobby for the last 4.  We have a wonderful lot of grands!  😀

Now, I’m working on my spreadsheet of who gets what for presents and stocking stuffers. :O lol

I wanted to show you this card I made for the stamp club gals I meet with once a month here.

I used the Memory Box Hanging Lantern die from last year… the new Holly Double Arch die from this year and the smallest snowflake from the poppystamps 2016 Ava Snowflakes set.

Some Distress Oxide inking on the circle…three bluish ones… spatter with white acrylic paint of white liquid watercolor.

Here’s 3 pictures of how I did the Holly Double Arches…

I die cut in red and green…

Then I clipped off the green berries…

I glued the green cut on top of the red cut being sure to line everything up…

and there you have it!  So easy when you’re making multiples!

I used mounting tape under the circle and the top and bottom of the lantern but everything else is glued flat.

So happy to share a card with you again… I’m sure I’ll be back with more… so much I still want to do! eek! Not sure it’s humanly possible! ha!

Thank you for stopping by!

Some shopping info!

There’s NEW Memory Box products at Starlit Studio!!! Always on special! Click STR link below

Simon Says Stamp is running a special with 15% off Memory Box right now too… just click a SSS link below if you want to look! Use code MBX554

Memory Box HANGING LANTERN FRAME…
[ SSS ]
Memory Box – 94304 Harvest Double…
[ STR ]
Art Deco Celebrate Christmas clear…
[ PPP ]
Welcome to Poppystamps –
[ PPP ]
Sizzix – Big Shot Accessory – Tool…
[ SBC | SBC ]
Sizzix – Big Shot Machine – White and…
[ SBC | SZZ | SSS | SBC ]