cards · Distress Ink coloring · Magnolia · Marianne Design · Perfect Layers Tools · rubber stamps · Tilda's Town · Winter

Magnolia, Tilda’s Town… Winter Fun!

PamSparksInTheSnowTildas700

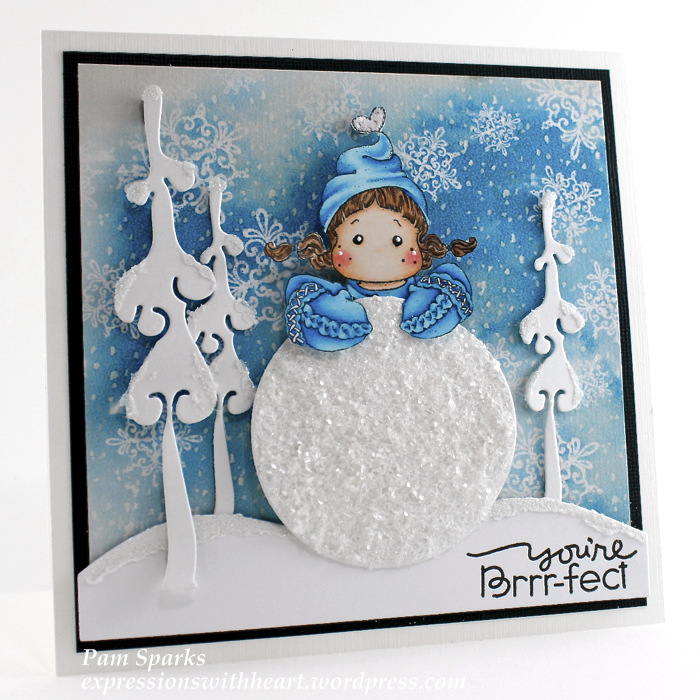
Living in Iowa.. you know how to get ‘All Bundled Up’ to go outside for any amount of time.  That’s the theme this week at Tilda’s Town Challenges!

Click over to Tilda’s Town ChallengesHERE and enjoy the inspiration from the Design Team and enter the weekly challenge!  We’d love to have you!

Each week there is a random winner, chosen by Inlinkz, for a $10 gift certificate to Tilda’s Town.com!

logo1

Tilda’s Town is a most magical shop specializing in Magnolia Stamps. Over 1,100 stamps in stock at all times. Tilda’s Town offers FREE worldwide shipping on every order, every day. You can also save up to an additional 20% on your purchase by using one of the famous coupon codes. Shop at Tilda’s Town.com and live the magic.

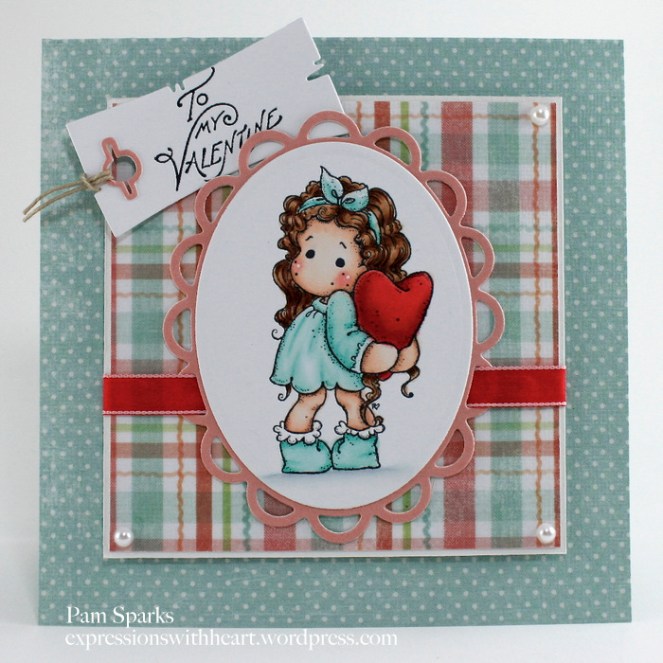
I used the new In the Snow Heart Tilda and In the Snow Scarf Tilda.  I just love how they look like they are having a snowball fight!  It’s been too cold here to even think of being outside…now it’s the other extreme! lol  Although if a person hurried, they could build a snowman quick before it melted.

PamSparksInTheSnowTildasClose700

I colored these cuties with Distress Ink markers on Canson Cold Press watercolor paper.  I loved Jay Jay’s card using these two…love her watercoloring with pencils! I had to have them then!  Stamps are great Christmas presents! lol

Here’s the Distress marker colors I used…

Face – tattered rose/worn lipstick on the cheeks
snowballs/sky – tumbled glass
red is all Fired Brick
Green is Peeled Paint
In the Snow Scarf Tilda – Brown is Vintage Photo (hat and pants)  Shoes – Walnut Stain, Hair – Mustard and Vintage Photo
In the Snow Heart Tilda – pants – Faded Jeans,  Shoes – Vintage Photo,  Hair – Antique Linen and Walnut Stain
Ground – Pumice Stone

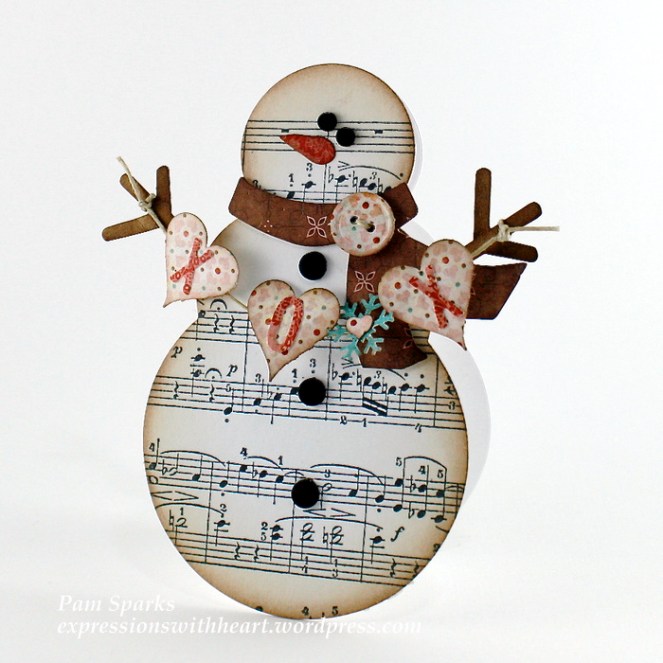
The tree is a Marianne Designs die… the snowflakes are a pack of embellishments I grabbed while out shopping one day…kinda crazy purchase when you have so many punches and dies already! ugh.  They came in handy today when I needed something quick!

I used the Perfect Layers Tools to mat the image and the red layer.  They are so awesome!  Link on the right in the sidebar.

I’m linking to the Midweek Magnolia Challenge – New Stash

Thanks for stopping by today!  It was fun to do some coloring.  I’ll be back soon with a Printworks snowman and more NEW Memory Box!

Birthday · cards · CAS · copics · LOVE · Memory Box · rubber stamps · Valentine

Memory Box Blog Blitz Day Two…

PamSparksYorkshireLoveTagsClose
I have a lot to show you today!  I got started on my cards for the Memory Box Blog and before I knew it, I had four cards to share today!  Good thing I needed to stop and fix supper or this really would’ve been a long post!

It’s Day Two of the Memory Box 2014 Creative Elegance Collection Blog Blitz! Scroll through the posts all week…comment on all the posts for chances to win the NEW dies and stencils! 

Happy Day!  My tree card won Top Three at Addicted to CAS Challenge blog!  Thank you ladies!

Addicted to CAS top 3 badge


PamSparksYorkshireLoveFront

Here, I used the NEW Yorkshire Tree, Yorkshire Tree background and Library Alphabet Tags dies.  The letters ‘Y’ and ‘U’ are from the tag set also and the hearts are from the Cherish Border die. I colored the trunk of the tree with a copic marker.  I just love the pop of red in the green!

Next…

PamSparksPianoBorderClose

Here I used the NEW Piano Border and Perky Poppy dies.  The sentiment is Just a Note Combo. I added the detail on the leaves with a copic marker.

PamSparksPianoBorderFront

LOVE this keyboard and how can you not love this Perky Poppy!  I even love the name!

Next…

PamSparksPartyMusicHeart625

Here I used the NEW Party Music, Musical Motifs, Heart of Hearts, Sweet Heart, Queen of Hearts and Alphabet Soup dies. (I just used the heart cut from the center of the Queen of Hearts die)  I cut the Cupid Heart out of red card-stock and it is glued on the inside of the card behind the Heart of Hearts that is cut directly in the white notecard.

Next…

PamSparksHappyBirthdayButterflySide

Here I used the NEW Grand Happy Birthday, Norwich Corner and Lunette Butterfly dies.  I cut the corner die twice, left one complete and cut one up to use here and there.

PamSparksHappyBirthdayButterflyFront
I LOVE these Grand word dies… there is also a New Grand Thank You! yep…tons of AWESOME NEW product!  The dies cut wonderfully!

Believe it or not…that was my last card for today! lol  Now to make some more with the NEW stencils.

Linking to the Addicted to CAS challenge blog…Die Cuts
Keep it Simple …Anything Goes
Shopping Our Stash …Something New
Papertake Weekly …Anything Goes

Thanks for stopping by and letting me share with you!  Makes my heart happy!

Supplies I used… 

cards · Memory Box · Spring

Memory Box… NEW, NEW, NEW!

PamSparksHappyBirthdayPeonyFront

Oh happy day!  Time for the NEW Memory Box ‘Creative Elegance’ 2014 Papercrafters Collection release!  So if we can’t do Christmas… let’s ‘think Spring’! lol  Memory Box Blog Blitz starts next week!

Lots of flowers in this collection…you’re going to love it!

I used the Delightful Peony Outline die and Delightful Peony Background die.  I need to make a video of what I did.  I’m afraid my ‘word’ explanation would just be to confusing!  It’s easy though and fun!

PamSparksHappyBirthdayPeonyClose

See the New MESH stencil behind the Peony?!  Love it!  I taped it down with Washi tape and used three Distress inks to color it in.  First Wild Honey, then Worn Lipstick randomly and then Peeled Paint around the edges.  Warning….too much Peeled Paint on the pink, well, it kinda makes khaki!   We like khaki…ok! lol

Don’t you love the new Eva Stem though… so delicate and feminine!

PamSparksHappyBirthdayPeonyWordsClose

And this Happy Birthday Extravaganza die is so cool!  These dies cut like a dream!  woohoo!

Thanks for stopping by today… so fun to share…can’t wait to see what you make with the new dies too! TFL!

Supplies I used…Blue Moon links below (Starlitstudio coming soon!)


Birthday · cards · copics · Distress Ink coloring · Fall · LOVE · Magnolia · Memory Box · Perfect Layers Tools · rubber stamps · Spring · Step card · Valentine

Some of My Favorite Creations for 2013…

Debby has a linky party for your Favorite Five creations for 2013 going on HERE…  I tried to keep it to five but it didn’t work.  I stopped at 12! lol

Catered Crop has a remembering 2013 linky party HERE

AND… I started a Facebook page for my blog… click over to like it if you have time! 

Welcome Winter ATC’s

_MG_6389-001
Tilda with Mittens

Tilda with Mittens 700


Love Snowman

_MG_6176


Tilda with Heart Arrows

_MG_6439-001


Tilda Hiding Heart

_MG_6429-001


Meadow Bird with a Spring Song

_MG_6907
Jasper Leaves

pam.jasper.front.bird.hello


Mannequin in the Rain

_MG_7695-001
Tilda with Lace Flag

P
Marvelous Bridge Step card

PamSparksBridge700


Just a Note

_MG_8223


Chess Tilda

PamSparksTildadesk

Happy New Year to you friends, kindred stampers and papercrafters!  TFL!  Looking forward to more in 2014!  Be watching…Memory Box new designs coming soon!  Blog Blitz starts the 6th!

cards · Christmas · Memory Box · Winter

Memory Box thanks…

PamSparksGardeniaFront
Hi everyone!  Hope you had a wonderful and Merry Christmas!  Tim and I had a delightful Christmas Eve day with family. Here’s a ‘thanks’ card idea using a couple Memory Box dies I haven’t used yet!  I’ve been dreaming about the DeLacie Border die and decided early this a.m. that I’d do a white on white background with it.  Similar to a pattern paper or embossed card-stock look.

PamSparksGardeniaClose
Here’s the dies I used and the steps to creating this card…

Cut the DeLacie Border die three times from a Memory Box white notecard and glue them to a Memory Box A-2 white Notecard for the background.

Cut the Gorgeous Gardenia Background die from a Memory Box white notecard.

Cut the Gorgeous Gardenia Outline die from glitter silver card-stock and a Memory Box Dill notecard.

Glue the silver Gardenia outline to the white Gardenia background and piece in the Gardnia leaves from the Dill.

Cut the Winterberry Sprig die three times out of glitter silver card-stock.

Cut the thanks die from glitter silver card-stock.

Cut the Pinecone Corner die from Memory Box Dill and Vanilla Bean card-stocks.  Trim and layer to fit under the Gardenia focal point.

I mounted the Gorgeous Gardenia to the card with mounting squares.  Then arranged the Pinecone  Corner cuts behind, gluing the ends flat.  Then I added in the Winterberry Sprig cuts, gluing the ends flat also.

I added silver domes in three sizes to the berries on the Winterberry Spring cuts.

Last, I glued the thanks cut on.  This is all die cuts, no stamping, no embossing.

Finished card is A-2 size!

Thanks for looking today!  ‘preciate it and happy after Christmas to you!

Links to the supplies I used…