All Occasion · Birthday · cards · CAS · Distress Ink coloring · Flowers · Hot Foiling · Spellbinders dies · Stencils · Valentine

Spellbinders NEW Stencil Club!

Hi everyone! Here we are after Christmas and moving right on to the New Year faster that the speed of light!

Have you heard about the NEW Spellbinder stencil of the month club?  I’m sure you have cuz I’m late getting my card posted for December and it’s already closed!  Usually you can order them a month later though.

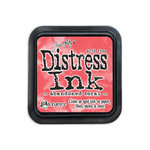
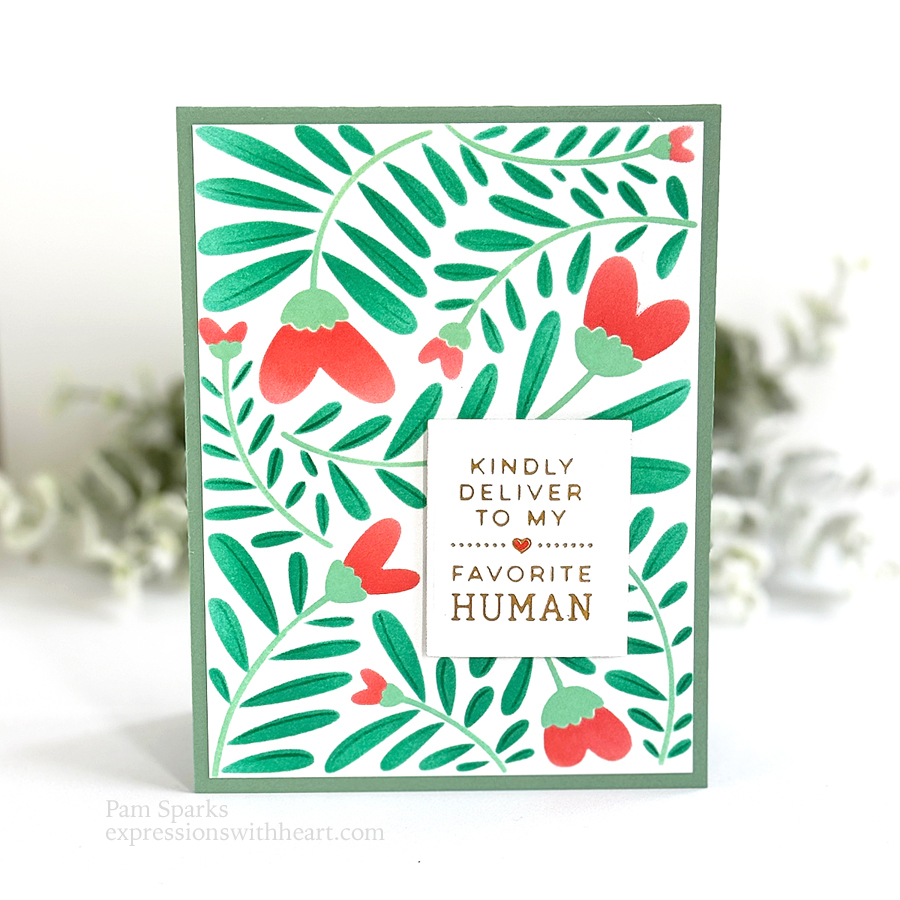
This set has four stencils.  I used Distress inks and the mini circle Tim Holtz blending tools.

I used Cracked Pistachio, Lucky Clover and Pine Needles for the greenery.  For the heart flowers I put down Kitsch Flamingo first, then some Worn Lipstick and Abandoned Coral! lol  You sure wouldn’t need to use all the pinks/reds! lol

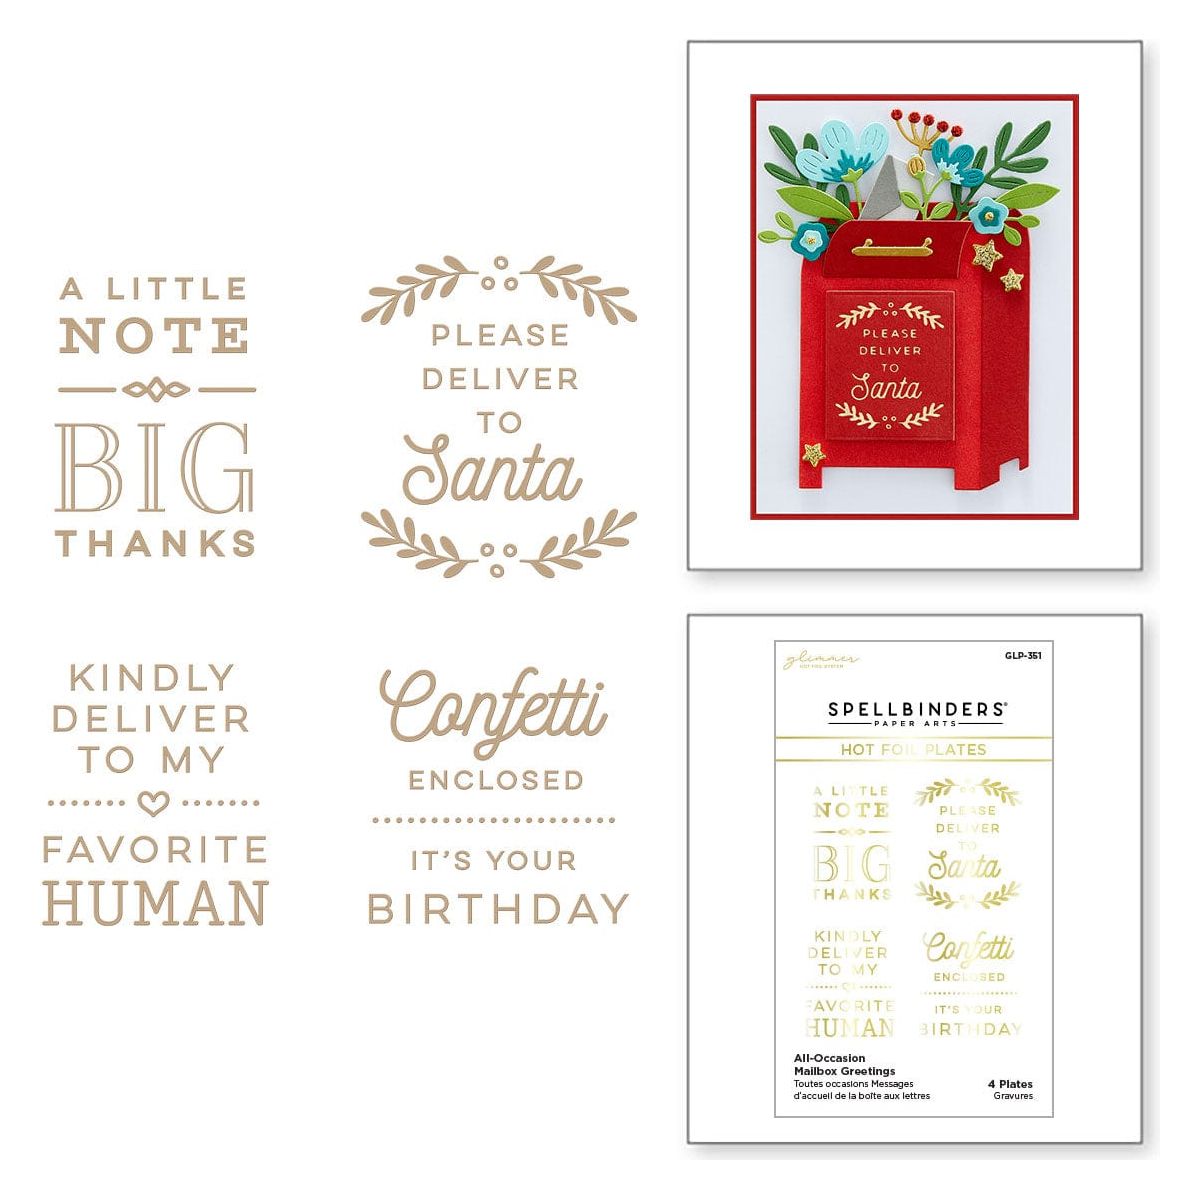
I hated to cover up all the stenciling so I went with a fun hot foiled sentiment from the Spellbinder All Occasion Mailbox Greetings Hot Foil set.

I really like how clean and simple it turned out plus it was fast to make!

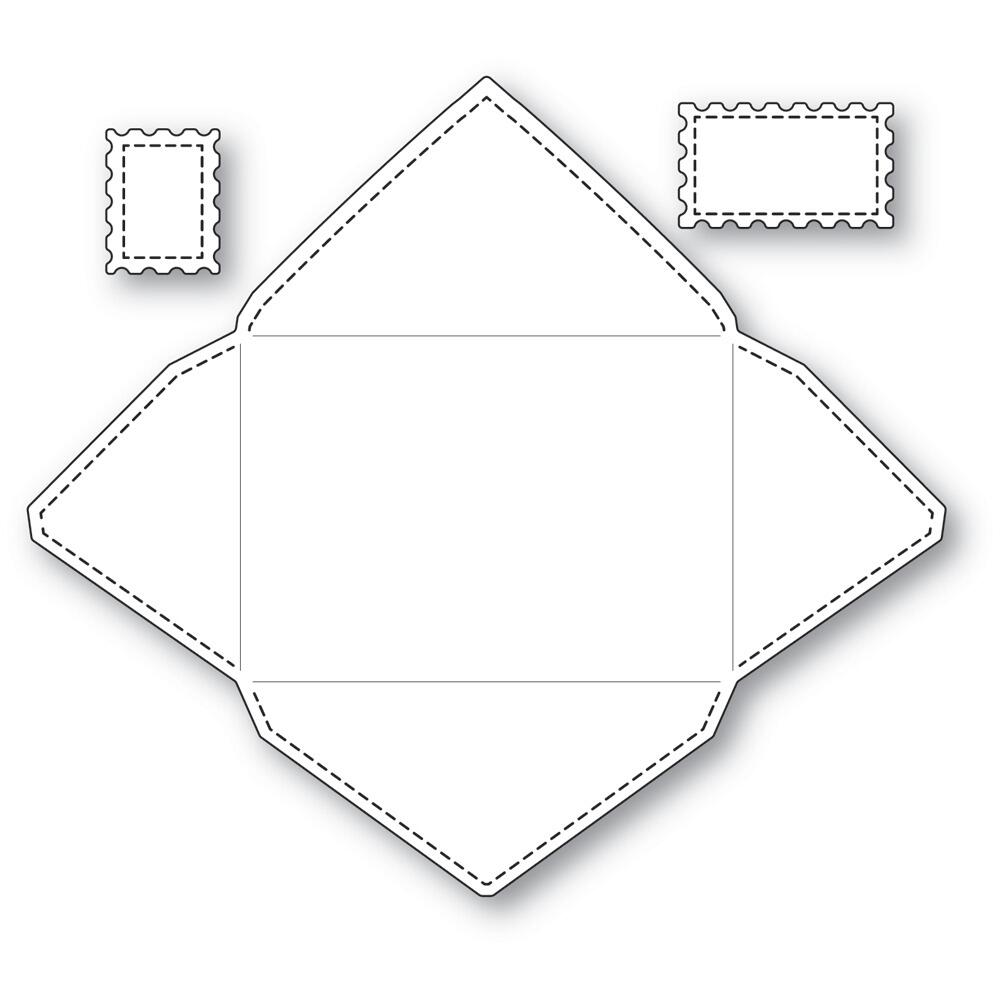
It’s an A2 size card and completely mailable! I noticed the post office was running cards through the machines even if they had ‘hand cancel’ and extra postage on them.  That is really frustrating.  I even received cards that were completely rigid that had been machined. So cardmakers just put a stamp on it and call it good!  I even received a pkg that was a stamp set and a die, weighed 1.8 ounces and only had one forever stamp on it and it still came intact and no extra postage envelope wanting me to pay extra!  All this technology isn’t speeding things up or accurate!  HOHOHO!

Thank you so much for stopping by today!  I went MIA because I needed to get some house stuff done and be ready with gifts and 27 ppl on Christmas Eve day!  WOW!  Did we have fun!  Still smiling about it.  I thank God for our family every day!  I hope you had a blessed Christmas too. Talk to you again soon!

Here’s what I used to make this card…

Stencil of the Month Membership -…
[ SPL ]
All-Occasion Mailbox Greetings…
[ SPL | SBC | SSS ]
Ranger Ink – Tim Holtz – Distress Ink…
[ SBC | SSS ]
Ranger Ink – Tim Holtz Distress Ink…
[ SBC | SSS ]
Ranger Ink – Tim Holtz – Distress Ink…
[ SBC | SSS ]
Ranger Ink – Tim Holtz – Distress Ink…
[ SBC | SSS ]
Ranger Ink – Tim Holtz – Distress Ink…
[ SBC | SSS ]
Tim Holtz Distress Ink Pad Pine…
[ SSS ]
Neenah Cardstock Classic Crest Ultra…
[ SSS ]
Glimmer Hot Foil System | Spell…
[ SPL | SSS ]
Glimmer Hot Foil Roll – Gold -…
[ SPL | SBC ]
Hammermill WHITE 100 LB SMOOTH…
[ SSS ]
TE Premium Cardstock – Spearmint -…
[ TE ]
Tombow Mono Multi Liquid Glue
[ STR | SSS | BLIC | SBC ]
Scrapbook Adhesives Crafty Foam Tape…
[ STR ]


All Occasion · Birthday · cards · Die Piecing · Fall · Memory Box · Poppystamps · Thinking of You

poppystamps Whittle Napping Cat Hello Fall Card…

Hello with a cat going postal today!  I love the Memory Box double sided plaid papers so I started there with this card die cutting the poppystamps Large Stitched Envelope and Postage.  Kinda unusual colors for Fall  but I tried! lol

This piece of plaid is from the Jolly Christmas 6×6 pad.

I die cut the Leafy Vine Corner die by poppystamps from kraft and light green cardstock.  I just clipped the kraft apart with a scissors at the corner for the stems coming out of the envelope and cut the leaves off the light green die cut and glued them to the kraft cardstock stems.

The Whittle Napping Cat is die cut in kraft and inked with Gathered Twigs Distress Ink and the mini ink blending tool. I glued a little square of black cardstock behind the nose.

It’s a top folding A2 size cardbase using TE cardstock.  A rectangle panel glued on, kraft color cord tied around and knotted.

I mounted the envelope with the thin foam mounting tape I love so well.  I use the scissors linked below to cut it.  It’s sticky but so great for adhering and mailing!

I die cut the two postage stamps from the TE cardstock also.  Scribble a little black on them…

That’s pretty much it!  I can see this envelope used in so many ways!  I almost started over but thought, I’ll use it again later for another occasion!

Oh… I used the outline part of the Hello Moonlight Script die set for the sentiment.  Die cut in gold foil cardstock.  Love that stuff!

Thanks for coming over to see what I’ve been up to!  Well, I didn’t post that I rearranged my kitchen counter this morning! lol  Do you do this too when you get a new appliance?  My thoughts are what can I get rid of! haha  Big old house but small kitchen, which I’m glad it’s small until all the family is home for Christmas! lol  We manage!

talk to you again soon!  Lots of NEW coming!  Suspense!  It’s good!!!!

Dies and supplies I used to make this card…

Poppystamps – 2530 Large Stitched…
[ STR | SSS ]
Poppystamps – 2544 Whittle Napping…
[ STR | SSS ]
Poppystamps – 2511 Leafy Vine Corner…
[ STR | SSS ]
Poppystamps – 2509 Hello Moonlight…
[ STR | SSS ]
Memory Box – PP1019 Jolly Christmas…
[ STR | SSS ]
Bazzill FOIL Cardstock – matte and shiny
[ STR ]
TE Premium Cardstock – Spearmint -…
[ TE ]
TE Premium Cardstock – Salt Water…
[ TE ]
TE Premium Cardstock – Toffee -…
[ TE ]
Scrapbook Adhesives Crafty Foam Tape…
[ STR ]
Fiskars Non-Stick Titanium Softgrip…
[ STR ]
Tombow Mono Multi Liquid Glue
[ STR | SSS | SBC ]
Scor-Pal MINI SCOR-BUDDY Scoring…
[ SSS | SBC ]

https://linkdeli.com/widget.js?id=f5e8378456858c916708

Birthday · cards · Masking · One Layer Card · Shopping · Simon Says Stamp · Slimline

Simon Says Stamp Stamptember Blog Party! Cue the Confetti!

Happy Day!  It’s that time of the year when Simon Says Stamp has a BIG release, STAMPTEMBER!

I’m participating in the blog party that starts on the Simon Says Stamp blog, HERE.

I received the stamp set  ‘Cue the Confetti‘!  Super fun to stamp a one layer card and use a lot of the stamps in the set!

I stamped in black, masked using the reverse of the positive image to fill in the balloons with ink blending.  I used the positive mask of the balloon to stamp the confetti in the background.

Very fun, festive, cute sentiments in this set!  I found them very usable and I love the Big Happy Birthday for the inside! I also stamped it in color on the envelope.

I can also see these balloons and even some of the sentiments used for other occasions like retirement.  It’s all about you today.  There’s no such thing as too much happy! YAY!  And even Make it Epic!

It was fun to do stamping!  I do so much die cutting and gluing.

I used the MISTI to stamp the sentiments and a clear block to stamp the balloons, confetti and sparkles.

Thank you so much for stopping by and I have a banner to share with your for a great giveaway when you order today or tomorrow from Simon Says Stamp.

I hope you enjoyed my celebratory card!

It’s Slim size and fits in a business size envelope.

Talk to you again soon and enjoy the Labor Day weekend!

Products I used to make this card…links to Simon Says Stamp.

Simon Says Clear Stamps Cue The…
[ SSS ]
Simon Says Stamp Cue The Confetti…
[ SSS ]
Simon Says Stamp Stencils All The…
[ SSS ]
Simon Says Stamp Stencils All The…
[ SSS ]
Ink Pads for Crafting & Stamping –…
[ SSS ]
Ranger Archival Ink Pad JET BLACK…
[ SSS ]
MISTI PRECISION STAMPER VERSION 2.0…
[ SSS ]
Simon Says Stamp Blending Brush SET…
[ SSS ]
Simon Says Stamp Blending Brush SET…
[ SSS ]
Simon Says Stamp Envelopes Large…
[ SSS ]
Neenah Cardstock Classic Crest Ultra…
[ SSS ]
Scrapbook Adhesives THIN 3D 217 WHITE…
[ SSS ]
All Occasion · Birthday · cards · CAS · Die Piecing · Flowers · Spellbinders dies · Spring · Summer · Thinking of You

Spellbinders Breezy Swing Small Die of the Month Club for August…

Hi everyone!  This is a change from the festive cards I’ve been posting.  I don’t normally do pastels so this is a real change for me! Such a dainty, lovely lady on a fine Summer day wishing you Hello!

The sentiment is a fun change from the ordinary also.  It comes separate so you can use it or not use it!

One of our granddaughters loves to swing…this might just be going to her.

I made it an A7 size so it gives the appearance of being clean and simple.

Decide what papers you want to use, die cut, glue and it’s ready to mail!  One postage stamp will do it! YAY!

I used Lawn Fawns Flower Market 6×6 paper pad for her dress and hat band.

I used the branch from the Sweet Birds on a Branch die set. Everything else comes in the set.

Hope she makes you smile!  Love the extra little details.  Spellbinders is really coming up with some amazing sets!

Learn about the Clubs of the month HERE and this particular Stamp and Die of the Month HERE.  Sign up window is from the 6th of the month to the 27th of the month!  Three more days to get in on this month!

Thank you so much for stopping by and I have some more Christmas to share real soon…as soon as I get pictures.

Here’s what I used to make this card…

Small Die of the Month Membership –…
[ SPL ]
Sweet Birds on a Branch Etched Dies…
[ SPL | SBC | SSS ]
Memory Box Fairy Drops • Jewels •…
[ STR | SSS ]
Scrapbook Adhesives Crafty Foam Tape…
[ STR ]
Tombow Mono Multi Liquid Glue
[ STR | SSS | SBC ]
Zig Glue
[ STR | SSS | SBC ]

All Occasion · Birthday · cards · Christmas · Die Piecing · Embossing Folders · Flowers · Spellbinders dies · Thinking of You

Spellbinders Large Die of the Month and 3D Embossing Folder of the Month Card…

Hi everyone! Something truly unusual today for this month’s Large Die of the Month Club from Spellbinders!  I was surprised to see a Pomegranate but it turned out so fun!

Growing up, my dad was the grocery shopper for my mom, she didn’t drive.  I remember him bringing home pomegranates and we’d sit around the table digging for the treasured fruit!  Fun memories.

Spellbinders has a great club program!  Join for a great price and cancel anytime.  Simple details HERE. (a short video with the details too)

I took a picture of the pomegranates before I glued them together so you could see what I cut out of what!

I used Lumberjack Plaid Distress Ink to color the red layer of the pomegranate insides.

See the circles at the ends of the branches?  That’s where you glue on the flowers and buds!  So handy to have a good area to put glue on!

Die cutting and gluing….

then I decided to use the 3D Embossing Folder of the Month – Stylized Floral.  So pretty!  I ran it through the die cutting machine, no added techniques!

I did some inking for shading here and there… lumberjack red and gathered twigs distress inks.

THANKS is the sentiment die that comes with the set!

I made an A2 size card and it’s nice and snail mail friendly!

Thank you for stopping by today!  Take a look at the club offerings for the month… I still have one more to post next week!

Quick shopping links to the products I used to make this card…

Large Die of the Month Membership –…
[ SPL ]
3D Embossing Folder of the Month…
[ SPL ]
New & Improved Platinum SIX Machine…
[ SPL ]
Cardstock, Paper, & Envelopes |…
[ SPL ]
Scrapbook Adhesives Crafty Foam Tape…
[ STR ]
Tombow Mono Multi Liquid Glue
[ STR | SBC | SSS ]