Christmas · Die Piecing · Ornament · Spellbinders dies · Winter

Spellbinders Dancin’ Christmas Cute…

Hi everyone!  This cutie Dancin’ Figgy Pudding made up so cute as an ornament or it could be a gift tag too!  The legs swing on their own and it’s so cute!  I love it so much!

It’s real straight forward.  Die cut the pieces, glue and boom, you’re done.  The pieces are easy sizes to work with.  Even the berries are finger manageable!

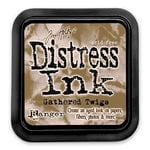
I did a little Gathered Twigs Distress inking with the foam mini blending tool and a little white pen here and there.

It is nice to have a pick up tool for the eyes and cheeks.

I’ve never eaten figgy pudding but it’s something I should look up!  I’m even more curious now!

I made up the Dancin’ Penguin as an ornament too!  One of our grandsons loves penguins so I made one for him and one for me! lol

He’s actually a Skating  penguin!  So cute and his skates move too!  Not quite as easily as the legs on the pudding though.

Below is the scarf before I thought to add white with a Posca pen.

Super cute and again so easy to put together.  I finished the back so if it twirls on the tree, it’ll still look cute!

I still have the Gingerbread and Mouse to make.  The cuteness factor from Spellbinders makes me happy!

Thank you for clicking over to see these characters!  I hope they make you smile too!

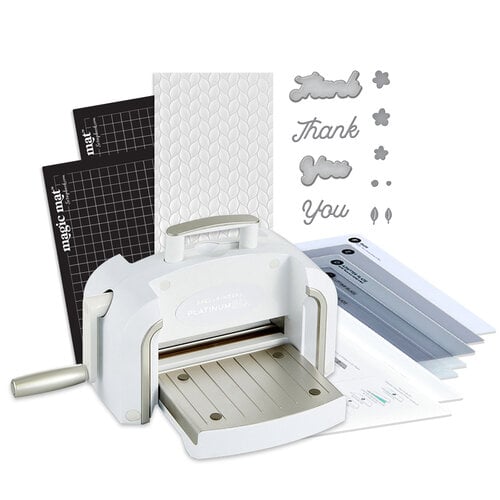
Here’s what I used to make these cute ornaments/tags…

Dancin’ Figgy Pudding Etched Dies…
[ SPL | SSS | SBC ]
Dancin’ Penguin Etched Dies from the…
[ SPL | SSS | SBC ]
Tombow Mono Multi Liquid Glue
[ STR | SSS | SBC ]
Scrapbook Adhesives Crafty Foam Tape…
[ STR ]
Fiskars Non-Stick Titanium Softgrip…
[ STR ]
My Favorite Things SPIN AND SLIDE…
[ SSS ]

cards · Christmas · Die Piecing · Distress Ink coloring · Flowers · Hot Foiling · Memory Box · Oxide Inks · Winter

Memory Box Christmas 2023 Release – Glorious Poinsettia Card

Hi everyone! I’m getting a poinsettia card posted before you can buy them in the stores!  I always look forward to them showing up for sale!  The seas of poinsettias when you walk in the door!
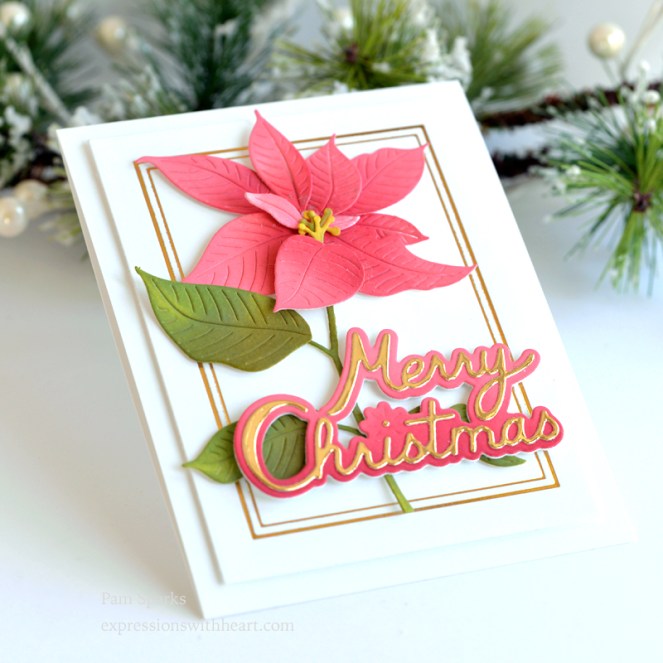
I went with pink for this BRAND NEW Glorious Poinsettia!  I used Distress Oxide Inks, Worn Lipstick, Lumberjack Plaid, Peeled Paint and Forest Moss.  I absolutely love coloring white cardstock with inks and blending tools or brushes.  I die cut and used Neenah Classic Crest Solar White cardstock this time.

I used Worn Lipstick on the tips of the leaves and Lumberjack Plaid from the centers out.

Oh, I used Fossilized Amber for the centers.  I got a little green on the center that’s connected to the stem but I liked it that way!

I used the New Merry Christmas Charmed Script Sentiment die.  I used it this way but you’ll notice on Dave’s card HERE page 43 in the Memory Box idea book that you can use it another way also!  I love having more than one option!

I used the Rectangle Double Border Hot Foil Plate and A2 Rectangle Frames Die set to make the panel the poinsettia is mounted on.

I used my fave thin mounting tape, linked below to stick the panel to the cardbase.

Linking to some challenges…

The Flower Challenge #84 – Use a Die and flower/s

Triple B Challenge – Birds, Butterflies and Blooms

The Sisterhood of Crafters – Die Cuts

Addicted To Stamps and More #454 – Any Occasion

And so the festive cards begin!  I’m excited and I hope you are too!

Talk to you again soon!

Check out the NEW Memory Box Christmas Idea Book here and I want to know what’s your favorite!

Here’s links to what I used to make this Glorious Poinsettia card…

Memory Box – 94734 Glorious…
[ STR | SSS ]
Memory Box – 94749 Merry Christmas…
[ STR | SSS ]
Memory Box – MBF006 Rectangle Double…
[ STR | SSS ]
Memory Box – 94672 A2 Rectangle…
[ STR | SSS ]
Glimmer Hot Foil Roll – Gold -…
[ SPL | SSS | SBC ]
Glimmer Hot Foil System Platinum |…
[ SPL ]
New & Improved Platinum SIX Machine…
[ SPL ]
Neenah Cardstock Classic Crest Ultra…
[ SSS ]
Bazzill FOIL Cardstock – matte and shiny
[ STR ]
Simon Says Stamp Blending Brush SET…
[ SSS ]
Tim Holtz Distress Oxide Ink Pad WORN…
[ SSS | SBC ]
Tim Holtz Distress Oxide Ink Pad…
[ SSS | SBC ]
Tim Holtz Distress Oxide Ink Pad…
[ SSS | SBC ]
Tim Holtz Distress Oxide Ink Pad…
[ SSS | SBC ]
Tim Holtz Distress Oxide Ink Pad…
[ SSS | SBC ]
Scrapbook Adhesives Crafty Foam Tape…
[ STR ]
Tombow Mono Multi Liquid Glue
[ STR | SSS | SBC ]
Simon Says Stamp SMALL TEFLON BONE…
[ SSS ]


All Occasion · Birthday · cards · Die Piecing · Fall · Memory Box · Poppystamps · Thinking of You

poppystamps Whittle Napping Cat Hello Fall Card…

Hello with a cat going postal today!  I love the Memory Box double sided plaid papers so I started there with this card die cutting the poppystamps Large Stitched Envelope and Postage.  Kinda unusual colors for Fall  but I tried! lol

This piece of plaid is from the Jolly Christmas 6×6 pad.

I die cut the Leafy Vine Corner die by poppystamps from kraft and light green cardstock.  I just clipped the kraft apart with a scissors at the corner for the stems coming out of the envelope and cut the leaves off the light green die cut and glued them to the kraft cardstock stems.

The Whittle Napping Cat is die cut in kraft and inked with Gathered Twigs Distress Ink and the mini ink blending tool. I glued a little square of black cardstock behind the nose.

It’s a top folding A2 size cardbase using TE cardstock.  A rectangle panel glued on, kraft color cord tied around and knotted.

I mounted the envelope with the thin foam mounting tape I love so well.  I use the scissors linked below to cut it.  It’s sticky but so great for adhering and mailing!

I die cut the two postage stamps from the TE cardstock also.  Scribble a little black on them…

That’s pretty much it!  I can see this envelope used in so many ways!  I almost started over but thought, I’ll use it again later for another occasion!

Oh… I used the outline part of the Hello Moonlight Script die set for the sentiment.  Die cut in gold foil cardstock.  Love that stuff!

Thanks for coming over to see what I’ve been up to!  Well, I didn’t post that I rearranged my kitchen counter this morning! lol  Do you do this too when you get a new appliance?  My thoughts are what can I get rid of! haha  Big old house but small kitchen, which I’m glad it’s small until all the family is home for Christmas! lol  We manage!

talk to you again soon!  Lots of NEW coming!  Suspense!  It’s good!!!!

Dies and supplies I used to make this card…

Poppystamps – 2530 Large Stitched…
[ STR | SSS ]
Poppystamps – 2544 Whittle Napping…
[ STR | SSS ]
Poppystamps – 2511 Leafy Vine Corner…
[ STR | SSS ]
Poppystamps – 2509 Hello Moonlight…
[ STR | SSS ]
Memory Box – PP1019 Jolly Christmas…
[ STR | SSS ]
Bazzill FOIL Cardstock – matte and shiny
[ STR ]
TE Premium Cardstock – Spearmint -…
[ TE ]
TE Premium Cardstock – Salt Water…
[ TE ]
TE Premium Cardstock – Toffee -…
[ TE ]
Scrapbook Adhesives Crafty Foam Tape…
[ STR ]
Fiskars Non-Stick Titanium Softgrip…
[ STR ]
Tombow Mono Multi Liquid Glue
[ STR | SSS | SBC ]
Scor-Pal MINI SCOR-BUDDY Scoring…
[ SSS | SBC ]

https://linkdeli.com/widget.js?id=f5e8378456858c916708

cards · Christmas · Die Piecing · Hot Foiling · Spellbinders dies · Winter

Spellbinders Sealed Christmas Sprigs Card…

Hi everyone!  The dies I used on my card today are part of the NEW Spellbinders Sealed For Christmas Release.   I don’t have the wax seals but I was able to use this fun foliage and floral die set anyway and used one of the Make it Merry Sentiment Banner dies. Three banners in the set, Jingle All the Way, Make It Merry and the one I used, ‘Tis the Season.

I foiled the Plaid Tidings Hot Foil Plate on a white panel for the background and edged it with Gathered Twigs Distress ink.

I die cut the twigs a few times and placed them where I liked the arrangement, picked them up with Press n Seal, put mounting foam on the back (the thin stuff I like), turned it over and hovered over my front panel and then stuck it where I liked it!

Added the sentiment, Layered on red cardstock and then teal cardstock.

This is closer to an A7 size card than an A2.  The plaid foiled panel is A2 size.  It will fit in an A7 envelope and mail for one stamp!

I like it a lot!  I love these colors together.  Next time I would make the panel smaller and keep it to an A2 size card.  They’re easier to take pictures of! lol

Half way through September….I know I’m always saying this but I can’t believe it!  We’ll just keep making and hope we’re ready for the holidays, right?!  After all it’s people that are the most important!

I’ll be back with the cutest little ornaments I’m making soon!

Heads up for the Fall Warehouse Sale at Spellbinders…click the logo below to check it out!

A GREAT offer at Simon Says Stamp right now too!  Click on the logo below or the links below to check it out!

Here’s the links for my card today!  Feeling festive with all the new Christmas products!

Sealed Christmas Sprigs Etched Dies…
[ SPL | SBC | SSS ]
Plaid Tidings Background Glimmer Hot…
[ SPL | SBC | SSS ]
Make It Merry Sentiments Etched Dies…
[ SPL | SBC | SSS ]
Scrapbook Adhesives Crafty Foam Tape…
[ STR ]
Tiny Pearl Embellishments – flat…
[ STR ]
Glimmer Hot Foil Roll – Gold -…
[ SPL | SBC ]
Ranger Ink – Tim Holtz – Distress Ink…
[ SBC | SSS ]
Ranger Ink – Tim Holtz – Mini Ink…
[ SBC | SSS ]
Spellbinders – New and Improved…
[ SBC | SPL | SSS ]


All Occasion · cards · copics · Flowers · Memory Box · Simon Says Stamp

Simon Says Stamp and Memory Box for STAMPtember!

It’s reveal time for the Simon Says Stamp and Memory Box Exclusive Collaboration in honor of STAMPtember!

Here’s my card…


Memory Box signature Magnolia images for this exclusive stamp and die set today!

I went with an easy to color method for this stamp set…then an easy to make cardbase too!

Memory Box 6×6 Magnolia Grove and Magnolia Plaid paper pads.  It’s hard to see the design in the base panel but it’s there and so pretty in real life!

I used a narrow strip of Gold Foil cardstock to accent the foiling in the paper.

It’s a mini slimline size, 3 x 6 inches this time.  It’s such a fun size… it feels feminine in my hand. lol

I stamped, cut the images out and colored with Copic Sketch Markers.

Seven sentiments in this set!  I love the font too!

I’m thinking you’ll recognize the Magnolia flowers from the Memory Box Magnolia Dies, Embossing Folders and paper pads release earlier this Summer.  This set is going to coordinate beautifully with them.

This stamp set is a one time offer just for STAMPtember!  So head to SSS and grab it before they sell out!

Shopping links below…Free shipping with the code FRSHP and a $25 order!

Thank you so much for visiting my blog for this special exclusive collaboration!


STAMPtember Exclusive Collaborations…
[ SSS ]
Memory Box STAMPtember Exclusive So…
[ SSS ]
Memory Box STAMPtember Exclusive So…
[ SSS ]
Memento TUXEDO BLACK INK PAD Full…
[ SSS ]
copic sketch markers at Simon Says…
[ SSS ]
Memory Box Magnolia Grove 6×6 Paper…
[ SSS ]
Memory Box Magnolia Plaid 6×6 Paper…
[ SSS ]
Ranger Archival Ink Pad JET BLACK…
[ SSS ]
Simon Says Stamp Envelopes MINI…
[ SSS ]
Tombow MONO MULTI Liquid Glue Two…
[ SSS ]
Scrapbook Adhesives THIN WHITE 3D…
[ SSS ]