cards · Christmas · Hero Arts · punches · rubber stamps · Tim Holtz stamps

A Joyful Christmas…

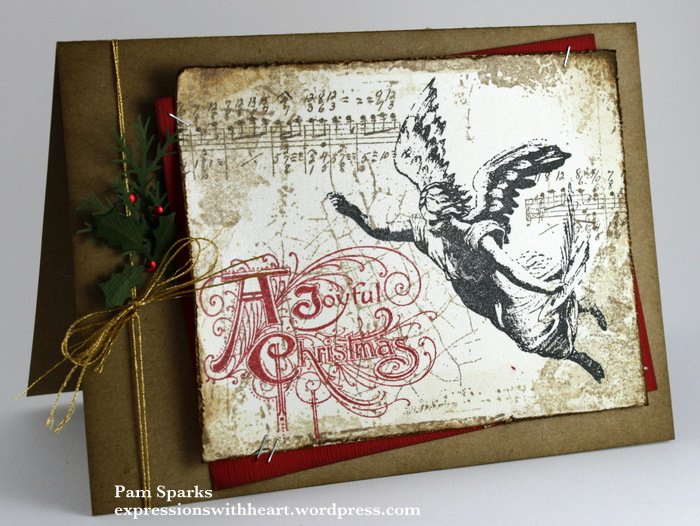
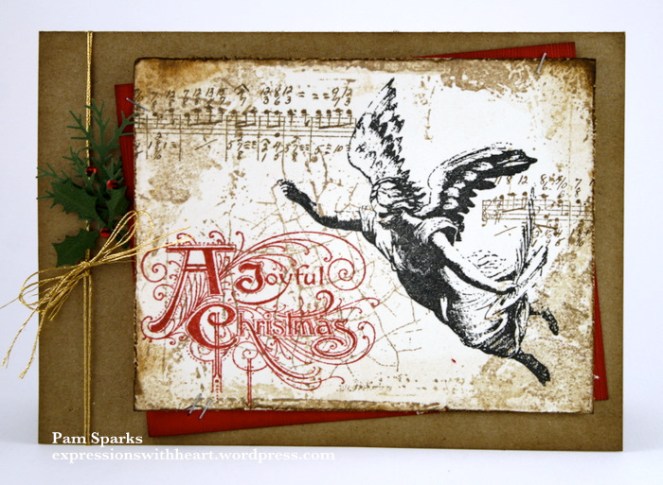
Today is our monthly stamp club and it’s showbox party time!  This is the card I’m taking for everyone to make.  If you receive Archivers email newsletter,  they had a card like this in one awhile back.  I don’t know how they did what they did to achieve their results but this is what I did! lol  I used Hero Arts CG154  Aged Print Background stamp and Tim Holtz A Joyful Christmas Cling stamp set.  I wrote up the instructions for club,  so I’ll copy and paste them here too…

Two Peas in a Bucket does have some of these Tim Holtz stamps wood mounted HERE, if you can’t find the cling set.  Glimmer Mists HERE.  I like glimmer mists a lot!  : )

Over on the Jingle Belles Challenge blog they are wanting to see a card inspired by a Christmas carol!  I’m gonna go with “O Holy Night”.

A Joyful Christmas
1. On the 4 ¼ x 5 ½ piece of natural card-stock stamp the Hero Arts distress background stamp two times.  The first time ink it up with Old Paper distress ink and stamp it with the arrow pointing up ( I added an arrow w/a sharpie marker)…stamp it off on the scrap paper to clean it.  Ink it up a second time with Frayed Burlap distress ink and stamp it with the arrow pointing down, over the top, on the same piece you stamped the first time.  Stamp it off on the scrap paper to clean it for the next gal.
2. Stamp the crackle stamp one time in Frayed Burlap distress ink – look at the sample card for placement.
3. Stamp “A Joyful Christmas” with fired brick distress ink in the bottom left corner… the stamp positioner is ready if you want to use it for positioning.
4. Stamp the angel with Versafine Black ink – look at the sample card for placement.
5. Stamp the music staff with Walnut Stain distress ink – look at the sample card for placement.
6. With the Tim Holtz edge distressing tool… scuff up all four sides of the stamped, natural piece.
7. Using the ink blending tool and Walnut Stain distress ink,  edge all four sides of the natural, stamped card with ink and then go around the piece of red card-stock also.
8. Using the cardboard box… place your stamped piece in it and hold it up to spritz it with 4 blasts of the dazzling diamonds glimmer mist… set it aside to dry a bit.
9. Fold your kraft card base in half on the scored line, crease
10. Ink the edges a little with the ink blending tool and the Walnut Stain distress ink.
11. Punch a rectangle with the handheld punch in the back behind the fold for your gold cord to go through.
12. Using the TH tiny attacher, staple the stamped piece to the red piece – look at the sample card for placement.
13. Adhere your stamped piece to the kraft card.
14.  Add the gold cord,  the greenery, holly and berries.
Merry Creating!
Thanks for stopping by and talk to you later!!!

Two Peas in a Bucket

25% off ALL 6×6 paper pads…

I know…we all have too much paper but…just in case…here’s a deal too good to pass up! 

Two Peas is having this great sale!   Click the photo above and check it out… you know… just in case….you NEED something! hehe

And if you’re punch crazy like me… bottom of this page HERE and the next couple pages… a lot of Martha Stewart punches 25% off!

ATS · ATS Preview

No card…a cold! ugh!

ETA – I don’t know why Feedburner sent out another email for this post but this is from Oct. 5th… I’m fine now… the cold was only a few days! So glad for that! Sorry for the crazy update email…the “FOLLOW” at the top of my blog now is from WordPress instead of Feedburner if you want to subscribe via that way and unsub from Feedburner. WordPress is better! The email comes right away and doesn’t do crazy stuff like this! Thanks! Appreciate you stopping by… I do have new posts since this if you want to click the home tab and see new NEWS! ttul! Pam
***********************************************************************************

I sure wanted to have a card to post today but yesterday I woke up sneezing and by noon…yikes…the drip!  YUK!  I would much rather be stamping and blogging!

YOU must not miss the post on the All That Scraps blog though.  I got it done before I ruined my new computer keyboard!  Aren’t you glad I’m sharing all this?!  sorry!

Today the ATS DT gals are showing Amy Young’s, Sweet November Christmas Fairwees on the ATS blog HERE and on their personal blogs too!  I know they will make you smile and want some at your house!

Now while you’re at the ATS blog,  LINK UP for a chance to win!  There are nine chances with the October release!  (three blog posts)  Good Luck with the drawing and don’t get a cold!

Take care – I see more Cold Care tea in my immediate future! Lovely! haha! NOT funny!

Animal Crackers · ATS · ATS Preview · cards · CC Cutters · CC Designs · Christmas · copics · punches · rubber stamps

Merry Christmas to Ewe….

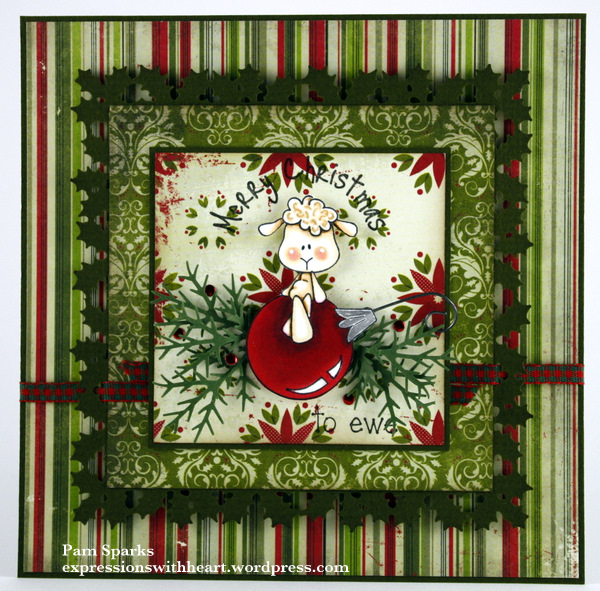
Look at this super cute new lamb in the Animal Crackers line from CC Designs!  Ornament Ewe and the sentiment Merry Christmas to Ewe are in the store now at All That Scraps.com,  HERE.   I stamped her with Memento Tuxedo Black ink on Beckett Expression Super smooth 80# card-stock… cut it out and added a real life ornament hanger…turned out so cute!  The branch is an old McGill punch but I’m thinking Martha Stewart might have one similar now.  I used the Holly Punch around the page set from Martha Stewart.  The pattern paper is that Authentique Christmas 6×6 pad again… ribbon from my “stuff”.  I threaded the ends through the holly border..they weren’t exactly in the same spot of each side so I left a little end showing on each side…although a bow could’ve been cute… I’m not much of a bow person but I’m working on it now and then!

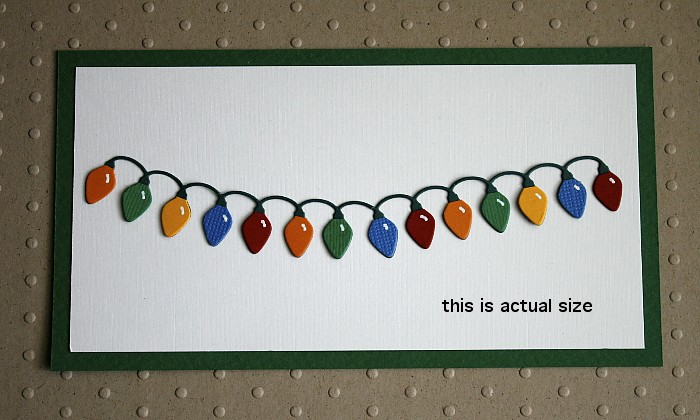
The October Release is so FUN!  Head over to the ATS blog HERE,  to see the other images the ATS DT gals are showing today!  Some awesome/fun creations!  You will LOVE Laugh Lines Christmas car and Reindeer Lights  AND…drum roll…this Fabulous Christmas Bulbs border die! I haven’t used it on a card yet but I did make up this sample to show off the die… it comes straight but I just glued it on curved a bit…

Isn’t it AWESOME?  I love it!!!!  I cut it out of dark green, then red, blue, yellow, bright green and orange.  Just clipped off the bulbs and stuck them onto the dark green I cut…super easy and fast. A little dot of  Tombow Mono Multi glue right on each bulb of the dark green cut is all it takes! *I’ll throw in a tip here…keep your mono multi glue laying down all the time… comes out better!  I even leave it with the lid off while I’m working… keep the glue cleaned off the tip and you’ll love it!*  Added the little light reflection with a white uniball pen.   I LOVE these old fashioned looking Christmas lights… it’s gonna be one of my favorite dies ever!

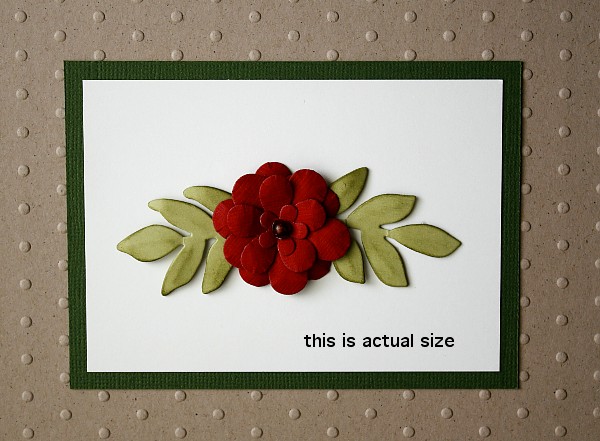
Here’s the sample I made for the dies we showed yesterday,  the 5 Point Flower and the Leaves dies…

(I used two of the largest flower on the bottom,  one middle sized and one small)

so pretty!  so much potential!  I know these will be favorites too!  yea!  Thank you Christine!

Thanks for stopping by… I’ll be back tomorrow with a card for the Sweet November part of the Oct. release…see ya then!

Stamps and stuff I used…


ATS · ATS Preview · cards · CC Cutters · CC Designs · Christmas · Distress Ink coloring · rubber stamps · Swiss Pixies · Watercolor

The Cutest “Group” EVER!!!

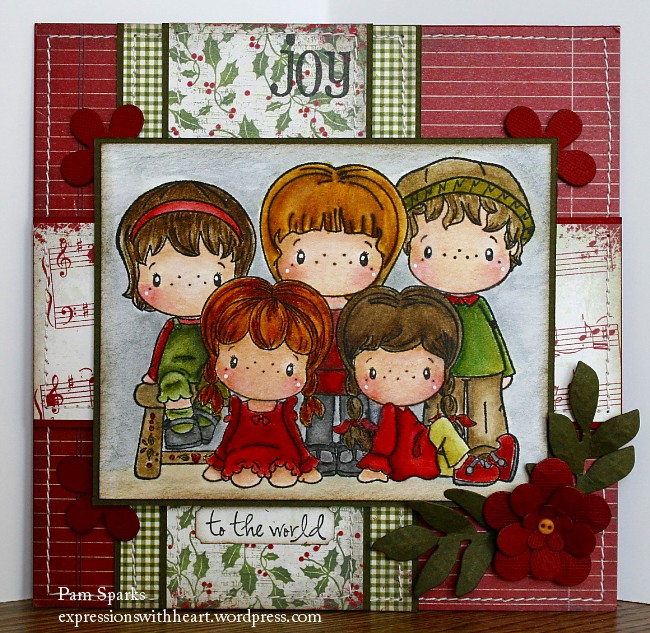
Time for the October Release and Preview Days at All That Scraps!!!  Christine has illustrated the cutest, sweetest new images for Christmas in her Swiss Pixies line… this one called the “Group” and another “Baby Jesus and Angel”.  You can see the ATS Design Team creations for today on the ATS blog, HERE.  We’re also previewing some of the new dies from CC Designs Cutters line… the 5 Point Flower die and the Leaves die.  I AM SO EXCITED TO HAVE THIS LEAVES DIE!  It is a pair of leaf branches – NOT just ONE but a pair!  I love that I don’t have to flip one over to have it go the other direction!  I told Christine this and she did it for me!!!  and YOU too!  Hurrah!  Two awesome sentiment sets…Amy R Stamps for Christmas!  oooooohhhhh….love how they work together… I used them on this card too!

THE BEST THING is today the whole release is in the store HERE!!!  YOU DON’T HAVE TO WAIT!  Sorry for yelling in caps but it’s so exciting!!!  You are going to want them all…hehe   The DT will be showing more tomorrow and Wednesday also…I do LOVE Christmas but I think you probably already knew that about me!

Here’s a close up of the 5 Point Flower and Leaves dies…

I colored these images with distress ink refills and used the Christmas pad from Authentique!  Stitched it on the sewing machine,  I use heavier thread so it shows up better.  I drew in the z looking trim on his cap with a copic multiliner pen.

Have a great Monday and have fun lookin’ and shoppin’!   ttul