cards · CAS · Fall · Halloween · Printworks · rubber stamps · Watercolor

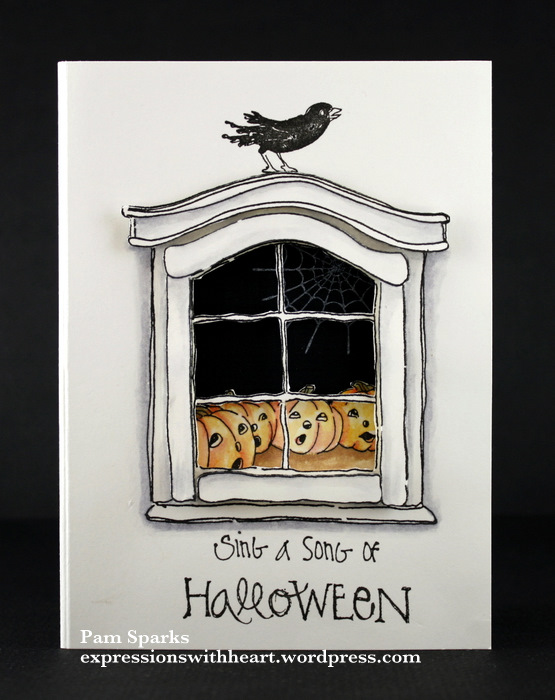
Singing Pumpkins….

Look at these adorable caroling pumpkins!!! They are called the Pumpkin Quartet! They just make me smile!  New cling rubber stamps from Printworks, HERE…don’t you ❤ it! I colored the pumpkins with Printworks Designer ink stamp pads, Tangerine, Sunflower Yellow, Ivy and Oak brown. The window and around the window I painted with the Granite Gray stamp pad ink. There is a video about painting with Printworks designer ink on the new website under Creative Lab and then techniques, HERE.  I cut out the windows with my EK Success really sharp scissors. I stamped the images and sentiments with Versafine Onyx Black ink.  I used the full size pad for the window and pumpkins and the little square pad for the sentiment this time because I separated the  lines… it’s real easy to ink them up separately with the little square pad… love that thing!  Yes,  I used my stamp a ma jig…I tell you,  I can’t stamp without it!

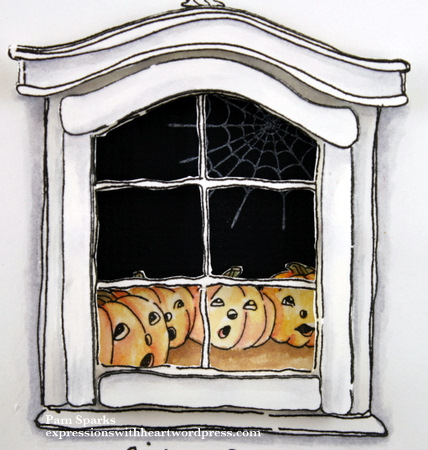
Here’s a close up of the window…
the inside…
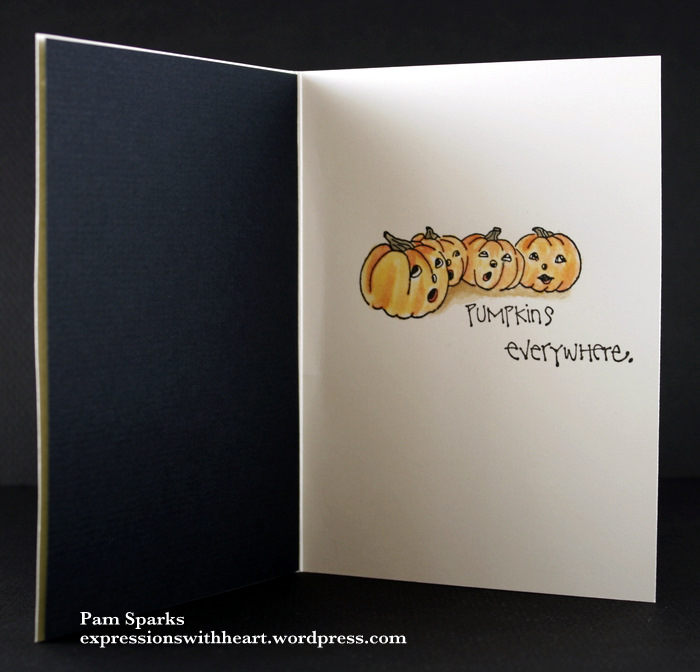
you can see I mounted a piece of back card-stock on the inside left with mounting squares…love these 3-L squares…they are so nice…the backing paper comes off so easy and if you’re careful and don’t press them down right away,  you can usually carefully pull it back up if you didn’t get the piece right where you wanted it and reposition, then push them down nice and secure.

I’m linking my card to The Secret Crafter Saturday Challenge blog, the theme is Halloween… to Stamps and Fun, the theme is anything goes… to Crafting for all Seasons, the theme is fall colors and to I Brake For Challenges, the theme is Fallin’ for you.

Here’s a picture at an angle. Hopefully you can see the layers…

Join the choir of pumpkins and sing a song of Halloween! Hope we made you sing and smile!!!  Thanks for stopping by…’preciate it!

Stamps and stuff I used on this card…

Card Sketch · cards · CC Cutters · CC Designs · copics · Fall · punches · rubber stamps

Latte Kiki for Fall…

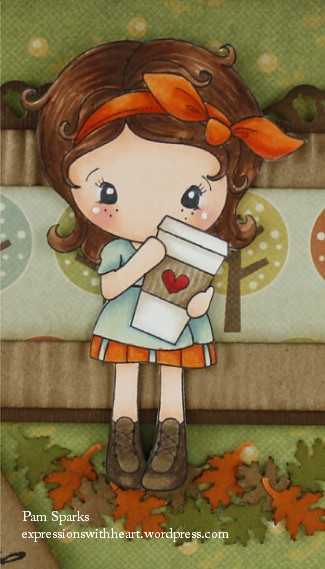
Latte Kiki is one of the new images for September from CC Designs.  I just love her with her to go cup…can you see I colored the holder to look corrugated?!  too fun!  Scroll down to my previous post for a skin coloring with copics video.

Here’s a close up…

I tried to match the copic colors I used to the We R Memory Keepers pattern paper… her dress is BG10, BG72, E81 and E41 over the top.  Kinda fun when the combo works out!  Her hair is E30, 23, 25, 27 and the orange is YR12, 14, 15, 18. I used a new Fiskars border punch…love the little squirrels, leaves and acorns it punches out, it’s called Fall Gatherings.  The leaves at her feet are from a Marvy oak leaf punch.  The sentiment is from CC Designs, Amy R stamps Sassy Sentiments set.  I ran the strip of kraft card-stock through a paper crimper.  The tag is cut with a CC Designs Cutters Tags It stamp and die set.

Just love using these warm Fall colors!

Thanks for stopping by – I’ve been messing around with videos off and on and come to find out the battery or charger is bad in my new video camera.  I called Canon today and now I have to send it in.  I’d get almost done with one and the crazy thing would shut off!  Did you hear me moaning?  *sigh*  I’m sure my walls did here! lol  Hopefully they will be fast in getting it figured out and back to me before I forget what I’ve learned!

I made this card using the sketch from the Sketch Saturday blog HERE. I’m also linking to the Stampin’ for the Weekend Challenge blog HERE, the theme is “what a cutie”!  Anything goes at Simon Says Stamp Challenge Blog, HERE.

Stamps and stuff I used…

cards · CC Designs · copics · Fall · Masking · rubber stamps · Tutorials

CC Designs…Cleverly Cute and Classic

I’m posting a card I made with CC Designs Sugarplums Take A Seat kit.  I also made a tutorial for masking with it,  so I’ll post it today too!

Here’s Sunflower Emma sitting on the wagon from the kit…Emma says pink is a great Fall color! lol

Here’s the tutorial for masking Emma sitting on the wagon…

Masking an image to create a scene…

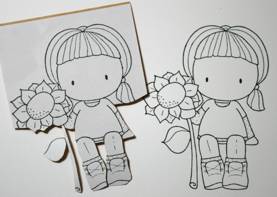
#1 – I start out by stamping my focal image on my card-stock and again on a piece of eclipse tape (thin paper with post it note type adhesive on the back side).  The eclipse tape image will be my mask.

#2 – I cut out the bottom part of my focal image, cutting inside the stamped line on the eclipse tape. I like to pretty much cut the black line away so I don’t have a halo around the image after I’m done.

#1                                                                                             #2


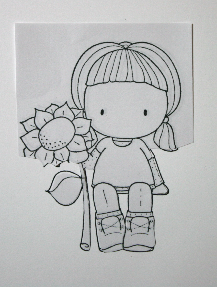
#3 – I’ve placed my mask over the stamped image on my card-stock, making sure to keep the mask inside the stamped lines of the main image stamped on the card-stock.

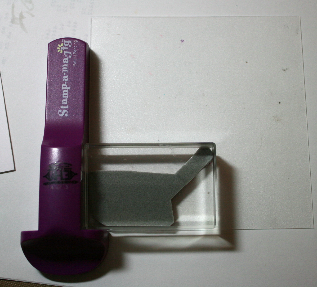
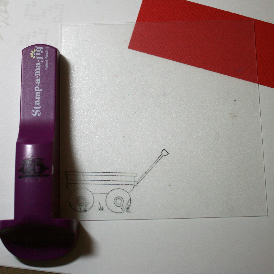
#4 – I have an old Stamp a ma jig!  They are an aqua color now but both work exactly the same! Here I’ve placed the imaging sheet on my work surface and aligned the “jig” up against the bottom corner of the imaging sheet.  Ink up the stamp and bring it into the corner of the “jig”,  making sure nothing moves… very easy!  You can touch the “jig” with your stamp/block and then go down to stamp.  This leaves a stamped image on the imaging sheet.

#3                                                                                #4


#5 – Remove the stamp/block and see the image.

#6 – Move the “jig” away and pick up the imaging sheet and place it over your masked image on the card-stock.  You will be able to see where you want to place the wagon in this case for Emma to sit on. Line it up,  just how you want it.

#5                                                                                            #6


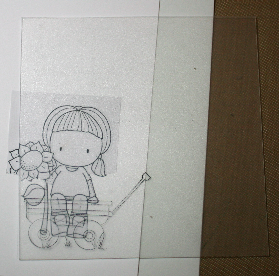
#7 – Bring the “jig”  back up to the bottom corner and fit it up against the imaging sheet adjusting to where you want the wagon to end up.

#8 – Holding the “jig” in place,  carefully remove the imaging sheet.

#7                                                                                            #8


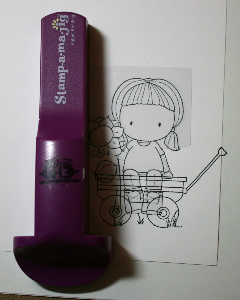
#9 – Ink up the wagon stamp. While holding the “jig” in place,  bring the stamp/block over to the “jig”, fitting it into the corner.  Stamp and lift.

#10 – It looks funny!  You’ve stamped over the eclipse tape.  Go ahead and remove the mask/eclipse tape

#9                                                                                                 #10


Here she is… Sunflower Emma sitting on her wagon!  So CUTE!

My original post for this card is HERE.

Thanks for visiting today!  I hope I inspired you to take up masking if you haven’t already!  Holler if you have any questions!  ttul!

Birthday · cards · copics · Magnolia · punches · rubber stamps · Spellbinders dies

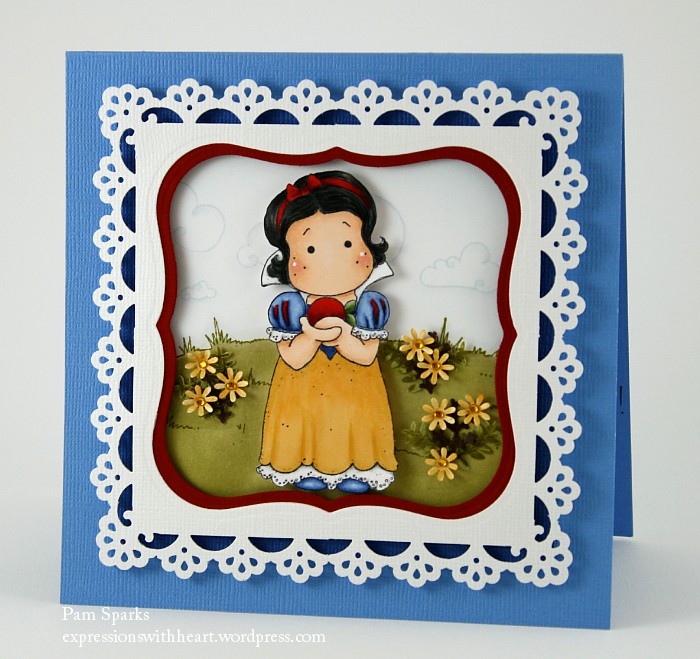
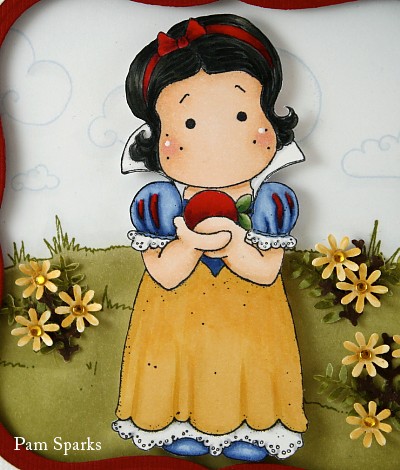
Magnolia Tilda as Snow White…

Birthday time!  G-daughter Lizzie Faith had a Snow White birthday party Sunday.  So sweet!  Aunt “Colors” made her a Snow White dress that was out of this world beautiful!  Lizzie Faith loves it!

Here’s a picture of the party set up… Breanna, Lizzie Faith’s mom…she did the Green Lantern party awhile back for her 1 yr old and I showed a Green Lantern Edwin card.

So pretty with red roses and red apples!

A close up of Tilda…

She is stamped on Beckett Expression Super smooth 80# card-stock  with Memento Tuxedo Black ink, cut out and colored with Copic Sketch markers.  Lizzie Faith insisted on having strips of red in the sleeve… so I just tried to please her!  : )   I can’t remember what colors I used.  Punches are from the Punch Bunch.

I was inspired by Kittie’s frame cards – her tutorial is HERE!  Lovely cards on her blog!

I’m linking Tilda up to a couple challenges…

Hanna and Friends challenge blog – anything goes

Wee Memories challenge blog – no pattern paper

Hope you’ve had a stamping great week!  I cannot believe it’s late Thursday afternoon already! eek!  Thanks for stopping by! ttul!