cards · Christmas · Die Piecing · Ornament · Slimline · Spellbinders dies · Stitching · Winter

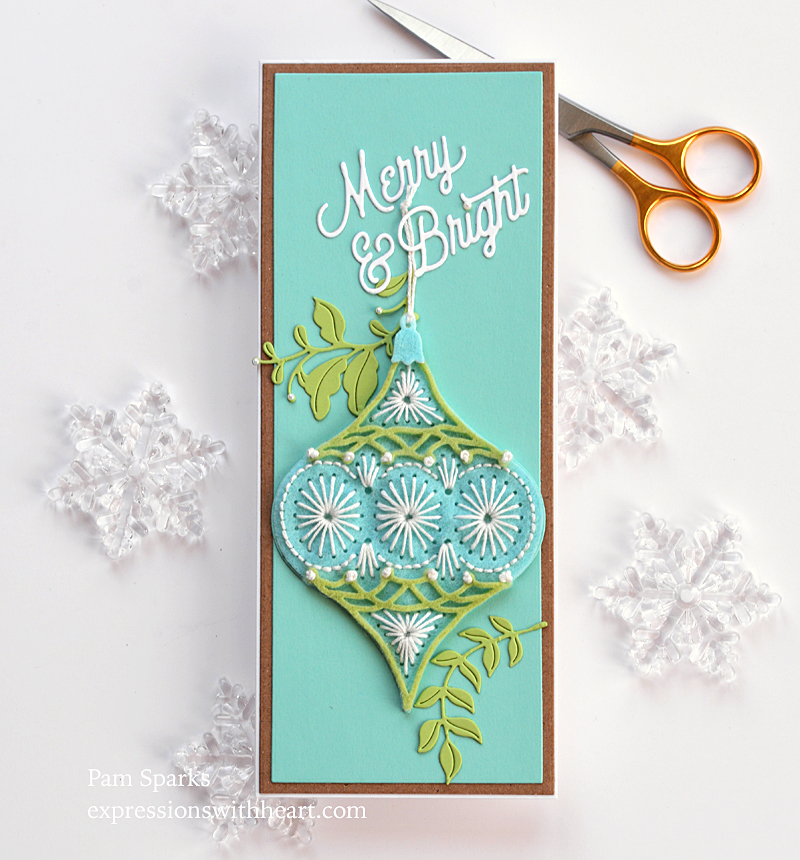
Stitched Ornament Merry and Bright Slimline Card…

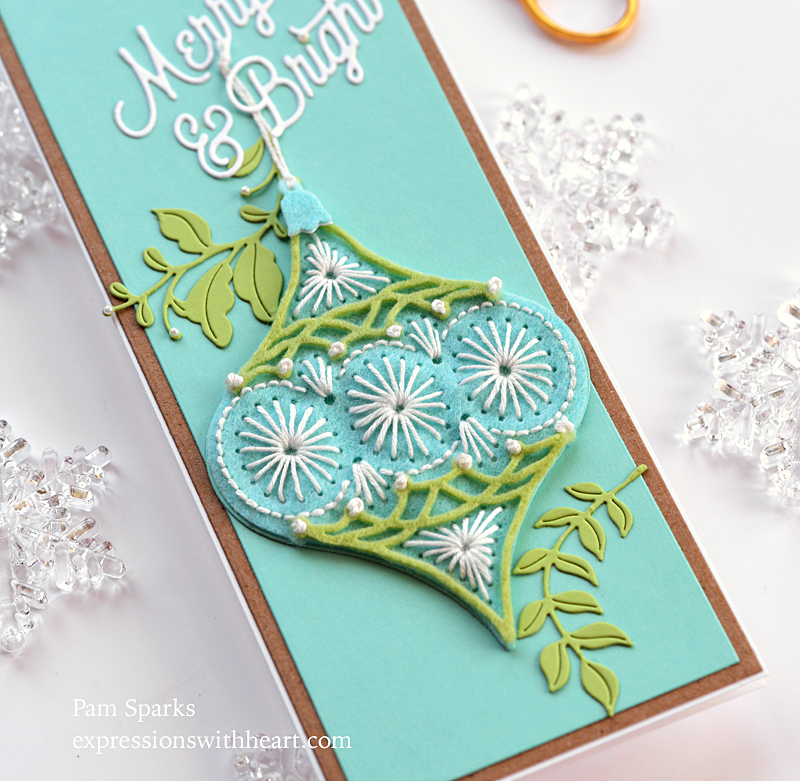
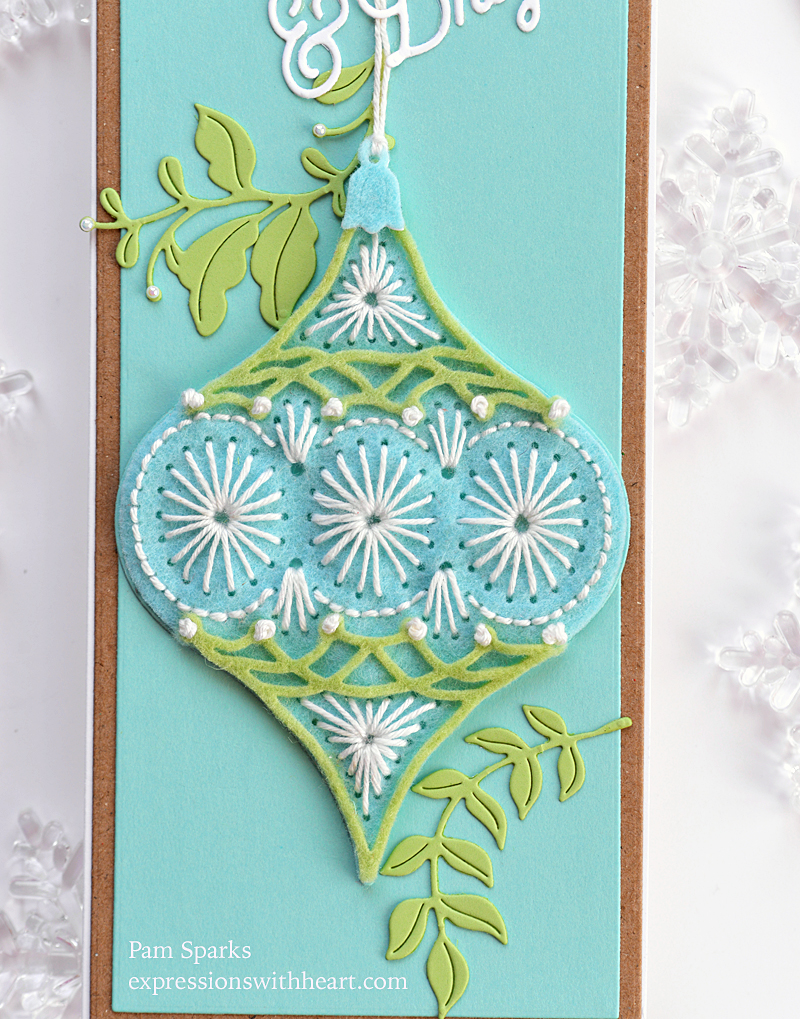
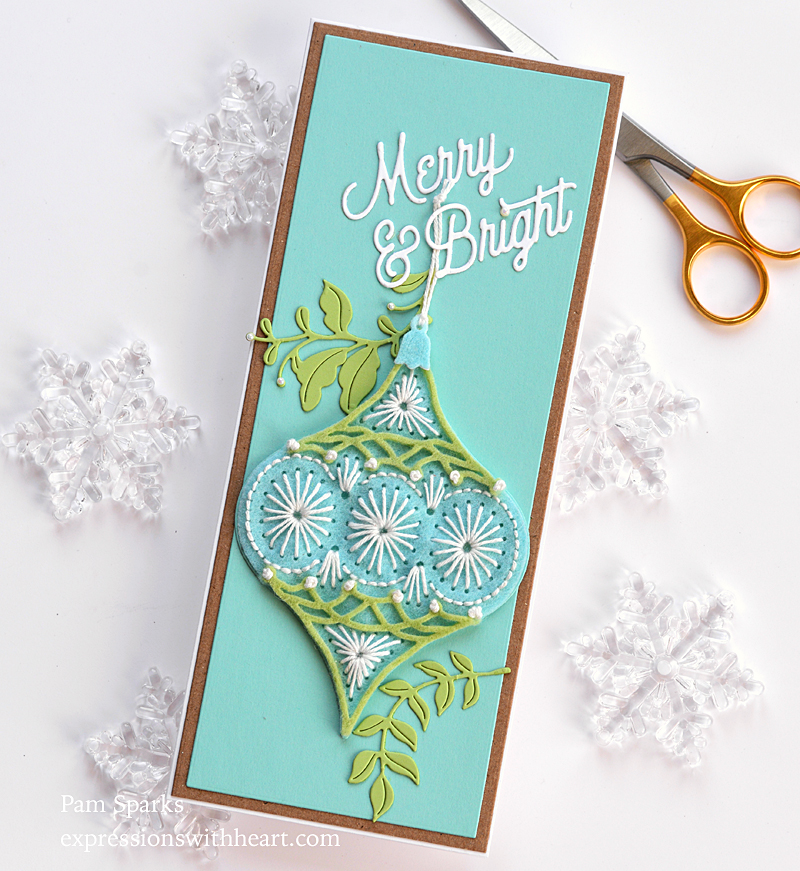
Hi everyone!  It’s been some time since I used wool felt so I found my box and set to work die cutting and stitching up this new die from Spellbinders Stitched Christmas release.

I meant to make it as an ornament to hang on the tree but once again I forgot the plan and glued it to a card! lol

The pretty branches are part of the die set.

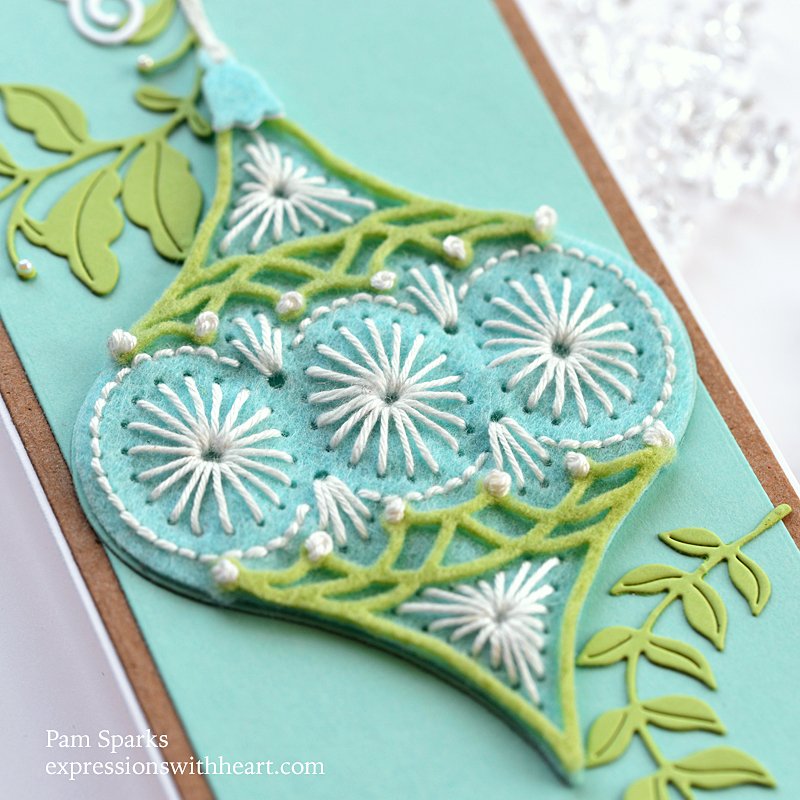
I used Knit Crosheen thread to for my stitching.  Taylored Expressions Tiffany and Avocado wool felt.

I used Tombow Mono Multi liquid glue to adhere the top and bottom avocado felt pieces.

My slimline card size is 3 ⅜ in x 8 ⅜ in.

I used Spellbinders new Mix and Match Holiday Greetings die set for the sentiment. I love this font!  There’s 18 word dies in the set!

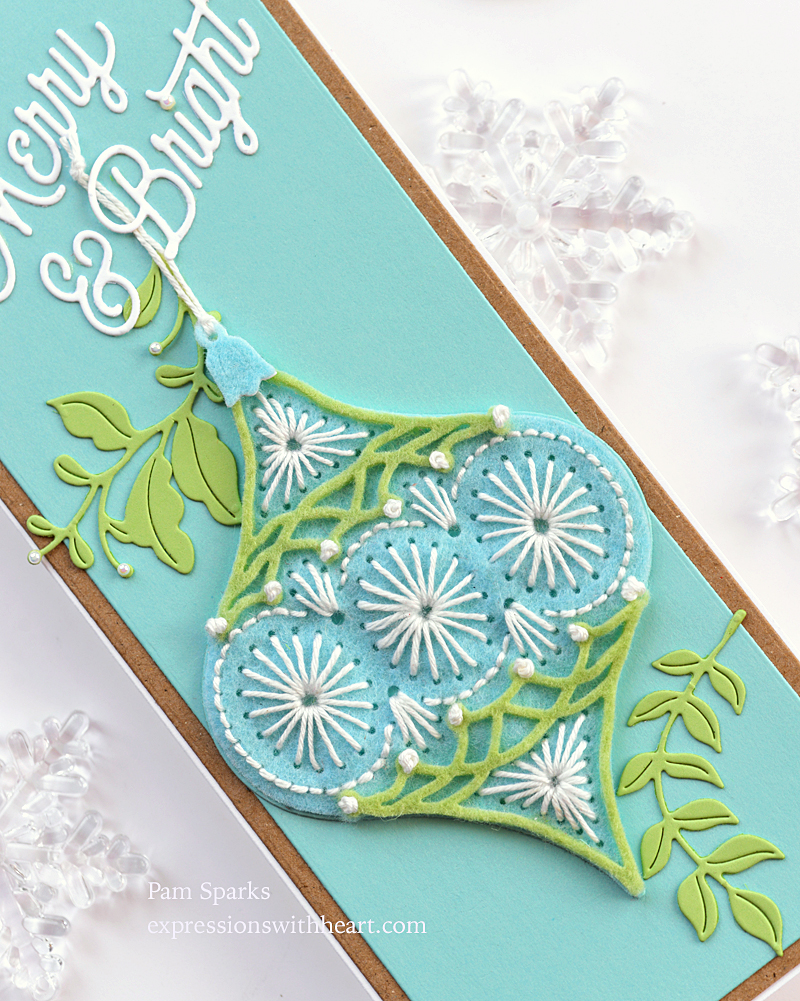
Here’s a close up of just the ornament…so pretty!

I wish I could show you this one in person! It’s definitely a card to give to someone that will keep it and get it out for display each Christmas season. 

The tiny pearls are from starlitstudio. 

Linking to some Challenges…

The Holly and Ivy Christmas Challenge – anything Christmas goes 

Craftyhazelnut’s Christmas Challenge – anything Christmas goes

Merry Little Christmas challenge – anything Christmas goes

Sweet Stampers Challenge – Christmas in July

The 12 Months of Christmas Link Up – Anything Goes Christmas

Thank you so much for stopping by! Countdown to Christmas is on!  EEK!  

Links below for what I used to make this card…


Spellbinders Buy One Get One offer good through August 7!

Spellbinders – Celebrate The Season…
[ SBC | SSS | SPL ]
Spellbinders – Stitchmas Christmas…
[ SBC | SSS | SPL ]
100% Wool Felt – Blues & Purples
[ TE ]
100% Wool Felt – Yellows & Greens
[ TE ]
Pearl Embellishments – 2mm, 3mm and…
[ STR ]
Bazzill Card Shoppe – Spearmint Stick
[ STR ]
Bazzill Card Shoppe – Robin’s Egg
[ STR ]
Crystal Katana Black Edition |…
[ SPL ]
Spellbinders – Tool N One – Rose Gold
[ SBC | SSS | SPL ]
Tombow Mono Multi Liquid Glue
[ STR | SBC | SSS ]
Platinum 6 Die Cutting and Embossing…
[ SPL ]


cards · Christmas · Die Embossing · Die Piecing · Distress Ink coloring · Memory Box · Oxide Inks · Techniques · Wreath Building

Merry Christmas in July, Holly Wreath Card and Tutorial

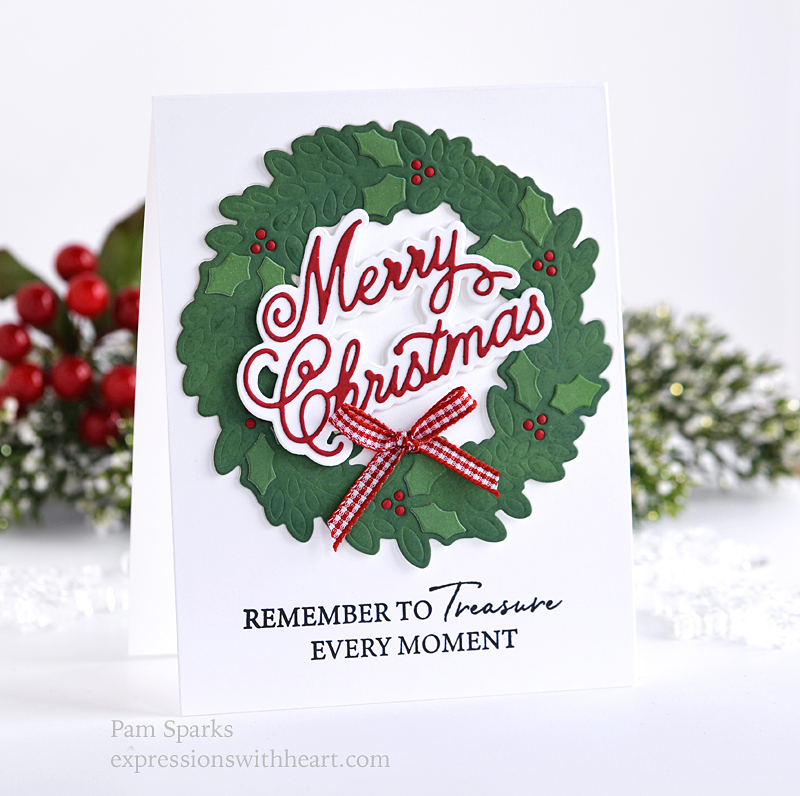
Salutations of the season to all!  And just like that, it’s the end of July!  Let’s get a head start on Christmas cards! 

My card today is from the NEW Birch Press Design Festive Floral release!

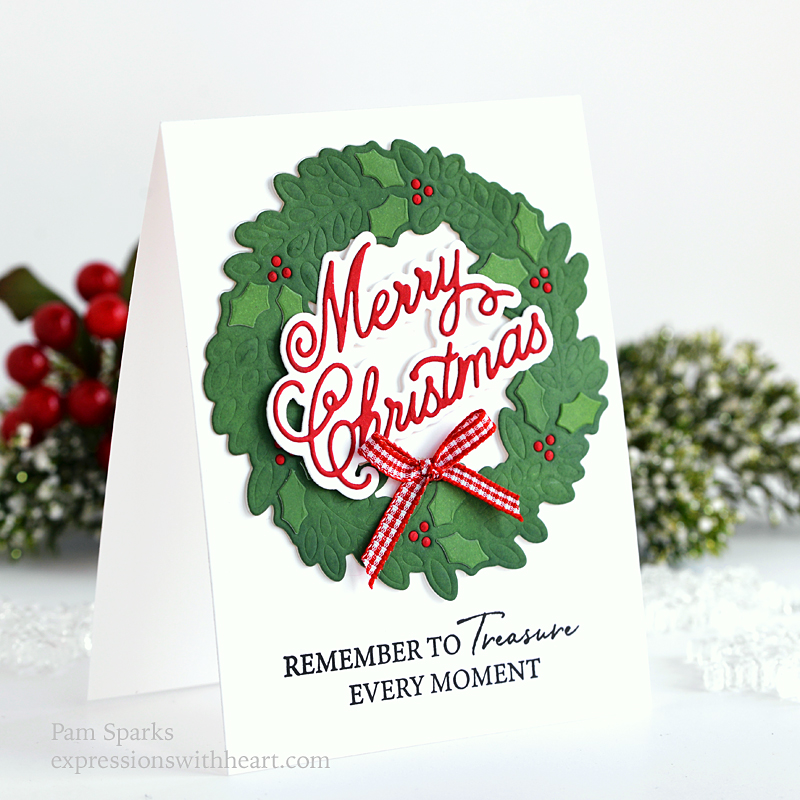
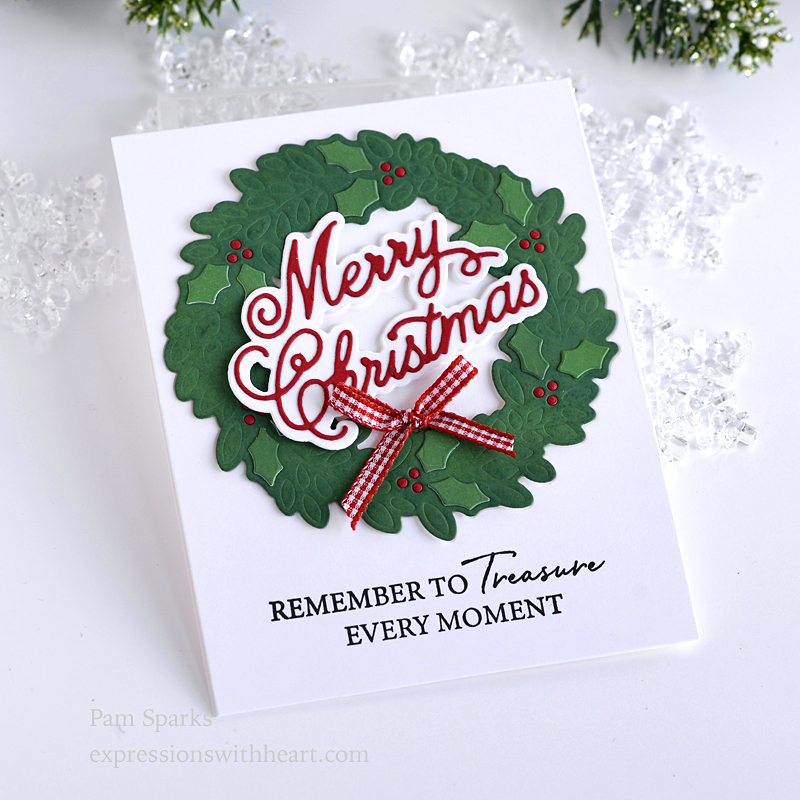
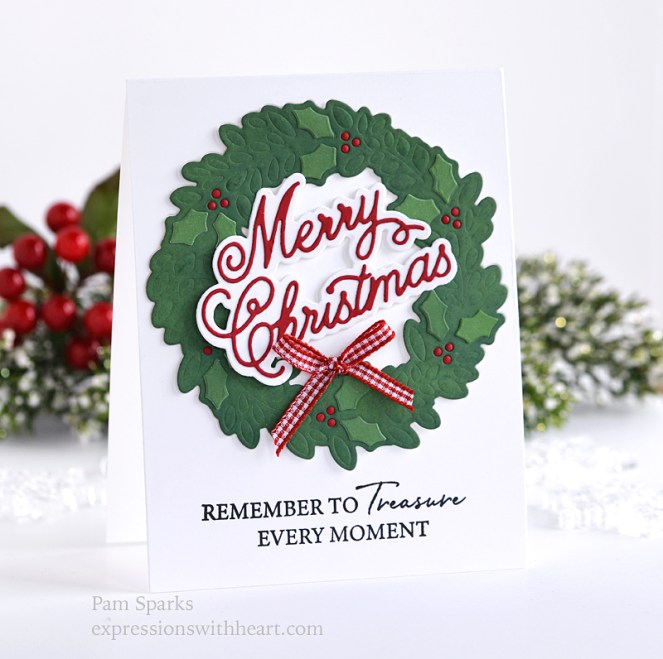
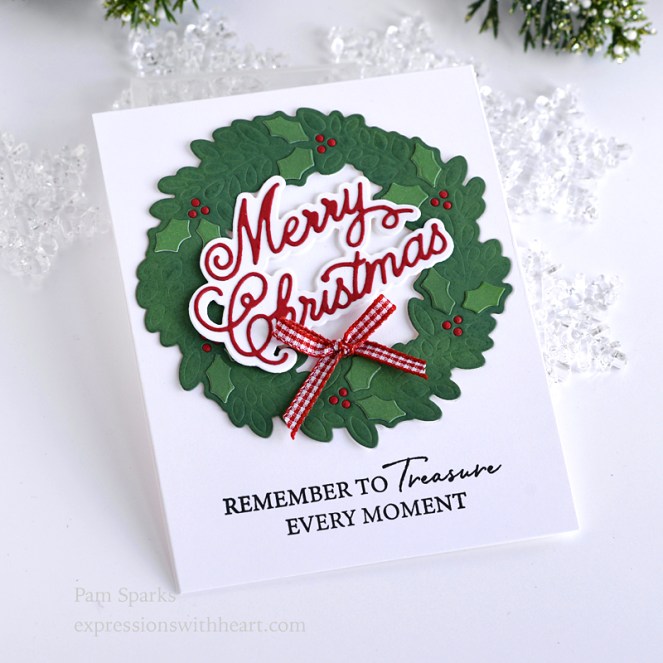
I’m using the NEW Holly Wreath Plate die set. Keep reading for a tutorial how I made the wreath without layering!  First the finished card pictures…
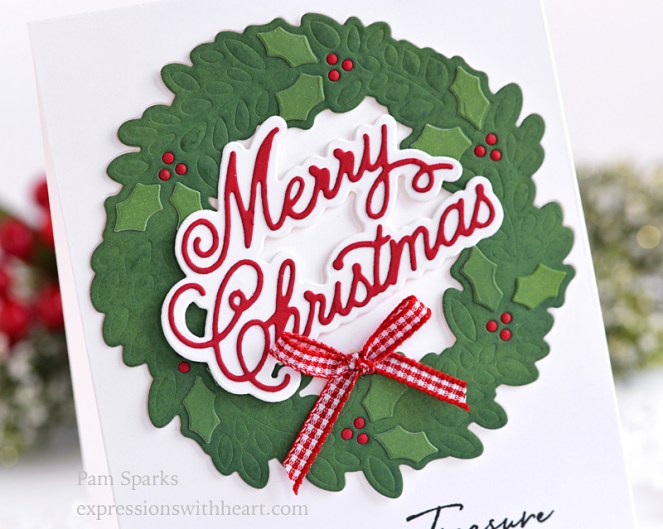
 

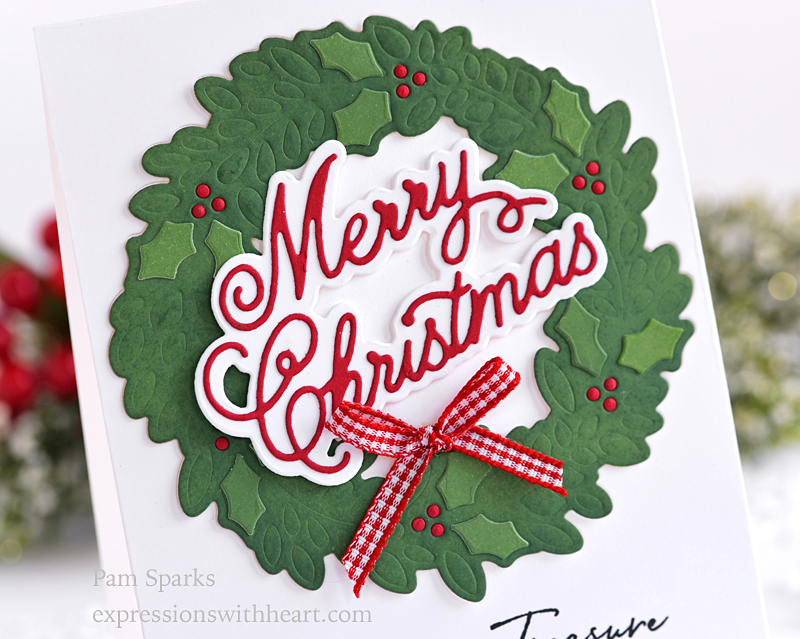
Close up showing the NEW Handwritten Merry Christmas and Outline die set… so beautiful! I love how he included the dot of the ‘i’ onto the ‘t’!  No gluing tiny dots this time!  (well except on the wreath hohoho)
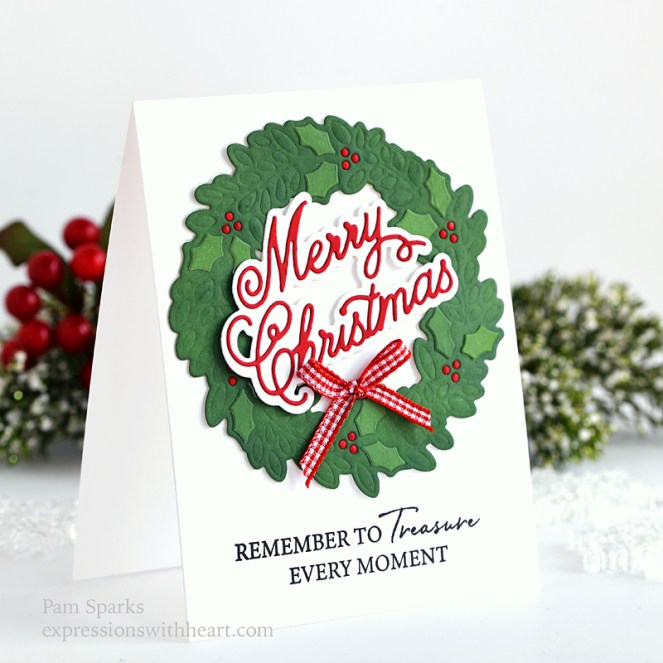
A shot from the side…

Sentiment from Birch Press Design Kind Hearts clear stamp set. (gorgeous sentiments in this one)
Here’s how I made this card in pictures…hope it works!  Let me know what you think!  Was it worth it?
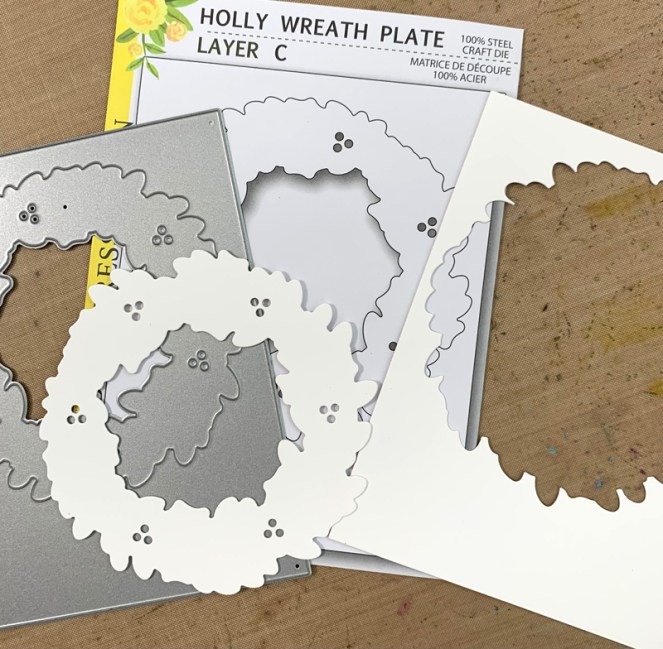
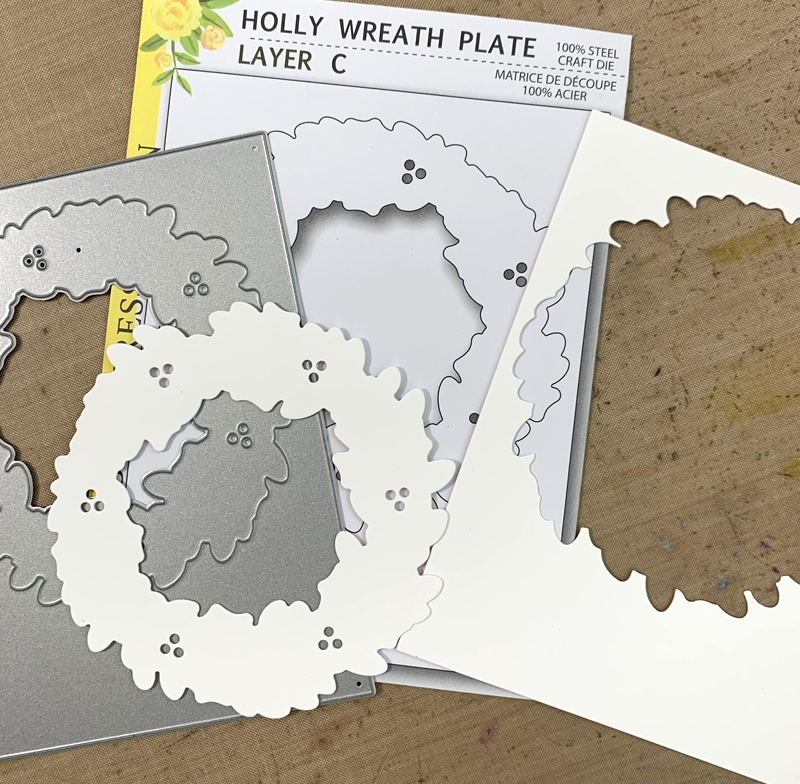
I started by die cutting Layer C in Hammermill 100# Color Copy Cover cardstock.  Keep both pieces.
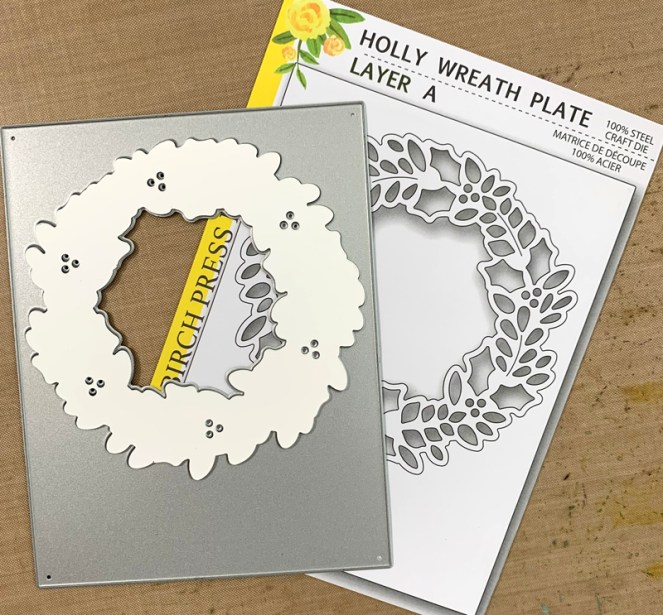
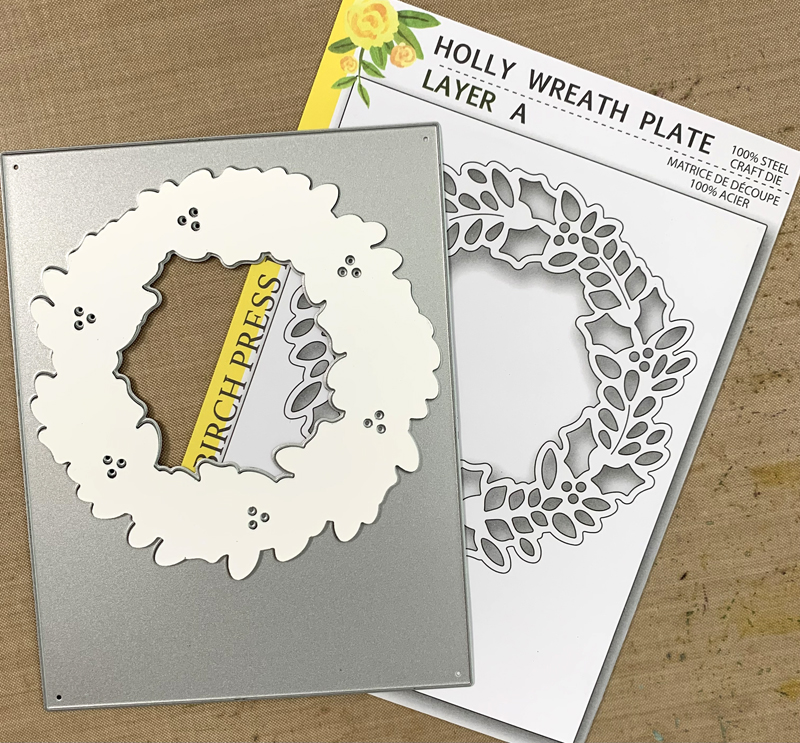
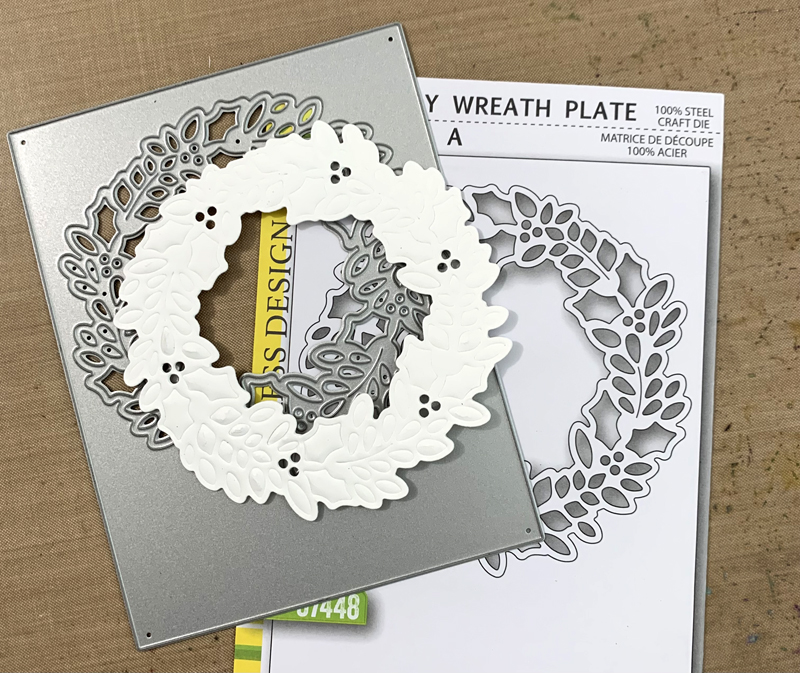
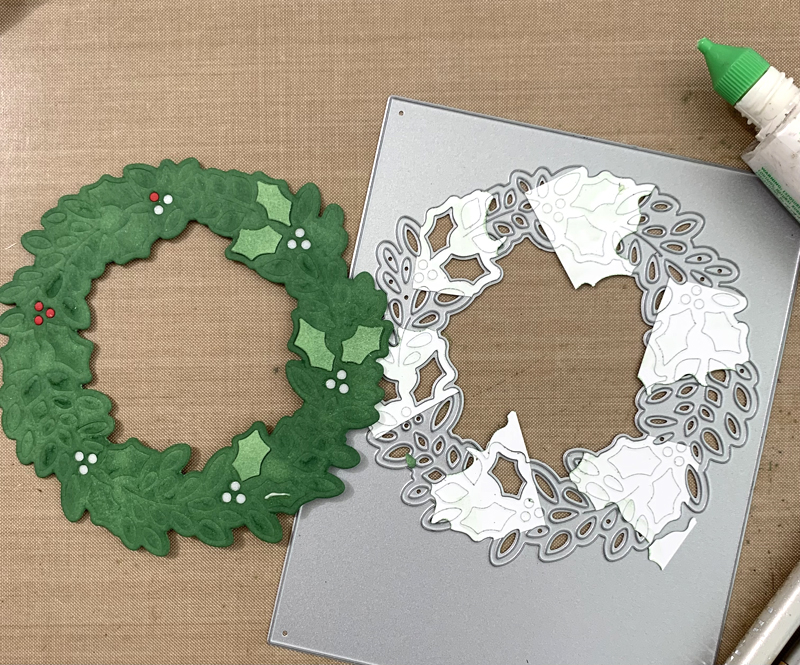
Now, using Layer A (the plate with all the detail), lay the plain wreath you die cut with Layer C into layer A die, right side into the die.
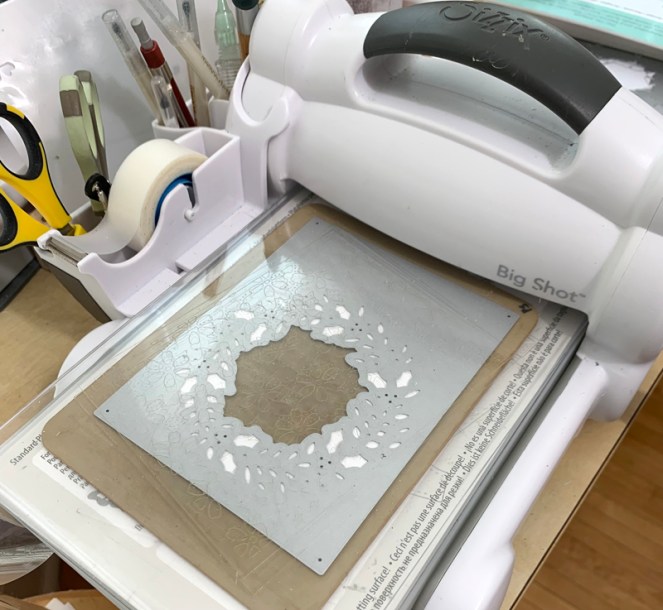
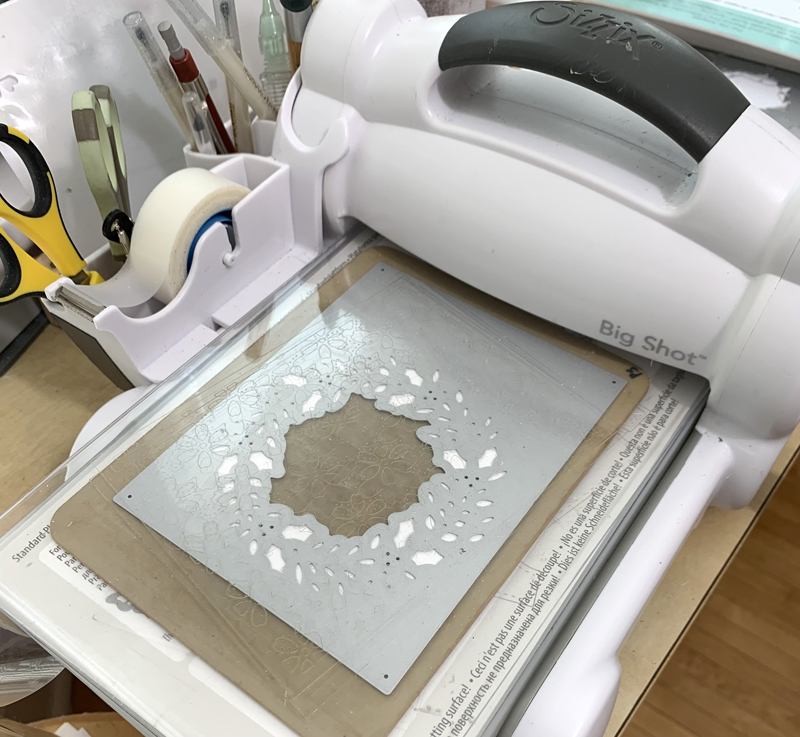
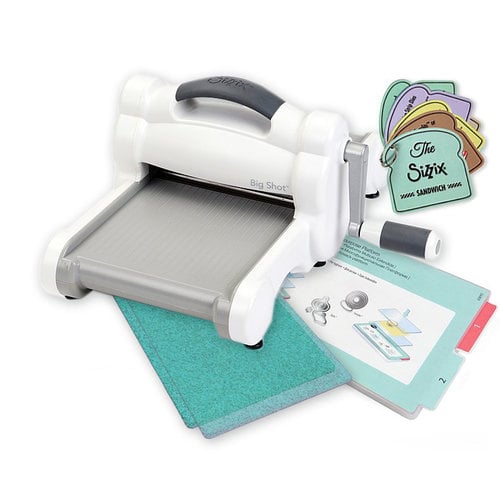
Next we are going to emboss the plain wreath die cut by running it through the die cut machine. From the bottom up you’ll need the standard platform, clear cutting plate, tan (squishy) mat, die cut in the die with cutting blades facing into the mat and on top a clear cutting plate.

(If you have the older multi purpose platform, use it like you would a regular embossing folder. Fold the top layer back.)
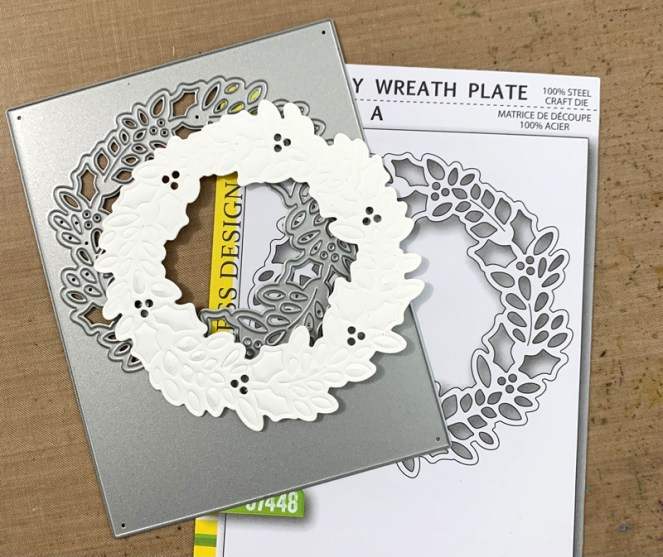
Look how cool this is… it’s embossed!
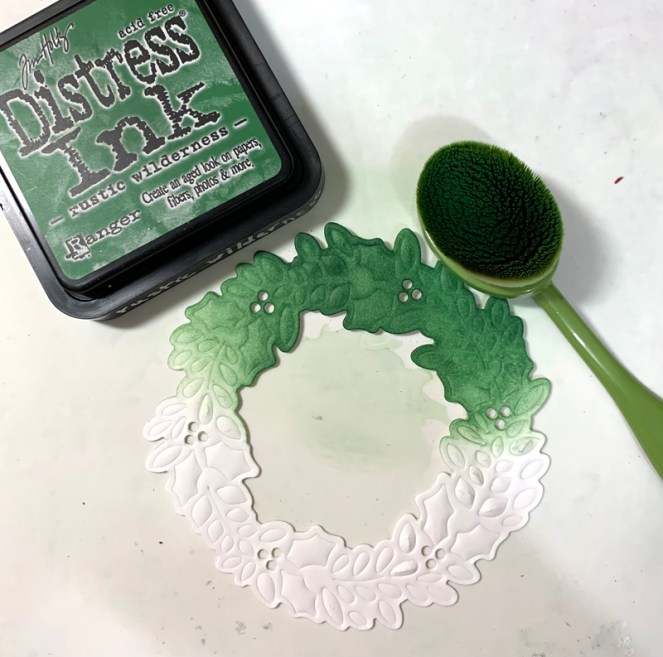
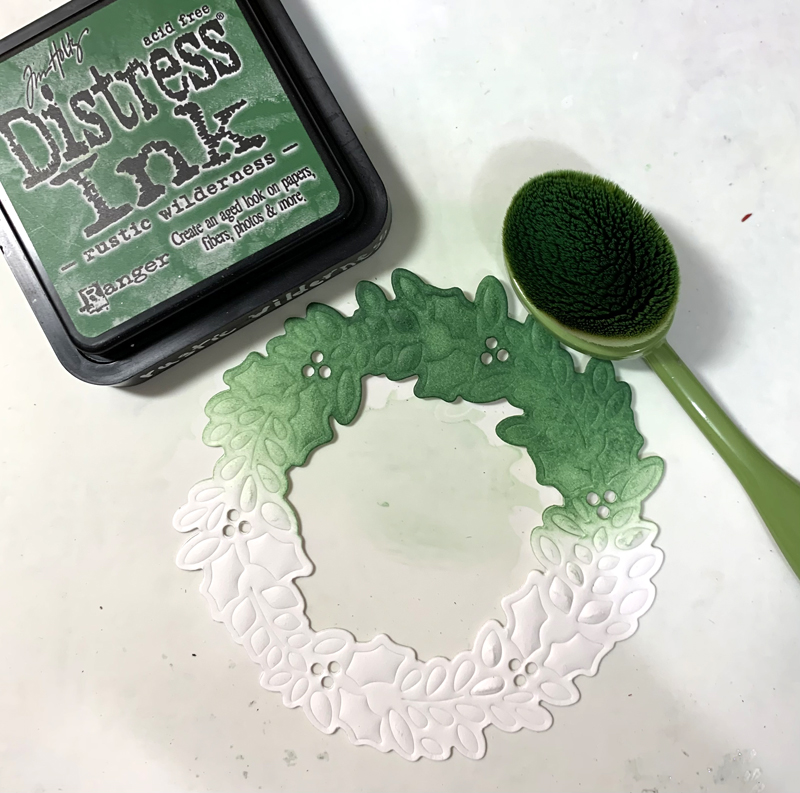
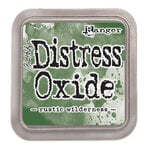
Now we’re going to ink the wreath with Distress ink.  In my picture I grabbed regular Distress ink but when I was making my card, I used Distress Oxide Rustic Wilderness.  ugh.  My regular are out in plain view and my oxide are in a drawer now. Change is hard! lol  I used my oxide brush with regular ink.  There go my eyes rolling at myself again!
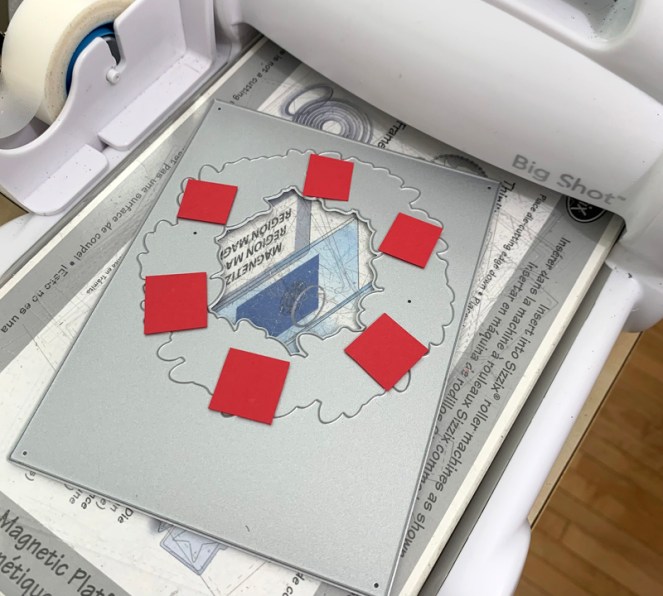
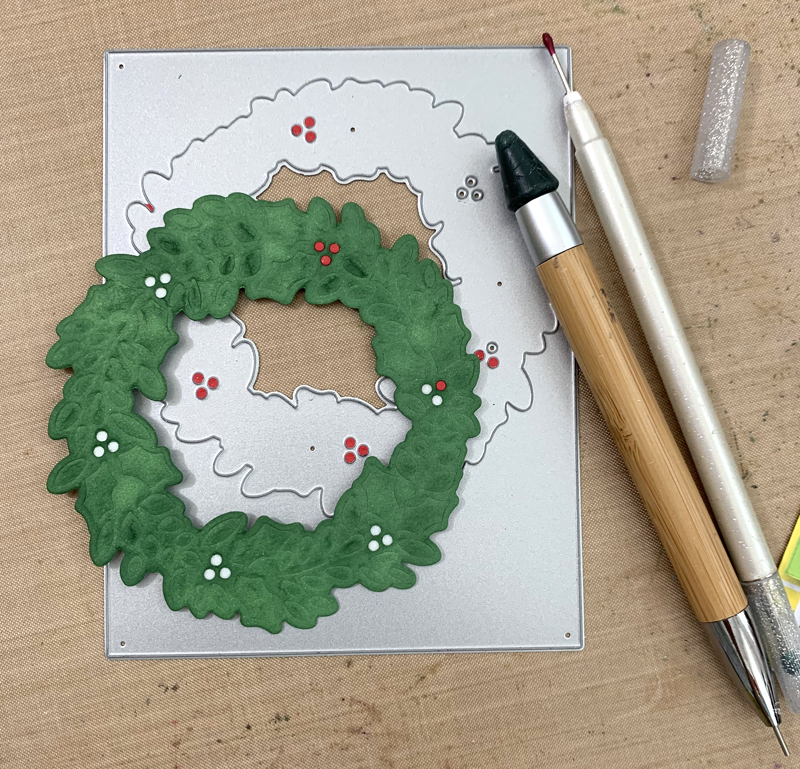
Back to layer C – die cut scraps of red cardstock for the berries.
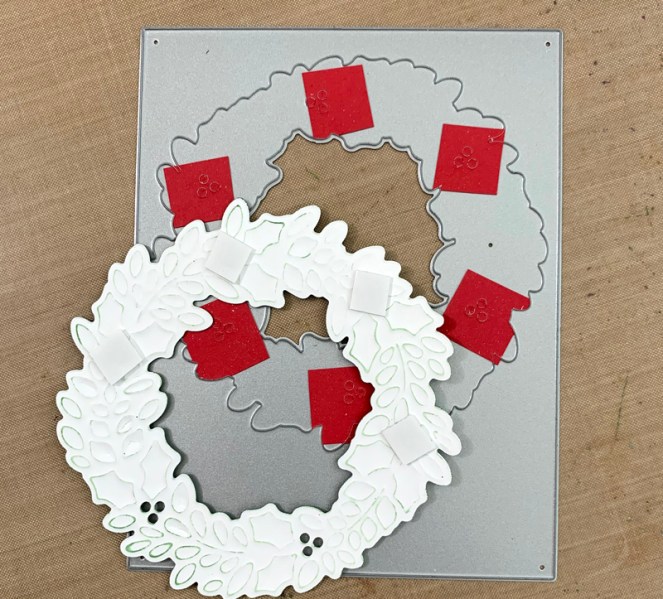
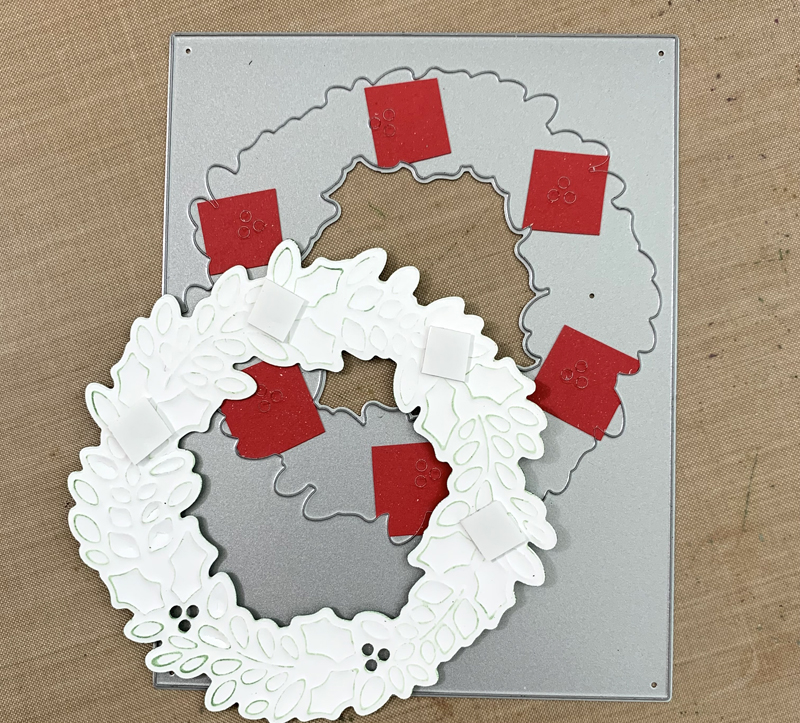
Here you see the back of the inked, embossed wreath…I placed pieces of thin mounting tape over the berry holes.  Link below… I love this mounting tape!
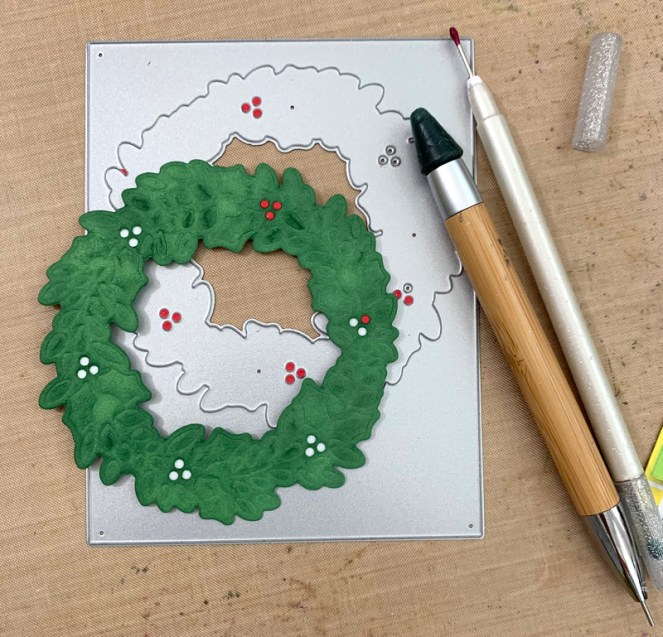
Then turn the wreath over and using a pickup tool of your choice add the berries to the holes and they will stick in place!  Easy!
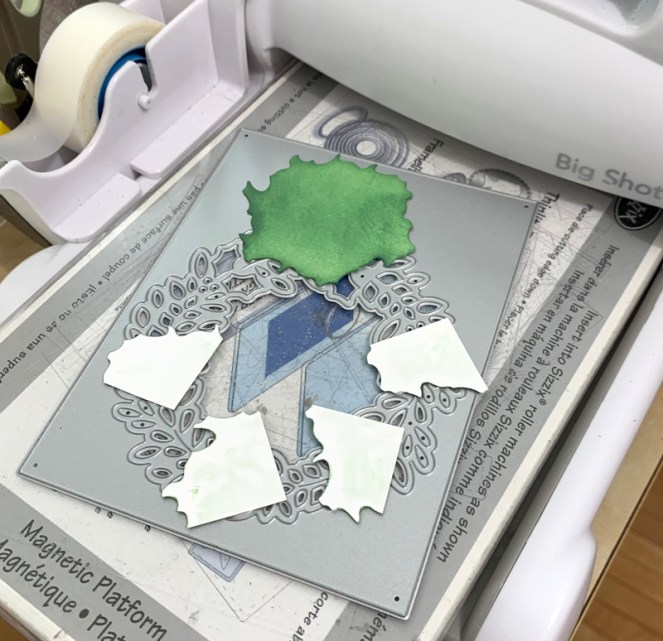
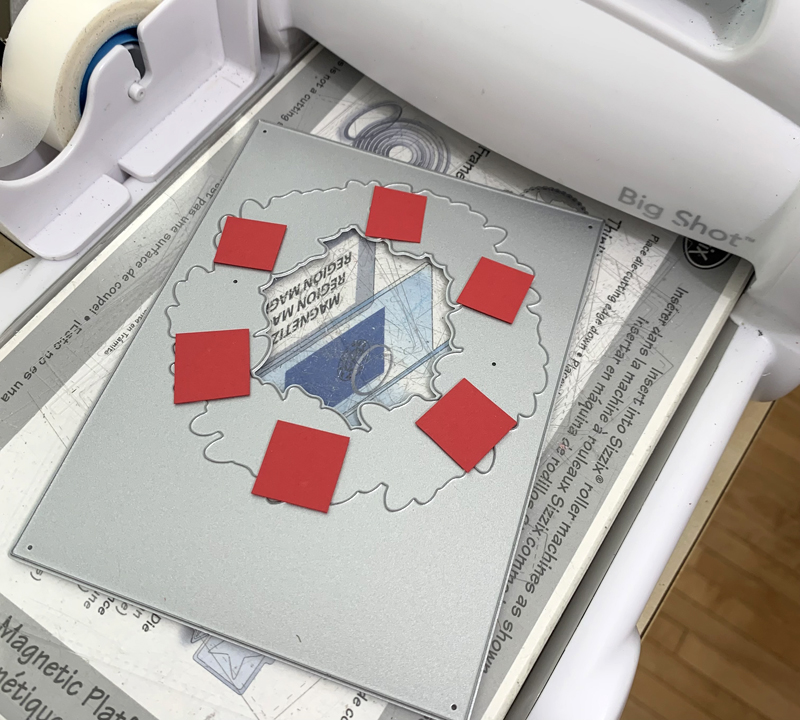
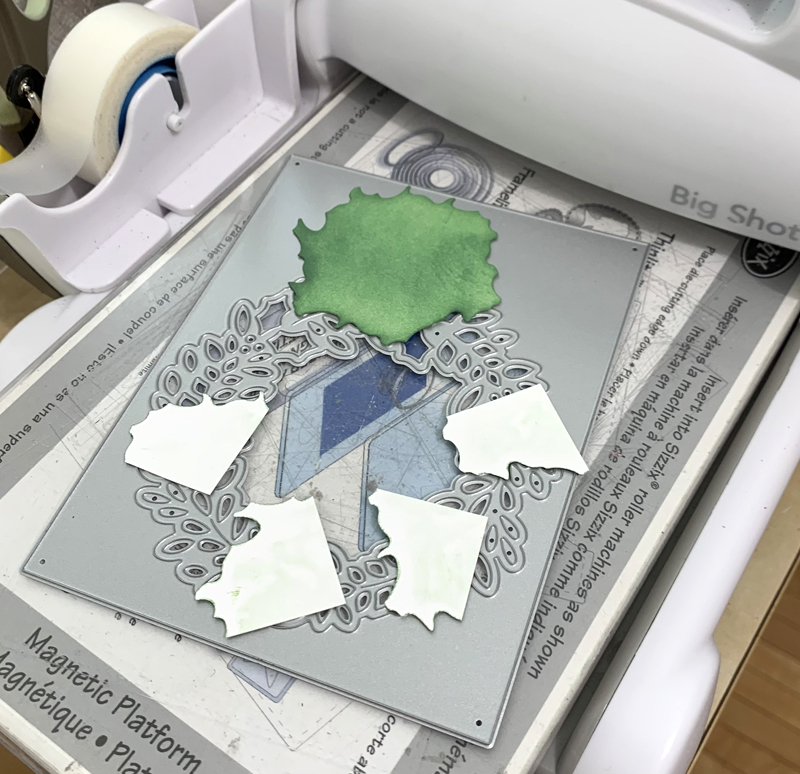
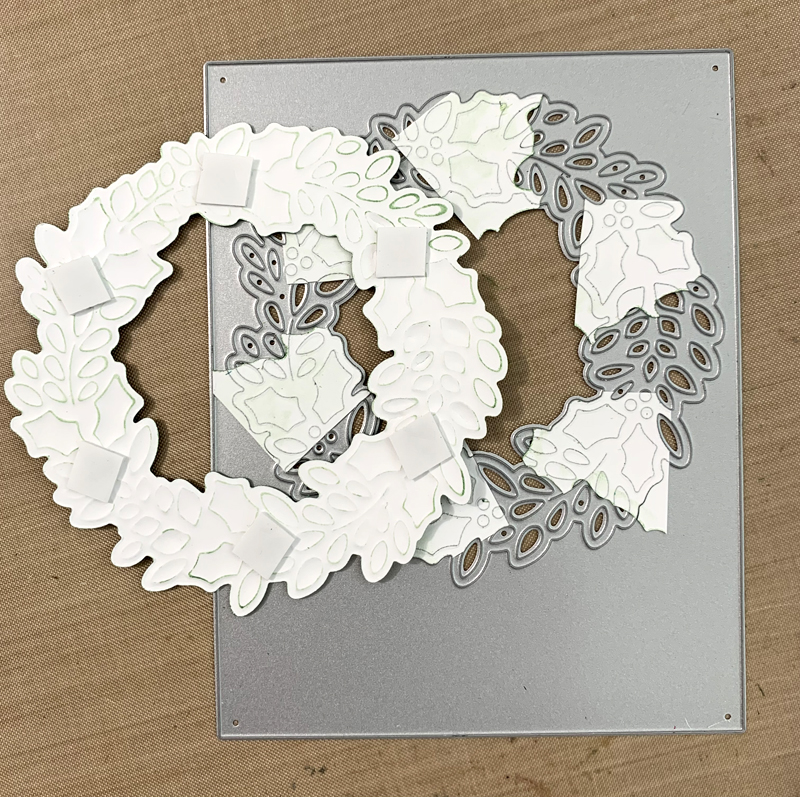
Ink scraps of white cardstock with Rustic Wilderness Distress ink, cut into pieces to lay over the holly leaves on layer A and run it through the machine.
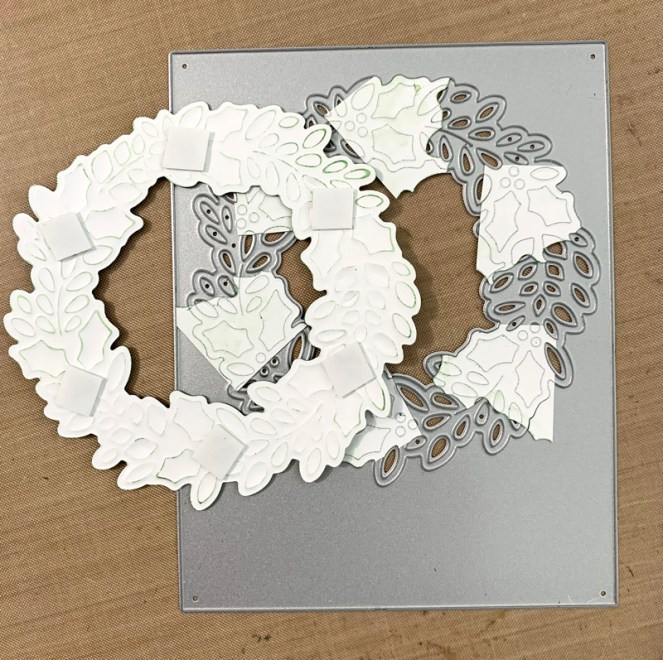
Turn wreath back over and line it up to layer A to match up your Holly. Then turn it right side up and glue on the Holly.
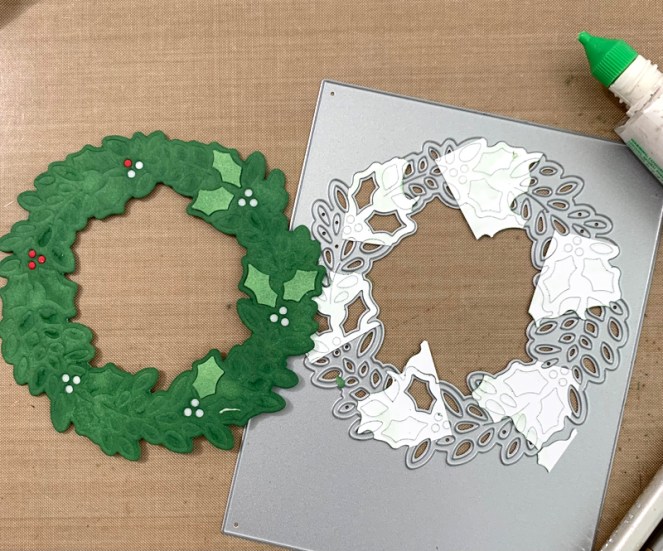
Remember it’s opposite…
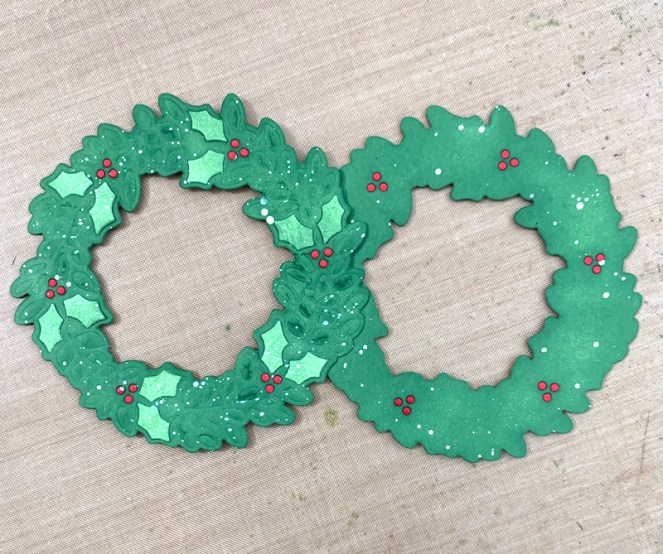
No earthly idea why in this picture the green is a funky color! lol

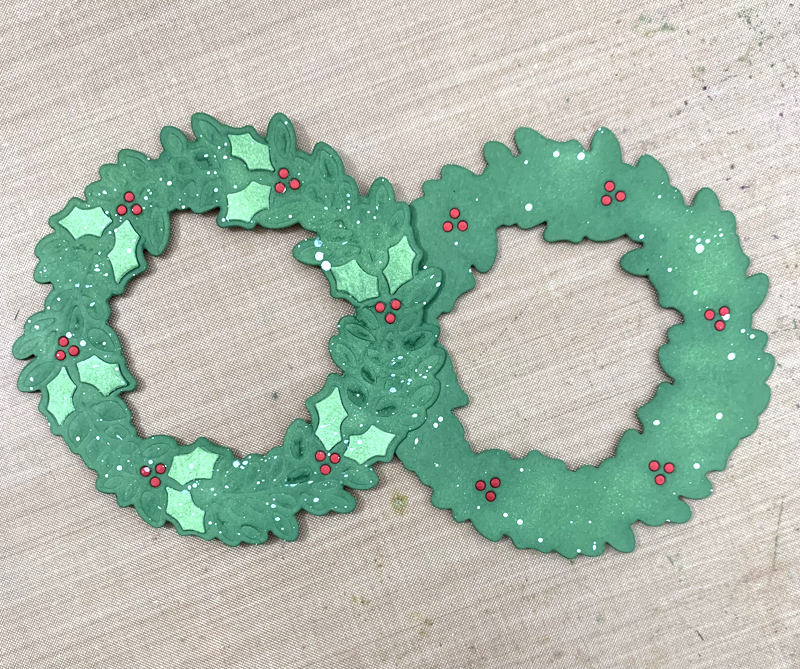
I wanted to show that the wreath is super fun just inking the solid wreath without embossing too.  At the last minute I thought to splatter it with some white spray ink.  I didn’t go back and splatter my card though.

So I’m showing three variations using these dies differently than they were intended!  Let’s make Christmas cardmaking fun! lol

Holler if you have any questions.  I have some old videos showing how to do embossing with dies too.

Linking to some challenges…

ABC Christmas Challenge – N is for NEW,  O is for OLD (mine is new)

Addicted to Stamps and More – any occasion

Crafty Gals Corner – Christmas in July #233

Simon Says Stamp Wednesday Challenge – Anything Goes

Thank you for stopping by!

Here’s what I used to make this card…

Birch Press Design – 57478…
[ STR | SSS ]
Birch Press Design – 57450 Holly…
[ STR | SSS ]
Birch Press Design – CL8162 Kind…
[ STR | SSS ]
Tombow Mono Multi Liquid Glue
[ STR | SBC | SSS ]
W 023 Spellbinders WIZARD TAN…
[ SSS ]
Sizzix MULTIPURPOSE PLATFORM STANDARD…
[ SSS ]
Sizzix – White and Gray – Big Shot…
[ SBC ]
Sizzix – Big Shot Accessory – Tool…
[ SBC ]
Sizzix Cutting Pads – standard
[ STR | SBC ]
Ranger Ink – Tim Holtz – Distress…
[ SBC | SSS ]
Ranger Ink – Tim Holtz – Distress Ink…
[ SBC | SSS ]
TE Blender Brushes
[ TE ]
Ranger Ink Jet Black Archival Ink Pad
[ SBC | SSS ]
Gingham Red 3/8″
[ RSN ]
Scrapbook Adhesives Crafty Foam Tape…
[ STR ]

cards · Christmas · Die Piecing · Distress Ink coloring · Mini Slim Card · Spellbinders dies · Winter

Winter Garden Release Letterbox Card…

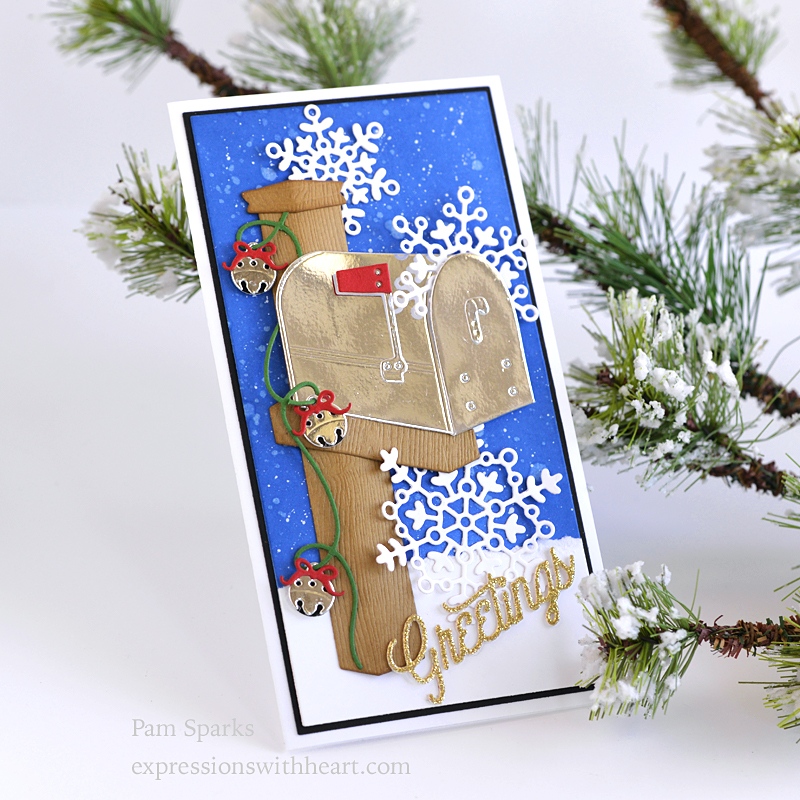
Special Delivery!  All the fun things of the season right there!  Snail mail, snowflakes, jingle bells and snow!

I went with a Mini Slimline Card for this one.  I used Spellbinders Precision Layering Mini Slimline A and B sets to cut my layers.  I really like these dies because they are heavier and hold the rectangle shape better than the thin silver ones do. I don’t like it when I die cut layers and they’re wonky!

I tore a piece of white cardstock for the mailbox to stand in (snowdrift) and die cut it with the same layer die as the blue background size.  I used Prize Ribbon Regular Distress Ink to ink up the background this time.  I spattered on some water droplets.  I like to spray water into the palm of my left hand, then I rub both my hands together so they’re both wet, then I clap over the inked background to spatter the water drops. I let it sit a minute, then lay a paper towel over it to get the extra water.

Then I spattered on some diluted white acrylic paint.

I die cut the mailbox post from woodgrain cardstock and the mailbox from silver mirror cardstock.

I die cut the sentiment from gold glitter cardstock and white cardstock, then glued the gold on top of the white.

The jingles bells and ‘garland’ are from the NEW More Holiday Decor die set.  I love how cute the little bow is on the super cute jingle bells I die cut in silver mirror cardstock also.

I love that there’s just enough dimension to add perspective.  It’ll still mail in an envelope for one stamp.

I used the thin mounting tape, I’ll link below, behind the mailbox post and box on this card and yesterdays.

Finished size is 3 ½ in. x 6 ½ in.   So happy to have a start on Christmas cards!  I can’t believe we’re half way through July! I need to get more done!

I’ll be back soon….we have to keep making!

Here’s what I used to make this card…

Spellbinders – Winter Garden…
[ SBC | SSS | SPL ]
Spellbinders – Celebrate The Season…
[ SBC | SSS | SPL ]
Spellbinders – Celebrate The Season…
[ SBC | SSS | SPL ]
Kaleidoscope Snowflake | Small Die of…
[ SPL ]
Spellbinders – Precision Layering…
[ SBC | SSS | SPL ]
Spellbinders – Precision Layering…
[ SBC | SSS | SPL ]
Hammermill WHITE 100 LB SMOOTH…
[ SSS ]
Ranger Ink – Tim Holtz – Distress Ink…
[ SBC | SSS ]
Ranger 4oz Distress Sprayer by Tim Holtz
[ STR | SBC | SSS ]
American Crafts Glitter Cardstock – Gold
[ STR ]
Bazzill Foil Cardstock – Silver 12×12
[ STR ]
Platinum 6 Die Cutting and Embossing…
[ SPL | SSS ]
Scrapbook Adhesives Crafty Foam Tape…
[ STR ]
Scor-Tape; Scor Tape
[ STR ]
Tombow Mono Multi Liquid Glue
[ STR | SBC | SSS ]

cards · Christmas · Lawn Fawn · Stampin Up · SU

Sweet Little Stockings Cards…

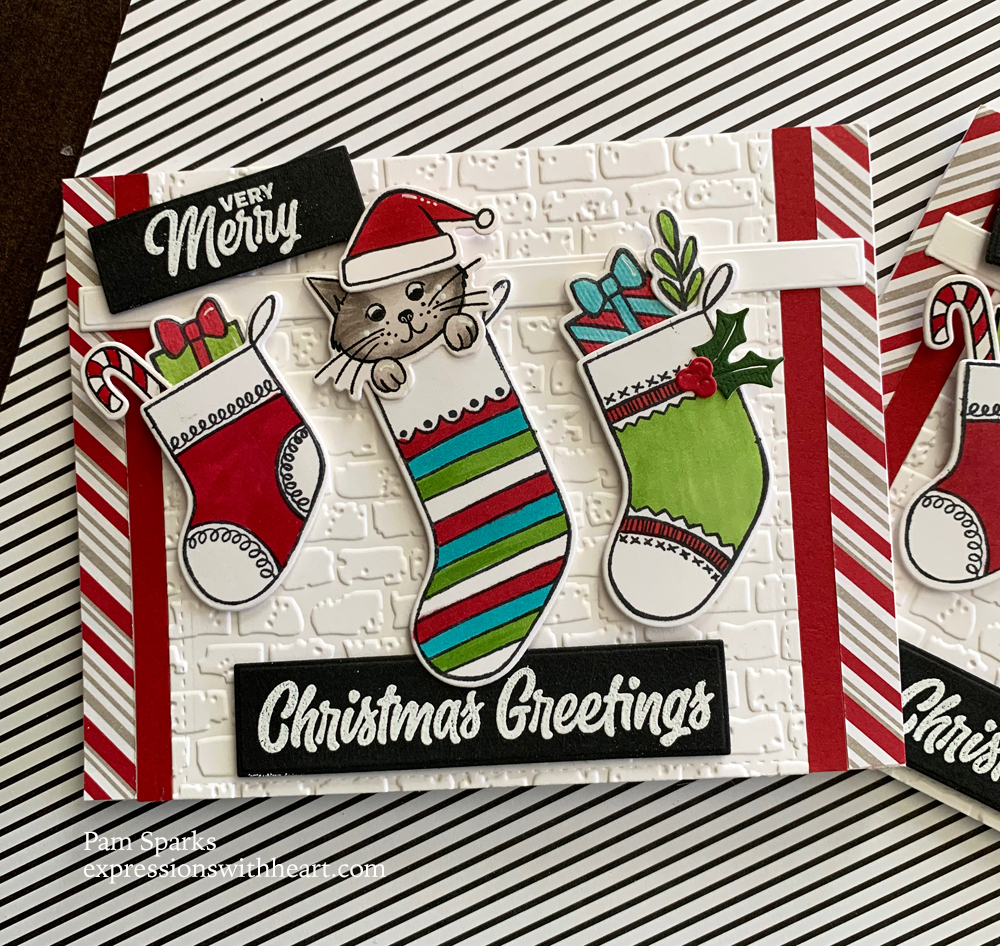
Hi everyone!  I have another Christmas card post to share before I move on!  I spent some of my spare time the last couple months making 18 of these cards for grandkids! They’re all cat and dog loving kids!

I got the fronts put together and adhered to the cardbases and it was what will I put inside to go with the greeting on the front?!

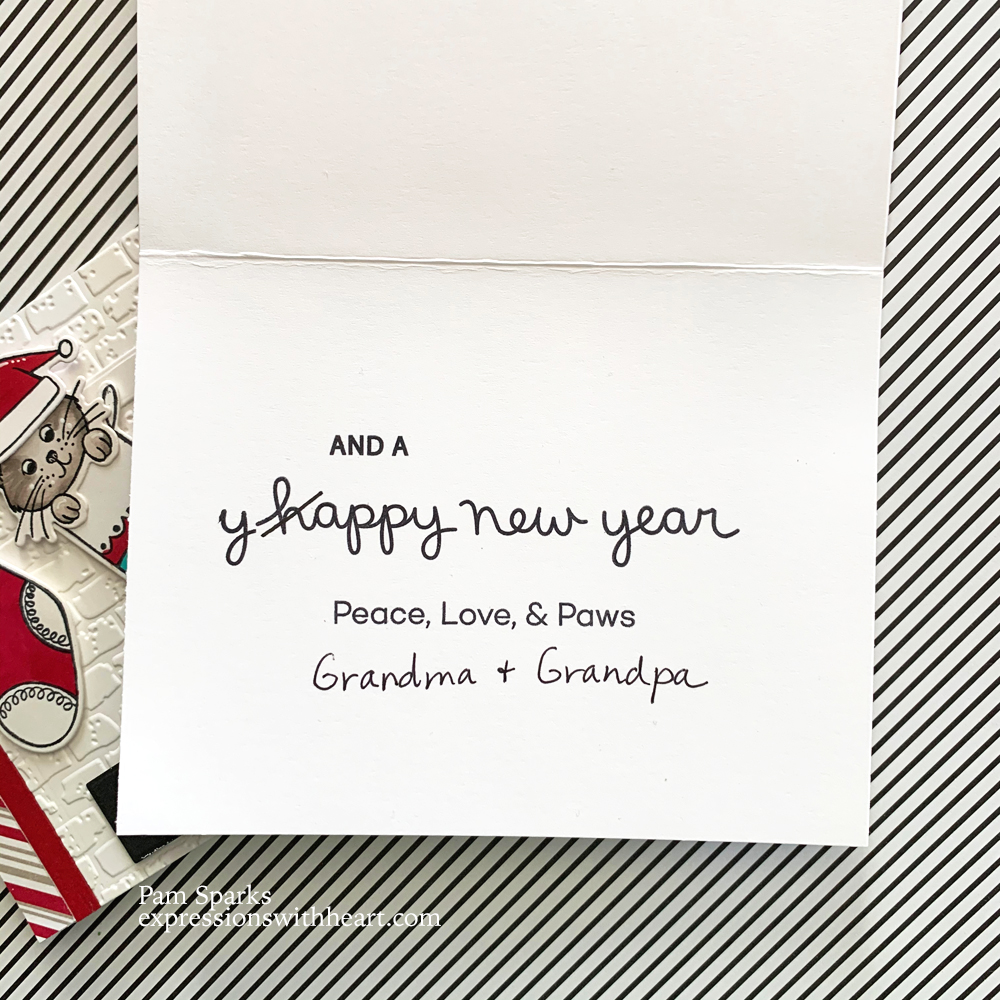
Very Merry Christmas Greetings… and a meowy New Year!  hehe  Thanks to Lawn Fawn for that part and the Peace, Love and Paws is from My Favorite Things. Very happy with how they turned out!

Then there’s the dog one…I had to color a variety of colored dogs to fit the ones in the families!  I didn’t try with the cats…they’re all outdoor cats.

So fun… I varied the stockings a little bit too.

I wanted to be clever with the saying inside the dog cards too… came up with this…

Very Merry Christmas Greetings…and a Yappy New Year!

So cute…they make me smile!  Love and good cheer to you all!  Thank you so much for supporting me and my cardmaking!  I appreciate it!

Stamped in the Misti, die cut in a Big Shot and Colored with Copic Sketch Markers.

Have a meowy and yappy New Year if you have critters!  I have to settle for a Happy New Year! lol

ttul,


p.s. I wanted to let you know about this great SALE at Simon Says Stamp! ❤

Alexandra Renke · cards · CAS · Christmas · Memory Box · Winter

Alexandra Renke Holly Branch Die CAS card…

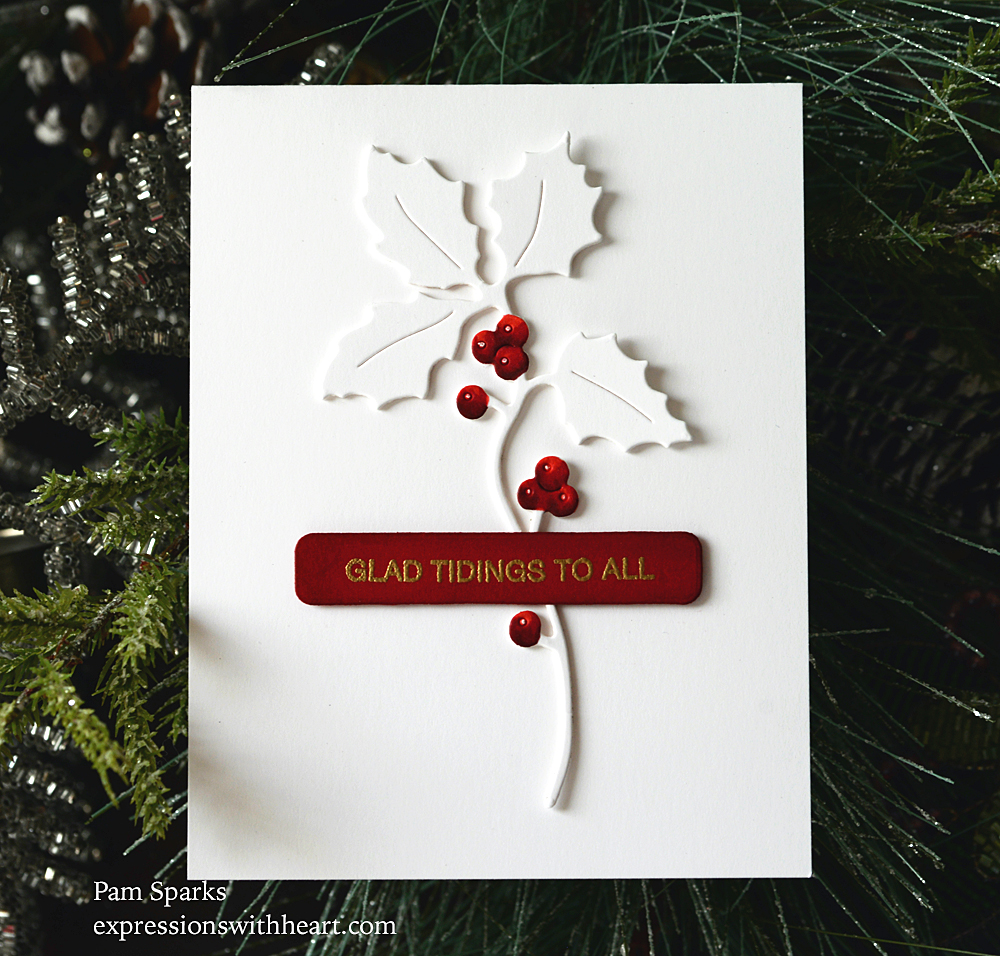
Hi everyone! Glad tidings to you and your kin!  A clean and simple card to share with you today.  I saw a wreath card on Instagram made up like this so I had to try it!

I used the beautiful, elegant Alexandra Renke Holly Branch die and beautiful Memory Box stamps for the sentiments inside and out.

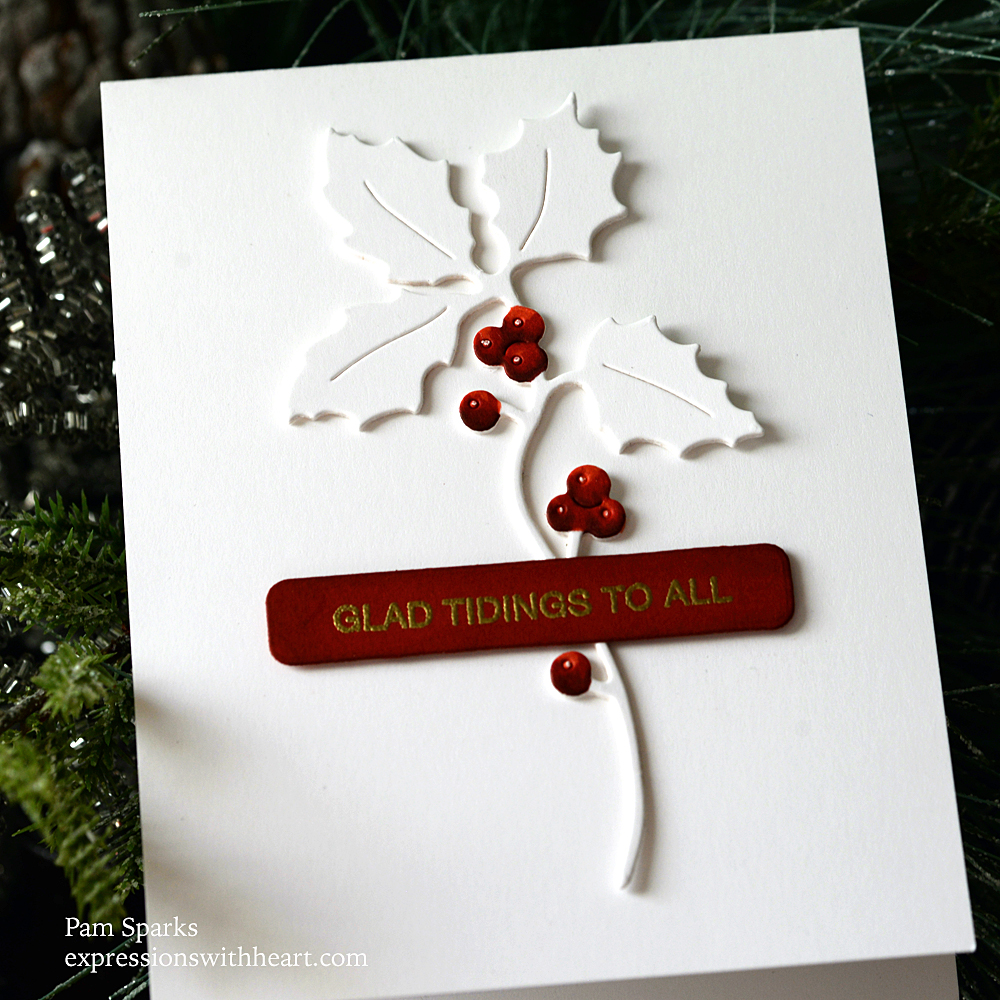
I die cut the holly branch three times, glued them together.  I think I colored the top one before I glued together.  I don’t know that it’d matter.

My pictures aren’t the greatest, I didn’t have time to set up like normal but I wanted to share anyway.

I colored the berries with Copic Sketch Markers R24, 29 and 89.  The little dot is in the die and I just put a dot of white gel pen on it.

I heat embossed the sentiment in Ranger Detail Gold Embossing powder on a strip of red cardstock and die cut it with the long narrow die from the Birch Press Design Contempo Christmas set.

An A2 size card…

Thank you for stopping by today!  I always appreciate your visits and I want to wish you a blessed Christmas. So much to be thankful for.

I just remembered I might be back with the cards I made for the grandkids!  We’ll see how pictures go!  Down to the wire and I haven’t started wrapping yet!  eep!

ttul,

Here’s the die and stamp I used!  Click on the letters below the image to see…

Alexandra Renke craft dies – Holly…
[ STR ]
Memory Box – CL5273D Festive…
[ STR ]
Birch Press Design – 8162 Contempo…
[ STR ]
Memory Box – CL5274 Yuletide Moments
[ STR ]
Copic Sketch Markers and Sets
[ BLIC | SSS | TE ]