cards · CAS · Christmas · Memory Box · rubber stamps · Winter

Memory Box Winter CAS card…

pamsparkspeacefulpineredbirdfront

Peaceful wishes to you as we prepare for another Christmas season!  So many things to be thankful for… Thanksgiving and Christmas go hand in hand!   Although my husband reminds me how hard it is to stay peaceful and calm in the hustle and bustle of the Christmas season!

My card today uses Memory Box stamps and dies, some glitter papers and the new Dark Green  and Red Wink of Stella Glittler Brush markers… I’ll link to them below…

Here’s a close up of how I layered up three trees…very easy… a few dots of glue down the trunk after cutting out of Memory Box Dill cardstock and brushing on the Dark Green Wink of Stella glitter.  I cut the Resting Birds die out of Memory Box cranberry cardstock and colored it with the Red Wink of Stella glitter brush pen.

I purchased the white glitter card-stock at my area stamp store…holler if you want their phone # to send it to you,  I can’t find it to link to.  Otherwise, Cindy has some spot glitter card-stock HERE.

pamsparkspeacefulpineredbird

My first photo before I thought to add the red bird, had more sparkle showing… the sun is in and out today!

PamSparksSnowflakeFrameMagnificentPineFront

Thanks for stopping by!  I’ll be back tomorrow for a blog hop with Perfect Paper Crafting and the Craft’s Meow stamps… you won’t want to miss it!!!  : )

Supplies I used…

cards · Christmas · Class · Hero Arts · Memory Box · punches · rubber stamps · Winter

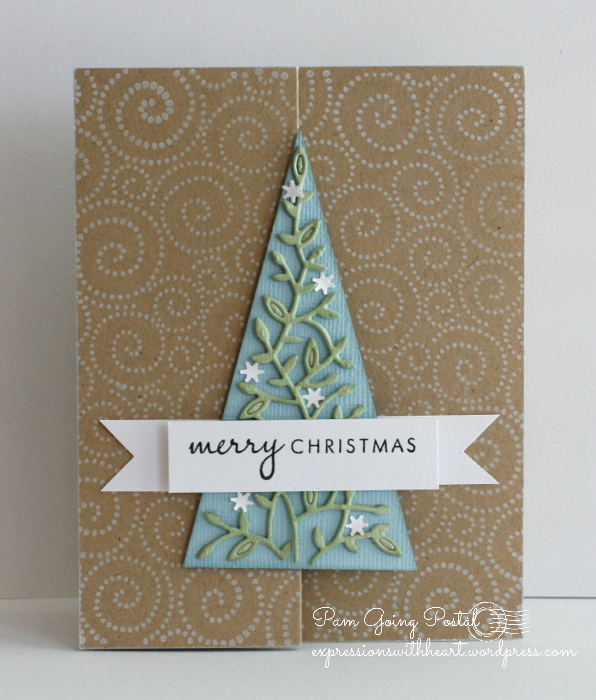
Memory Box Elyse Tree and the Holiday Online Card Class…

PamSparksElyseTreeFront

oh boo… should’ve put a partridge and a pear in the tree!  I was planning on putting a bird in the tree but I forgot when I started thinking the swirls looked like snow and then the snowflakes landed on there instead! haha!  I forgot to use the white Wink of Stella Glitter Brush pen on the snowflakes!  I’m going to add that!

I used the pretty Elyse tree die from Memory Box, HERE and mounted it on a piece of card-stock I just cut with the paper cutter.  The background is a Hero Arts stamp.  I stamped it with Clearsnap’s Frost White pigment ink on Desert Storm card-stock.

PamSparksElyseTreeTop

The sentiment stamps are from Papertrey Ink.  I cut a strip ¾ inch wide, stamped with Onyx Black Versafine ink and trimmed the ends to make the banner.  The teeny flake is an old Fiskars 3 different corners snowflake punch.

Clever way to do the sentiment on a Z-fold card… so why did it take two pieces of card-stock to get the background stamped?! lol  I was close to changing the plan and using pattern paper! lol

PamSparksElyseTreeSquare

The Holiday Card Class is fun, simply because it’s out of the ordinary of what I usually do!  More than likely you will get a break tomorrow…no post from Pam!  Friday I hope to be back with a Magnolia Christmas card for Tilda’s Town challenges.

Happy stamping to you!  Thanks for looking and talk to you later!

cards · Christmas · Class · copics · Printworks · punches · rubber stamps · Snowman · Winter

Joe Kool meets Holiday Online Card Class…


PamSparksPrintworksSMfront

Joe Kool visited our city bearing snow and cold yesterday!  He decided it was SNOW time!  It was still here this a.m. but the sun was out strong and melted it all away by afternoon…I’m sure Joe Kool will be back! haha  Gotta have a white Christmas!

I really hesitated signing up for this online class… didn’t register until Sunday!  In the past I’ve always struggled making the time to complete any of the assignments.   For this session there is a day between classes and that was just the break I needed to make one of the assignments! hip hip hooray!  I hope I can do some more!

What fun!  I love kraft, red, black and white! Throw in the washi tape, twine and a snowman and I’m smilin’!

Joe Kool is just one of the many awesome snowmen from Printworks Collection.  You can find him in the store HERE. The sentiment snow time HERE and Happy everything HERE.

PamSparksPrintworksSMheadClose

I stamped Joe with Memento Tuxedo Black ink and colored with Copic Sketch Markers.  Get a load of that sparkle!!!  You’ve heard about the Wink of Stella glitter brush markers?!  WAY cool, like Joe!  Check them out HERE! I used the white, red and dark green ones. (brushed right over the coloring) They dry fast too!

PamSparksPrintworksSMheadInside

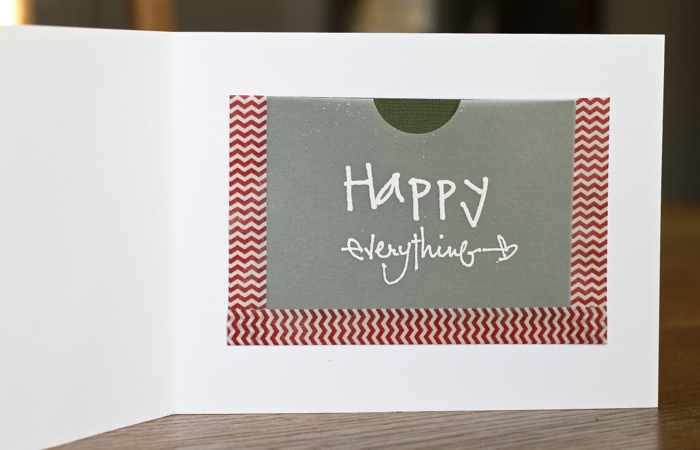
Inside…a gift card holder crafted with vellum and washi tape.  I didn’t have a gift card to put in the pocket, so I put a piece of green card-stock in there for the photo. Now  you can see the white embossed happy everything!   (don’t mind the few specks of white…insert TIP…when you’re embossing on vellum… put a dark paper behind so you can see said specks! Just pretend they’re snow! All better now)

Snowflake punch is this one… HERE.

Challenges…
Addicted to Stamps – punches or dies
Seize the Sketch  – sketch
Paper Playtime – sparkle
Shopping Our Stash – use something already out on your desk (wink of stella pens, copics, stamp pads, washi tape, twine)

Just plain fun!  Thanks for looking!  Love it when you stop by!  Always love to hear from you too!  Take care and stay warm!

Supplies I used…

Blog Hop · cards · copics · Easel · Fall · Perfect Layers Tools

Perfect Paper Crafting meets Some Odd Girl Blog Hop…

PPChop

Welcome to the Hop!  It’s been a hopping weekend and now it’s just moving right on to Monday!

PamSparksPPC-SOGhopAngle700

The Perfect Paper Crafting gals and Some Odd Girl gals are hopping together!  Starting today and running through the 17th, you’ll be inspired.

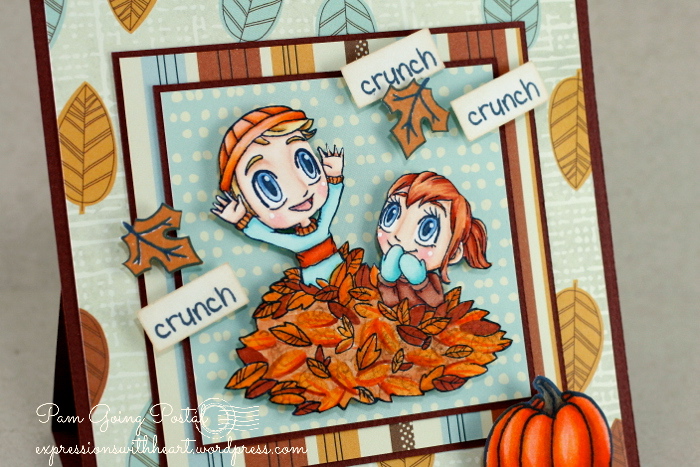
You know I ‘heart’ my Perfect Layers Tools from Perfect Paper Crafting.  I used them on my Easel card today.  I used the 1/16th inch ruler to mat my inner layers and the 1/8th inch ruler to mat the outer layer.  Check them out HERE and use the code Sparks 5% when you checkout!  You will love them too!

PamSparksPPC-SOGhopClose

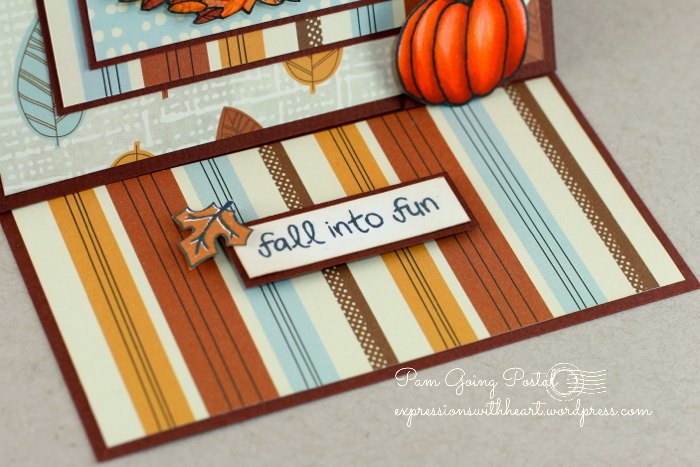
I used images from the Some Odd Girl Fall Friends stamp set.  I know, I know… I’m really into kids in piles of leaves this year! lol  I stamped with Memento Tuxedo Black ink and colored with Copic Sketch markers.  My Easel card is 5 inches square when folded down for mailing. The pattern paper I used is Nightfall from American Crafts but it’s older…sorry ’bout that!

TIP: I mounted the pumpkin on a folded in half circle of card-stock and it serves as the ‘stopper’ for the front panel, holding it in place when it’s standing up.  I adhered the bottom half of the circle to the base of the card and the pumpkin is mounted to the top part of the circle.  When you fold the card down, the pumpkin just lays down flat too!

PamSparksPPC-SOGhopBase


If you’re not already familiar with Some Odd Girl, you are in for a TREAT!  They offer clear and digital stamps, cut files and new accessories, and they are super cute and quirky too!  Once you see their unique style, you’ll always be able to spot them!  You should have arrived from Alexis’ blog, but in case you get lost or distracted along the way, here’s the hop order:

Some Odd Girl blog
Perfect Paper Crafting blog
Suzanne Bier
Eva Uyeunten
Alexis Kemp
Pam Sparks (you’re here)
Judy Bagwell
Wendy Ramlakhan
Jenn Cochran
Mary Pat Siehl
Katie Perry
Roxie Glaza
Kristy Dalman
Jenny Gropp
Leah l’Orange

Enjoy the hop, comment on every blog for a chance to win one of two prize packs that include one Perfect Paper Crafting Tool and one Some Odd Girl stamp set of your choice.

PamSparksPPC-SOGhopFront700

You have until midnight EST, Sunday  to leave comments.  The winner will be announced Monday, the 18th.

 All the best to you!  Thanks so much for stopping by!

Supplies I used…

cards · Fall · Lawn Fawn · Memory Box · Perfect Layers Tools · rubber stamps

Memory Box and Lawn Fawn…

PamSparksAutumn725

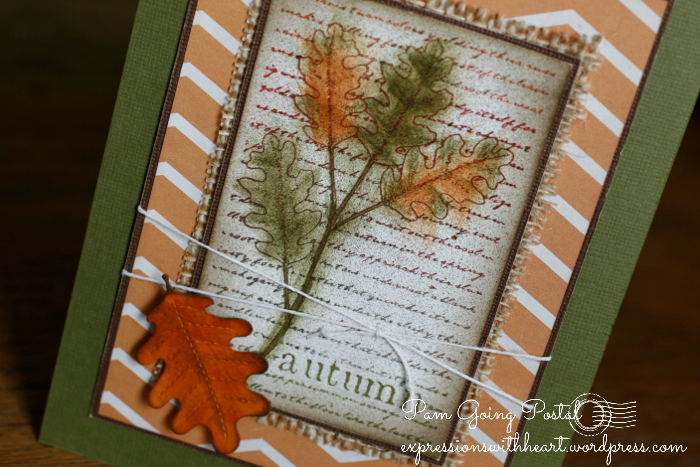
I love this Autumn Leaf Collage stamp from Memory Box.  I had to add a little burlap (she’s out of what I used but you could try this) after I spritzed it with Walnut ink from Tsukeniko.  I love how the rustic look still works with the straight lines of the Perfect Layers Tools.  I kept the mats smallish using the 1/16th in ruler for matting because I just wanted a hint of the dark brown to make the layers pop!   I stamped with Memento Rich Cocoa ink and colored with Distress inks (fall colors) and the foam ink blending tools.  Messy looking but spraying with the Walnut ink helped me get used to the messy! lol

I matted with My Minds Eye 6×6 Happy Haunting paper pad and tied it up with hemp cord.

I scored and folded a piece of 8.5 x 11 Bazzill textured card-stock in half… glued the layers to this with ATG tape, measuring in ½ inch in on the fold side with my clear ruler… then cutting the margins with the ½ inch Perfect Layers ruler.

Oh, I did rough up the edges of the dark brown coredinations card-stock with the Tim Holtz  Sanding Grip.

PamSparksAutumnSide700

The leaf is from a Lawn Fawn Leaves die set.  I inked it good with Distress ink and the ink blending tool too! : )   Happy Autumn!

Thanks for stopping by!  I appreciate your visit and your comments!  You’re the best!

Supplies I used…