cards · Christmas · Die Piecing · Ornament · Slimline · Spellbinders dies · Stitching · Winter

Stitched Ornament Merry and Bright Slimline Card…

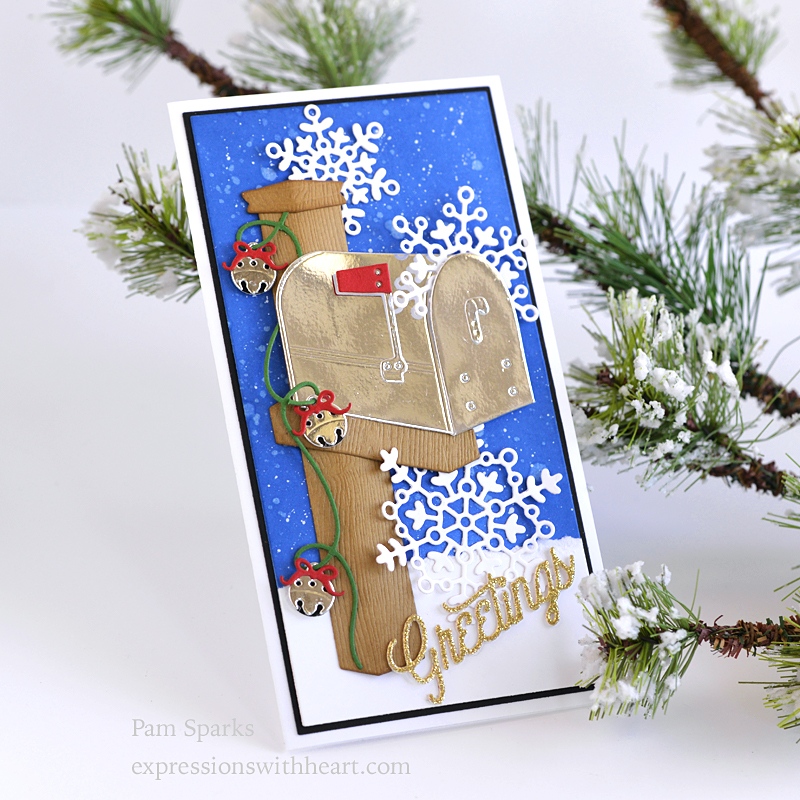
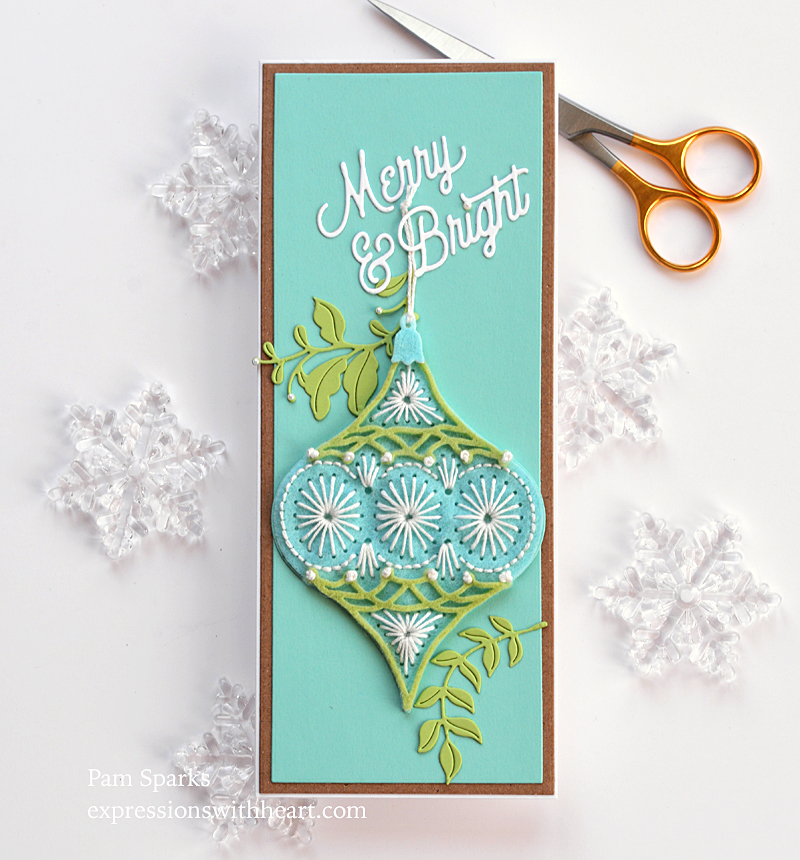
Hi everyone!  It’s been some time since I used wool felt so I found my box and set to work die cutting and stitching up this new die from Spellbinders Stitched Christmas release.

I meant to make it as an ornament to hang on the tree but once again I forgot the plan and glued it to a card! lol

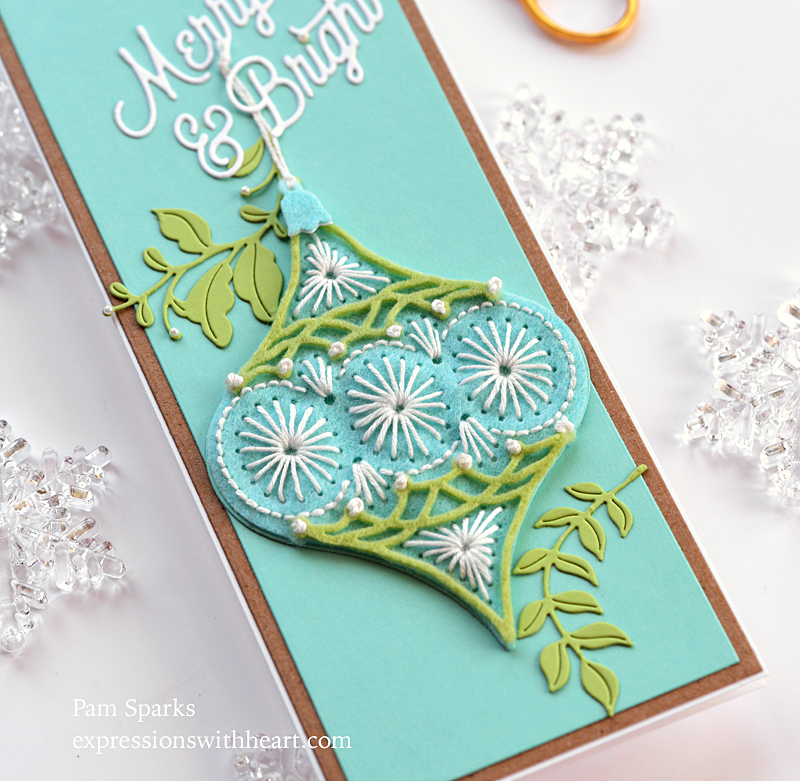
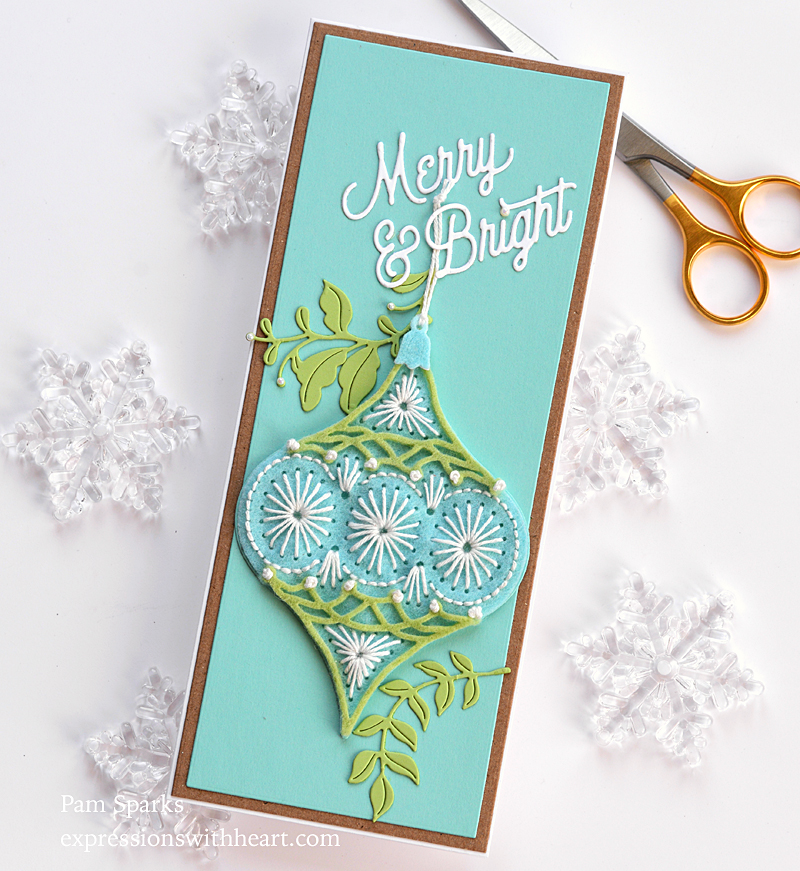
The pretty branches are part of the die set.

I used Knit Crosheen thread to for my stitching.  Taylored Expressions Tiffany and Avocado wool felt.

I used Tombow Mono Multi liquid glue to adhere the top and bottom avocado felt pieces.

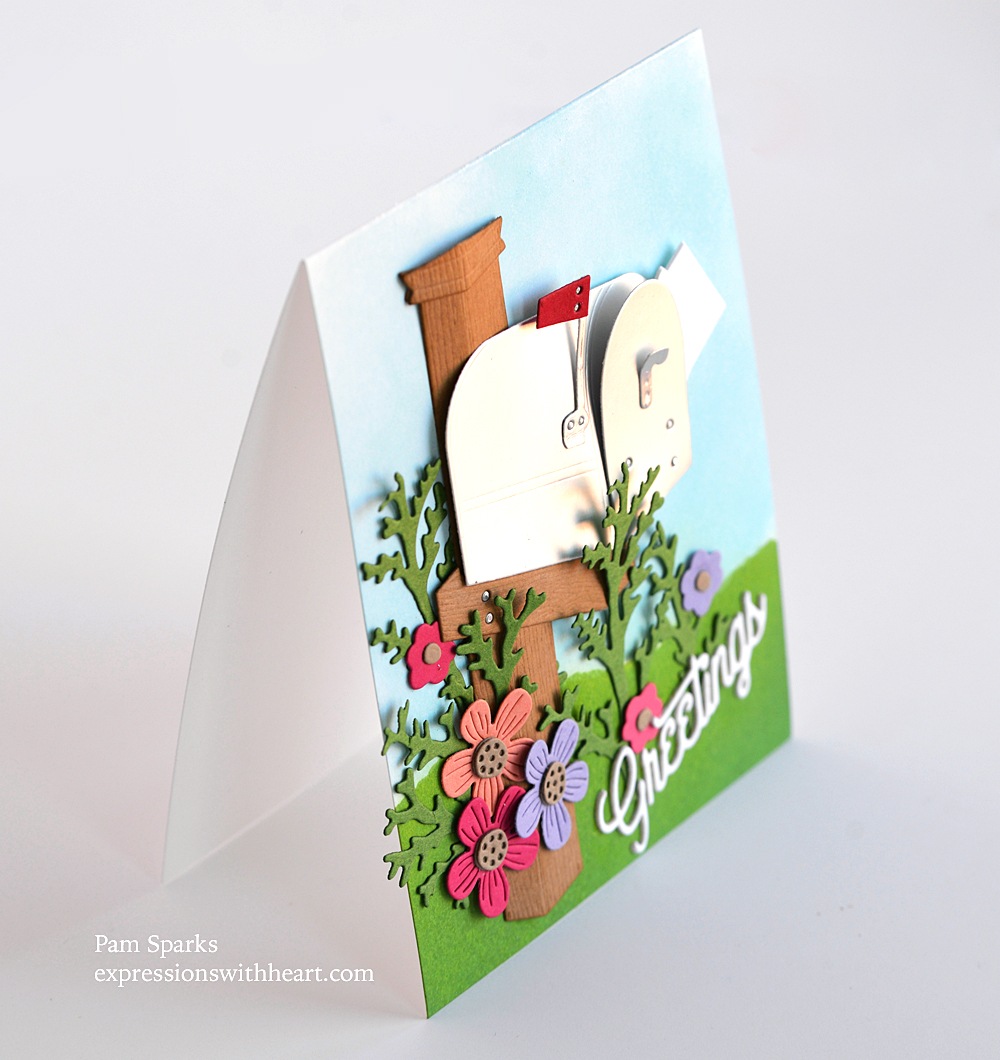
My slimline card size is 3 ⅜ in x 8 ⅜ in.

I used Spellbinders new Mix and Match Holiday Greetings die set for the sentiment. I love this font!  There’s 18 word dies in the set!

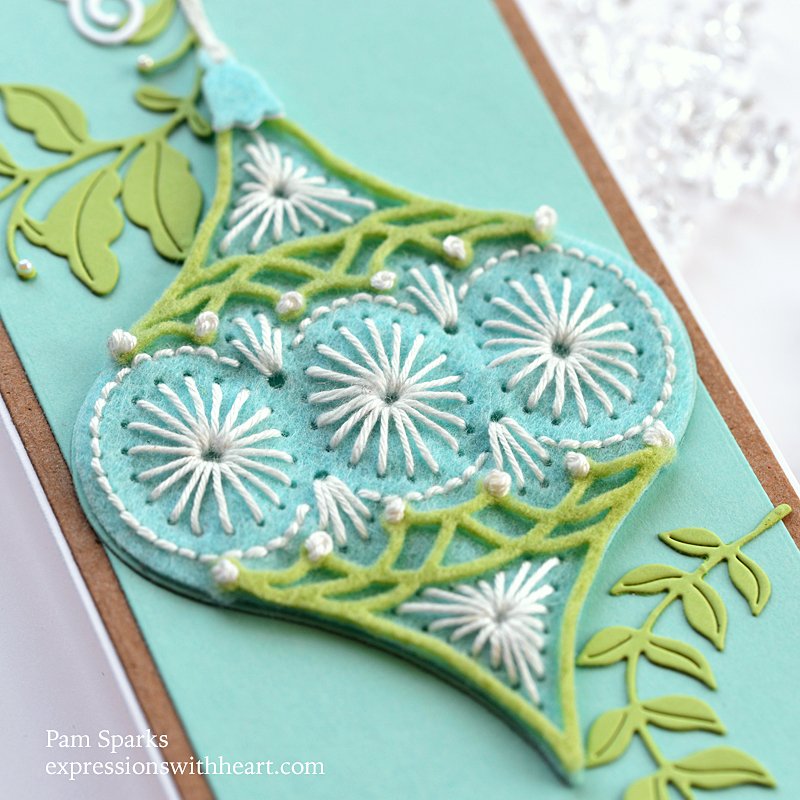
Here’s a close up of just the ornament…so pretty!

I wish I could show you this one in person! It’s definitely a card to give to someone that will keep it and get it out for display each Christmas season. 

The tiny pearls are from starlitstudio. 

Linking to some Challenges…

The Holly and Ivy Christmas Challenge – anything Christmas goes 

Craftyhazelnut’s Christmas Challenge – anything Christmas goes

Merry Little Christmas challenge – anything Christmas goes

Sweet Stampers Challenge – Christmas in July

The 12 Months of Christmas Link Up – Anything Goes Christmas

Thank you so much for stopping by! Countdown to Christmas is on!  EEK!  

Links below for what I used to make this card…


Spellbinders Buy One Get One offer good through August 7!

Spellbinders – Celebrate The Season…
[ SBC | SSS | SPL ]
Spellbinders – Stitchmas Christmas…
[ SBC | SSS | SPL ]
100% Wool Felt – Blues & Purples
[ TE ]
100% Wool Felt – Yellows & Greens
[ TE ]
Pearl Embellishments – 2mm, 3mm and…
[ STR ]
Bazzill Card Shoppe – Spearmint Stick
[ STR ]
Bazzill Card Shoppe – Robin’s Egg
[ STR ]
Crystal Katana Black Edition |…
[ SPL ]
Spellbinders – Tool N One – Rose Gold
[ SBC | SSS | SPL ]
Tombow Mono Multi Liquid Glue
[ STR | SBC | SSS ]
Platinum 6 Die Cutting and Embossing…
[ SPL ]


cards · Christmas · Die Piecing · Distress Ink coloring · Mini Slim Card · Spellbinders dies · Winter

Winter Garden Release Letterbox Card…

Special Delivery!  All the fun things of the season right there!  Snail mail, snowflakes, jingle bells and snow!

I went with a Mini Slimline Card for this one.  I used Spellbinders Precision Layering Mini Slimline A and B sets to cut my layers.  I really like these dies because they are heavier and hold the rectangle shape better than the thin silver ones do. I don’t like it when I die cut layers and they’re wonky!

I tore a piece of white cardstock for the mailbox to stand in (snowdrift) and die cut it with the same layer die as the blue background size.  I used Prize Ribbon Regular Distress Ink to ink up the background this time.  I spattered on some water droplets.  I like to spray water into the palm of my left hand, then I rub both my hands together so they’re both wet, then I clap over the inked background to spatter the water drops. I let it sit a minute, then lay a paper towel over it to get the extra water.

Then I spattered on some diluted white acrylic paint.

I die cut the mailbox post from woodgrain cardstock and the mailbox from silver mirror cardstock.

I die cut the sentiment from gold glitter cardstock and white cardstock, then glued the gold on top of the white.

The jingles bells and ‘garland’ are from the NEW More Holiday Decor die set.  I love how cute the little bow is on the super cute jingle bells I die cut in silver mirror cardstock also.

I love that there’s just enough dimension to add perspective.  It’ll still mail in an envelope for one stamp.

I used the thin mounting tape, I’ll link below, behind the mailbox post and box on this card and yesterdays.

Finished size is 3 ½ in. x 6 ½ in.   So happy to have a start on Christmas cards!  I can’t believe we’re half way through July! I need to get more done!

I’ll be back soon….we have to keep making!

Here’s what I used to make this card…

Spellbinders – Winter Garden…
[ SBC | SSS | SPL ]
Spellbinders – Celebrate The Season…
[ SBC | SSS | SPL ]
Spellbinders – Celebrate The Season…
[ SBC | SSS | SPL ]
Kaleidoscope Snowflake | Small Die of…
[ SPL ]
Spellbinders – Precision Layering…
[ SBC | SSS | SPL ]
Spellbinders – Precision Layering…
[ SBC | SSS | SPL ]
Hammermill WHITE 100 LB SMOOTH…
[ SSS ]
Ranger Ink – Tim Holtz – Distress Ink…
[ SBC | SSS ]
Ranger 4oz Distress Sprayer by Tim Holtz
[ STR | SBC | SSS ]
American Crafts Glitter Cardstock – Gold
[ STR ]
Bazzill Foil Cardstock – Silver 12×12
[ STR ]
Platinum 6 Die Cutting and Embossing…
[ SPL | SSS ]
Scrapbook Adhesives Crafty Foam Tape…
[ STR ]
Scor-Tape; Scor Tape
[ STR ]
Tombow Mono Multi Liquid Glue
[ STR | SBC | SSS ]

All Occasion · Birthday · cards · Die Piecing · Flowers · Oxide Inks · Spellbinders dies · Summer · Thinking of You

Winter Garden Release in a Summer Way Card…

Hi everyone!  How fun is this NEW die set called Letterbox from Spellbinders Winter Garden Release!  I made it up in a Winter Scene card too but I think I’ll post it separately because I have so many pictures of this one.

I die cut everything and put them together before I adhered them to a Distress Oxide ink blended A2 size cardbase. I used Mowed Lawn and Tumbled Glass with a torn piece of copy paper to separate the sky and grass.

I used a NEW die set called Winter Evergreen Foliage behind the Be Bold flowers.

I love these sweet blooms with the mailbox!

The die cut sentiment is from the NEW Mix and Match Holiday Greetings Die set.  I die cut it twice in white cardstock, glued them together and glued them directly to the card.

I used woodgrain cardstock for the post and a matte silver metallic cardstock for the box.

I hope you like this as much as I do!  I’m anxious to show you the Winter version too!  ❤

Linking to Simon Says Stamp Wednesday Challenge – Make your own backgound

Thank you for clicking over and holler if you have any questions!

Dies and Supplies I used to make this card…

Sale info below!

Spellbinders – Winter Garden…
[ SBC | SSS | SPL ]
Spellbinders – Celebrate The Season…
[ SBC | SSS | SPL ]
Spellbinders – Winter Garden…
[ SBC | SSS | SPL ]
S5-502 Spellbinders BE BOLD BLOOMS…
[ SSS | SBC | SPL ]
Spellbinders – Parcel and Post…
[ SBC | SSS | SPL ]
Tim Holtz Distress Oxide Ink Pad…
[ SSS | SBC ]
Ranger Ink Tim Holtz Tumbled Glass…
[ SBC | SSS ]
Hammermill WHITE 100 LB SMOOTH…
[ SSS ]
Bazzill Card Shoppe
[ STR ]
Simon Says Stamp Cardstock MATTE…
[ SSS ]
Tombow Mono Multi Liquid Glue
[ STR | SBC | SSS ]
Platinum 6 Die Cutting and Embossing…
[ SPL | SSS ]
Memory Box – SH44003 Woodgrain Paper…
[ STR | SSS ]


Christmas in July Sale at Scrapbook.com!  Ends July 24th… check it out!


All Occasion · Birthday · cards · Die Piecing · Interactive · Spellbinders dies

Spellbinders 20th Birthday Celebration and SALE!

Hi everyone! Time to celebrate another birthday!  It’s hard to believe Spellbinders has been around 20 years!  I can remember when they first started in the papercrafting business! Remember the Wizard?  We’ve come a long way! lol

I had the opportunity to post for them today and you know I’m always up for an interactive die design! 

I’m showing my take on the Pick Your Greeting Slider Die set, the Slider Bar Accents die set and the Complimentary Slider Greetings stamp set. They’re all a part of the Birthday Celebrations Collection.

As you pull the tab, the arrow moves up and down the sentiments…

So cute! I think this would be super fun with stickers also for a quick and easy card…last minute…although just die cutting is fast too.

Just looking at these pictures makes me want cake! haha

I put a little white pigment ink on the die and pressed the die cut back in the die to get the letters ‘PULL’ to show up more.

I die cut the white tab frame in white cardstock and used mounting tape strips on three sides and small pieces on the top for the stopper.

On the inside it’s very clean and simple but a GREAT BIRTHDAY message!

And back to the top!  I love easy to make interactive cards.  Super cute sets… check them out at the links below! If you’re like me, you always need more birthday cards! Enjoy the celebration!

p.s. I added a reel with another slider made with stickers on Instagram… go see it HERE and turn up your volume!  ❤   


Spellbinders is having a birthday special right now… $20 OFF your next purchase of $100 and a Bonus $20 OFF Machines! 

Discount applied in the cart…

Spellbinders – The Birthday…
[ SBC | SPL ]
Spellbinders – The Birthday…
[ SBC | SPL ]
Spellbinders – The Birthday…
[ SBC | SPL ]
The Birthday Celebrations Bundle –…
[ SPL ]
S5-502 Spellbinders BE BOLD BLOOMS…
[ SSS ]
Scrapbook Adhesives 3D Foam Strips…
[ STR | SSS ]
Spellbinders – Platinum 6 – Die…
[ SBC | SPL ]
Spellbinders – Quick Trimmer for Foil…
[ SBC | SSS | SSS ]

cards · CAS · Christmas · Spellbinders dies · Winter

Spellbinders Limited Edition, Merry Everything Christmas Kit Cards…

Hi cardmakers and friends! My post today is something a little unusual for me!  Stick with me and keep scrolling!  Five cards today and one is a die cut card from this fun, new kit from Spellbinders!

The Merry Everything Christmas Kit is an ENORMOUS holiday kit that contains OVER 630 PIECES. This gorgeous traditional holiday themed kit can create 25+ Cards, 24+ Tags and so much more. Put your creative juices to work to come up with so many more holiday projects. Plus, check out the project tutorial included in the kit along with all the fun ideas on the kit link, on the SB blog and IG. This card kit is NOT a part of our Clubs, anyone can purchase it, there’s no need to join the Club. YAY!

To add a little detail to my mistletoe card, I scored with my scor-pal a long the lines of the bow and shaped it a little with my fingers. I inked around the focal image with Cracked Pistachio and Lucky Clover Distress Oxide Inks and the mini ink blending tools. I added a little glitter pen to the berries but then scraped it mostly off because it covered up the red.

There is a cute car and tree die set in this kit!  I always love cars and trees at Christmas, don’t you?! hehe

I die cut both tree pieces, folded the branch piece in half and colored the trunk with a brown marker.  I cut the backer tree piece in half and glued them together and then to the car… so cute!  Several other pieces and ways to use the tree in the set also!

Tis the Season is a super cute stamp from the sentiment stamp set that comes in the kit.  Super cute and stamped very nicely with Ranger Archival Black ink.

AND… the background paper is from the 6×6 paper pad that comes in the kit!

This card panel …. so beautifully CAS (clean and simple), I just left it that way! I did corner round the cardbase corners… that is all!  I know, a cheater card for sure! hoho

Some more of the ephemera and paper from the kit. All I added was gold stickles to the poinsettia center and white gel pen on some of the pieces.  Oh, I did edge the papers and the Santa Bingo piece with ink.

On this one, the noel is a sticker from the kit, the hohoho is from a chipboard sticker set in the kit, the tag is one of several tag designs from the kit…so much festive goodness to create with in the kit!  So many things I didn’t use yet! :O

There’s even double sided tape and mounting foam squares and dots and the cardstock is really nice… a perfect red in there!

So glad you stopped by and I hope you enjoyed my wandering from my usual type posts.  It was fun for me! I’ll be back because I have lots more to share!

Links to the products I used…

Platinum 6 Die Cutting and Embossing…
[ SPL ]
Merry Everything Christmas Kit -…
[ SPL ]