Blog Hop · cards · copics · Die Piecing · Memory Box · Perfect Layers Tools · Poppystamps

Perfect Paper Crafting and Simple Stories Blog Hop…

get-attachment-2.aspx


WELCOME to Day One of our Perfect Paper Crafting Blog Hop with Simple Stories.  I’m starting the week long hop here on my blog.  The other PPC and SS gals will have a post on another day of the week.  Check in on the Perfect Paper Crafting Blog each day, April 7 – 12,  for what two blogs to visit!

Prizes!!! * A set of Perfect Paper Crafting Rulers and a Simple Stories Paper Collection! Comment on the blog posts all week for a chance to win!

My first card today, I colored the cut from the Joyful Bouquet die by Memory Box with Copic Sketch markers. Then I colored the flower centers and some of the stems with the Wink of Stella Clear Glitter Brush marker.  (forgot to take a close up to see the sparkle)  I kept the negative/waste part and pieced it back in like I did on this card, in this post HERE

I trimmed it down, matted it with black card-stock and the Perfect Layers Mini Rulers ⅛ inch ruler and layered it on SS Lookin’ Good card-stock trimmed down to an A6 size card. I also used one of the label stickers and the circle heart chipboard sticker from the DIY Boutique Collection.

Challenges…
Stampin’ for the Weekend 
wants to see Spring Colors


Weekly-Favorite


PamSparksJoyfulBouquetSS


Enjoy! it’s a beautiful day!  On this card I used the Perfect Layers Mini Rulers ⅛ inch ruler to mat SS Newspaper card-stock to white card-stock and then to an A2 size kraft card base.   I colored the SS enjoy sticker with Copic Sketch markers to get a closer match to the card-stock I used for the leaves in the die cuts. The sentiment is cut from the SS Who’s To Say card-stock and layered to one of the pieces from the SS Card Foundations pack.   I used the Memory Box Sophia Bloom dies to cut and layer up the flower border.

PamSparksSophiaBloomSS


“Let’s Do This”… what a cute sticker.  We like to ride bikes and take pictures… so it was fun to make a card with the SS bike, flower and butterfly chipboard stickers and poppystamps Cinema Film Strip die.  I added the SS heart talk bubble sticker and a couple more behind the film strip.  I used the Perfect Layers Mini Rulers ⅛ inch ruler to mat SS Chevron card-stock (the back side) to white card-stock, then to SS Polka card-stock and then to a 5 ½ inch square white card base.

PamSparksCinemaFilmStripBike


“You Are My Anchor”, I cut the sentiment from the SS Who’s To Say card-stock.  SS Anchor chipboard, some twine, a SS circle heart chipboard sticker and Memory Box Big Splash Border die at the bottom. This card uses the back side of the SS Outside the Box card-stock sheet and a narrow strip from the SS Herringbone sheet.

PamSparksBigSplashAnchor


A cute “just a note” SS typewriter chipboard, some super sweet heart chipboard circles, a card foundation (I added the white stitching lines), a frame from the Freeze Frame sheet matted with the 1/16th in Perfect Mini Layers Rulera couple sticker labels and this and that word stickers.  A2 size card.

PamSparksSStypewriter


The last one!  hehe  A 4 ½ in. square card with the cute little SS Chipboard telephone sticker and word stickers.  The frame is from the SS Freeze Frame sheet, I used the 1/16th in. Perfect Mini Layers Ruler to mat it and layer it on a SS Polka square of card-stock.  I used one of the blooms from the Memory Box Sophia Bloom set in the corner.

PamSparksSStelephone

No stamps!!! eek!  can you believe it!  I missed them while creating these though.  Paper is fun but I love my stamps!  At least I worked in some dies.  Simple Stories pattern paper, stickers and chipboard make cute and fun cards though and it was challenging for me to use pattern paper again!  I love a challenge! : )

So happy to promote Perfect Paper Crafting!  I LOVE my Perfect Layers Rulers and Mini Rulers.  The mat is awesome too!  Smooth and easy cutting every time! Be sure to use my code, Sparks5%, when you shop the PPC store.

Hop over to Simple Stories blog to see their FABULOUS work!  Comment here and there for a chance to win one of the prizes being given away at the end of the hop! Enjoy the week of inspiration!  Thanks for visiting my blog and happy creating!

Supplies I used to create these cards…


Blog Hop · cards · copics · Easter · Perfect Layers Tools · Printworks · rubber stamps · Spring · Watercolor

Perfect Paper Crafting Blog Hop and Printworks…

get-attachment.aspx

Welcome to the week long, Perfect Paper Crafting, Brand Ambassador blog hop.

  • the hop starts today, March 31st and goes through Friday, April 4th at Midnight PST
  • visit all of the participating blogs and leave a comment on every single one for a chance to win one of the prizes!
  • prizes…one $50 Gift Certificate to Perfect Paper Crafting and one $25 Gift Certificate to Sugar Pea Designs
  • the winner will be announced  Sunday, April 6th on the Perfect Paper Crafting blog

We’re posting today to show you what we created using the NEW Perfect Paper Crafting Mini Tools and the NEW Perfect Cutting Mat!  (use Sparks5% at checkout for 5% off your order)


MinisPkg__02217.1388869767.451.416MatPckg__92234.1388872844.451.416

I have a bunch of cards to show you so I better get started!  You know me… I LOVE, LOVE, LOVE my Perfect Layers Tools and NOW we have NEW Mini tools and an AWESOME NEW Cutting Mat!  I love this mat… it is different than other mats!  It has just the right amount of softness to it… so different than all the hard, hard, mats we’ve been using. I love how the craft knife works on it and you can hardly see any cut marks!  It’s the perfect size for card-making and so are the new mini rulers.

Fabulous products to save card makers time!  That is a BIG plus for me!  No more trimming, measuring, trimming, measuring, trimming, measuring, to get the right mat size! YAY!

On my first card, I used the ⅛ inch and ¼ inch ruler and Printworks NEW Spring Release rubber stamps.  They come in CLING HERE and mounted on WOOD HERE(use the code “PAM2014” for 5% off your order total)


PamSparksPWCrossesRisen2


I was so excited at how this card turned out. I stamped in Archival Coffee stamp ink on Canson watercolor paper.  I painted in the grass and the little bit of yellow with Distress Markers, using them like watercolor.

I edged the piece with Tumbled Glass distress ink and the ink blending tool and then flicked water on it.

Here’s a close up…


PamSparksPWCrossesRisenClose


Here’s the NEW sentiment I stamped with Versafine Onyx Black on the inside.  The flower is colored in with a white gel pen.


PamSparksPWCrossesRisenInside


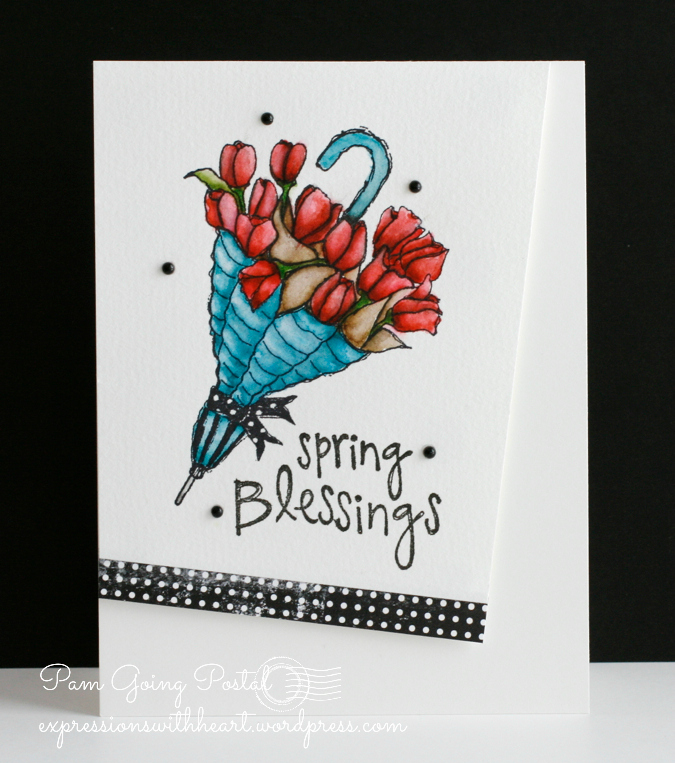
Here’s a pretty Spring card with the NEW Tulip Umbrella stamp and Spring Blessings sentiment stamp…


PamSparksPWTulipUmbrella


For this card, I used the ⅜ inch ruler to add the polka dot mat.  So easy with the new mini size ruler.  They make me happy!
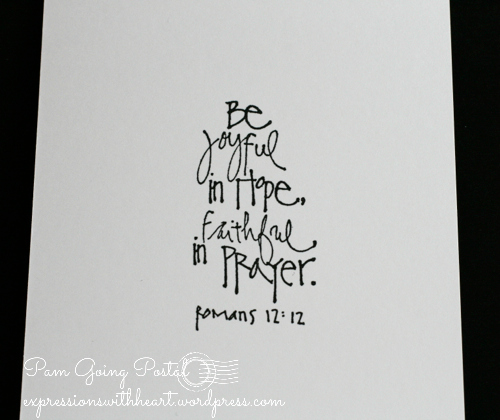
Then on the inside I used another new sentiment from Printworks…stamped with Versafine Onyx Black ink.


PamSparksPWUmbrellaInside


I have a tip for you… did you notice the top layer of my card matches up to the card base layer in the top left corner?  This slant type card is really popular right now, so I thought, why not!  Then it was like, oh, well, I want the layers to fit together perfectly, what can I do?!   Did you guess?  I use my stamp a ma jig ALL the time!  YES!  It works perfect!  Another awesome tool!  I took a picture so you could see what I mean.  Lay the card base in the angle of the stamp a ma jig, then lay the top piece right in on top and it’s perfect.  I did use mounting squares on the image piece.


PamSparksPWTulipUmbrellaTip


One more thing to make me very happy!  YAY!

The Tulip Umbrella is stamped with Ranger Archival Black ink on Canson 90# watercolor paper.  I wanted a similar white for the card base, so I used Strathmore Bristol card from a pad for it. I watercolored the image with Distress Markers.

***Linking up to the Simon Says Stamp Monday Challenge – Anything Goes

CAS-Favorite

Do I dare post another card?!  So many cute new stamps from Printworks!  Here’s a cute bunny card! I used the 1/16th inch and 3/8th inch ruler to mat the image.  Then I positioned it on the card and used the 3/8th inch ruler again for the sides.


PamSparksPWBunnyCarrotNameTag


I stamped the NEW Carrot Name Tag stamp and NEW thanks with Memento Tuxedo Black ink and colored with Copic Sketch Markers.  The background is Tumbled Glass Distress ink applied with the ink blending tool.

Darling image and wouldn’t it be so cute for place cards at your big Easter Dinner! Just put the name where the ‘thanks’ is.  Cute!

Copics – green YG00, 13, 17;  orange YR00, 02, 04, 07, 09; bunny E40, 41,42 and R81,83,85

I have another card but I think I better save it for another day! : )  You’ve been so patient to make it clear to here in this post! eek!

Here’s the blog  hop list…

Perfect Paper Crafting & Laura Lynn 
Wendy Ramlakhan 
Pam Sparks  – you are here
Roxie Glaza 
Jenny Gropp 
Susie Moore 

Kim O’Connell
Jeanie Witmer 
Heather Hudson 
Lori Brown 
Kat Ancheta 
Dana Joy 
Kristie Maynard 
Kim Bush 
Diane Bove 
Patti Gilliam 
Cathie Rigby 
Linda McClain 
Leigh Brunton 
Nancy Baier 
Jenn Cocran 
Lezlye Lauterbach 
Faith Abigail Prado 

Thanks so much for stopping by today!  I always love sharing what I’ve been up to! Have a great week hopping and commenting for a chance to win! ttul!


Supplies I used on my cards today…

cards · copics · Easter · Memory Box · Spring

Memory Box Blog Blitz week…

PamSparksBasketBlossom

Hi everyone!  It’s Blog BLITZ week on the Memory Box blog all week!  Two posts and TWO chances to win each day!  Inspiration and prizes!  YAY!

For my post today, I’m using NEW dies, a NEW stencil and a couple dies from the January release too!

I embossed the NEW Distressed Tula Stencil by running it through the Big Shot on Kraft card-stock. I inked it with Walnut Stain Distress ink and the ink blending tool. Layered this piece to a 4 3/4 x 6 inch white card base.

I die cut and embossed the NEW Bountiful Basket die from Kraft card-stock and inked it with Walnut Stain Distress ink and the ink blending tool too. LOVE this basket… it’s going to be cool for so many things!

I die cut and embossed the NEW Blushing Bouquet die from Dill card-stock and then again in Sweet Corn card-stock for the flower part of the die. I ran the Sweet Corn flowers back through again to emboss them.

While the flowers are still in the die… I shaded them with a little more color using two Copic Sketch Markers…Y13 and Y15.

PamSparksBasketBlossomClose

I love adding greenery to flower arrangements…so the search through dies begins for the right leaves! I love this NEW Beach Sprig die, it adds a whimsical, sprinkly, spronkly feel to the card. I cut it from Meadow card-stock.

Then I needed some larger leaves so I used the Slender Leaves die in the basket and an end piece from the Norwich Corner die with the loose flower, both cut in Dill card-stock. I love using pieces of dies to finish things off.. just makes me happy! : )

The single flower is one of the dies in the Botanic Frame set. Perfect match!

I needed a table doily… so to speak! *grin* Enter the Holly Holiday Frame Set. Love it! So dainty and pretty… love the little flower it cuts out in the corner… wouldn’t it be sweet pieced back in with a color card-stock! Another card idea!

And then…back to this NEW release…check out this NEW Plush Bow die cut in Lavender card-stock. A darling addition to the basket of flowers…feels like Spring/Easter for sure!

I think that pretty much covers the details for my card… holler if you have any questions!

Click over to the Memory Box Blog and comment on the blitz posts!

***Linking to some challenges…
Moxie Fab World 
– Styling with Stencils Challenge
Crazy 4 Challenges – Shake your Thing

Weekly-Favorite

ttul!

Supplies I used to make this card…


Blog Hop · cards · CAS · Christmas · copics · Impression Obsession · Memory Box · Perfect Layers Tools · Poppystamps · rubber stamps · Serendipity Stamps

Blog Hop – Perfect Paper Crafting and Serendipity Stamps…

SerendipityHop

Good morning and WELCOME to the first day of the week long Perfect Paper Crafting with Serendipity Stamps Blog Hop!  So excited to be blogging with this wonderful group of stampers!

If you’ve come from Marybeth’s Blog, you are in the right place.

You will want to hop and comment on all the blogs… AWESOME PRIZES… I mean AWESOME!
Perfect Paper Crafting and Serendipity Stamps are both giving away a $50 Gift Certificate
Two winners will be chosen randomly from the people that have commented on all the blogs!
Winners will be announced on the PPC and Serendipity blogs on March 17th.

PamSparksSerendipityOrnamentIOPine

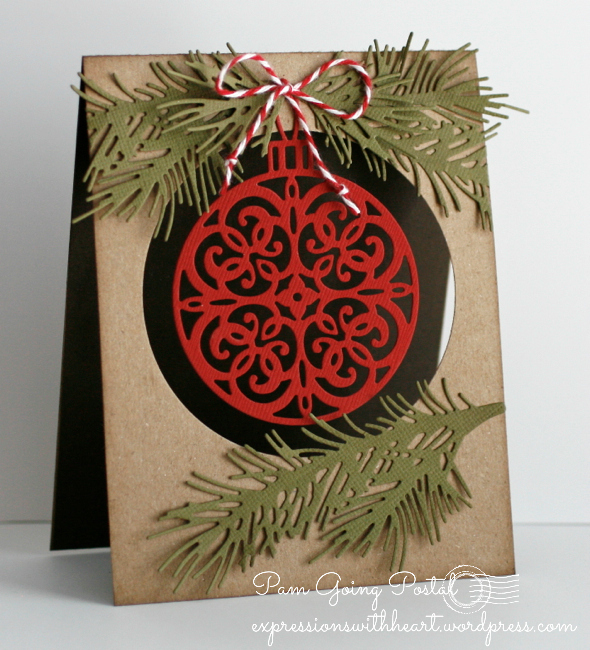
My first card for the hop is a window card…cut a circle from an A-2 top folding card, die cut the Serendipity Ornament die…lovin’ this die! Poked a couple holes for the twine bow, die cut some pine branches, glued them on and there you have it!  It was hard for me to leave it without a sentiment, but I’ll figure something out! lol

PamSparksSerendipityOrnamentIOPineClose

Up close…that is dark brown card-stock in the background…helped it show up for the photos.

❤ ❤ ❤ ❤ ❤

PamSparksSerendipityOrnaments3

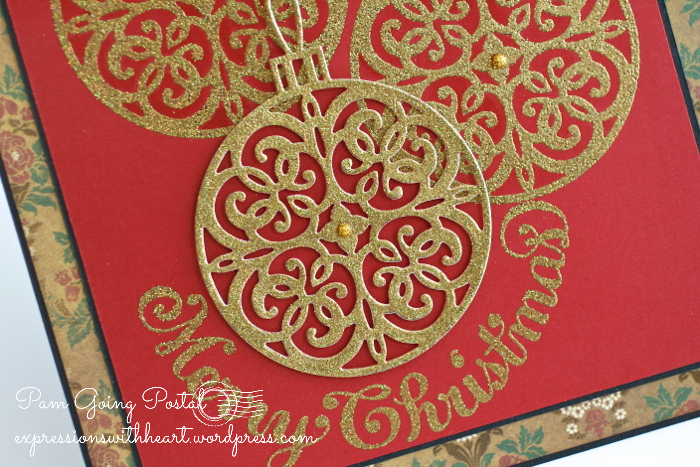
On this card I used the Ornament Stamp and Die set from Serendipity Stamps.  I heat embossed the ornament stamp, twice on the background, then die cut the ornament die, heat embossed it and using mounting squares, adhered it to the card front.  I used black pigment ink to ink up the ornament stamp all three times and Judikins Egyptian Gold embossing powder.  I used the Stamp a ma jig for positioning.

The ornament stamps beautifully and the ornament die cuts perfectly!

Here’s a close up…

PamSparksSerendipityOrnaments3Close

I used my Perfect Layers Rulers to mat the image panel and the base of the card.  I love how perfect and elegant the 1/16th inch ruler cuts the mats.  I’m lovin’ the new shorter rulers and the cutting mat… both are AWESOME and I’m telling you true!  : )

❤ ❤ ❤ ❤ ❤

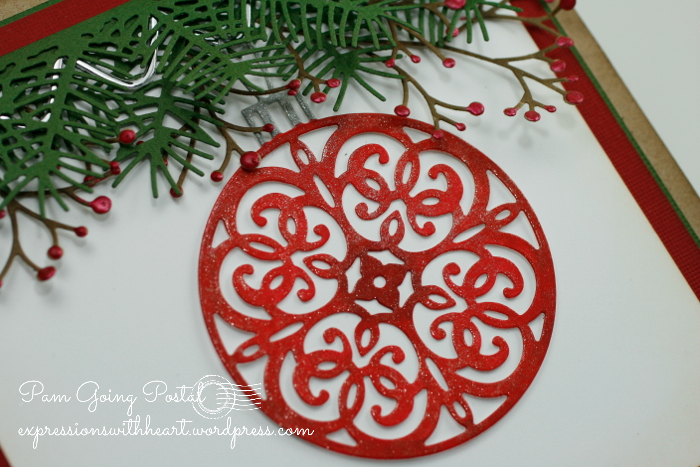
I was in the mood to color, so I cut the ornament die from white card-stock so I could color it with Copics!  I wanted to use my Wink of Stella Red and Silver Brush pens too!  It’s Christmas…bring on the sparkle!

PamSparksSerendipityOrnamentPineClose

Then I needed some greenery to hang the ornament!  poppystamps Pine Needle Border, Berry Sprig and Memory Box Ribbon Candy Border all combined to make a festive arrangement for it to hang from. Ranger Cranberry Liquid Pearls on the berries.

PamSparksSerendipityOrnamentPineSide

A festive sentiment from Serendipity Stamps, Tis the Season… stamped beautifully with Versafine Onyx Black ink.

❤ ❤ ❤ ❤ ❤

*** Serendipity has a SPECIAL going on right now… Everything in their Easter Category is 20% off until Wednesday March 12, 2014. ***

The HOP will go through Sunday, March 16, Midnight Pacific time. Enjoy, be inspired and comment for a chance at the prizes!

❤ ❤ ❤ ❤ ❤

Your next stop on the HOP is Julie

❤ ❤ ❤ ❤ ❤

Thanks so much for stopping by and see you next time!  Working on a scene card with Serendipity Stamps and Perfect Layers tools..

Supplies I used on my cards…

Birthday · cards · copics · Distress Ink coloring · Printworks · rubber stamps

Printworks Birthday cards…

PamSparksPWdog

Back to class… haha… chalkboard!  Now wouldn’t this be a FUN class?!!!  I just need some place to teach it! haha   On the inside of this puppy card I stamped,  Celebrate Today!  I stamped the pup on watercolor paper and watercolored him a bit with a Black Soot Distress Ink Marker.

Linking up the puppy card to some challenges…
Sweet Sketch Sunday Challenge 208 – I followed the sketch.
Come and Get it Challeges – Sweet Domestic Animals
Fan-tastic Tuesday Challenges – Anything Goes
CASology – Paint
CAS on Sunday – Masculine

PamSparksPWBirthdayCollectionCards

I posted the balloon card several days ago… so scroll on down for it…

PamSparksPWTriFoldFront

This is a Tri-fold card… 4 1/4 in. wide by 11 in. long… scored and folded into thirds.

PamSparksPWTriFoldInside

I love how it turned out… so fun!  Printworks stamps complement each other perfectly!  Zillions of cute combinations!

PamSparksPWTriFoldMiddle

Linking my Tri-Fold Birthday card to some challenges…
Tuesday Throwdown – Anything Goes
Party Time Tuesday – Anything Goes
Sister Act Card Challenge – Anything Goes
Scribbles Design – Frame It

There’s a cupcake sentiment too!  Click over HERE to shop the store… Printworks Collection.com.  Click on NEW release to see these new stamps… they come wood mounted or cling mounted.  The Cling mounted are indexed!  Top quality rubber stamps!   REMEMBER to use the code PAM2014 to save 5% on your order!!!

PamSparksPWwish

Linking my Make a Wish card up to some challenges…
Challenges 4 Everybody – Anything Goes
Crafty Girls Challenge – Anything Goes
Just B Creative – Linky Party, Anything Goes
Crafty Creations Challenges – Keep it Simple

The Printworks gal’s would love to have you ‘like’ their Facebook page too… HERE… a great way to keep up with all the specials and NEW releases.

PamSparksPWCelebrate

Seems like I need Birthday cards more than any other kind… is that how it is with you?  Enjoy the whimsical style of this release!  I love how there are so many sentiments that coordinate!
Thanks for stopping by! ttul!