Baby · cards · CAS · Christmas · Die Piecing · Memory Box

Christmas in July with Memory Box and Baby!

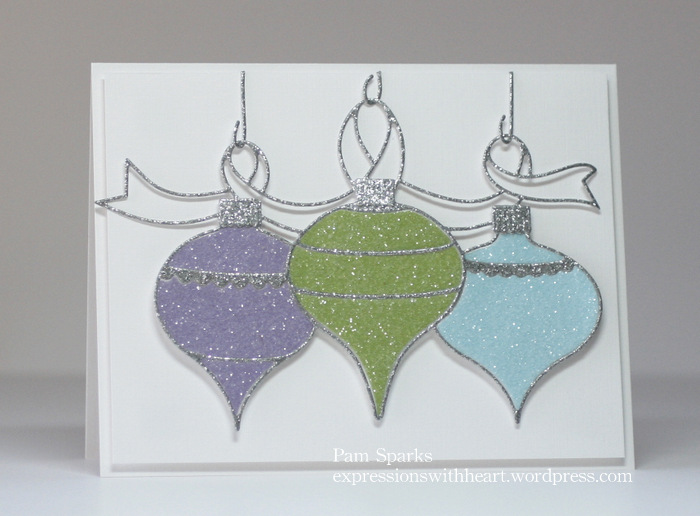
PamSparksChristmasRibbonOrnaments2


HO HO HO Merry Christmas!  I know, I know… it’s early!  Still…it’ll be nice to have a stash of cards and ideas before the last minute!

Here’s the NEW Memory Box Christmas Ribbon Ornaments die…soon to be HERE!

I broke out the glitter… haha… the Clear Rock Candy Distress Glitter HERE works great for this!  It’s not getting all over everything after!  YAY!  THIS would work also… pretty!

I die cut the ornaments with Scor Tape HERE on the right side of the Memory Box card-stocks.  Peeled off the release paper, dumped on glitter, dumped it off and burnished it on with a bone folder (place a piece of scrap paper on top of the glittered piece and rub).  All without getting it all over me!!!

After you have your pieces cut and glittered,  I lay the main piece right side down on the table, then place the pieces in right side down.   I used Scotch tape this time but you could easy use ⅛ th or ¼ th inch scor tape too.

If you’re mounting it with mounting squares like I did,  the scotch tape works because you don’t need the double stick.

If you are adhering the design directly to the card, scor tape would work great instead of scotch tape.

Linking to the Christmas All Year Round Challenge, non-traditional colors
Craftyhazelnut’s Christmas challenge extra – anything goes
Dies R Us Challenge, Christmas in July
Holly Jolly Christmas Challenge – Glitter
Papertake Weekly – Anything Goes, Make it Christmas-ey

❤ ❤ ❤ ❤ ❤

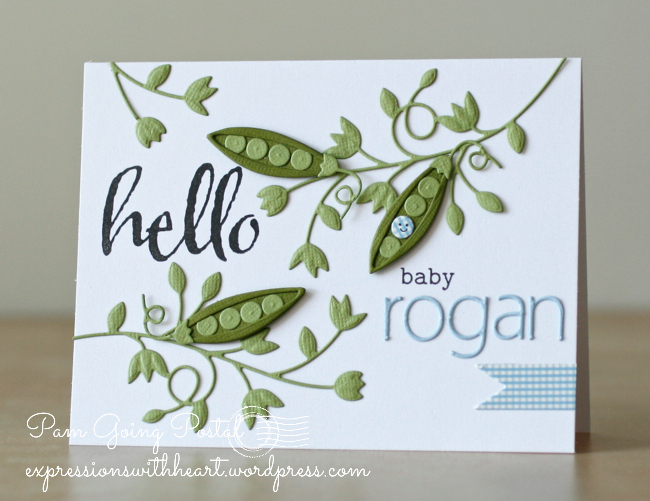
Here’s a couple Baby cards.  We welcomed Leo to our family in December and Rogan the 1st of June!

PamSparksSweetPeaLeo

I LOVE the Winnie and Walter clear stamp sets HERE!   For this card I used the Big, Bold and the Happy set. I stamped with Versafine Black Ink.

PamSparksSweetPeaLeoClose

Just darling! lol  I love the gingham pea!  I used  Memory Box A Pea in the Pod die HEREGeneva Vine die HEREUrban Upper and Lower Alphabets HERE and HERE and the poppystamps Classic Ribbons die HERE.

PamSparksSweetPeaRogan

Now to finish up the insides and get them mailed!  eek,  I am so bad about that!   So tickled with how these two cards turned out… Cute!  Don’t you love it when you’re happy with what you make?! lol   Memory Box and poppystamps…a great combo!  Win, win!

My baby cards were in the Favorites this week at Splitcoast Stampers!  Thank you ladies!

Weekly-Favorite

Linking my baby cards to… Tuesday Throwdown Challenge – Anything Goes
Papertake Weekly – Anything Goes
Cardz For Guyz – Baby Boy
Lady Bugs Crafts Ink Challenge – Anything Goes
Sweet and Sassy Stamps New Release Challenge – Anything Goes
The Card Concepts – Baby, Freestyle Collage – Winner!  Thank you Kay for choosing my Sweet Pea cards!

Challenge Winner

You know I love Copics too!  Here’s a deal if you’re in the market!

SALE – Simon Says Stamp Copic Sale

1_123

Back to cutting and pasting!   So happy you stopped by!  More Christmas coming at you soon!


Blog Hop · cards · CAS · Christmas · copics · Impression Obsession · Memory Box · Perfect Layers Tools · Poppystamps · rubber stamps · Serendipity Stamps

Blog Hop – Perfect Paper Crafting and Serendipity Stamps…

SerendipityHop

Good morning and WELCOME to the first day of the week long Perfect Paper Crafting with Serendipity Stamps Blog Hop!  So excited to be blogging with this wonderful group of stampers!

If you’ve come from Marybeth’s Blog, you are in the right place.

You will want to hop and comment on all the blogs… AWESOME PRIZES… I mean AWESOME!
Perfect Paper Crafting and Serendipity Stamps are both giving away a $50 Gift Certificate
Two winners will be chosen randomly from the people that have commented on all the blogs!
Winners will be announced on the PPC and Serendipity blogs on March 17th.

PamSparksSerendipityOrnamentIOPine

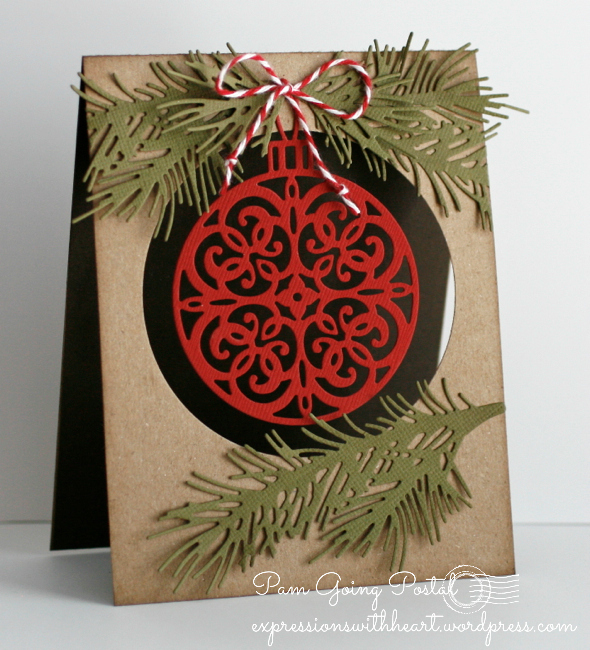
My first card for the hop is a window card…cut a circle from an A-2 top folding card, die cut the Serendipity Ornament die…lovin’ this die! Poked a couple holes for the twine bow, die cut some pine branches, glued them on and there you have it!  It was hard for me to leave it without a sentiment, but I’ll figure something out! lol

PamSparksSerendipityOrnamentIOPineClose

Up close…that is dark brown card-stock in the background…helped it show up for the photos.

❤ ❤ ❤ ❤ ❤

PamSparksSerendipityOrnaments3

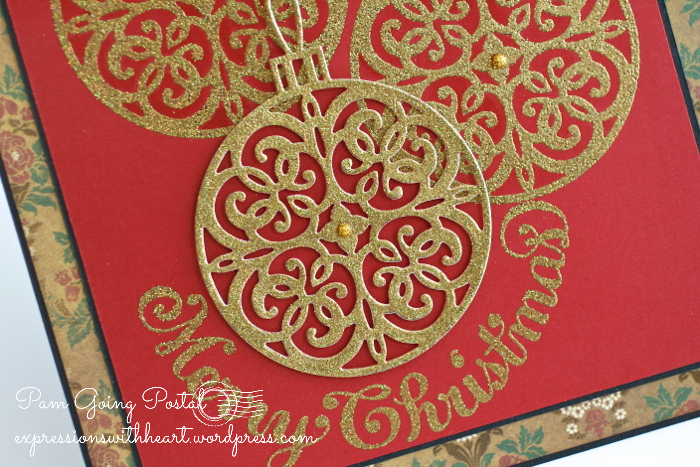
On this card I used the Ornament Stamp and Die set from Serendipity Stamps.  I heat embossed the ornament stamp, twice on the background, then die cut the ornament die, heat embossed it and using mounting squares, adhered it to the card front.  I used black pigment ink to ink up the ornament stamp all three times and Judikins Egyptian Gold embossing powder.  I used the Stamp a ma jig for positioning.

The ornament stamps beautifully and the ornament die cuts perfectly!

Here’s a close up…

PamSparksSerendipityOrnaments3Close

I used my Perfect Layers Rulers to mat the image panel and the base of the card.  I love how perfect and elegant the 1/16th inch ruler cuts the mats.  I’m lovin’ the new shorter rulers and the cutting mat… both are AWESOME and I’m telling you true!  : )

❤ ❤ ❤ ❤ ❤

I was in the mood to color, so I cut the ornament die from white card-stock so I could color it with Copics!  I wanted to use my Wink of Stella Red and Silver Brush pens too!  It’s Christmas…bring on the sparkle!

PamSparksSerendipityOrnamentPineClose

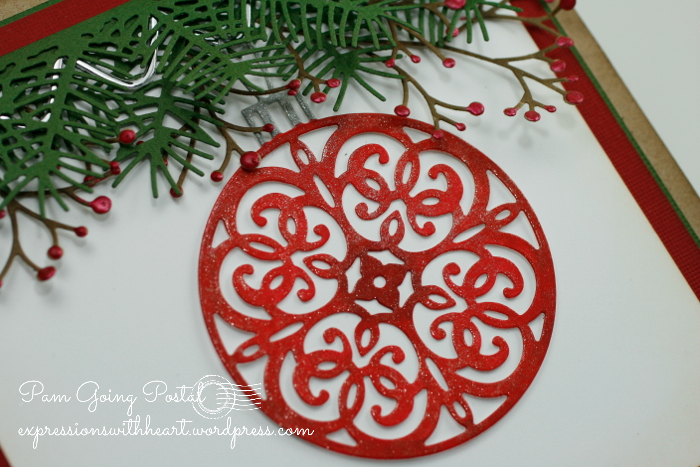
Then I needed some greenery to hang the ornament!  poppystamps Pine Needle Border, Berry Sprig and Memory Box Ribbon Candy Border all combined to make a festive arrangement for it to hang from. Ranger Cranberry Liquid Pearls on the berries.

PamSparksSerendipityOrnamentPineSide

A festive sentiment from Serendipity Stamps, Tis the Season… stamped beautifully with Versafine Onyx Black ink.

❤ ❤ ❤ ❤ ❤

*** Serendipity has a SPECIAL going on right now… Everything in their Easter Category is 20% off until Wednesday March 12, 2014. ***

The HOP will go through Sunday, March 16, Midnight Pacific time. Enjoy, be inspired and comment for a chance at the prizes!

❤ ❤ ❤ ❤ ❤

Your next stop on the HOP is Julie

❤ ❤ ❤ ❤ ❤

Thanks so much for stopping by and see you next time!  Working on a scene card with Serendipity Stamps and Perfect Layers tools..

Supplies I used on my cards…

Birthday · cards · CAS · Christmas · copics · Memory Box · Paper Smooches · Poppystamps · Winter

Paper Smooches and Memory Box…

PamSparksPSDeerBirthday

Hi everyone!  I’m behind posting cards… so there’s a few in this post… then Tilda coming for Tilda’s Town and then a Printworks snowman!   So hang on but don’t worry, I’m not going to start posting everyday all the time!

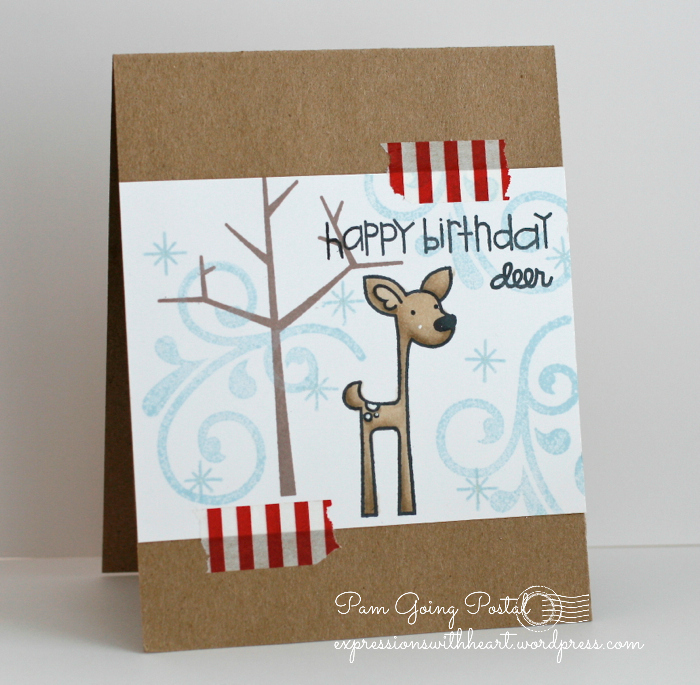
I wanted to get in on the Paper Smooches Sparks Challenge Blog Anything Goes post.  This is a birthday card I made for Tim.  I saw one of the PS designers using this flourish for a snow look so I had to do it too! Stamped with Tumbled Glass Distress Ink.  Perfect for a January birthday! Colored with Copic Sketch Markers.  Right now ‘deer’ aren’t so ‘dear’ to me though.  Hit one with my car in July and did a lot of damage.  I just like the stamp and paper cute ones now!!!

A little Wink of Stella Glitter marker on the flakes and flourish too!

Happy Day!  My Deer card was one of the featured cards for this challenge!  YAY!

Paper Smooches

A couple cards with Memory Box dies…another Birthday and hey… a start on Christmas cards too!

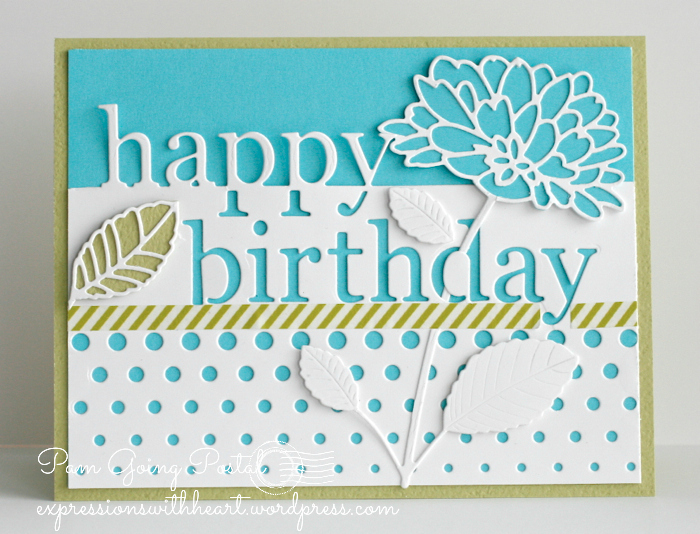
PamSparksHappyBirthdayPeonyFront

the Grand Happy Birthday die, Delightful Peony dies and the poppystamps Fading Dot Border die…

PamSparksMerryChristmasBellsFront

the Grand Merry Christmas die, Bells are Ringing die and Piestra Tile die…

Thanks for stopping by!  It’s snowing here in Iowa… so pretty!  Happy stamping weekend to you!

Supplies, stamps and dies I used…

Christmas

A few of my favorite things…

I love looking back and seeing what I’ve made…so many wonderful stamps and products to love!  It’s hard though, narrowing it down to FIVE!  eek!  Is it that way for you?  If I like what I made,  I really like it and it’s a favorite! lol

Linking to Debby’s Top Five Christmas cards for the year… HERE.

This one was the first one I thought of…

Christmas Living Room Easel Scene – HERE is the original post

PamSparksStaircaseScene2:775

#2 Blooming Poinsettia with Gwyneth Flourish HERE

PamSparksGwynethPoinsettia700
#3 Tilda in the Forest HERE

PamSparksTildaForest700
#4 All is Calm Chalkboard HERE

PamSparksPWChalkboardChevronFront
#5  Gingerbread House HERE

PamSparksGingerbreadHouseLanternOpen

HERE is my Christmas card category, if you have time to scroll through.  Did you have a favorite that I didn’t pick?  I sure thought about the mittens… hehe

*****

P.S. The Twelve Days of Christmas Sale is still going on at Scrapyland… lots of great deals and steals!  Memory Box and today they added Copics!   HERE

*****

Thanks for stopping by!  I appreciate your friendship and thanks for following my blog!  It’s been a great year!

All the best to you and yours in the NEW YEAR!

cards · Christmas · Memory Box · Winter

Memory Box thanks…

PamSparksGardeniaFront
Hi everyone!  Hope you had a wonderful and Merry Christmas!  Tim and I had a delightful Christmas Eve day with family. Here’s a ‘thanks’ card idea using a couple Memory Box dies I haven’t used yet!  I’ve been dreaming about the DeLacie Border die and decided early this a.m. that I’d do a white on white background with it.  Similar to a pattern paper or embossed card-stock look.

PamSparksGardeniaClose
Here’s the dies I used and the steps to creating this card…

Cut the DeLacie Border die three times from a Memory Box white notecard and glue them to a Memory Box A-2 white Notecard for the background.

Cut the Gorgeous Gardenia Background die from a Memory Box white notecard.

Cut the Gorgeous Gardenia Outline die from glitter silver card-stock and a Memory Box Dill notecard.

Glue the silver Gardenia outline to the white Gardenia background and piece in the Gardnia leaves from the Dill.

Cut the Winterberry Sprig die three times out of glitter silver card-stock.

Cut the thanks die from glitter silver card-stock.

Cut the Pinecone Corner die from Memory Box Dill and Vanilla Bean card-stocks.  Trim and layer to fit under the Gardenia focal point.

I mounted the Gorgeous Gardenia to the card with mounting squares.  Then arranged the Pinecone  Corner cuts behind, gluing the ends flat.  Then I added in the Winterberry Sprig cuts, gluing the ends flat also.

I added silver domes in three sizes to the berries on the Winterberry Spring cuts.

Last, I glued the thanks cut on.  This is all die cuts, no stamping, no embossing.

Finished card is A-2 size!

Thanks for looking today!  ‘preciate it and happy after Christmas to you!

Links to the supplies I used…