Birthday · cards · copics · Die Piecing · Memory Box · Spring

Memory Box Spring 2015 Release…


PamSparksEnglishRoseBouquetWindham700


Hi everyone!  I’m posting today on the Memory Box blog HERE.  It’s time for the Spring 2015 Release Blog Blitz!  It started on Monday and goes through Friday.  Comment on the blog posts there for chances to win!

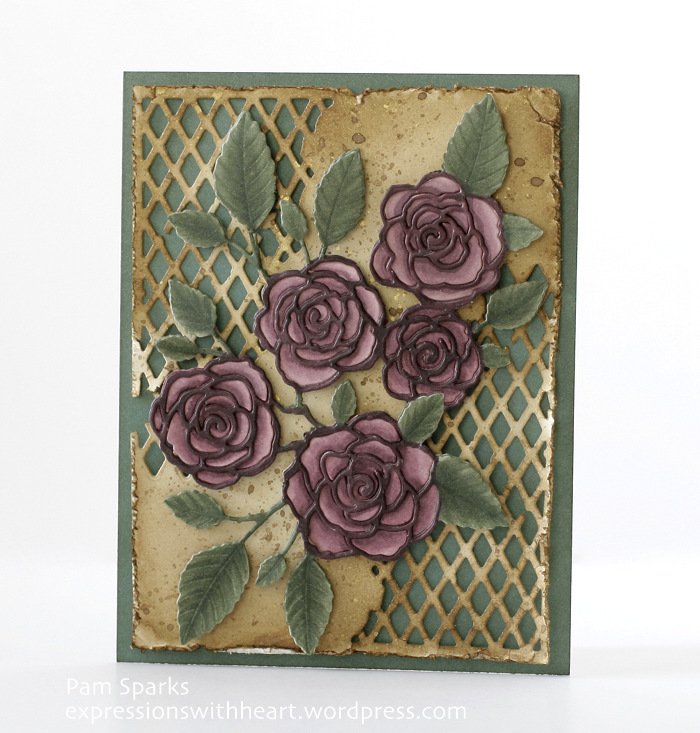
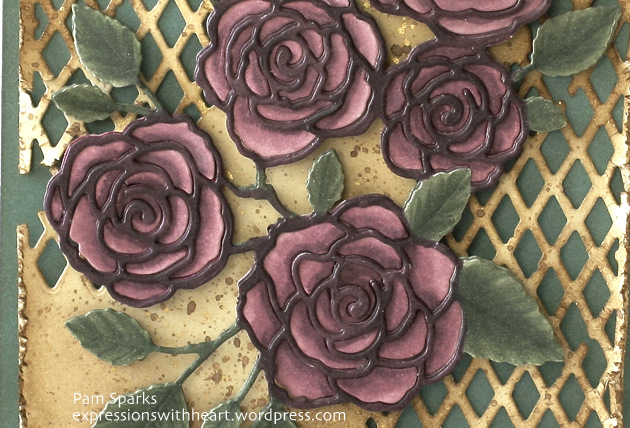
For my card today, I die cut one of the corners from the NEW Open Studio Distressed Windham Collage die set twice.  Once in the upper left corner and then again in the bottom right corner of a 4 in. x 5 1/4 in. piece of parchment card-stock. I distressed the edges with a Tim Holtz paper distresser tool.  Then I inked most of the piece with Gathered Twigs Distress ink and a mini round ink blending tool. I spattered with Walnut ink and Metallic Gold spray ink.
 

PamSparksWindhamEnglishRoseClose


I die cut the English Rose Bouquet die in Parchment card-stock and colored it with Copic Sketch markers. The flowers are the RV 90 series and the leaves are the BG 90 series.


I hope I can explain what I did without it being confusing.  Here goes…

* I leave the rose cut in the die after I cut it, this is one time I hope the pieces stick in the die (if any of the pieces come out I stick them back in the die)

* With the wide yellow frog tape (painters tape), I put pieces of the tape over the die cut card-stock  I left in the die (tape goes adhesive down on the wrong side of the card-stock and extends over the edges)

* Now I remove the die cut from the die and all the pieces stick to the frog tape

* Take the outline part of the die off the tape and color it

* The flower petals I left on the frog tape and colored

I know, this is getting long…do you want me to carry on?!  : )  ok!

* After coloring lay your outline die cut wrong side up and put mounting squares all over it in strategic places so they will be overlapping all the lines.  I cut mounting squares in half for this and yes, it takes a lot but it’s worth it!

* Now turn your colored outline die cut right side up and you’re ready to place all the colored petals into the rose outline.  The rose petals will all stick to the mounting squares.  YES!

*  Add mounting squares to your leaves and place it on the background piece

* Add mounting squares to the background piece and place it on an A2 Juniper notecard


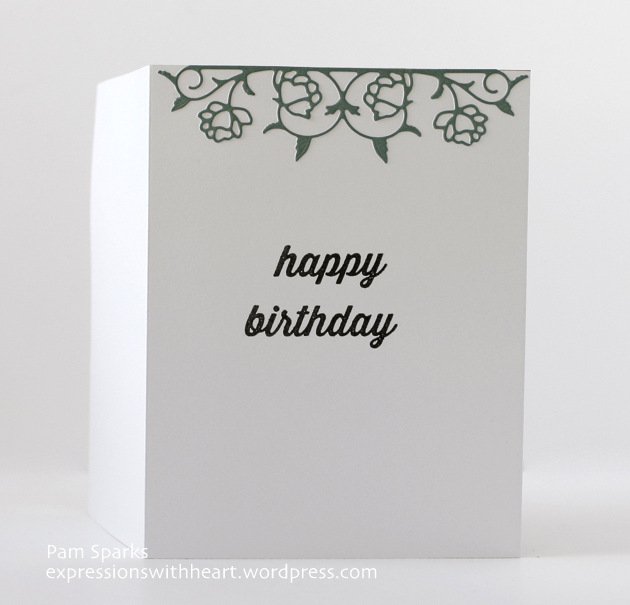
Here’s the inside!
 

PamSparksEnglishRoseBouquetWindhamInside


I die cut the NEW Pennington Rose Border die in Juniper card-stock, glued it to the top and  stamped the words, happy birthday from the NEW Party Time stamp set.  

Lots of NEW stamps!  Clear sets, wood mounted and cling!  YAY!  HERE

It’s been a lovely Spring so far in Iowa!  I love this cooler but not cold weather!  I just got a new bike!  So excited! Now to get the sound fixed on my computer… ugh…but how can I go without it?!  I know, a video would’ve been a whole lot easier than explaining this card! lol

Happy Wednesday!  TTYL!

cards · CAS · Memory Box · Spring

Memory Box…Florina Corner meets Prim Poppy


PamSparksFlorinaCornerPrimPoppy700


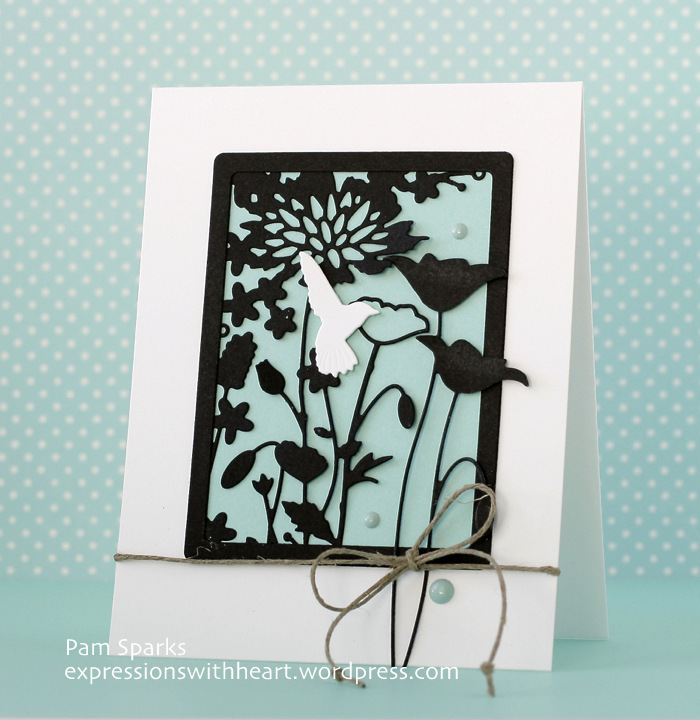
Hi everyone!  I know… a card finally! lol  CAS, Springy color and Memory Box pretty dies!

I die cut the Florina Corner, Prim Poppy and Shaker Rectangle Frame dies in Black card-stock and glued them together.

I die cut one of the Studio Rectangle Layers dies in Pool card-stock and glued it to the back of the glued together black pieces.

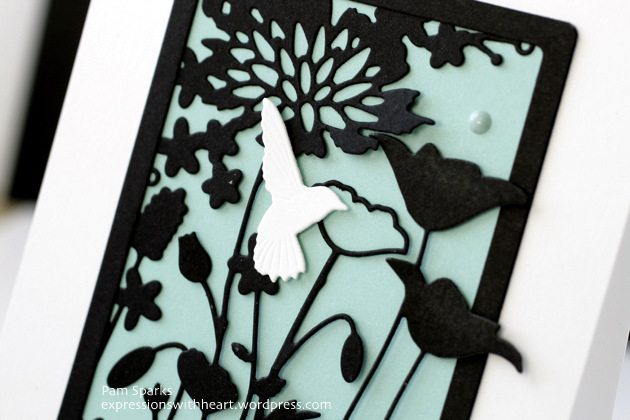
I die cut the smaller Forest Hummingbird die in White card-stock and using a thin mounting square, adhered it over a flower.


PamSparksFlorinaCornerPrimPoppyCose


Then I adhered the rectangle to a white A-2 card base.

Tied  hemp twine around and in a bow.  Added three enamel dots.

That’s it!  Fabulous dies together and don’t you love this pool color?!  I do!

Linking up to some challenges…

CASology – Spring

Simon Says Stamp Monday Challenge – pastels

Simon Says Stamp Wednesday Challenge – happy birthday

the Challenge – anything goes

One Year Celebration

Crazy for Challenges – Think Spring

Time Out Challenges – CASE with your twist (Cased this card HERE)

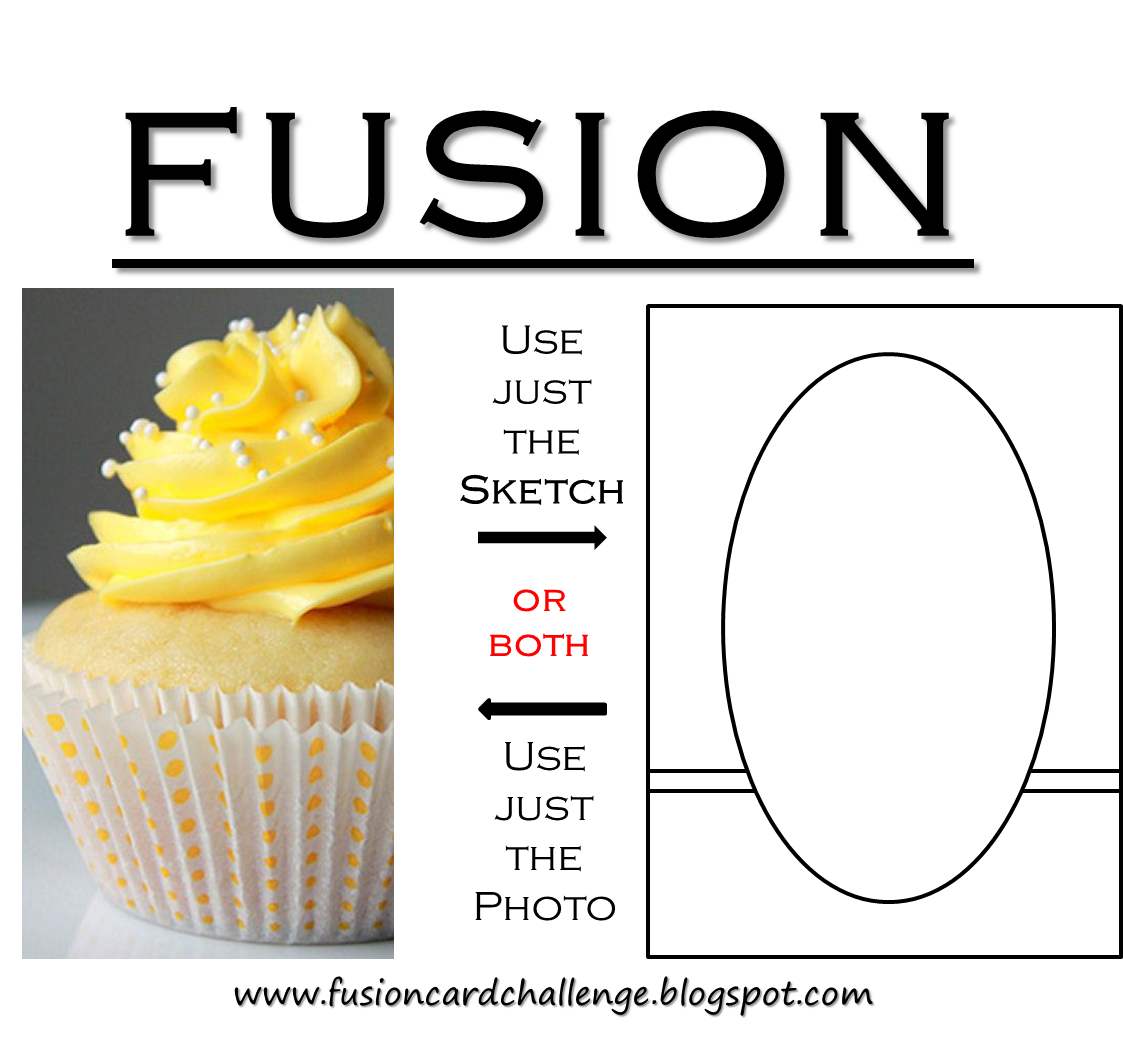
Fusion Card Challenge – use the sketch or photo or both

Cupcake


Thanks for stopping by today!  Happy Easter to you and yours!


cards · Die Piecing · Easter · Memory Box · Scrapbook.com · Shopping · Spring

A little Memory Box Spring and a SALE!


PamSparksBunnySceneHello700


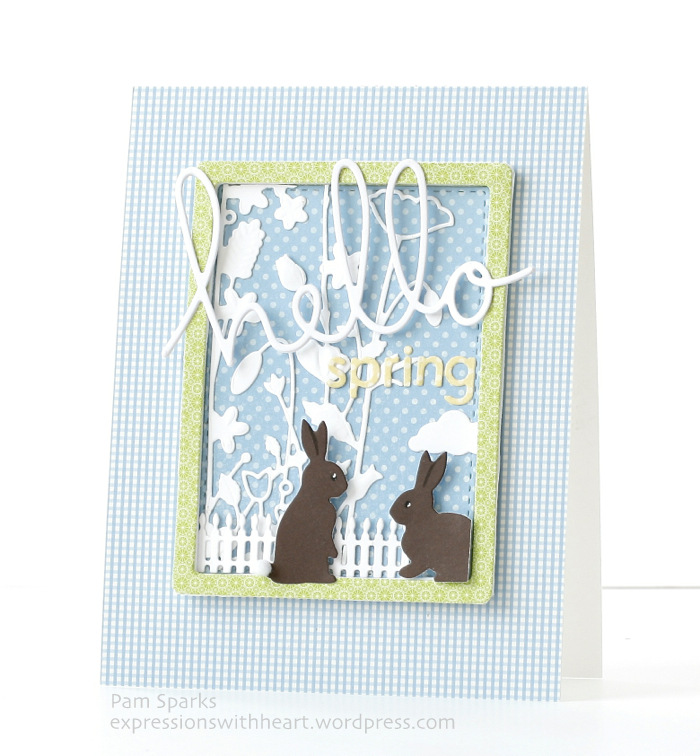
I’ve noticed the dark chocolate bunnies showing up in the grocery store aisles! These two cute NEW bunnies are hiding out under the flowers in their own little miniature world!


I created the little scene on an A-2 size card with the following dies…

links go to Starlitstudio.net – great prices on Memory Box and check out the new Penny Black stamps and dies while you’re there too!

Shaker Rectangle Frames (30003)

Stitched Rectangle Layers (30009)

Oh Hello Again (30010)

Fanciful Fences (30035)

Springtime Bunnies (99109)

Florina Corner (99081)

Puffy Clouds (98172)

Alphabet Soup (98795)


Here’s a close up of the bunnies… I drew in a little brown line with an E49 copic marker to define the ears, a black dot for the eyes and a little white gel pen on the eye. An itty  bitty white pom pom for the tail.


P


Next… the NEW Tulip Bouquet die!  So pretty and ready for Spring!

Linking up my Tulip Bouquet card to the Card Concept Challenge – thinking of you photo inspiration (CAS)

30


Simon Says Stamp Wednesday Challenge – anything girly/feminine

and Addicted to Stamps Challenge – CAS


PamSparksTulipBouquet700


Here’s the steps to create this card…

  • *die cut the Tulip Bouquet in an A-2 white top folding card-base (you’ll want to keep a few of the white pieces to stick back in)
  • *then die cut it in black card-stock, keeping the Tulip outline
  • *line the inside of the card with a piece of Raspberry Dot Signature Pattern Paper
  • *piece and glue the black cut into the white negative die cut space in the white card-base
  • *glue in the little white pieces you kept
  • *die cut the middle size butterflies from the NEW Leavenworth Butterfly Trio die in black card-stcok and NEW Cascadia Butterfly Trio die in Raspberry Moroccan Signature Pattern Paper
  • *glue them together and glue to card
  • *wrap the card with two rows of Black and White Bakers Twine, knot is under the rectangle
  • *die cut the smallest rectangle from the NEW Cross Stitched Frame Borders set in white card-stock
  • *stamp just the word ‘hello’ from the Hello Combo stamp (I used my stamp a ma jig to stamp it)
  • *adhere the rectangle over the knot with mounting squares


While I’ve got you here, I wanted to tell you about a sale where I’m an affiliate…Scrapbook.com…a four day stamping sale event!

Header_stamping_sale_2015

 Save BIG on all stamping supplies! Every stamp, ink pad, and stamping accessory is on sale. You save 20% to 60% off! This stupendous stamping sale starts now and lasts until Sunday March 8th at midnight MST. Check out a few of our best-selling stamping brands below or shop all stamping today! The stamp a ma jig, paper for masking, clear blocks, Delicata ink, Memento ink, tack ‘n peel, Distress ink, Tim Holtz stamps, Lawn Fawn, Avery Elle and so much more!

All Inkadinkado Stamping 20% to 60% off!
All Deep Red Stamping 20% to 60% off!
All Tim Holtz Stamping 20% to 60% off!
All Taylored Expressions Stamping 20% to 60% off!
All Hero Arts Stamping 20% to 60% off!
All Lawn Fawn Stamping 20% to 60% off!
All Technique Tuesday Stamping 20% to 60% off!
All Tsukineko Stamping 20% to 60% off!
All Prima Stamping 20% to 60% off!
All CC Designs Stamping 20% to 60% off!
All Avery Elle Stamping 20% to 60% off!
All Stamping on SALE 20% to 60% off!


Have fun shopping and so glad you stopped by! Thank you for all the comments on my coffee blog hop cards!

It’s still cold with snow on the ground here in Iowa but that is going to change!  My computer dashboard says it’ll be a high of 19˚ on today but watch out Friday!  We’re jumping to 46˚!  Almost bike riding weather! lol

Blog Hop · Card Sketch · cards · CAS · LOVE · Memory Box · Paper Smooches · Perfect Layers Tools · Spring · Uncategorized

Spring Coffee Lovers Blog Hop and Memory Box…


PamSparksCoffeeSpringHop700
Print
Have you heard of this event? It’s been a coffee kind of day!  Lots of people love coffee, me, not so much!  I’m a cocoa kind of gal! Have you heard of raw cacao powder?  That’s what I use… love it! ; ) So what am I doing making coffee cards?  I know people that love coffee and would like receiving coffee cards!  So here I am with 2 more cards to show you and link up!  I got inspired!  Scroll down to my previous post to see the CAS card I made with a Paper Smooches stamp and die.


HERE is where the action is.  Make a card or two and link up!  All the info is at that link too.  Hop around and enjoy the inspiration!


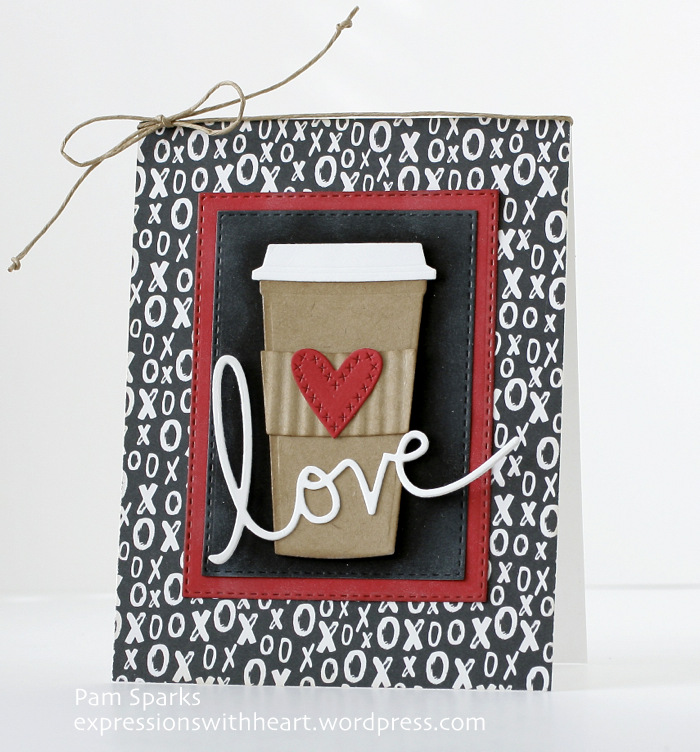
The card at the top is the 2nd card I made… I used some Memory Box dies and some Pink Paislee papers… yay… using some of the stash! I crimped the little cozy and embellished with Lawn Fawn Trimmings.


Dies I used…
Cross Stitched Frame Borders
Cross Stitched Frames
Splendid Clarkia
Large Coffee on the Go


Here’s the first card I made…my go to colors…lol


PamSparksCoffeeCup XOXO700


Here I used Memory Box dies again, a bit of paper twine and pattern paper from the 6×6 Authentique Crush paper pad.  So much fun!  I love this card! hehe  It’s got ‘faux’ coffee in it! haha


Dies I used…
Large Coffee on the Go
Stitched Rectangle Layers set
All About the Love set
Cross Stitch My Heart set


Linking up to some challenges…

Simon Says Stamp Monday challenge – no rules!
Simon Says Stamp Wednesday challenge – anything goes!
City Crafter Challenge – use it up (white and red scraps and old silver brads)

Thanks for stopping by today!  Enjoy the rest of the weekend!  Happy creating!


Blog Hop · Card Sketch · cards · CAS · Paper Smooches · Perfect Layers Tools

Paper Smooches Sparks Challenge and Spring Coffee Lovers Blog Hop


PamSparksPSCoffeeSketch650


Hi everyone!  Sharing a CAS card I made for the Paper Smooches Sparks February Designer Drafts Challenge.   Last minute Lulu! haha


FEB-2015

SPARKS BADGE


I also wanted to make some cards and link up for the Spring Coffee Lovers Blog Hop.  Lots of inspiration there and TONS of cool prizes they’re giving away! I hope I win something! hehe


Print


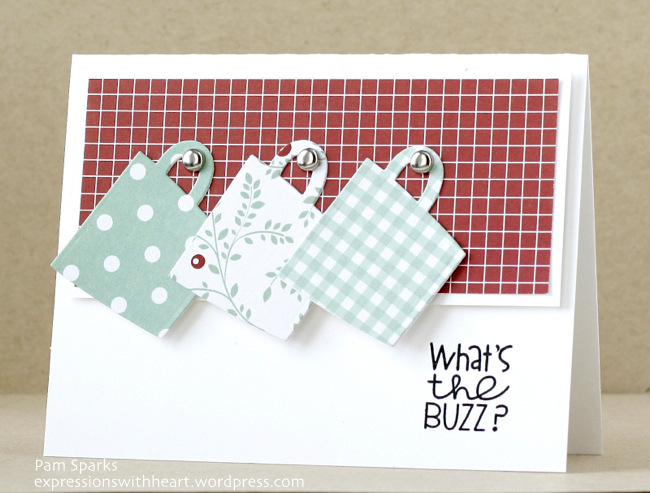
I used Paper Smooches Cyber Cafe Stamp set and Coffee/Tea die set.  Pattern paper from a Christmas 6×6 pad, some brads,  Versafine onyx black ink and my 1/8 inch Mini Perfect Layers Ruler and Cutting Mat.  (link in the sidebar – be sure to use my code to save!)

oh eek… here we are talking Spring and it just started snowing here! lol  That’s ok, I love snow!   Take care and I’ll be back with some more coffee!  : )