cards · Christmas · Color Pencil · Die Piecing · Distress Ink coloring · Embossing Folders · Flowers · Masculine · Spellbinders dies · Winter

Christmas in July Spellbinders Stamp and Die Set Club Card…

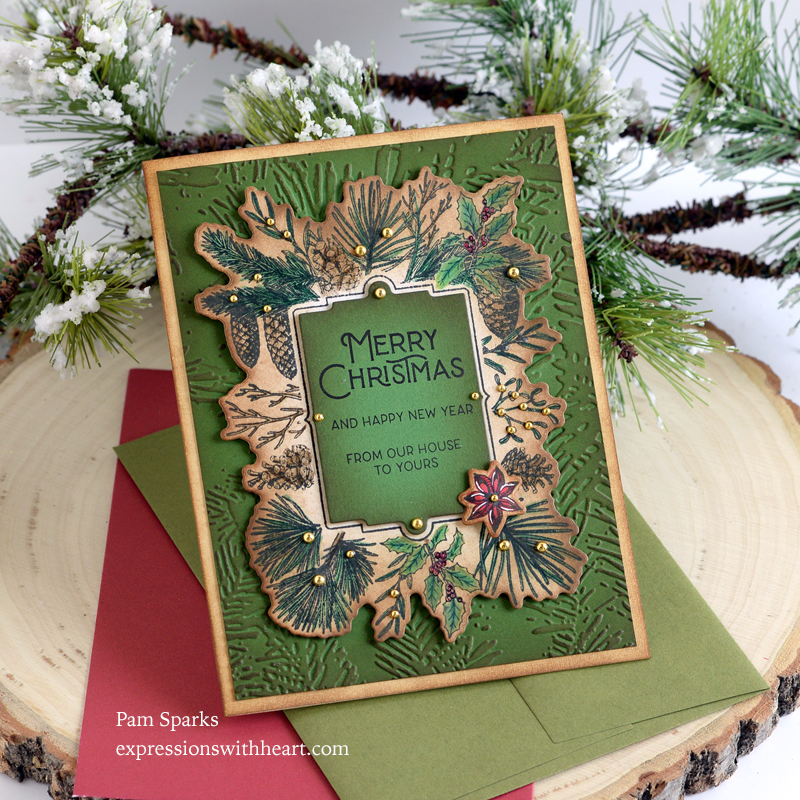
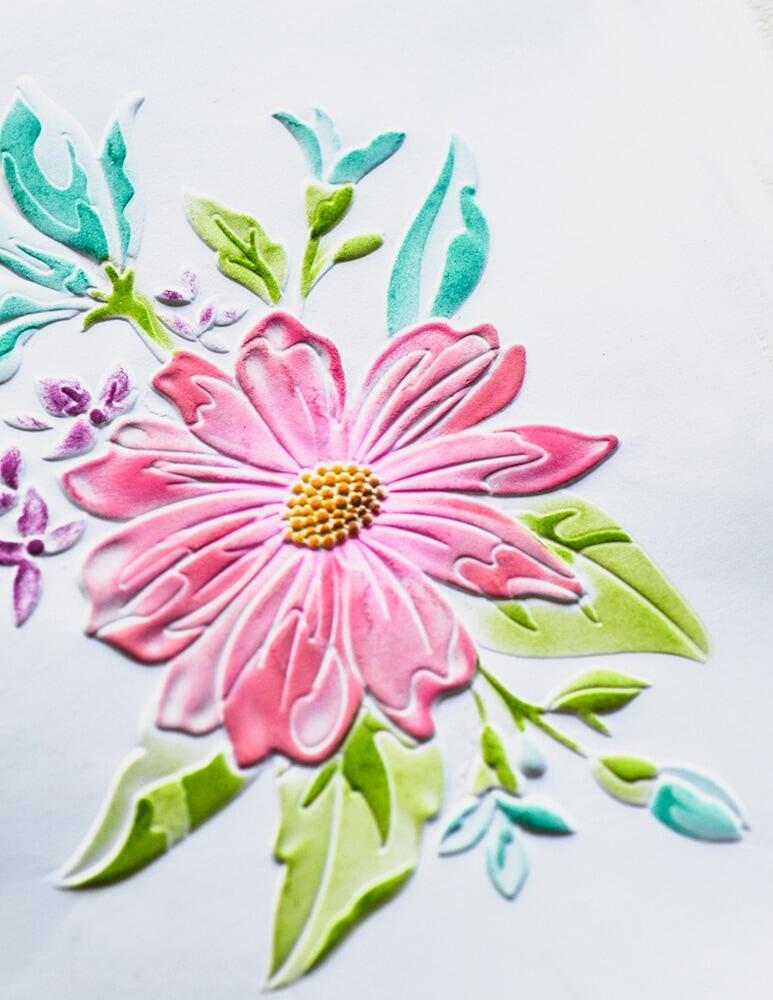
Hi everyone! I had fun with this!  If you’ve known me for all the years I’ve been stamping, you know I LOVE brown! haha  I stamped and die cut this twice in Hammermill White cardstock thinking I would color it with Copics.  I sat down and started coloring one with color pencils! lol  I still have the other white one to color with Copics.

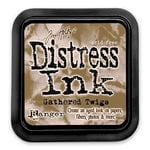
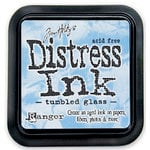
I have a deep love for brown…when Ranger came out with Van Dyke Brown all those years ago I bought a few reinkers thinking I’d use it forever!  But then Distress Inks and then Gathered Twigs!  Gathered Twigs regular Distress is my go to!  Do not take my Gathered Twigs away!

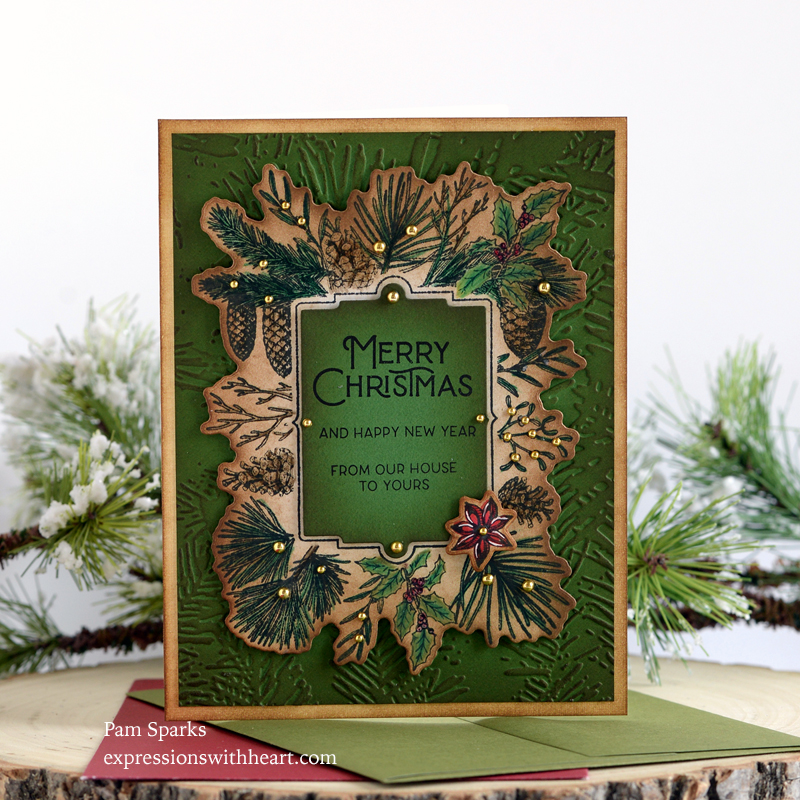
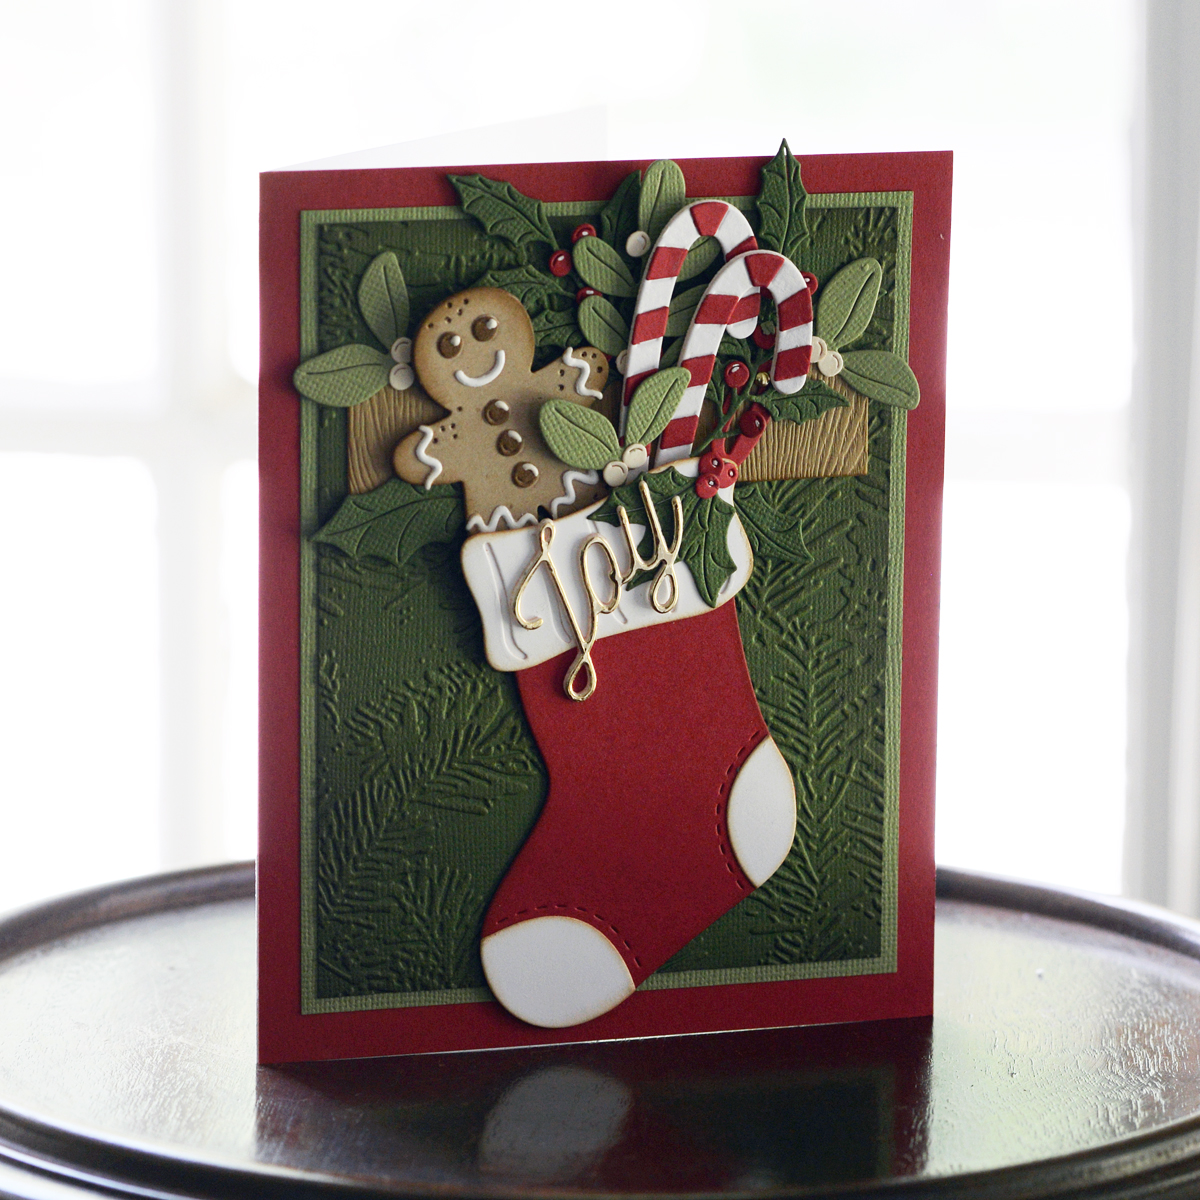
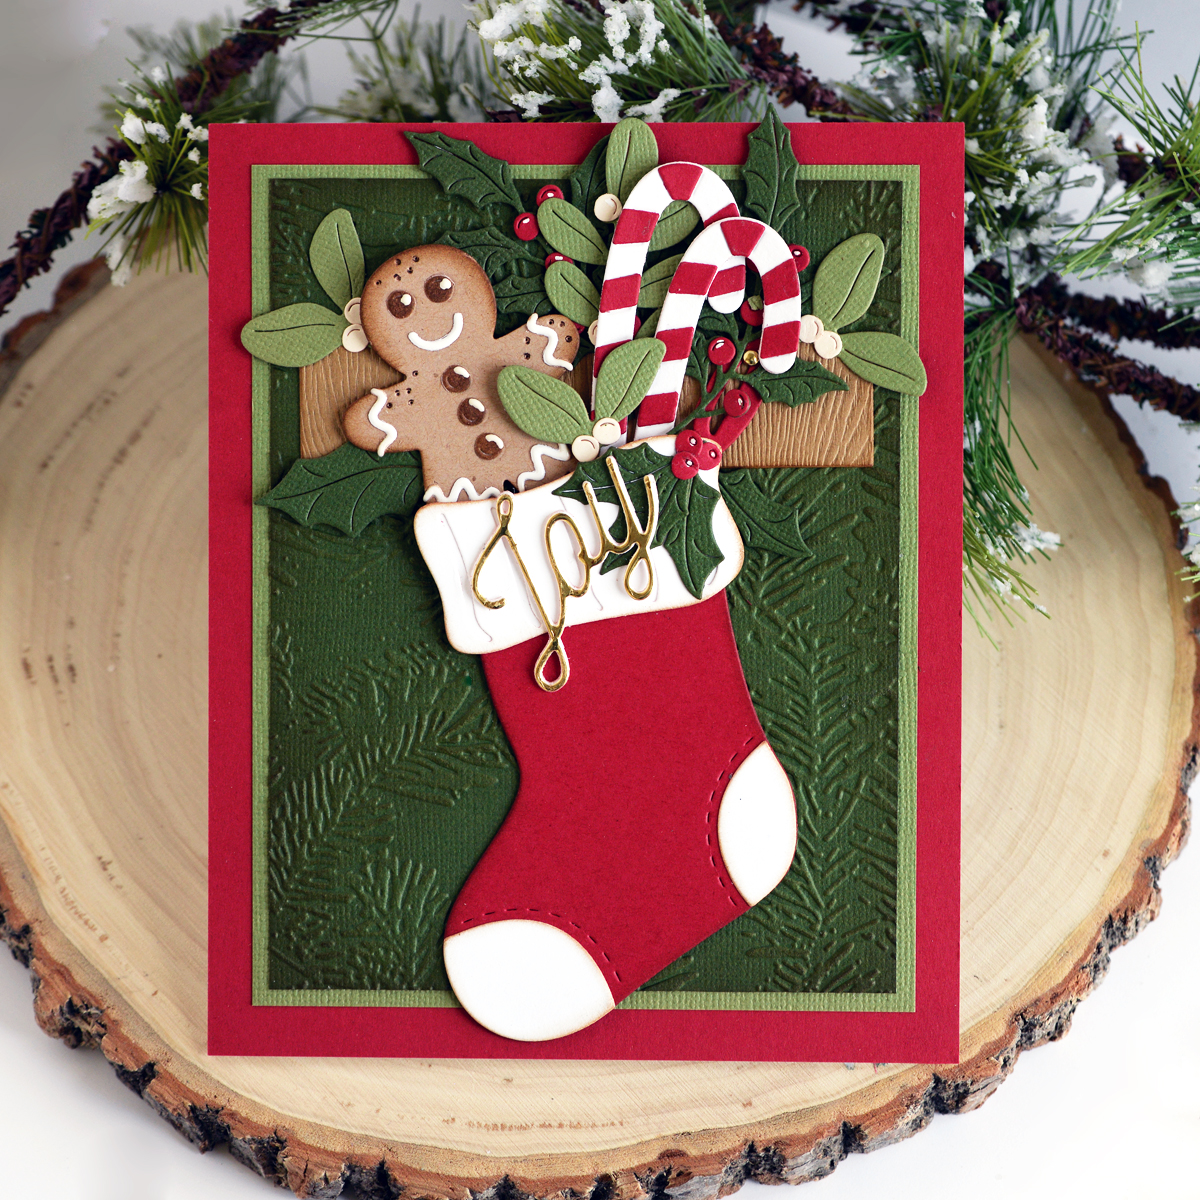
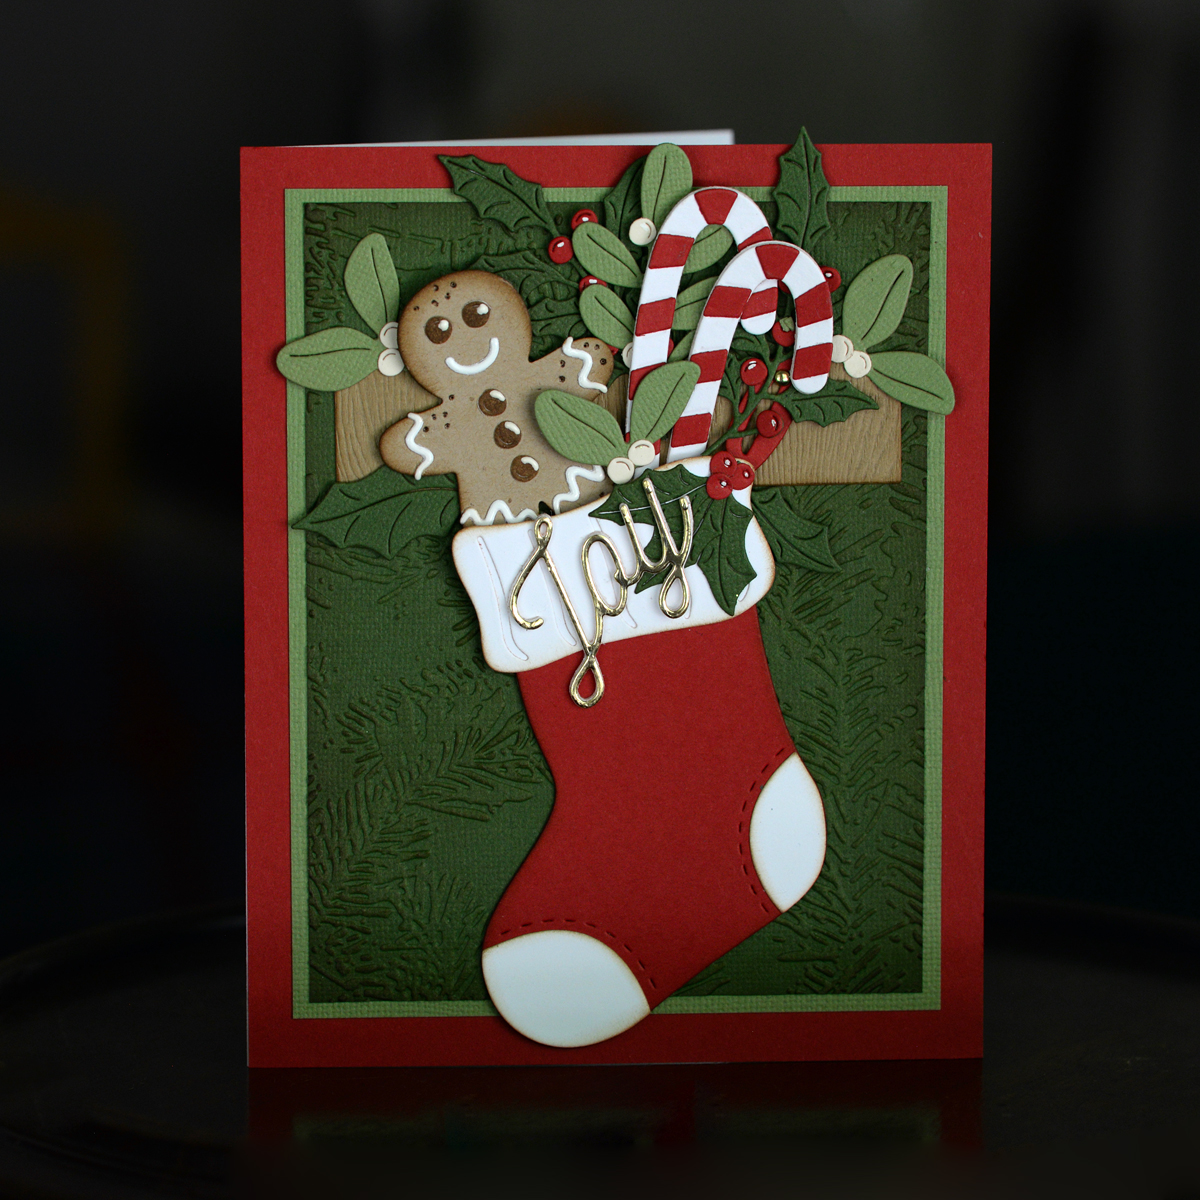
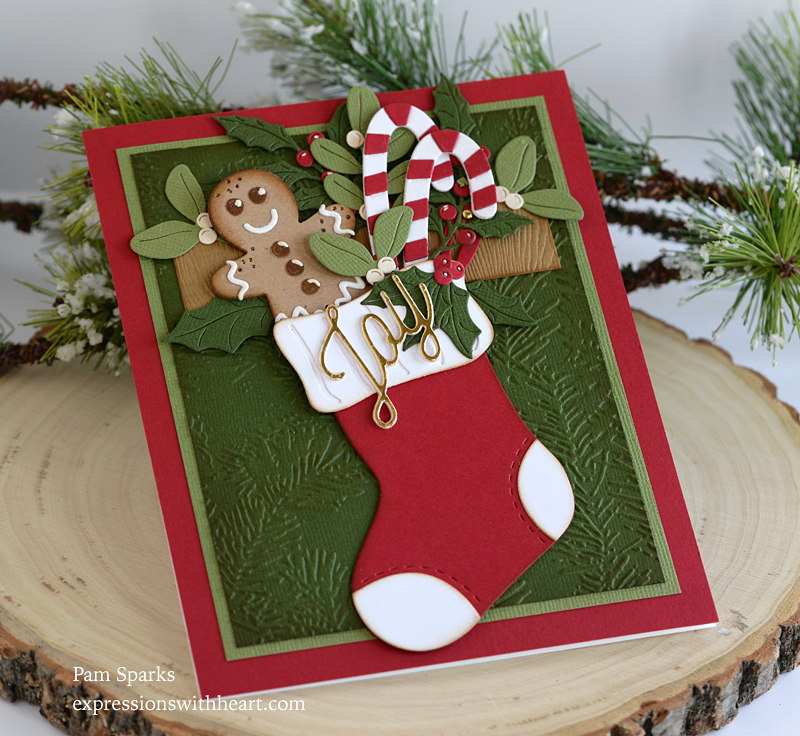
I die cut the floral shape, put the waste/frame in the MISTI, lined up the stamp in the hole, put in the die cut, inked up the stamp and stamped with Memento Tuxedo Black ink.

I used Caran d’Ache Pablo Color Pencils to color but any will work.  After coloring I went around the edges with Gathered Twigs and the mini ink blending tool.  I just keep this color and this tool handy on my desk all the time!

I embossed the Forevergreen Embossing Folder in TE Cilantro cardstock and inked it with Gathered Twigs Distress ink and the mini ink blending tool.   I trimmed it down this time so my card would end up A2 size.

I ink blended a natural linen cardbase with Gathered twigs also. Just around the perimeter.

The panel in the center is a die that comes with the set too!  Dies for everything in the stamp set!  Such an amazing deal!

I lined up the sentiments in the MISTI and inked up the decorative panel…inked it up with GT also!

Glue on the little gold pearls…adhere everything to the cardbase and it’s ready to mail almost!  I need to bring back my last year’s resolution to finish the insides…. ugh. haha

Here’s where you need to go to get the info on joining the Spellbinders monthly club option or options!

Here’s the link to the Clear Stamp and Die Kit of the Month.  You can also choose just to get the Stamp Set.

CHRISTMAS in July SALE going on right now HERE!

Thank you for stopping by my blog today…hope you’re inspired and making something fun!

Links to the products I used to make this card…

Clear Stamp & Die of the Month Club –…
[ SPL ]
Spellbinders – Tis The Season…
[ SBC | SSS | SPL ]
Hammermill WHITE 100 LB SMOOTH…
[ SSS ]
Ranger Ink – Tim Holtz – Distress Ink…
[ SBC | SSS ]
Ranger Ink – Tim Holtz – Mini Ink…
[ SBC | SSS ]
Caran d’Ache Pablo Colored Pencils…
[ BLIC ]
TE Premium Cardstock – Cilantro -…
[ TE ]
Scrapbook Adhesives Crafty Foam Tape…
[ STR ]
Tombow Mono Multi Liquid Glue
[ STR | SSS | SBC ]
Tiny Pearl Embellishments – flat…
[ STR ]
New & Improved Platinum SIX Machine…
[ SPL | SSS ]
Spellbinders – Universal Plate System…
[ SBC | SPL ]

cards · Christmas · Die Piecing · Shopping · Spellbinders dies · Winter

Christmas in July with Spellbinders Large Die of the Month! Super CUTE!

Hi everyone!  It’s hard to believe we’re half way through 2023!  It’s nice to get a head start on Christmas cards though!

You have to check out this NEW die set from Spellbinders Papercrafts!  I was so tickled to see it!  So many favorite things to create with for Christmas!

I have too many pictures again. hohoho

I made this card a little larger than A2 size. It ended up 5 ⅛ in x 6 ⅜ in.

White cardbase, read panel, light green panel then an embossed dark green panel.  I love this pine branch embossing folder!  It comes in two sizes! I used the Forevergreen A2 size folder.  In the Pines is the 8 ½ in. x 5 ½ in. size.

I die cut all the pieces and assembled. I love that there’s candy cane stripes to glue on and multiple berries on dies.  I pretty much used everything except the super cute little ornaments and bow!  I will use them on another card for sure!

I added a long rectangle from the SB Precision Layering Mini Slimline B set die cut in woodgrain cardstock…like the stocking is hung from a fireplace mantle.

The ginger is totally charming.  I added white glaze pen to the icing, eyes, buttons and mouth.  It looks so cool in real life.

If this Large Die of the Month club interests you….click or tap over HERE and check it out!  It’s such a great deal and you’ll find all the particulars about joining HERE.

I’ll be back with two or three more posts using July clubs soon!

Thank you so much for visiting today…have a great cardmaking week!

Here’s shopping links for checking out what I used to make this card and a SALE too! Through July 16th!

Spellbinders Large Die of the Month…
[ EXP ]
Hammermill WHITE 100 LB SMOOTH…
[ SSS ]
Bazzill FOIL Cardstock – matte and shiny
[ STR ]
TE Premium Cardstock – Cherry Pop -…
[ TE ]
Sakura WHITE OPAQUE GLAZE GEL PENS 2…
[ SSS ]
Ranger Ink – Tim Holtz – Distress Ink…
[ SBC | SSS ]
Ranger Ink – Tim Holtz – Mini Ink…
[ SBC | SSS ]
Lawn Fawn – 8.5 x 11 – Woodgrain…
[ SBC | SSS ]
Scrapbook Adhesives Crafty Foam Tape…
[ STR ]
Forevergreen Embossing Folder | Tis…
[ SPL | SSS ]
In the Pines Embossing Folder from…
[ SPL | SSS ]
Precision Layering Mini Slimline B…
[ SPL | SSS ]

All Occasion · Birthday · cards · Die Piecing · Distress Ink coloring · Embossing Folders · Flowers · Inlaid Diecutting · Memory Box · Poppystamps · Summer

Memory Box Gracious Floral 3D Embossing Folder Version…

Hi everyone!  Someone somewhere is celebrating a birthday and here’s some soft color wishes for you! A pretty card makes a birthday seem better somehow, doesn’t it?  Birthdays just keep coming at ya! ha!

I started out looking at my Memory Box plaid paper pads for a color scheme.  I used the Madras Plaid Blue and Violet PP104 6×6 pad without looking to see if it was still in the stores I link to.  OOPS!  Evidently it’s been discontinued. ugh.

I’m linking to the other three plaid pads in the stores that will make fun color cards too!

It’s hard to see the gold in my pictures so I took a phone picture in front of the upstairs hall door so you can see the gold.  Wish I could show you in person! I know, I know, I’m always saying that! lol

The cardbase for this card is 4 ¾ in. x 6 in. so it’ll need an A7 envelope.

I die cut the poppystamps Lattice plate in white three times and glued them together.  I just really like how it added just enough depth without needing to cut little strips of mounting tape.  I used Tombow Mono Multi sparingly to glue them together and to glue the lattice to the plaid panel.

Then I cut a piece of plaid with gold lines to layer on top of the lattice panel,  It’s 2 ½ in. x 6 in.

I used the die from the stamp set to cut a piece of white cardstock for the floral bouquet shape.  Then I put the die cut shape in the 3D embossing folder and ran it through the Big Shot following the directions for 3D folders.  (I do add a few cardstock shims for mine)

After I had the big bouquet embossed I die cut just the center flower from the 3D embossing folder set,  ran it through the same embossing folder, then started coloring both embossed pieces with the Stencil set, regular Distress Ink Pads and ink blending brushes.

I’m having fun making cards with these products!  I haven’t inked the stamp and embossed it in the 3D folder yet but I think that would be beautiful too!

If you want some new products to create with on these hot Summer days when it’s better to stay inside in the AC…this release is just the thing you need!

When you tap or click on my links to see these products you’re going to get a surprise!  Cindy@Starlitstudio has been VERY busy and her new store is up and running with new products being added again!  Yay!  So excited!  It’s beautiful!  Be sure to click on the STR abbreviation to check it out!

Thank you so much for stopping by and happy cardmaking to you!


Memory Box – CL5280D Gracious Floral…
[ STR | SSS | SSS ]
Memory Box – 88620 Gracious Floral…
[ STR | SSS ]
Memory Box – EF1026 Gracious Floral…
[ STR | SSS ]
Poppystamps – 2427 Lattice Plate…
[ STR | SSS ]
Poppystamps – 2523 Birthday Wishes…
[ STR | SSS ]
Memory Box – PP1013 Madras Plaid…
[ STR | SSS ]
Memory Box – PP1021 Magnolia Plaid…
[ STR | SSS ]
Memory Box – PP1012 Spring Plaid 6×6…
[ STR | SSS ]
Scrapbook Adhesives Crafty Foam Tape…
[ STR ]
Tombow Mono Multi Liquid Glue
[ STR ]
Fiskars Non-Stick Titanium Softgrip…
[ STR ]
Ranger Ink – Tim Holtz – Distress Ink…
[ SBC | SSS ]
Ranger Ink – Tim Holtz – Distress Ink…
[ SBC | SSS ]
Ranger Ink – Tim Holtz – Distress Ink…
[ SBC | SSS ]
Ranger Ink – Tim Holtz – Distress Ink…
[ SBC | SSS ]
Waffle Flower Crafts – Blending Brushes
[ SBC | SSS ]
Simon Says Stamp Small Detail Flat…
[ SSS ]
Simon Says Stamp Blending Brush SET…
[ SSS ]
Hammermill WHITE 100 LB SMOOTH…
[ SSS ]
Bazzill Card Shoppe
[ STR ]
Sizzix – White and Gray – Big Shot…
[ SBC | SSS | BLIC ]

All Occasion · Die Piecing · Memory Box · Shopping · Simon Says Stamp · Summer

Simon Says Stamp Out of This World Release Card and SALE!


Hi Summer lovin’ friends!  Scorcher here…just in time for fireworks!  Some orange heat happening on my cards with the NEW Mid Century Ethereal Plate from Simon Says Stamp Out of this World Release!

I did some puzzle work with it!  I die cut it in four colors of cardstock and then in white cardstock one time for this first card where I inlaid the pieces.

No rhyme nor reason…I tried to come up with a plan for this shape and that color but it just didn’t work out.  So random it is on all four!

I used two strips of wide scor-tape on the back and inlaid the pieces right in. It’s really fun and enjoyable!  I was surprised!  So I kept going!


The next two cards, I put a die cut frame with peel and stick on the front, face down and added in the pieces right side down.

Then I put a mounting foam square on the back of each shape. Turned the panel over and stuck it to a white A2 card panel.  (If I’d been thinking, I could’ve mounted it directly onto an A2 cardbase.)   Then I pulled off the peel and stick and the die cut background panel I’d used to position the shapes.

I like them popped up like this a lot too.  For some reason the camera kinda blurs them out.  Maybe my phone pictures are better, I’ll add some.

I used sentiments from the NEW Memory Box Gracious Floral Clear Stamp Set.  Stamped and die cut…stamped and heat embossed.  I used a different one on each card.

For this card, I layered the four colored panels that I’d used the shapes from so it’s like a deep frame with the shapes down in.  I hope it shows that in my pictures.

They really turned out nice.  Wish I could show you in person! lol  A fun addition to my stash!

Here’s some more pictures….I took a lot with my Nikon and my phone!

Thank you so much for stopping by!  I love hearing from you and appreciate your comments so much!

Take care and Happy 4th of July!

HERE’S the SALE info I wanted to share if you haven’t already been shopping!