Die Piecing · Distress Ink coloring · Memory Box · Valentine

Memory Box NEW Slim Pinpoint Heart Plate Valentine…

Good Thursday to you! Another inky Valentine today.

I die cut in Neenah 110# solar white cardstock with the NEW Slim Pinpoint Heart Plate.  I inked with regular Distress inks and the mini foam ink blending tools.  Spun Sugar, Worn Lipstick and Picked Raspberry.

Then I needed something to do with it!  So I stamped words like conversation hearts from the Memory Box Big and Little Valentines stamp set.

I added the new Memory Box Sending Love Posh Script die.  I inked up a scrap of white with Picked Raspberry and die cut the top cut from it… the underneath two layers are just white.

The sweet cupid dotting the ‘i’ with a teeny heart is the Memory Box Cupid with Bow die.  There’s also a bow and arrow with the cupid and teeny heart.  It’d be great on ATC’s.

I’ll stop talking and get back to birthday cards!  The sun is shining here…thankful!

ttul,

What I used…

Memory Box – 94550 Slim Pinpoint…
[ STR | SSS ]
Memory Box – 94543 Sending Love Posh…
[ STR | SSS ]
Memory Box – 94115 Cupid with Bow…
[ STR ]
Memory Box – CL5252 Big and Little…
[ STR ]
Tim Holtz Distress Mini Ink Pad SPUN…
[ SSS ]
Tim Holtz Distress Mini Ink Pad WORN…
[ SSS ]
Tim Holtz Distress Mini Ink Pad…
[ SSS ]
Mini Ink Blending Tool *new* – 2…
[ STR | SSS ]
Mini Ink Blending Foam Refills – pkg…
[ STR ]

cards · CAS · Simon Says Stamp · Valentine

Simon Says Stamp Love You and Love You, Too Release Cards…

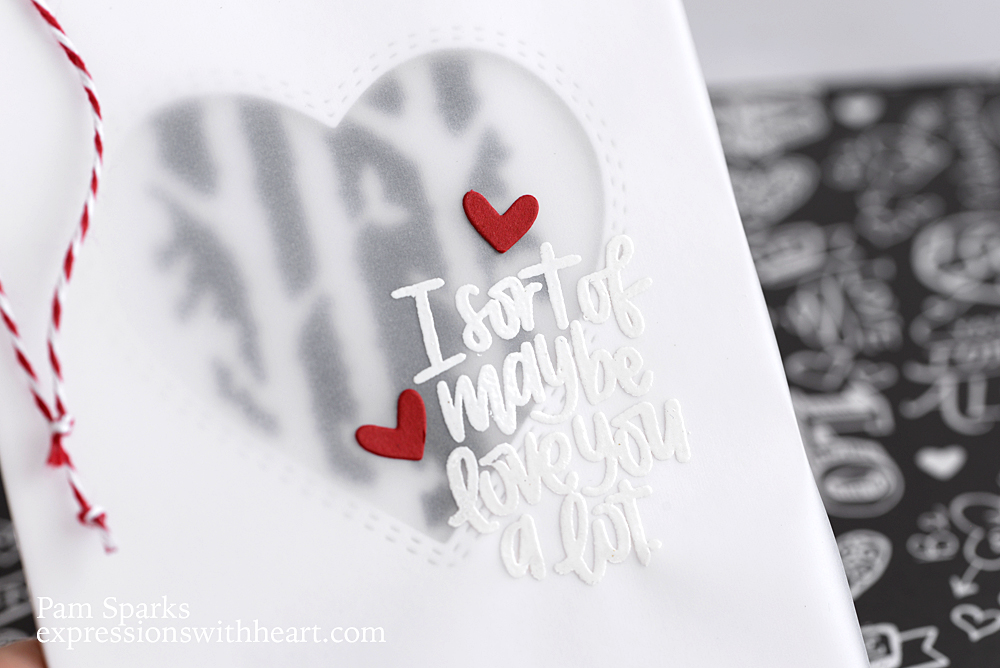
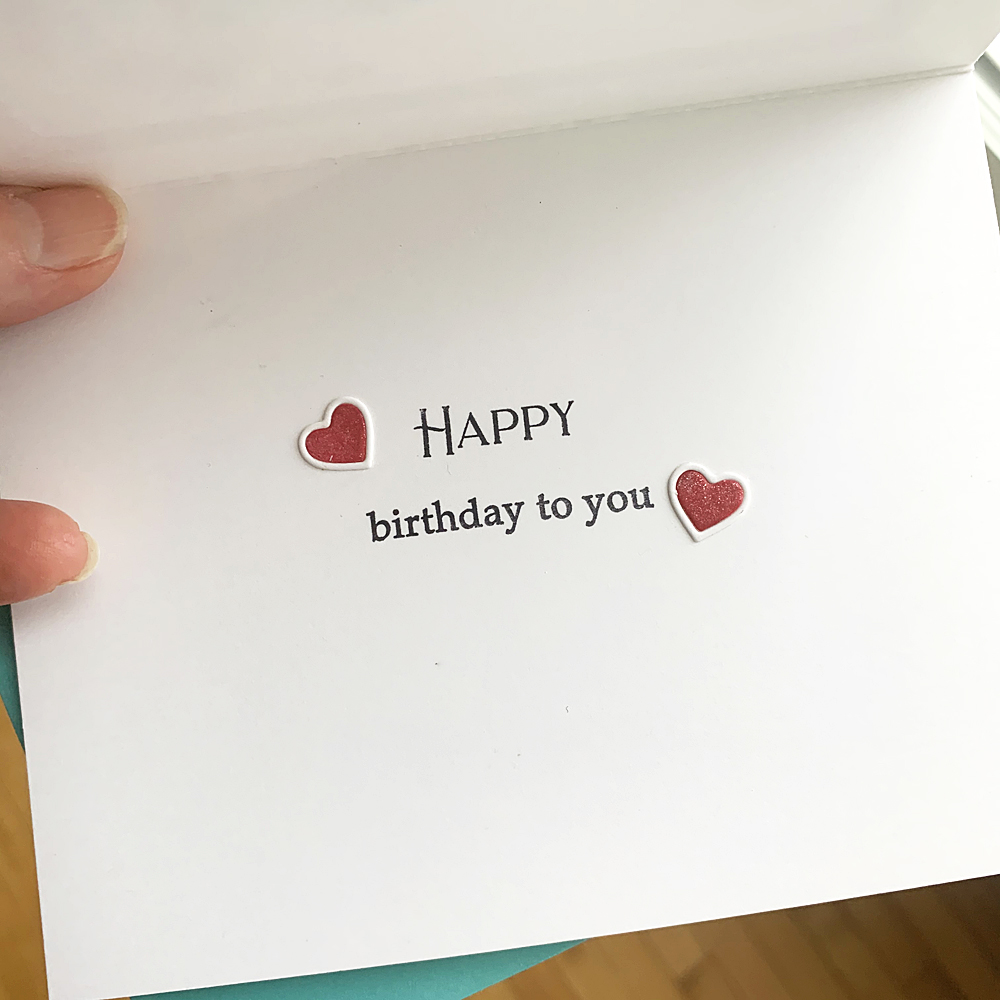
Hi everyone!  I got a kick out of this sentiment… I hope you can see it good enough.   Very hard card to photograph!

“I sort of maybe love you a lot”, we could probably add, depending on what day it is! lol

A very CAS card but I like it a lot.  Better IRL. It always bugs me when I can’t capture it the way I see it!  🙂

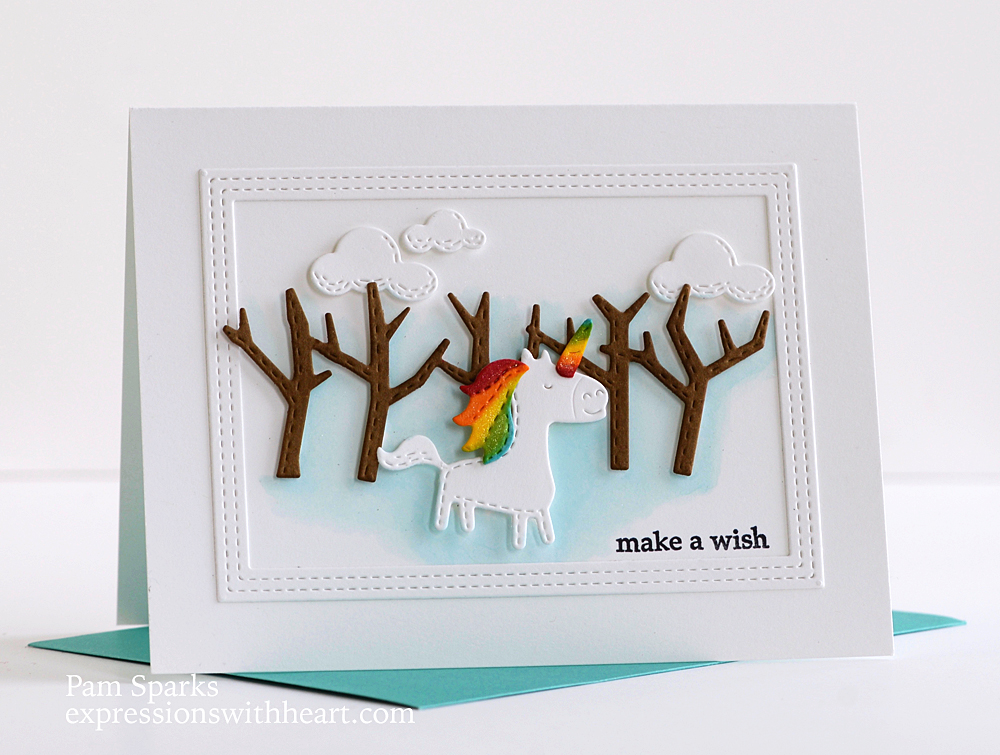
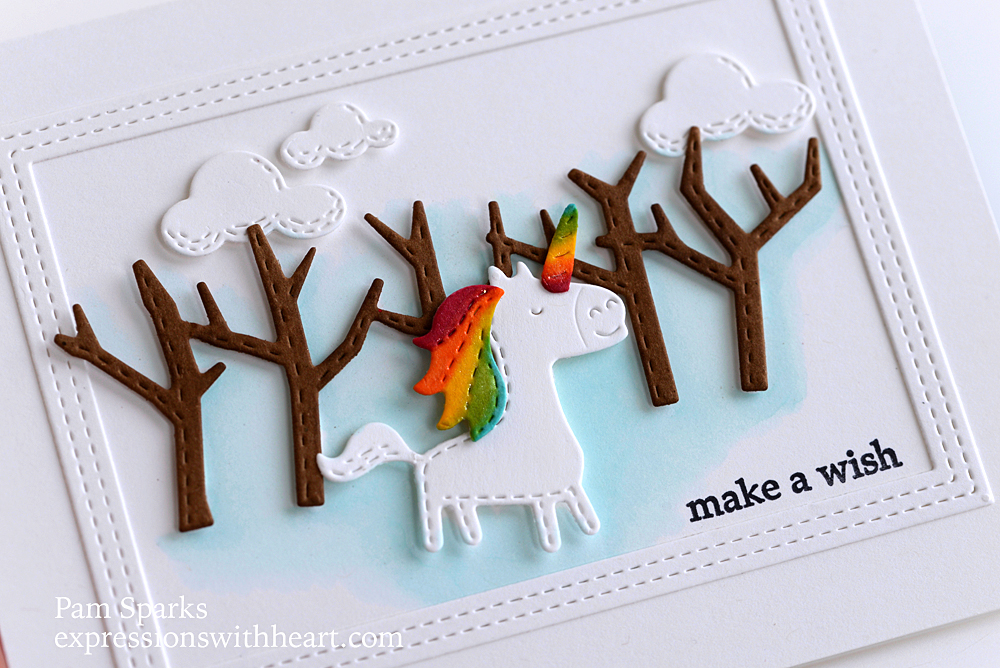
I die cut a heart from the Memory Box Double Stitch Loving Heart Cut Out set in a 4.25 x 5.5 inch panel and in the card base.  They have to be lined up.  I sandwiched the Simon Says Stamp Birch Tree Window inbetween the panel and the base.

I cut a piece of vellum a quarter inch longer than enough to cover the front panel and taped the extra behind the panel so it doesn’t show when you put the panel on top of the cardbase.

I stamped and heat embossed the sentiment from the NEW Simon Says Stamp Love Greetings Mix clear stamp set on the vellum before I adhered it to the card panel.  TIP:  When I heat emboss, I always have my piece laying on a piece of cardboard so it doesn’t curve up or down when I apply heat.  I leave it lay there to cool to.  Sure keeps it from warping on me.

The two red hearts I die cut from the Simon Says Stamp Stacked Hearts die.


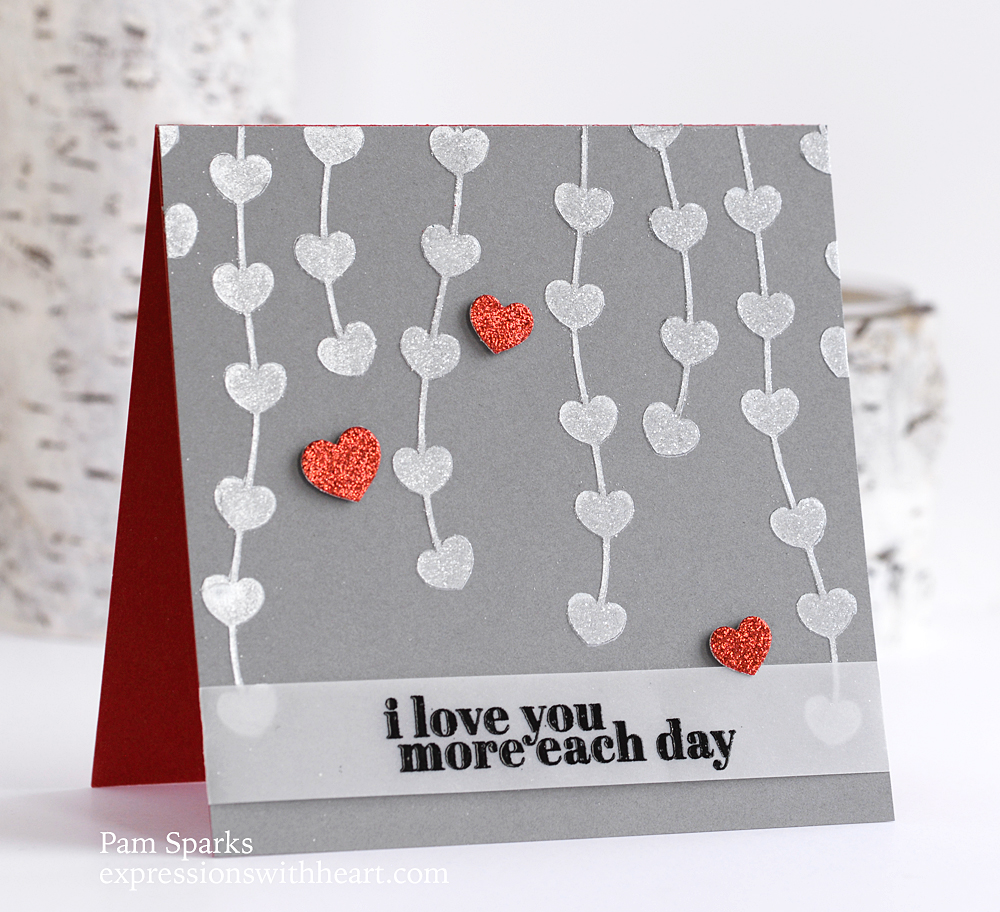
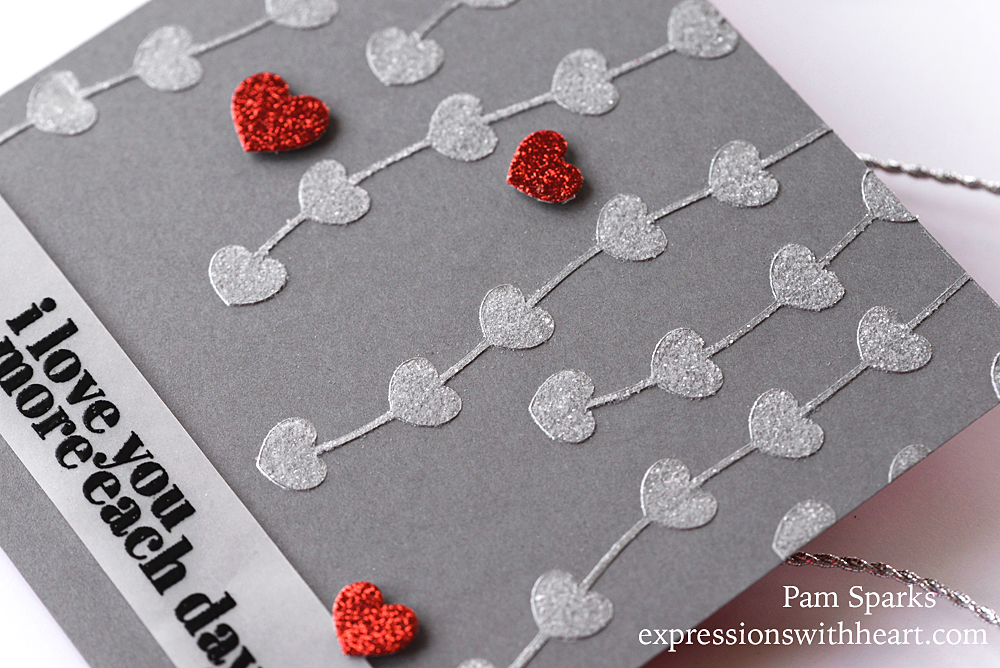
This card is one of the stencils from the NEW Simon Says Stamp Hearts and Streamers Stencil set.

I taped the stencil down and used Silver Embossing Paste from Ranger through the stencil, then sprinkled on clear glitter and dumped off the extra.

Let the paste dry while you’re embossing the sentiment from the NEW Simon Says Stamp Love Greetings Mix stamp set on vellum
and die cutting a few red hearts from glitter cardstock with the Simon Says Stamp Stitched Heart Collage die.

This card is 5 ¼ inches square.

A fun Valentine and I used some of the stash too!  I wanted to use red glitter embossing paste but it was dried up. boo.  So it’s good to use your stuff! lol

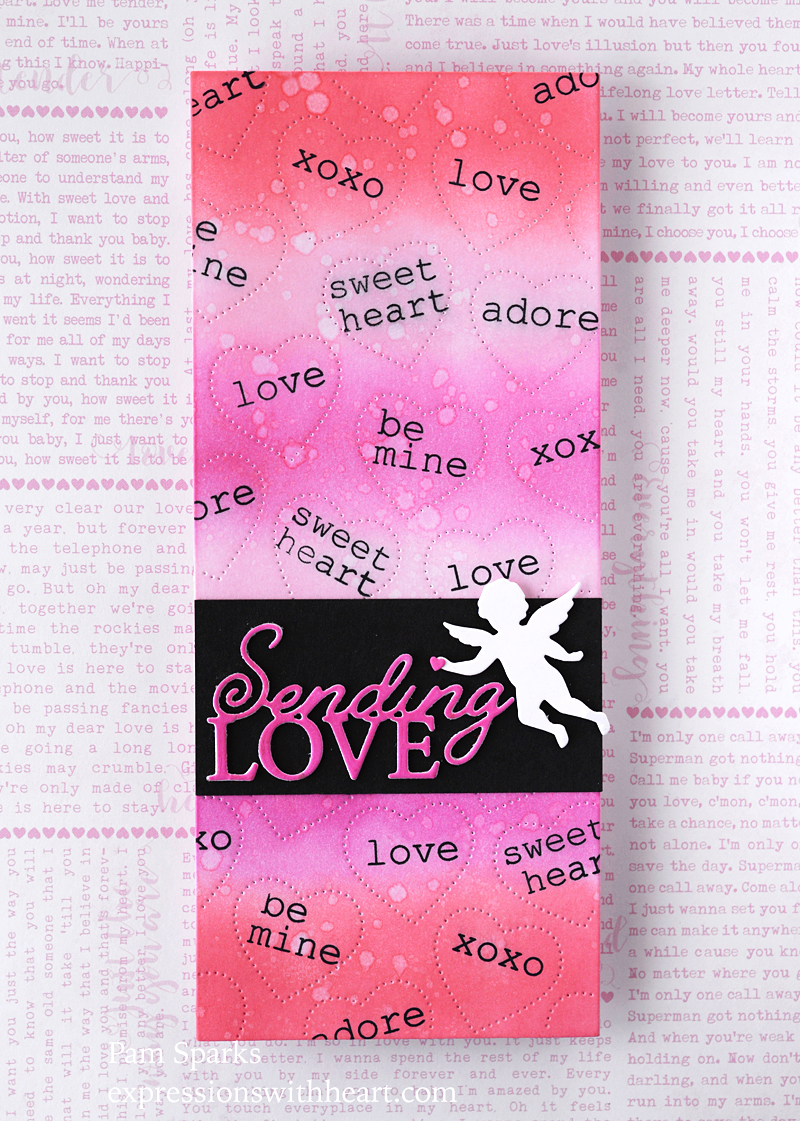
Fun stamps and dies from Simon Says Stamp for Valentines Day.   I’ll link up what I used below!

Thanks for stopping by today!

Simon Says Clear Stamps LOVE…
[ SSS ]
Simon Says Stamp BIRCH TREE WINDOW…
[ SSS ]
Simon Says Stamp STACKED HEARTS Wafer…
[ SSS ]
Memory Box DOUBLE STITCH LOVING HEART…
[ SSS ]
Simon Says Stamp Stencil HEARTS AND…
[ SSS ]
Neenah Classic Crest 110 LB SMOOTH…
[ SSS ]

All Occasion · Birthday · cards · CAS · Die Piecing · Distress Ink coloring · Flowers · Poppystamps · sympathy

poppystamps Lattice Plate Card…

Hi everyone!  Bright card for you today!  Wake up if you’re not already! lol

I started by diecutting the NEW poppystamps Lattice Plate die…there’s just something about flowers with lattice!

I needed something to go with it and was inspired by something I saw and now I can’t remember where or what. Shoot me now! haha

I love this poppystamps Floral Stem Collage die and it makes me think of a pretty garden with a fence and gate.

I’m not sure how I ended up with these colors!  :O I used regular Distress Ink pads and the mini ink blending tools.

I know the background color behind the lattice cut is Blueprint Sketch. I think the color behind the flower is Tumbled Glass with Blueprint spatters. I made this Monday or Tuesday and moved on to the next thing without even thinking to remember.  It’s so out of my normal color scheme… I can’t even decide if they really go together!  If it’s totally ugly, just ignore me! hehe

I used a sentiment from the poppystamps Greeting Basics stamp set… really liking this set. Another sentiment in the set that would’ve worked is ‘friends are flowers that never fade’.  Pretty and so true!

That’s it for today… off to take pictures of another Valentine and a couple cards with SSS new releases.  I still have family birthday cards to make!  I am behind…glad they love me anyway!  ❤

Thanks for stopping by!

Here’s what I used and a free die offer below!

Poppystamps – 2427 Lattice Plate…
[ STR | SSS ]
Poppystamps – 1737 Floral Stem…
[ STR | SSS ]
Poppystamps – CL490 Greeting Basics…
[ STR ]


All Occasion · Birthday · cards · CAS · Die Piecing · Inlaid Diecutting · Interactive · Memory Box · Oxide Inks · Poppystamps · Thank You · Thinking of You

NEW Memory Box Dies…Sweet Bay Collage and Verdant Leaf Collage…

Hi everyone! Two clean and simple cards to share today and I like them!  YAY!  I made a regular A2 size card with the NEW Sweet Bay Collage die, using it on a fold on the inside, as a pop up!

So pretty with this popular pattern paper from Hobby Lobby!  For the two bluegreen cuts, I die cut, then trimmed at the top and the bottom of the stem, then added/adhered the two leaves that completely cut out.  So pretty with the white contrast!

But then you have to decorate the front! haha  I just used the Rectangle Basics die set and die cut rectangles to fit the sentiment from poppystamps Friendship and Kindness clear stamp set.  I heat embossed in black detail powder on the bluegreen cardstock from TE.

I should’ve turned it toward the light better to catch the shine of the embossing powder!

My second card, I was inspired by a friend who sent me a card in the new mini slim card size 3 ½ x 6!  The new Verdant Leaf Collage is the perfect size for it!  I have another idea to try with this die but I wanted to go ahead and post because otherwise I just get too many pictures and the post gets too long!

The green turned out kind of blah. ugh. eek!  It’s Peeled Paint and Rustic Wilderness Oxides, then water and gold spatters.

Sentiments from the Wild Rose Stem stamp set and Friendship Floral Heart stamp set. I black heat embossed the Thank You on vellum.

Before I go, I want to tell you the measurements for the pop up inside piece on the first card.

  • For the first card cut your 8 ½ x 11 piece of white cardstock in half, exactly 5 ½ inches.  Leave one but cut the other one down to 8 inches, so it’s 5 ½ x 8.
  • Die cut the Sweet Bay Collage die centered in the 5 ½ x 8 piece, then score that piece at 4 inches… that will be your mountain fold.
  • Then I scored 1 ⅜ inches from both sides of that center score line and those will be your valley folds.
  • Then all that’s left is to finish everything and glue the longer sides to the inside of your regular A2 size card base with a side fold.

Holler if you have any questions!

Thank you for stopping by!  Make something today!  Copy or try something new! hehe  I have a collection of ideas I want to copy…we need a national copy day so I get some made! lol  ttul!

Products I used for these cards…

Memory Box – 94526 Sweet Bay Collage…
[ STR | SSS ]
Memory Box – 94525 Verdant Leaf…
[ STR | SSS ]
Memory Box/Open Studio – 30086…
[ STR | SSS ]
Poppystamps – CL492 Friendship and…
[ STR ]
Memory Box – CL5250 Friendship Floral…
[ STR | SSS ]
Memory Box – CL5258-D Wild Rose Stem…
[ STR ]
Memory Box – CL5258 Wild Rose Stem…
[ STR | SSS ]
Sizzix – Big Shot Accessory – Tool…
[ SBC ]
Sizzix – Big Shot Machine – White and…
[ SBC ]
Sizzix Cutting Pads – standard
[ STR ]
TE Premium Cardstock
[ TE ]
Neenah Classic Crest 110 LB SMOOTH…
[ SSS ]
Simon Says Stamp Envelopes MINI…
[ SSS ]
Mini Slim Envelopes
[ TE ]
Scor-Pal 12×12 INCH MEASURING AND…
[ SSS ]
Ranger Ink – Tim Holtz – Distress…
[ SBC | SSS | STR ]
Tim Holtz Distress Oxide Ink Pad…
[ SSS | SBC ]
Eucalyptus Scrapbook Paper – 12″ x…
[ HBL ]

Birthday · cards · CAS · copics · Die Piecing · Poppystamps

NEW poppystamps Whittle Unicorn and Whittle Tree Border Birthday Card…

Hi everyone! Back today with a birthday card using the NEW poppystamps Whittle Unicorn and Whittle Tree Border dies.  It turned out cute!

I die cut everything in white cardstock…colored the pieces with Copic Sketch Markers…I wish I’d inked the background before I adhered the die cuts but I didn’t so I ended up coloring around the images with a Copic Sketch Marker.  Normally I would ink with stamp pad ink and an ink blending tool!


A close up…I used the poppystamps Whittle Clouds and Double Stitch Rectangle Frames dies for this card also.  Maybe the unicorn should’ve been standing on clouds?  So much for my imagination!  I always had trouble coming up with stories for school. lol

The Whittle Unicorn comes with these cute heart dies… I didn’t get them worked on to the front so I used them inside!

Sentiment from poppystamps Greeting Basics clear stamp set.

Back to cards! Thank you for stopping by!

What I used to make this cute card!

Poppystamps – 2370 Whittle Unicorn…
[ STR | SSS ]
Poppystamps – 2424 Whittle Tree…
[ STR | SSS ]
Poppystamps – 2217 Whittle Clouds…
[ STR | SSS ]
Poppystamps – CL490 Greeting Basics…
[ STR ]
Poppy Stamps – Die – Double Stitch…
[ FRN ]
Neenah Classic Crest 110 LB SMOOTH…
[ SSS ]
A2 Envelopes
[ TE ]
Copic Sketch Markers and Sets
[ BLIC | SSS | TE ]
Sizzix – Big Shot Machine – White and…
[ SBC ]