cards · CAS · Die Piecing · Inlaid Diecutting · LOVE · Memory Box · Poppystamps · Valentine

Valentines with NEW Memory Box Dies…

Lots of pictures to share with you today!  You can tell by the colors here, it’s my usual Valentine ‘look’! ❤

I started with the black/plaid card and ended up with so many heart pieces by the time I cut the new Sprinkle Heart collage die in a few colors!

That led to the next card, then that card led to the next…you know how it goes when you have pieces and dies spread around! lol

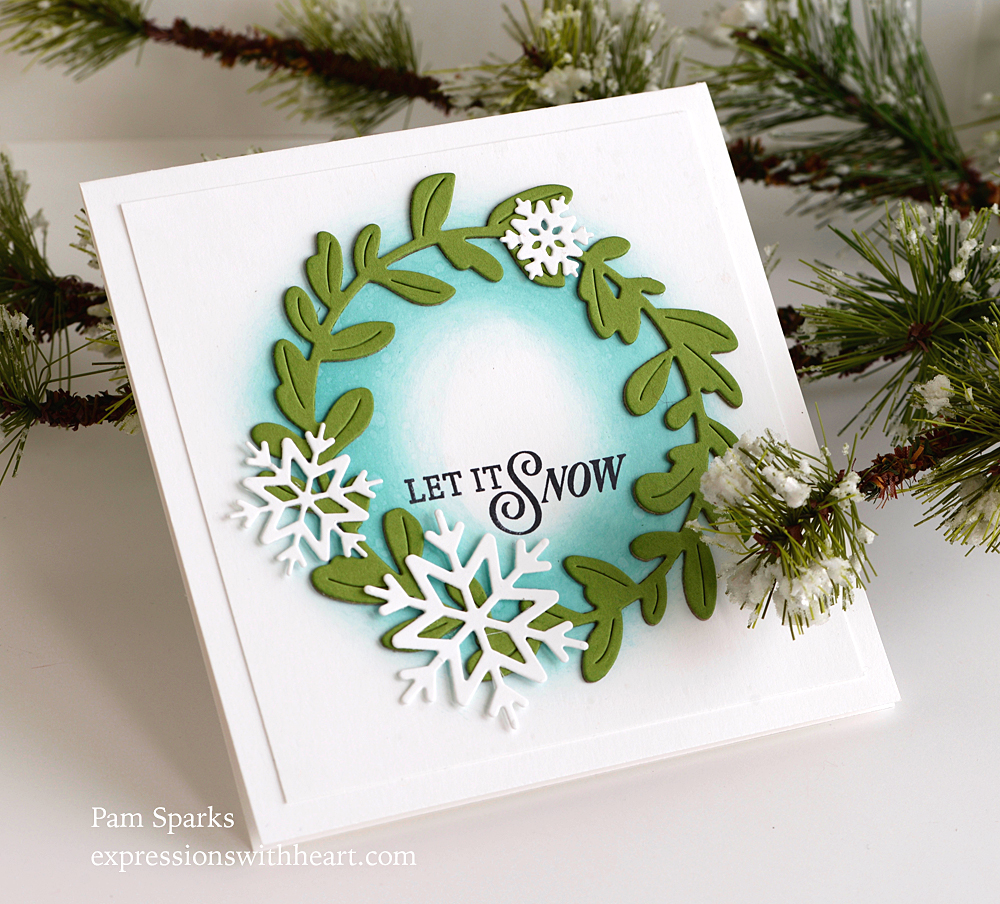
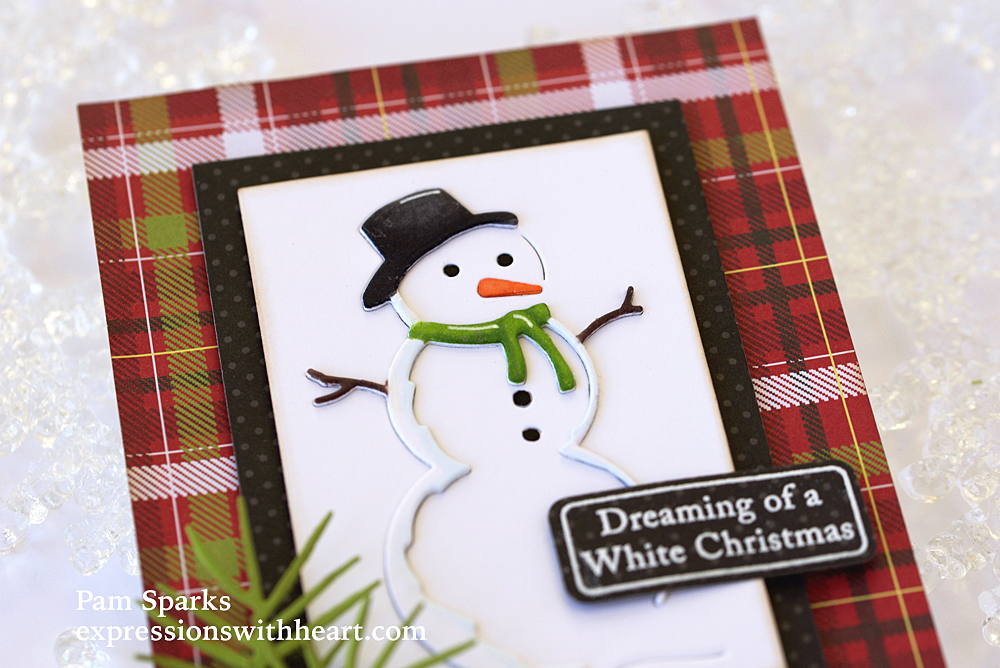
I used the new Memory Box Sprinkle Heart Collage in kraft color and red cardstock.  The two complete hearts are from the smallest heart in the Memory Box Double Stitch Loving Heart Cut Out die set.

The sentiments are from the Memory Box Big and Little Valentines clear stamp set.

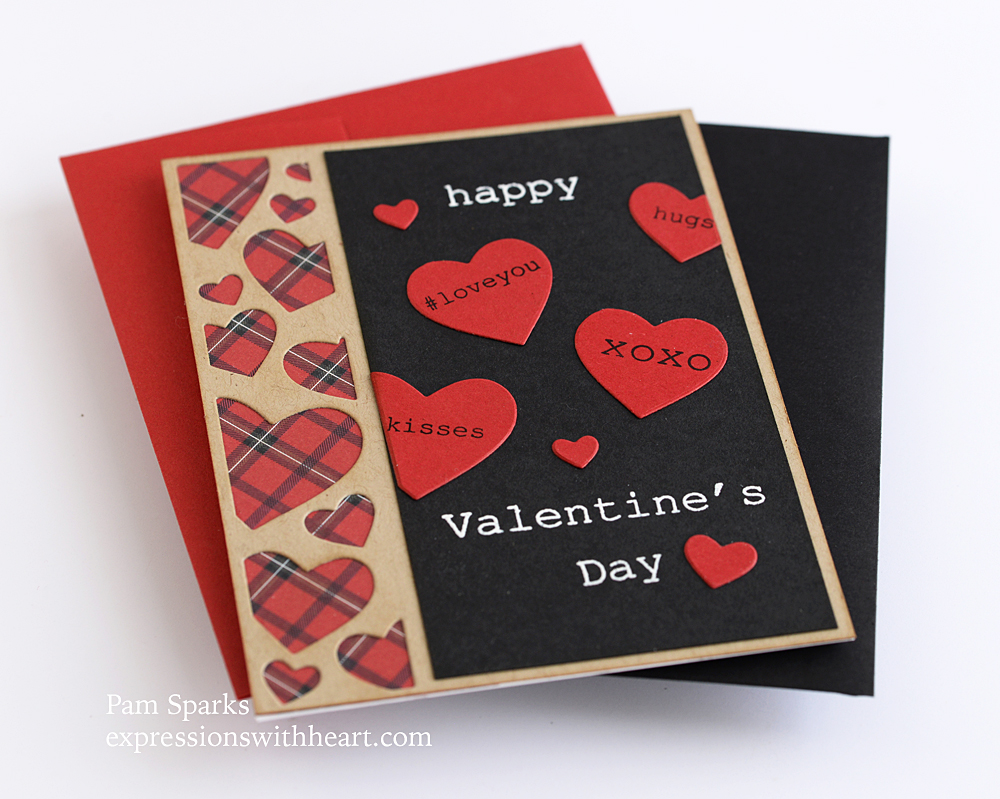
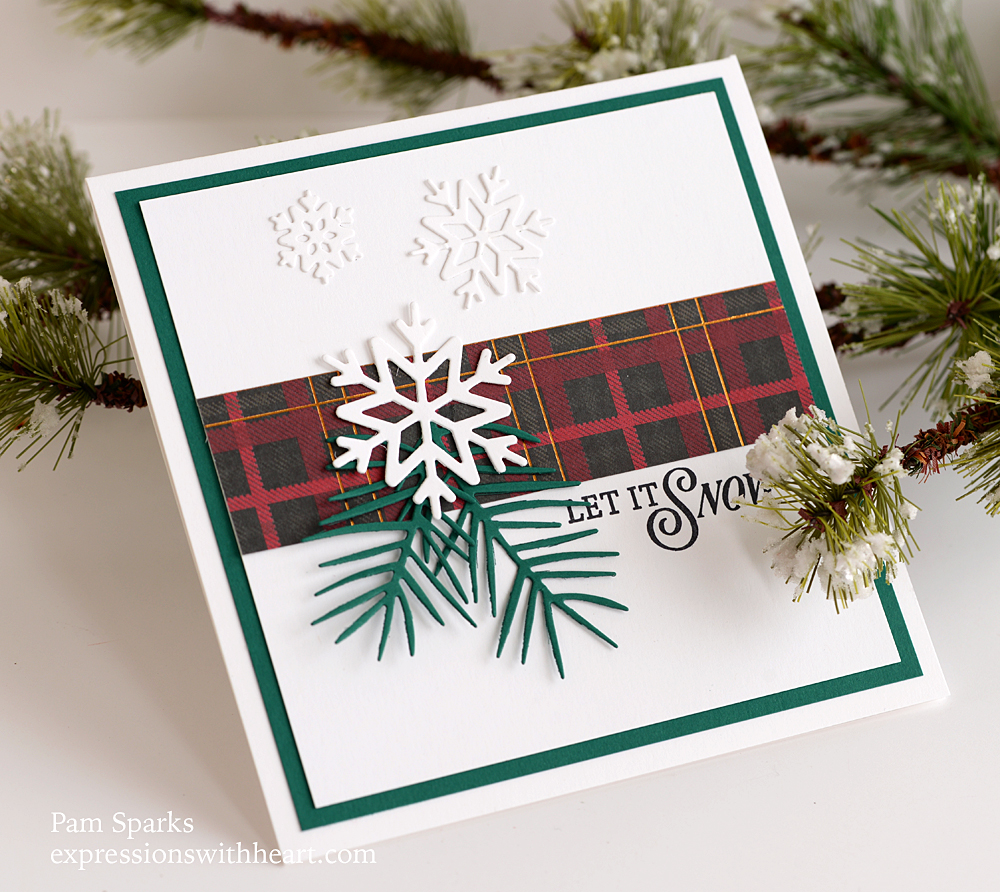
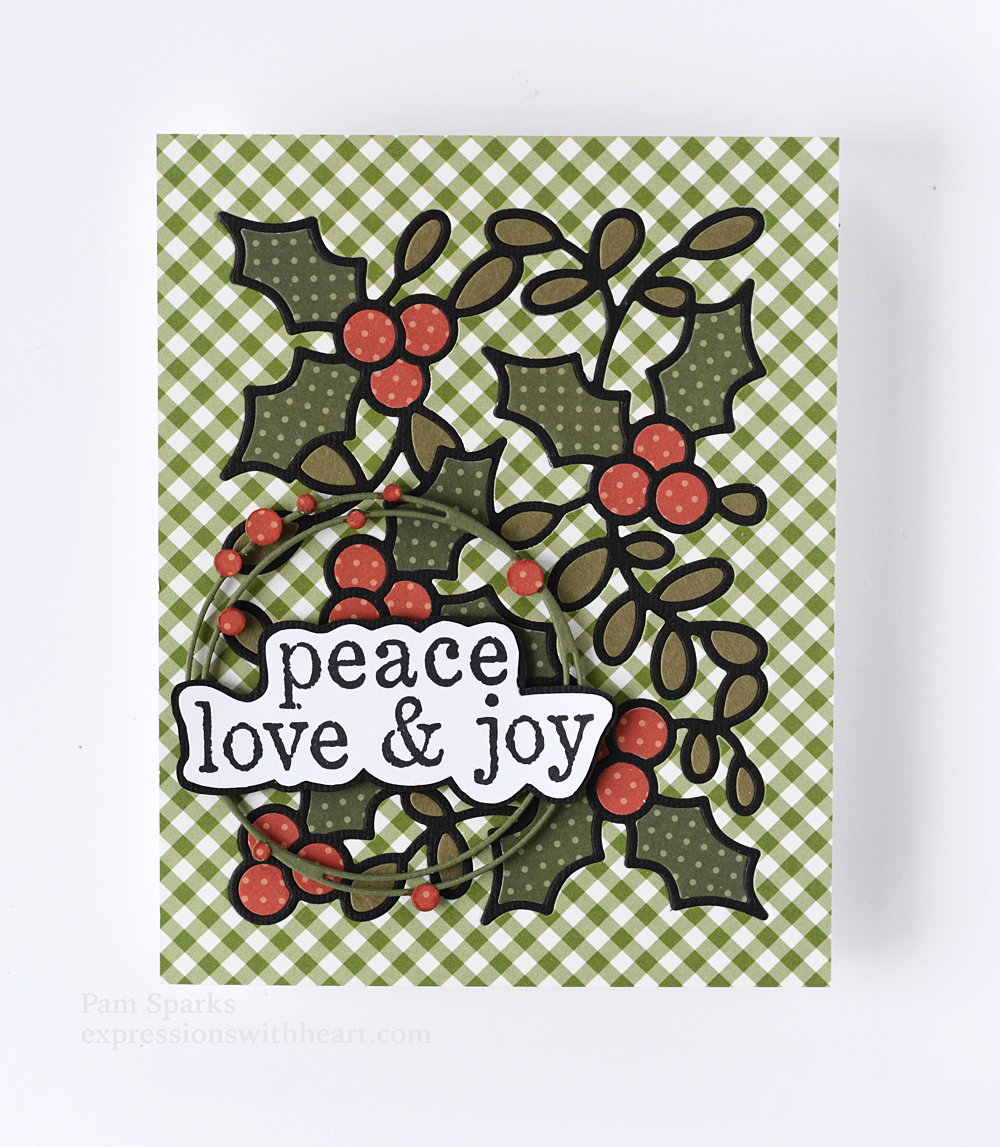
I used one of the plaid papers from the Memory Box Christmas Plaid 6×6 paper pad.


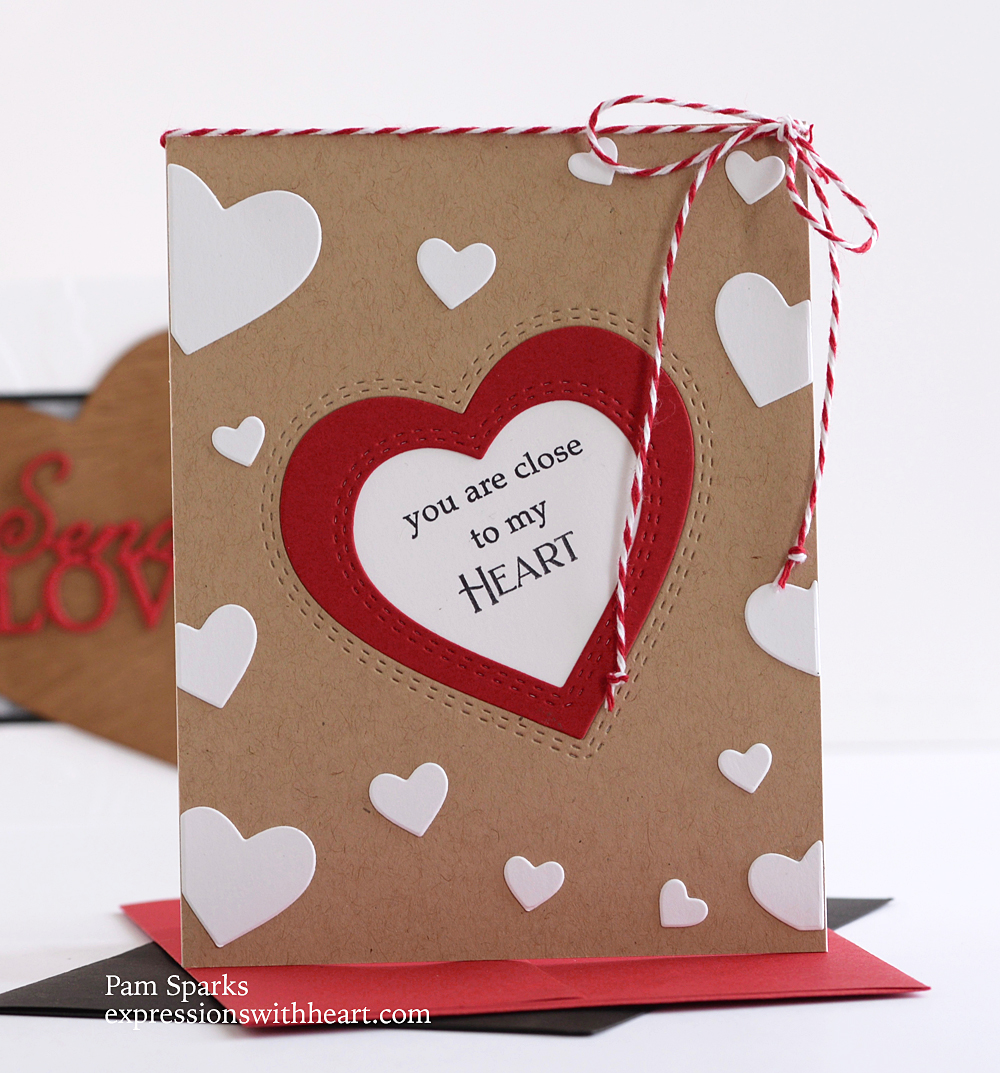
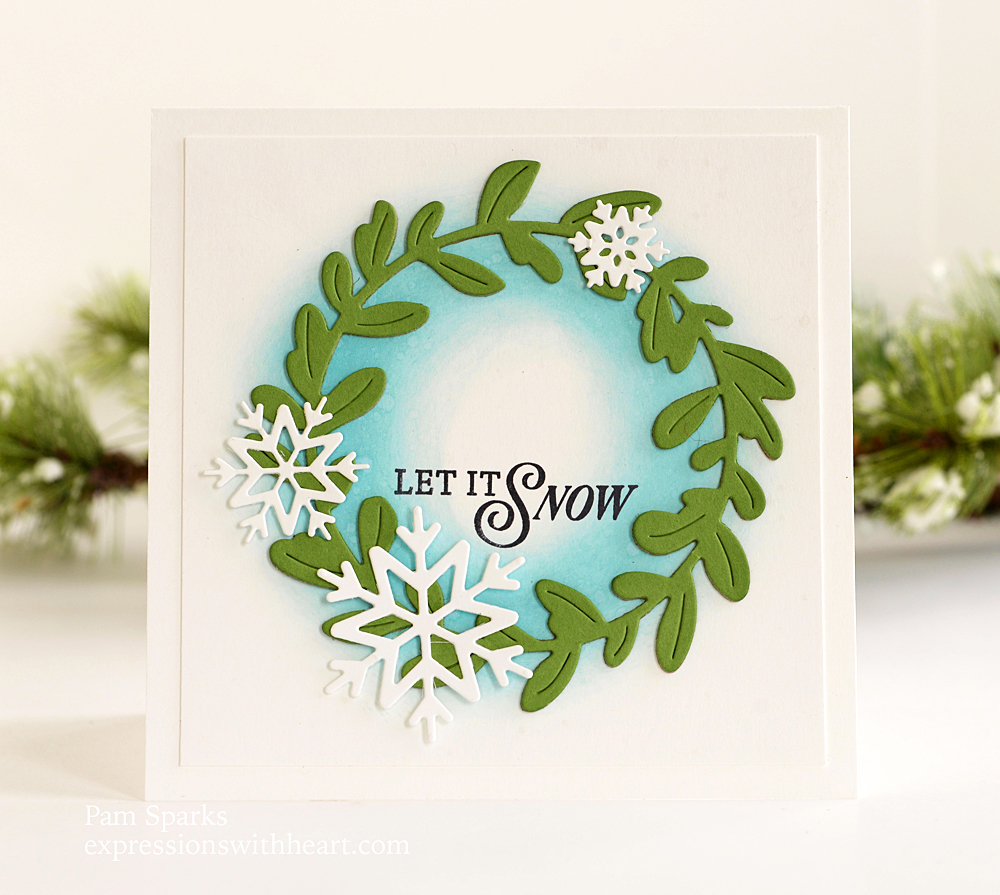
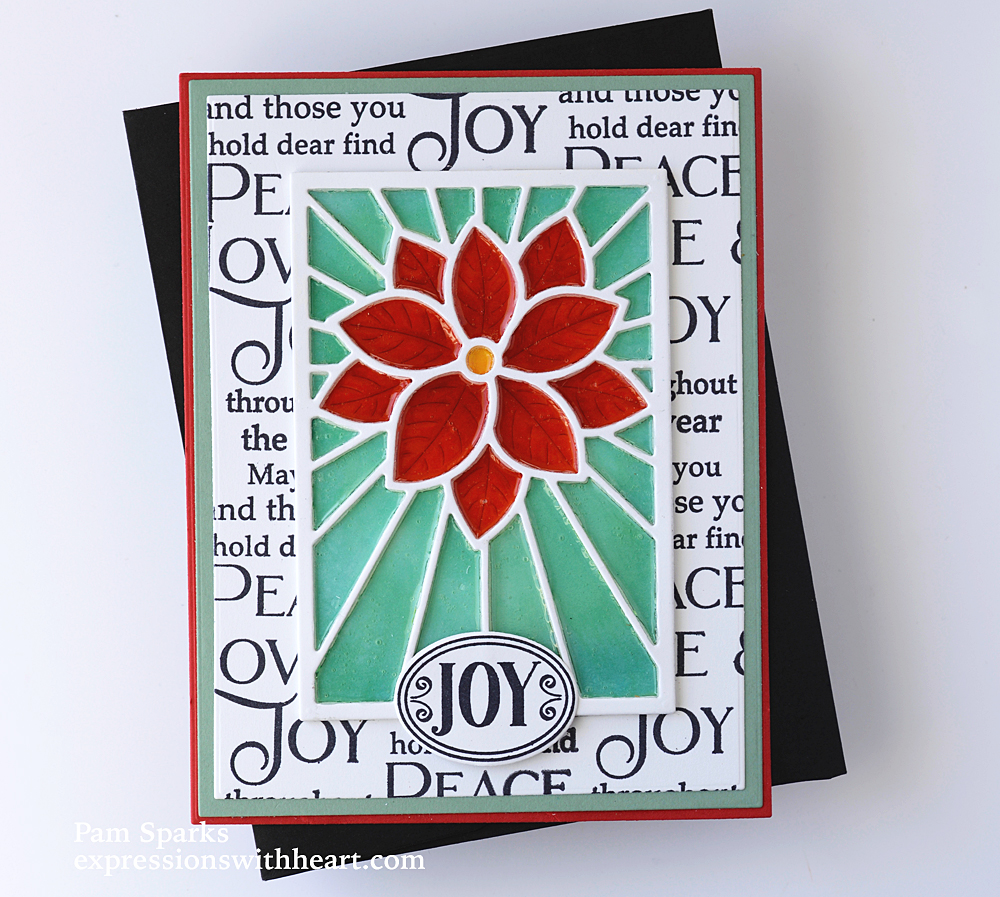
Here’s the heart cuts in white from the Sprinkle Heart Collage.  I really liked how this turned out.  I had cuts from the Double Stitch Loving Heart Cut Out too.  So I just messed around til it pleased my eyes!

I used a sentiment from the poppystamps Greeting Basics set for inside the heart.

I don’t know about you but I’m still using up all the twine!  I like Valentines day as a carry over for using red.  It’s my favorite color! lol

This card was inspired by an old card that I have sitting out on my book shelves in my office. It’s older than my blog! But I still love the card, so here’s this year’s addition! lol

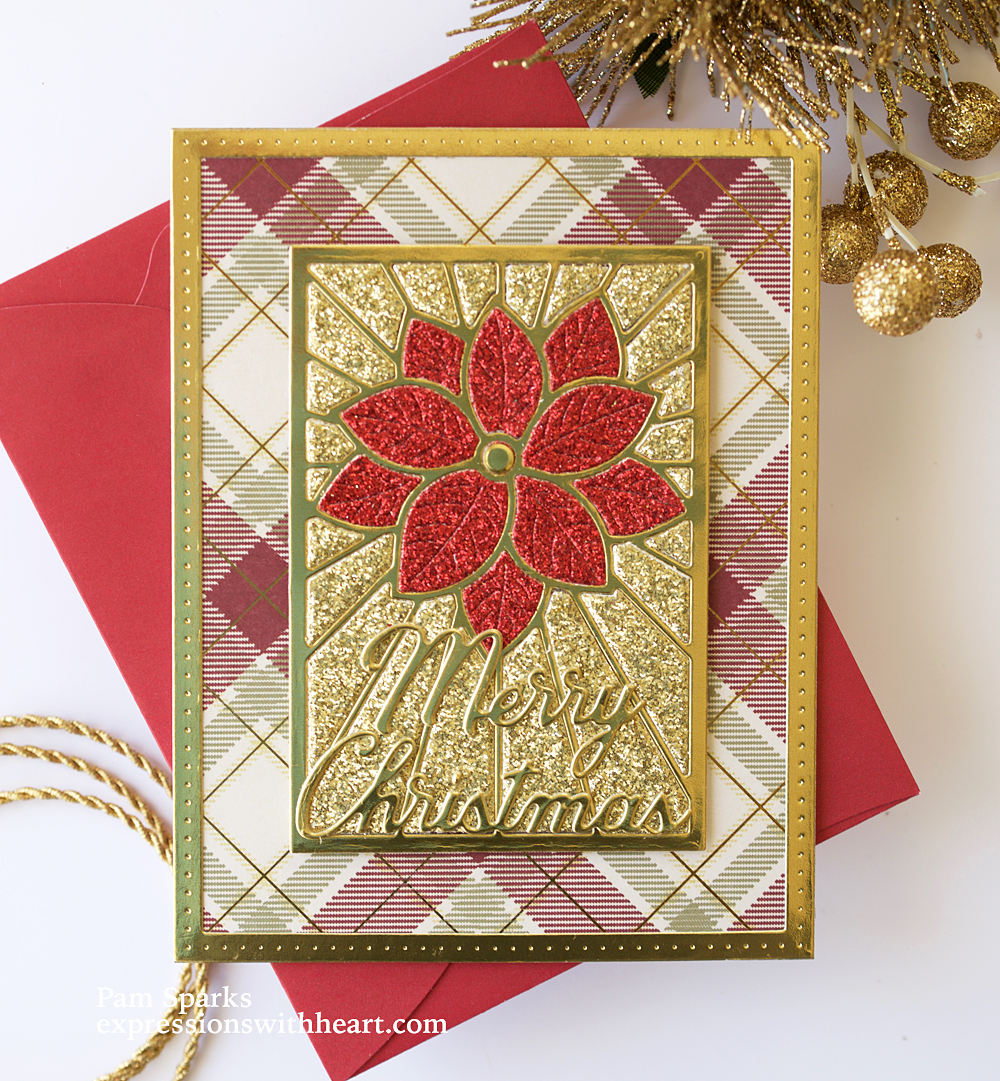
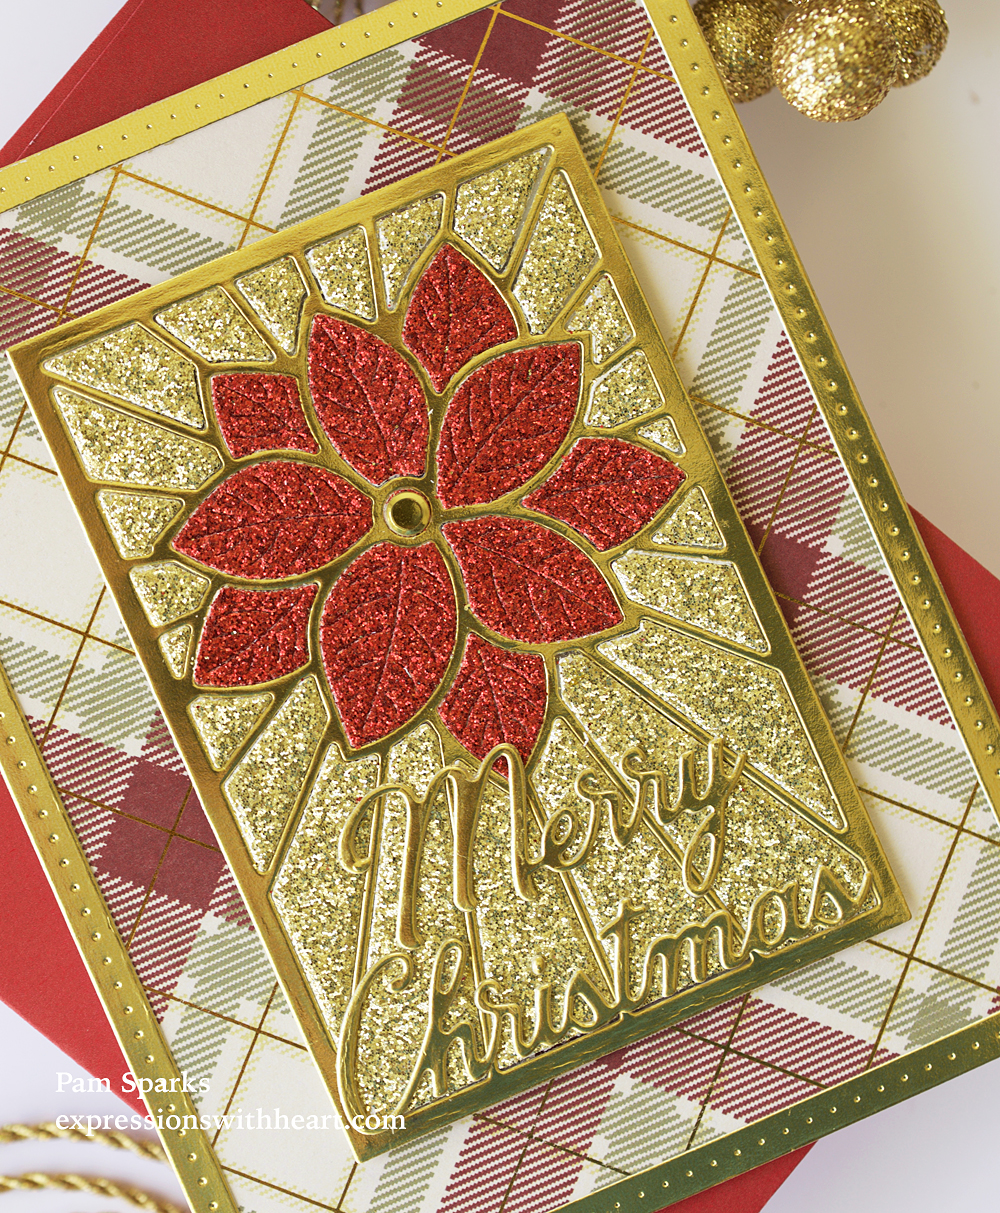
Do you have any of the Memory Box 3D embossing folders yet?  They are all gorgeous!  This one is called Gracious Leaves.

Then more plaid paper from the Memory Box Christmas Plaid 6×6 paper pad.

I die cut and inked the new Memory Box Woodgrain Heart and then die cut the new Sending Love Posh Script 3 times in red, glued them together and adhered to the heart.

I layered the plaid on to a piece of black cardstock also.

These 3 cards are all A2 size and flat to mail!

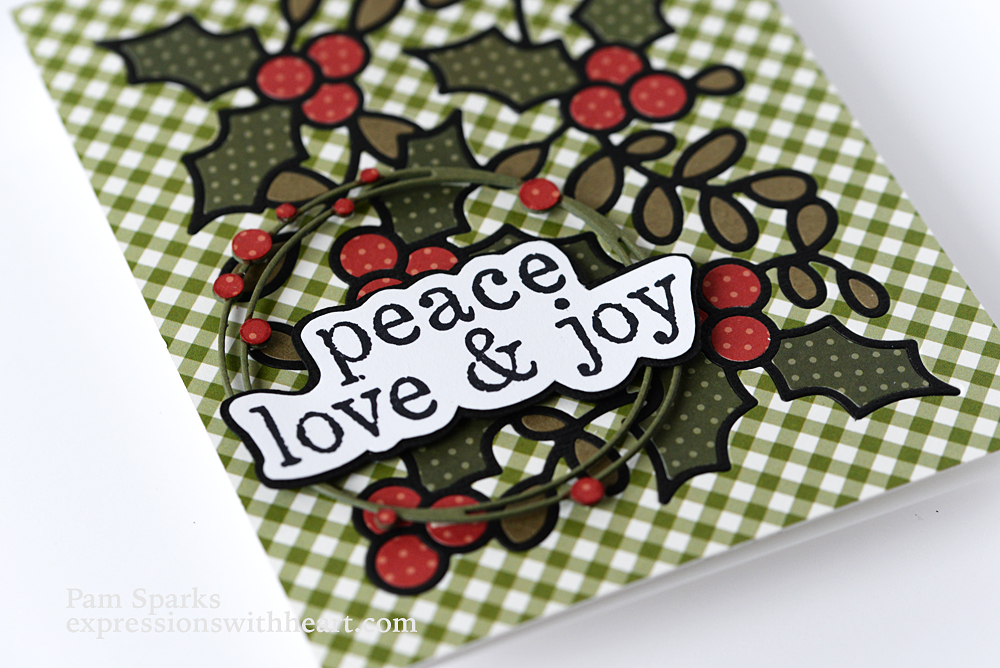
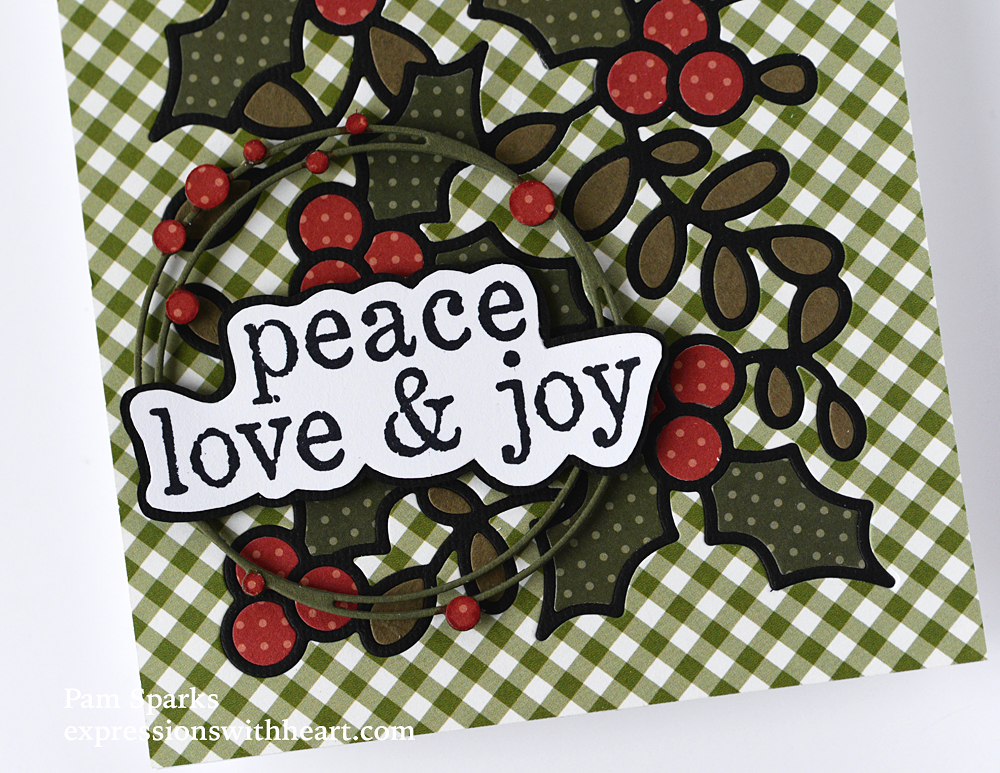
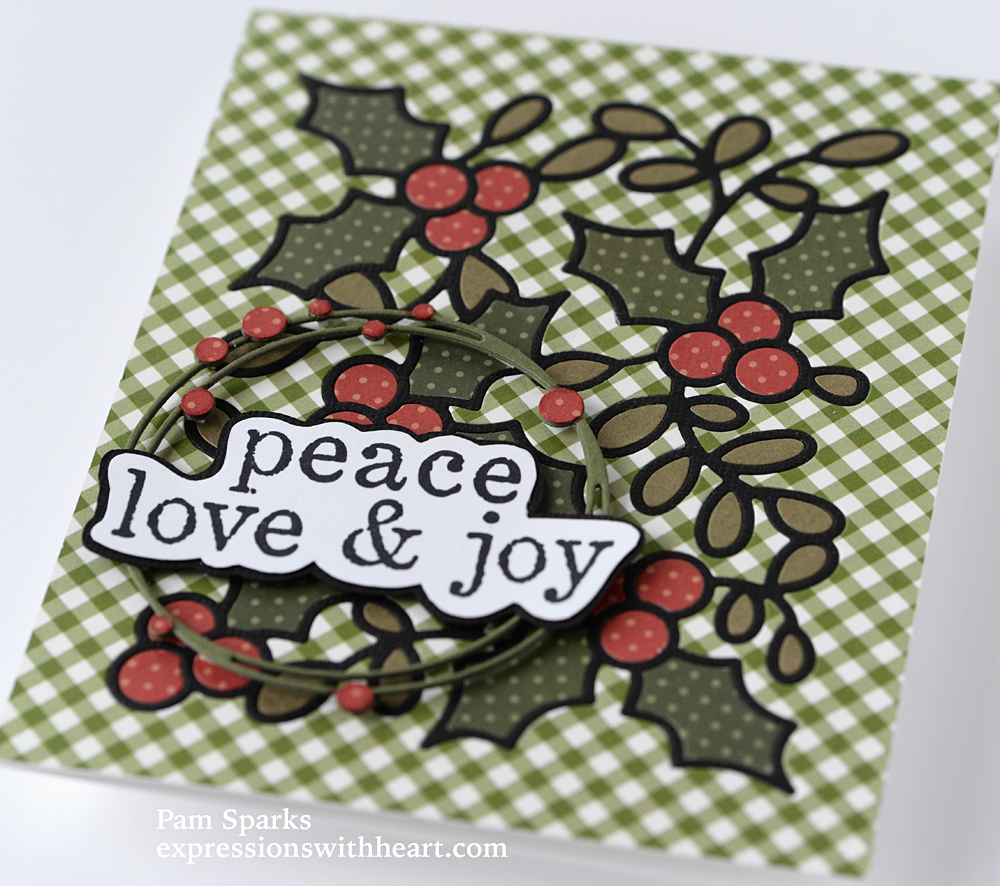
This last card is a small card, 3 ½ x 3 ½ inches.

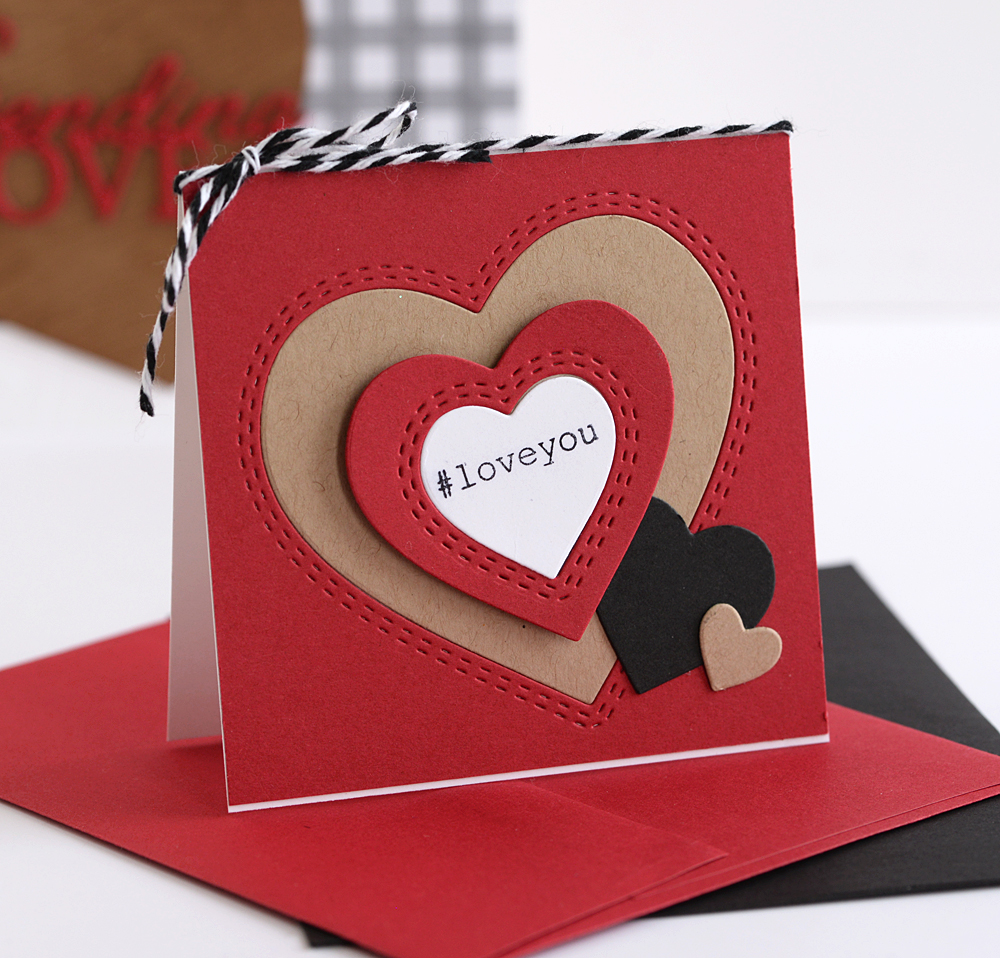
I used some more pieces from all the die cuts I was making.  ❤  It makes me happy!  lol

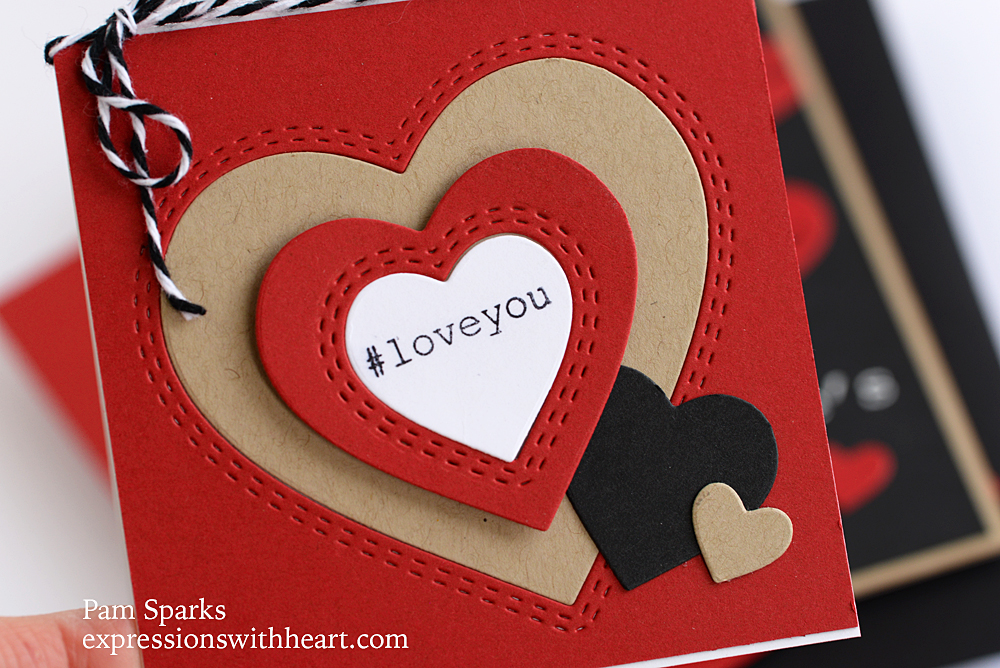
The sentiment is from the Big and Little Valentines clear stamp set again.

I hope you’re inspired to make some fun CAS valentines to give to friends and family this year. ❤

More to come!  Thanks for stopping by!

Products I used to make these cards…

Memory Box – 94552 Woodgrain Heart…
[ STR | SSS ]
Memory Box – 94543 Sending Love Posh…
[ STR | SSS ]
Memory Box – 94548 Sprinkle Heart…
[ STR | SSS ]
Memory Box – 94359 Double Stitch…
[ STR | SSS ]
Memory Box – CL5252 Big and Little…
[ STR ]
Poppystamps – CL490 Greeting Basics…
[ STR ]
Memory Box – EF1002 Gracious Leaves…
[ STR | SSS ]
Memory Box – PP1009 Christmas Plaid…
[ STR | SSS ]
Bazzill Card Shoppe
[ STR ]

birch press design · cards · CAS · Christmas · Die Piecing · Inlaid Diecutting · Memory Box · Oxide Inks · Poppystamps · Winter

3 Cards from Memory Box… Let It Snow!

Three cards, three pictures of each, three snowflakes or four!  ❤

I’ll start with this Clean and Simple one…still loving this blue green pine needle color!

Just a strip of Memory Box plaid with gold foil lines in it…

poppystamps Shiny Snowflakes again…

Memory Box Pointy Pine Needle Sprigs die and Let It Snow sentiment from Memory Box Spirit of Christmas stamp set.

Card size 5 ½ inches square.

Next one is another wreath…wreaths are always in season!

Same Let It Snow sentiment, same snowflakes but I went back to the new Memory Box Bountiful Wreath.  Die cut and inked with a little Distress ink.

Some Peacock Feathers Distress Oxide ink brushed on to shadow the die cut.

This one is 5 ¼ inches square…

The last one is a statement in contrast for sure! 😀

Bold plaid from the Memory Box Christmas Plaid 6×6 pad…same sentiment…same snowflakes with the addition of Birch Press Design Frosty Flake Layer Die set…I used all three, A, B and C.

The day I was making these it snowed big time, then it didn’t snow the next day but it snowed again yesterday!  It’s nice and bright here! Now that I’m sitting here looking at the pictures, I kinda wish I’d tried black for the top, fine snowflake layer….hehe… next time!

Here it is January 2nd already.  It feels like we had three Saturdays this week!  Anybody else think that too?! lol

Thanks for stopping by today! All the best to you and happy cardmaking new year too!

Products I used to make these cards…

Memory Box – 94487 Pointy Pine Needle…
[ STR | SSS ]
Memory Box – CL5261-D Spirit of…
[ STR | SSS ]
Memory Box Clear Stamps SPIRIT OF…
[ SSS ]
Memory Box – PP1009 Christmas Plaid…
[ STR | SSS ]
Poppystamps – Die – Shiny Snowflakes
[ FRN ]
Memory Box – 94490 Bountiful Wreath…
[ STR | SSS ]
Birch Press Design – 57388 Frosty…
[ STR | SSS ]
Ranger Ink – Archival Ink Pad – Jet…
[ SBC | SSS ]
Tombow Mono Multi Liquid Glue
[ STR | SBC | SSS | TE ]
TE Premium Cardstock
[ TE ]
Sizzix – Big Shot Accessory – Tool…
[ SBC ]
Sizzix – Big Shot Machine – White and…
[ SBC ]

cards · Christmas · Inlaid Diecutting · Memory Box · Poppystamps · Winter

Memory Box Charming Snowman Collage Card…

As I started thinking about making up this snowman, I knew I wanted to use plaid! Snowmen always melt my heart. ❤

I started with the new Memory Box Charming Snowman Collage and die cut it three times in white cardstock.  I colored the top snowman layer with Copic Sketch markers and added a little white gel pen. I glued the three snowman outlines together and inlaid them back into just one of the panels that I die cut with Memory Box Rectangle Basics set. His nose is three layers of the carrot cut.  The eyes are colored in with a black glaze pen.

I hope the picture explains it better than I did with words!  😀

I die cut the Memory Box Pointy Pine Needle Sprigs from TE cardstock for the bottom left corner.

I stamped and heat embossed the sentiment from  poppystamps Christmas Quotes stamp set and coordinating die.

The plaid and dot papers are from Memory Box.  I’ll link everything below. Holler if I forgot anything!

How is your Christmas card creating coming a long? hehe Hard to believe it’s almost Thanksgiving! Thanks for stopping by!

Links to what I used…

Memory Box – 94498 Charming Snowman…
[ STR | SSS ]
Memory Box – 94487 Pointy Pine Needle…
[ STR | SSS ]
Poppystamps – CB496 Christmas Quotes…
[ STR | SSS ]
Poppy Stamps Clear Stamps CHRISTMAS…
[ SSS ]
Memory Box/Open Studio – 30086…
[ STR | SSS ]
Memory Box – PP1009 Christmas Plaid…
[ STR | SSS ]
Memory Box – PP1011 Garland Stripes…
[ STR | SSS ]
TE Premium Cardstock
[ TE ]
Lawn Fawn WHITE Embossing Powder LF1537
[ SSS ]

cards · Christmas · Die Piecing · Inlaid Diecutting · Memory Box · Poppystamps · Winter

Two Cards With poppystamps Stained Glass Poinsettia Die…

Hi everyone!  Whew, I’m slow editing pictures and getting a post written! I had these two cards made before Breanna passed away.  Thank you all so much for your kind comments, cards and emails.  Your expressions of sympathy and prayers mean so much!  I had no idea and I wish I still had no idea!  It still doesn’t feel real or believable. The sorrow comes in waves and at times it feels like my heart is being squeezed. All I know to do is carry on…love harder, appreciate more and be thankful to God for the time we do have together!

I had fun using this new poppystamps Stained Glass Poinsettia die two ways.  This card is the die cut four times.  One time I made sure the pieces stayed intact and colored the flower petals and rays with Copic Sketch Markers. Then I glued the other three frames on top and filled them with Ranger Glossy Accents.  Very fun!  My fingers got a little tired of squeezing the little bottle.  I couldn’t find my big bottle. lol

I stamped a background panel with one of the stamps from the new poppystamps Joyous Christmas Wishes sentiment set.  I really ❤ this set.

Then the JOY oval is from the new Memory Box stamp set and die set Spirit of Christmas.  Another fabulous set for images to color and sentiments!

Both cards are A2 size.

This one I used the new Holiday Glitter 6×6 cardstock pad and the new Christmas Plaid 6×6 paper pad.

I die cut the new Stained Glass Pinsettia die in metallic gold cardstock, covered the back with scor-tape, then pieced in the petals and rays that I cut in the glitter pad cardstocks.

Memory Box Merry Christmas Noted Script die for the sentiment on this one.  I die cut it twice and glued together.  I didn’t want it to be too thick.

I die cut the poppystamps Pointed Rectangle Frames in metallic gold to frame the front.

I have a package of these gold ‘things’, like 3 sizes in the pack.  I used one for the center of the poinsettia.  I think either of the gold cardstocks would work too.  I almost left it red!

That’s it for me today… let me know if you have any questions.  My brain feels cobweb – y!

I have felt your ❤ felt prayers and appreciate it so much! 

Here’s some links to what I used…


Poppystamps – 2391 Stained Glass…
[ STR | SSS ]
Poppystamps – CL497 Joyous Christmas…
[ STR | SSS ]
Memory Box – CL5261-D Spirit of…
[ STR | SSS ]
Memory Box Clear Stamps SPIRIT OF…
[ SSS ]
Poppystamps – 1938 Pointed Rectangle…
[ STR ]
Memory Box – 94357 Merry Christmas…
[ STR | SSS ]
Memory Box – GP1005 Holiday Glitter Pad
[ STR | SSS ]
Memory Box – PP1009 Christmas Plaid…
[ STR | SSS ]
Mini Glossy Accents – .5 ounce
[ STR | SSS ]
Ranger GLOSSY ACCENTS Glue…
[ SSS ]
Bazzill Foil Cardstock – Gold 12×12
[ STR ]
TE Premium Cardstock
[ TE ]


cards · Christmas · Die Piecing · Inlaid Diecutting · Memory Box · Poppystamps

poppystamps Holly Background Card…

Hi everyone!  A paper pieced Inlaid die cut card to share with you today!  It sure is hard to cover up a neat background! lol

I started by cutting the Holly die in the gingham pattern paper. There were only 5 or 6 inside pieces to keep track of to place back in!  I was surprised!  Dave thought that out for us and made it easy!  YAY!  I die cut in TE Oreo cardstock and placed it in the gingham rectangle, flipped it over, covered it with 2 inch Scor-tape and started piecing in the leaves, berries and branch leaves.

The gingham paper is from the Pebbles Merry Merry Collection from a couple years ago, called Holly Berries 733552.  It’s the back side. Maybe you have it in your stash! ❤

I used the dot papers from the NEW Garland Stipes and Dots paper pad from Memory Box.  The solid leaves were just some cardstock scraps.

Then I die cut the Memory Box Bubble Circles medium size die three times, glued them together, then punched some circles and glued them on for the berries/bubbles on the circles.  I was going to tie jute around the panel and under the sentiment BUT I forgot the plan and taped it to the cardbase so I had to come up with another plan! haha

I like it! lol

The sentiment is from the super fun new Memory Box stamp set Christmas Tiles.  I drew around the stamp with a pencil to get the shape and hand cut it out so it’s not perfect but hey, it adds to the charm, right?! haha

It’s an odd size but will still fit in an A7 envelope and mail for one forever stamp!

Thank you for stopping by today!  Holler if you have any questions!

p.s.  Breanna is coming home today! She’s very weak but we’ll get her fed better and get her stronger to fight this!  So thankful!  Keep praying for us!  We appreciate it so much!

Products I used to make this card…

Poppystamps – 2392 Holly Background…
[ STR | SSS ]
Memory Box – CL5263 Christmas Tiles…
[ STR | SSS ]
Memory Box – 94439 Bubble Circles…
[ STR | SSS ]
Memory Box – PP1011 Garland Stripes…
[ STR | SSS ]
TE Premium Cardstock
[ TE ]
Ranger Archival Ink Pad – Jet Black
[ STR | SBC | SSS ]