Birthday · Blog Candy · cards · Class · Classes · Memory Box · Poppystamps · rubber stamps · Step card · Winners

The Give a way Winner and more cards…

AND… the winner is….

Lynn Gauthier!!!!

CLAP! CLAP! Congrats Lynn!!!  YAY for you!

I had Breanna pick a number between 1 and 63 and she picked 42!  Congrats Lynn!  Send me an email with your mailing information!

I tried to add names… for some reason you all didn’t put your names in for each thing, so I had to add a bunch.  Lesson learned…links must be too big a pain…stick with comments I guess!

THANK YOU Cindy from Starlitstudio!

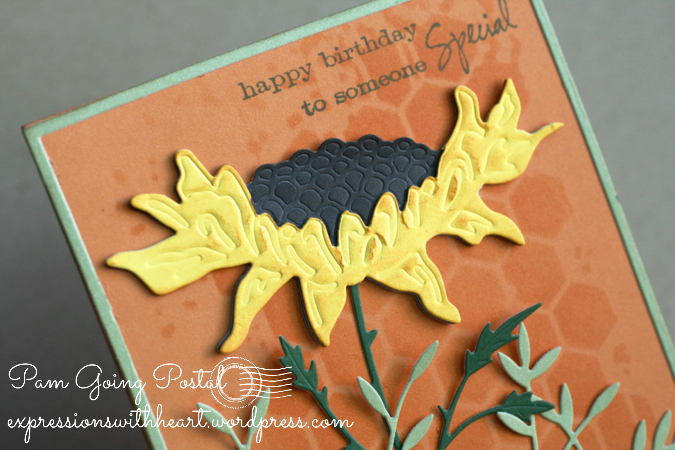
I started posting the cards I designed and taught at the Great Yosemite Stamp Escape a week ago… eek… time gets away so fast!  HERE’S the post with the Sunflower cards and HERE’S the post from a couple weeks ago telling about the weekend and about the process of getting ready for the classes.

Today I’m posting the other three cards…

PamSparksGolfSceneForeYou

‘fore you’ – layering up dies to create a scene.  Love making scenes!  Memory Box dies and stamps and poppystamps dies.

I had the ladies cut out the golf cart in white cardstock and color the pieces with markers. Easy and so cute!


PamSparksPailiaBloom

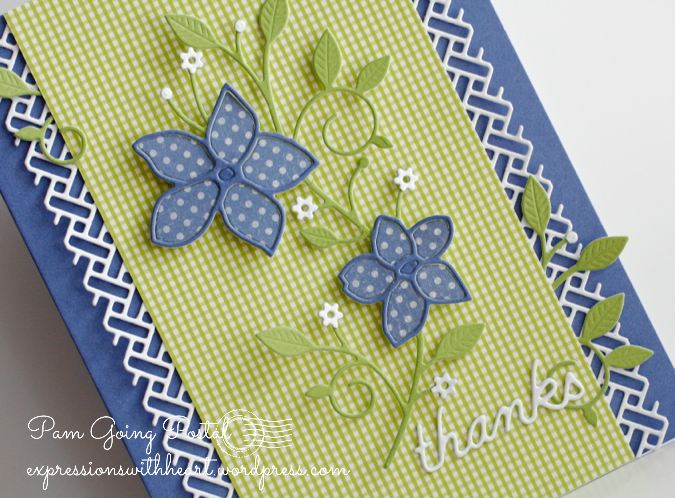
more Memory Box and poppystamps dies…the Memory Box Chic Chevron makes an appearance on the panel.  Inked with Mowed Lawn Distress ink and the mini ink blending tool.  Some spatters and sequins add to the fun of the design!

Linking up this card to the Keep it Simple Challenge – Splatters

Weekly-Favorite

YAY!  My Pavilia Bloom card was in the favorites at SCS on Sunday!  Thank you ladies!


PamSparksPaviliaBloomClose

I had the ladies emboss the flower just like I did in this video HERE.  Then it was inked with Dusty Concord Distress ink and the mini ink blending tool.


PamSparksWaterCanStep

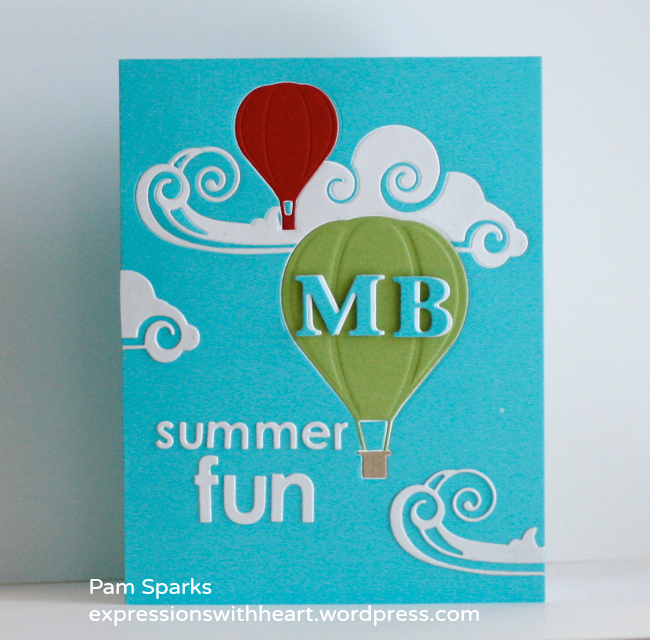
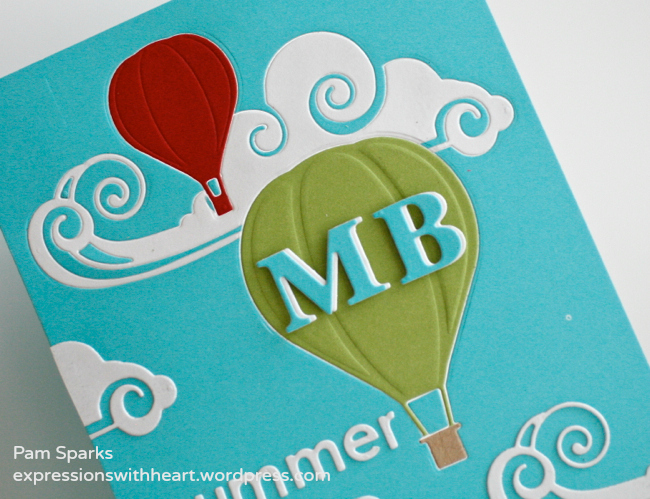
Another sweet Summer scene with Memory Box and poppystamps dies.  So fun to make!  I love step cards!

Linking my card to the Seize your Birthday Challenge – Summer Time

My card was a winner there too!  Thank you ladies!

STB Challenge Winner

Enjoy the Summer days!  We’re sure having some beautiful ones here in Iowa.  Love it when it’s not so hot and humid!   I hope to hop on my bike for a bit today!  : )

Thanks for visiting!  Love hearing from you and hope you enjoyed my cards today!

Dies, stamps and supplies I used to create these cards…

cards · CAS · Die Piecing · Memory Box · Shopping · Spring · Stencils · Summer · Techniques

More New Memory Box and SALES!!!


First up…the SALES!!! 

I use my Perfect Layers tools all the time!  Perfect Paper Crafting is offering an awesome deal!  If you haven’t gotten yours yet…don’t miss this opportunity to get a deal on the new set of Mini Rulers and the mat!  You will not be sorry!  LOVE them!   If you already have them, maybe you want another set or what an awesome gift for a stamper friend!
Click the box below to check it out!

2422News__60202.1401665389.451.416

I have admired and been tempted to buy for some time the New stamp and die sets from Simon Says Stamp.  I still don’t have any but if I have time to shop tomorrow, I want to but where to start!   In case you didn’t know and want to shop too… here’s the deal and a link to the sale. 

1_121

thanks for shopping through my links! 

❤❤❤


PamSparksButterflies

Cards! Here’s another card using the NEW Summer 2014 Memory Box release. I started with the Floating Butterflies die cut out of a Memory Box white notecard. Next I cut out two of the inner lines with a scissors so I would have one complete butterfly.  Here’s a picture of the die so you can see the lines I cut off.

6a00d83454a17469e201a3fd197a36970b-800wi


I cut the Floating Butterflies Background die from a Memory Box Sweetcorn notecard. Using the Butterfly Vine stencil, I inked up the complete butterfly first, with Wild Honey Distress ink and the mini round ink blending tool.  Then moved the stencil to fit over the other two butterflies, making sure not to ink into the complete butterfly I stenciled first.

I die cut the Bursting Berry Vine and Blushing Flower Branch from a Memory Box Kraft notecard. I inked them with Gathered Twigs Distress ink and the mini ink blending tool and then colored the leaves with YG Copics.

Cut the Blushing Flower Branch again with little pieces of Memory Box Lavender notecard placed over the flowers, emboss them with a stylus or run it back through the Big Shot with a tan mat and shims.  Leaving the flowers in the die, flip it over and ink through the die with Dusty Concord Distress ink and an ink blending tool.


PamSparksButterfliesClose


Using a variety of Memory Box butterfly dies… cut some butterfly bodies in lavender card…ink them a little with Dusty Concord Distress ink too.

The word ‘fly’ is cut from the Library Alphabet Tags set.

I glued with Tombow Mono Multi, Scrapbook Adhesives mounting squares and the ATG gun.

A2 size card…

Linking up to the NBUS Challenge HERE…  all of the dies have never been used!

button aqua

❤❤❤

Over on the Memory Box  facebook page this a.m., I posted the Floating Butterflies card and a gal said she wanted to see something with the Curling Cloud die.  So I took the challenge for this afternoon!

I inlaid the Mini Hot Air Balloon and Beautiful Balloon dies with the Curling Cloud, cut the Memory Box initials with the Classic Uppercase Alphabet dies, cut summer with the Alphabet Soup die and fun with Parker Lowercase Alphabet dies.


PamSparksMBSummerFun650


Another Curling Cloud glued on top of the card to finish it off.

It’s an A2 size card – Memory Box Lagoon notecard for the card base, white, cranberry and meadow for the cuts.


PamSparksMBSummerFunClose


So when it’s hot and humid… I stay in the house and keep cool!  How about you?  So my Summer fun is not in the air but on the ground, in the house playing with Memory dies, stencils and stamps!

I still have 3 class cards to post next week, some new Printworks stamps to play with and it’s time to color again!

TFL! and happy weekend…hope you get to make something too!

Here’s what I used to make these cards…


Birthday · cards · CAS · Class · Classes · Die Piecing · Memory Box · Poppystamps · rubber stamps

Memory Box and poppystamps Sunflower Card…

PamSparksPSsunflower

I really had a lot of fun creating this card!  I LOVE the poppystamps Bountiful Sunflower die!  I used it here with the Memory Box Toulouse Background die (trimmed off the flower head), the Memory Box Honey Comb Stencil, the Memory Box Happy Birthday Combo stamp and the poppystamps Bountiful Sunflower Background die.

I inked the front of a Memory Box Jack o Lantern A2 Notecard with the Honey Comb stencil, Wild Honey Distress ink and the mini Round Ink Blending tool.


PamSparksPSsunflowerClose

Remember this card and video?

I took the background piece and put it in the outline die, ran it through the Big Shot to emboss the detail into the background piece, that’s what I did here too… LOVE this look!

Then I inked the edges a little with Wild Honey Distress ink and the new mini Round Ink Blending Tool.

There is ONE big difference though… see it?

Instead of putting the background behind… I put it on top!

When I die cut the Bountiful Sunflower outline die in dark brown, I made sure to keep the seeds in the die and inked them with Walnut Stain Distress ink and the mini Round Ink Blending Tool.  TIP – to make sure the seeds stay in after you remove it from the die…tape them on the back side with scotch tape.

Then here is a card I made to show how you would normally think to cut this die and use it…

PamSparksBountifulSunflower

Only instead of lining up the background piece exactly, I decided to place it ‘off’!  I like it a lot this way!  YAY!

PamSparksBountifulSunflowerClose

I inked the edges of the Memory Box Kraft A2 Notecard with Walnut Stain Distress ink, stamped the Journey Collage stamp in black and ended up with a CAS card I’m really happy with too!

New Grandson and Mama are doing great!  Thanks for stopping by!

Still time to link up to the give a way… scroll down…

Supplies I used for these cards…

cards · Die Piecing · Memory Box

Memory Box Vignette Floral Branch and Wicker Panel…

PamSparksVignetteFloralBranch

Happy Tuesday everyone! It’s been an exciting week for Tim and I so far!  We have another new grandson, born early evening Sunday.  We are feeling very blessed… this is our 10th grandson and we have six granddaughters!

I wanted to share a card I started Saturday afternoon and just finished up today.  Another FABULOUS Flower die and the Wicker Panel die in white that I cut in half the long way and used on each side of the gingham panel.

I die cut the  Vignette Floral Branch die out of three colors, white, Meadow and Blueberry so I could ‘color’ the flowers.  Very easy to piece together.

*Trim the Blueberry flowers off the Blueberry cut and glue to the Meadow cut.

*Trim the little white flowers from the white cut and glue to the Meadow cut.

*Cut one more time out of the Blueberry Distress Dots Signature Pattern Paper for the flower petals…leave them in the die if you can until you are ready to place them.

Here’s a trick…on your green cut that you’ve added the blueberry and white flowers to already, turn it over and put a little piece of scotch tape on the wrong side of the big flowers…that will give you some adhesive area, so when you turn it back over, right side up, you can stick the flower petals in the right spot on the Blueberry flowers and the scotch tape will hold them in place!  YAY!  (you can use double sided tape instead of scotch tape if it has a release paper, so it doesn’t stick to whatever you are working on too)

A close up…

PamSparksVignetteFloralBranchClose

I mounted the finished Vignette Floral Branch to the card with mounting squares.

I cut the A Little Thanks die from white card-stock twice and glued them together.

I use Tombow Mono Multi glue.  Keep the tip clean and keep it laying down all the time and it’ll be your ‘new best friend’! ; )

Enjoy the NEW dies!  I love the Vignette Floral Branch…I think it will play nicely with the Wildflower Corner die too!  oh, and wouldn’t a butterfly be nice on here! lol

Thanks for stopping by today!  I’ll be heading back to Breanna’s tomorrow to help and play with the other kids.

oh, and so sorry for the link up confusion with the giveaway in my previous post… it’s still open until Saturday… so link up!  Thank you Cindy/Starlitstudio for your generosity! 

Starlitstudio.net has the new release in stock, click HERE to shop!

Baby · Birthday · cards · Give away · Memory Box · Patriotic · Video

Memory Box Star Garlands and a Giveaway…

PamSparksStarGarlandsUSA

I LOVE this NEW Star Garland die!  So wonderful, die cut from Silver Glitter card-stock!  I love the ‘broad stripes and bright stars’ here… I know…now the song is stuck in your head for hours! lol  It’s a good song!

PamSparksStarGarlandsUSAClose

A close up… I used the happy and birthday cloud dies cut from Memory Box Sapphire card-stock and the Classic Uppercase Alphabet set for USA, cut from Memory Box Cranberry card-stock.

The stripes are ¾ inch strips, 4 ¼ inches long, glued on about a ½ inch apart on a Memory Box White A2 Notecard.

It’s ok,  go ahead and bust out singing!  ; )  Oh say can you see…by the dawn’s early light…

The next card…well… it’s kinda birthday in a ‘birth’ day kind of way!  Welcome Baby!

PamSparksStarGarlandsBaby

Here’s the Star Garland die again but I only used half of it.  I ‘hung’ the words in space using the Parker Lowercase Alphabet set and the Alphabet Soup set. So cute!

Memory Box Baby Carriage die, Baby Stuff and the rug is from the Palace Oval Frame Set.

I used a little RV21 Copic marker on the rattle and the center of the carriage wheels.

Dies glued and mounted to a Memory Box Cherry Blossom A2 Notecard.

Won’t this die be awesome for Christmas?!!!  YAY!

NOW for an Awesome Giveaway!  (USA only)
I have a Sizzix Flower Making Tool Kit to give away! (not just for making flowers!!!)

sizzix-flower-making-tool-kit-3.gifretail value $35

Sponsored by Cindy from Starlitstudio.net

Link up below with inlinkz … up to five times…

1. link up
2. link up again for following my blog or if you already follow  (links on the top right)
3. link up again for liking my FB Page or if you already liked it
4. link up again for subscribing to Starlitstudio’s blog (Cindy’s gorgeous creations, sales and coupon codes)
5. link up again for subscribing to my You Tube Channel or if you already subscribed (in case you didn’t see the sad news about it being deleted by Google)

Link up will close next Saturday, June 7th at 9 a.m. CST

Click on the frog to add your links, or leave a comment here and I’ll add you to the draw

CLOSED


Thank you for supporting my blog and shopping at Starlitstudio. good luck!  Winner will be random.

Glad you stopped by and hope you’re still singing a long with me!  waaaahhhh… hahaha

Supplies I used (dies in stock! yay!)