

Hi everyone! I’ve been working on these two cards this week using the NEW Spellbinders June Small Die of the Month Club set. (link at the bottom of this post)
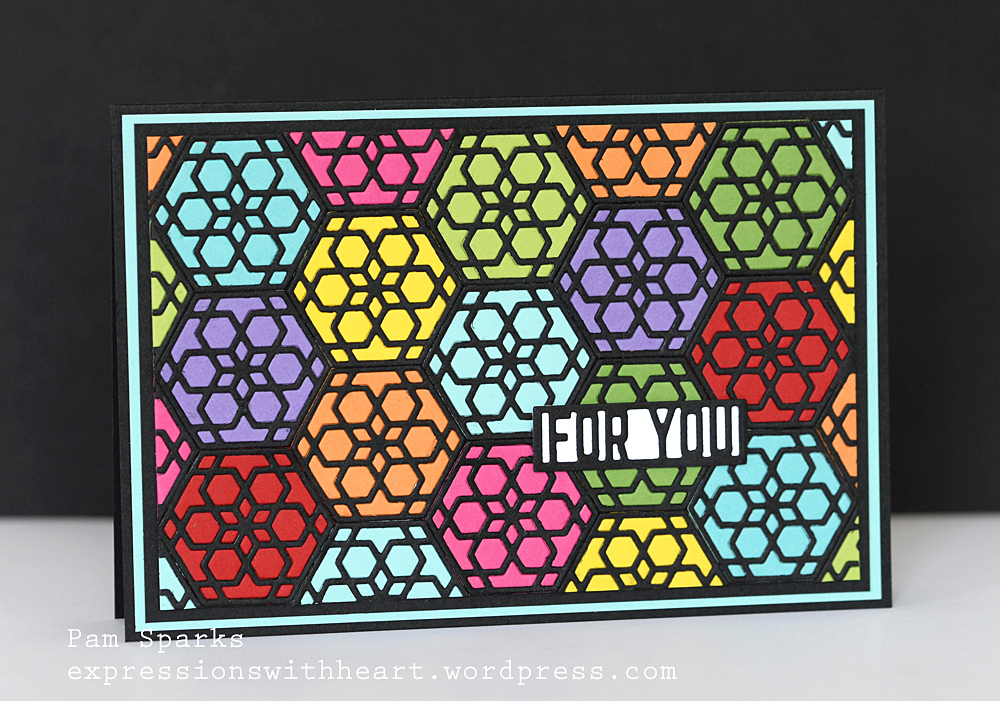
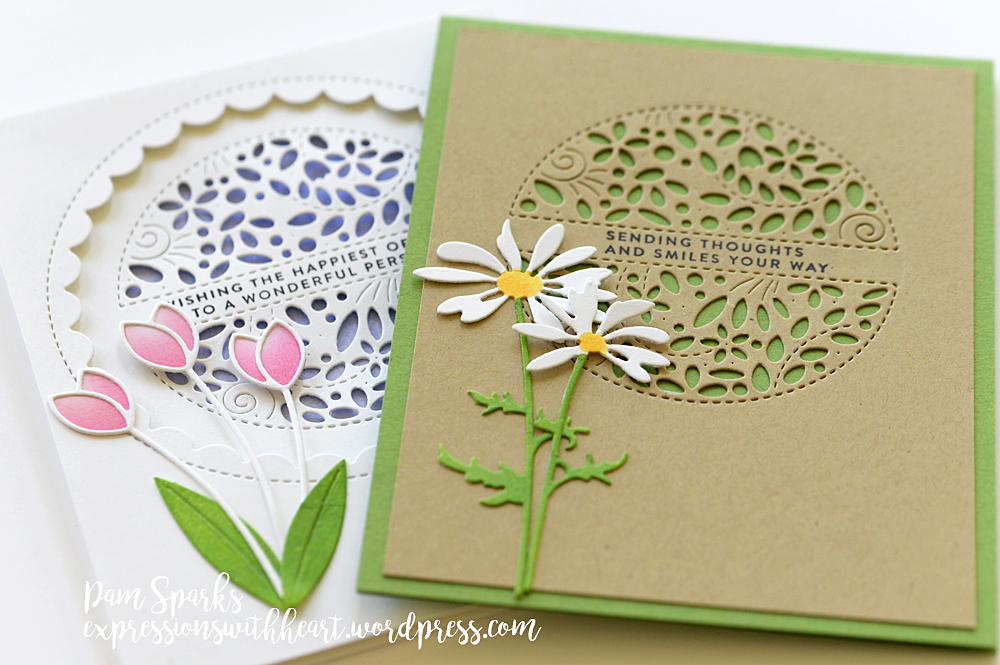
Two kinds of stained glass/quilt looking cards!
In the June kit there are three sets of dies that stack/coordinate. A hexagon set, a circle set and a fan looking set. All for a great deal!
I used one layer of the hexagon set for this first card. I die cut a lot of the black one (popped out the waste), then I die cut two of each color cardstock from Taylored Expressions, linked below, all from the same die. The color ones held together well so that made it easy to tape the back (to hole the pieces in) and then glue the black cut on top.
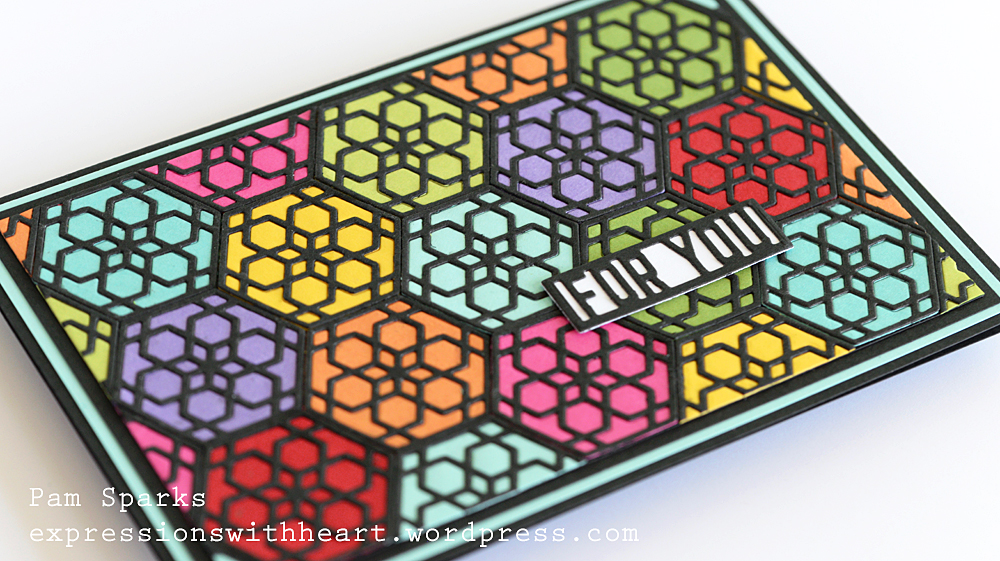
This ended up a ‘Hallmark’ size card. If I was doing it again, I would cut the panel in half and make two cards! 😀

The ‘For You’ sentiment die cut is from the Spellbinders Truckin’ Through the Seasons die set.
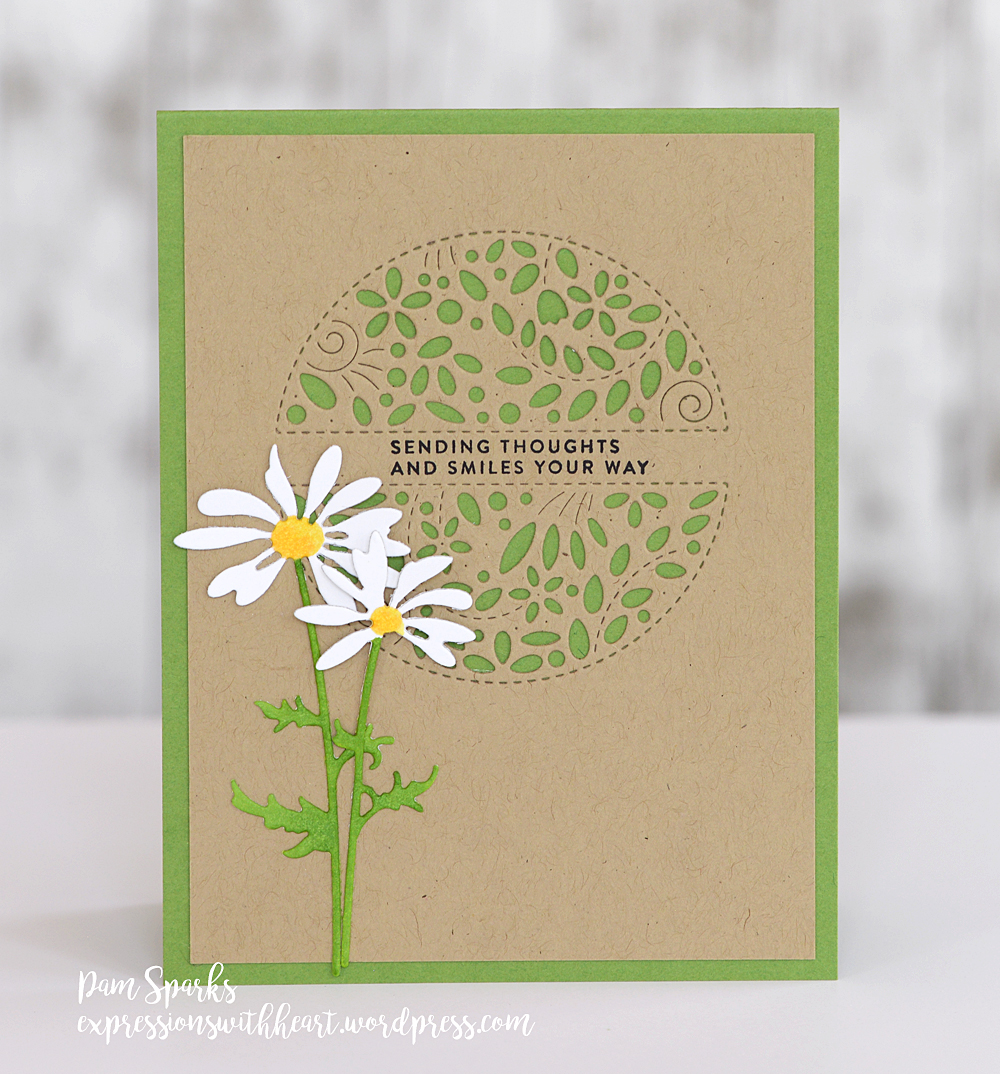
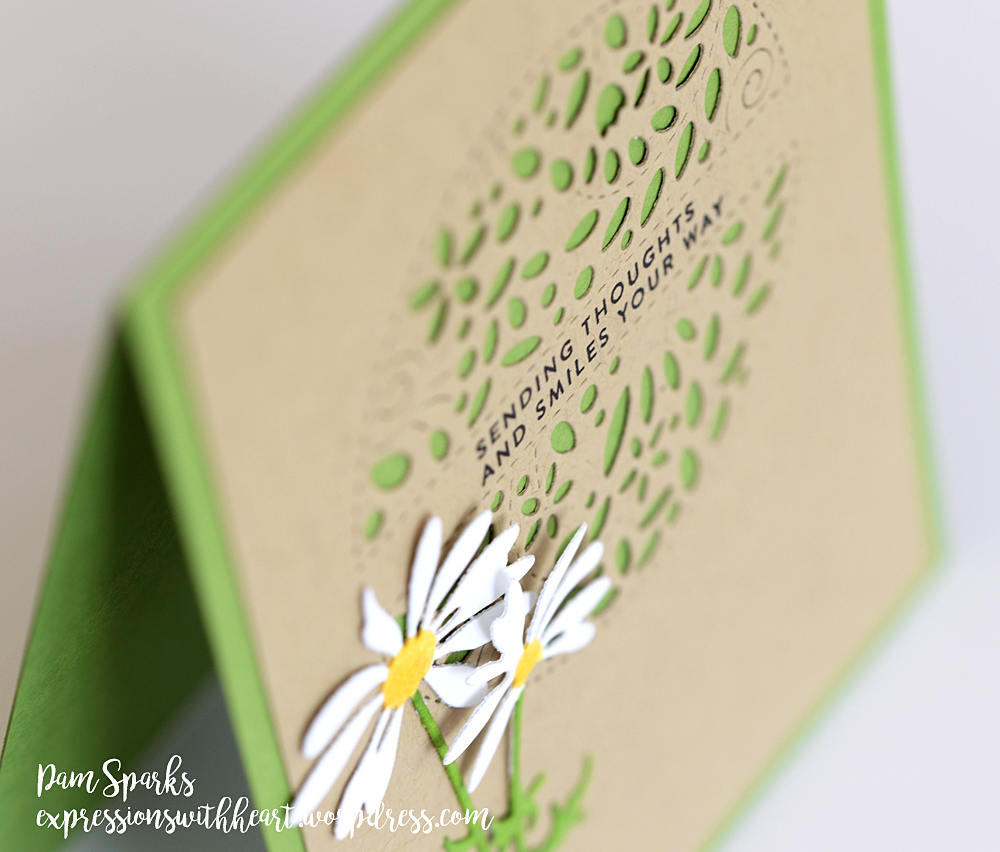
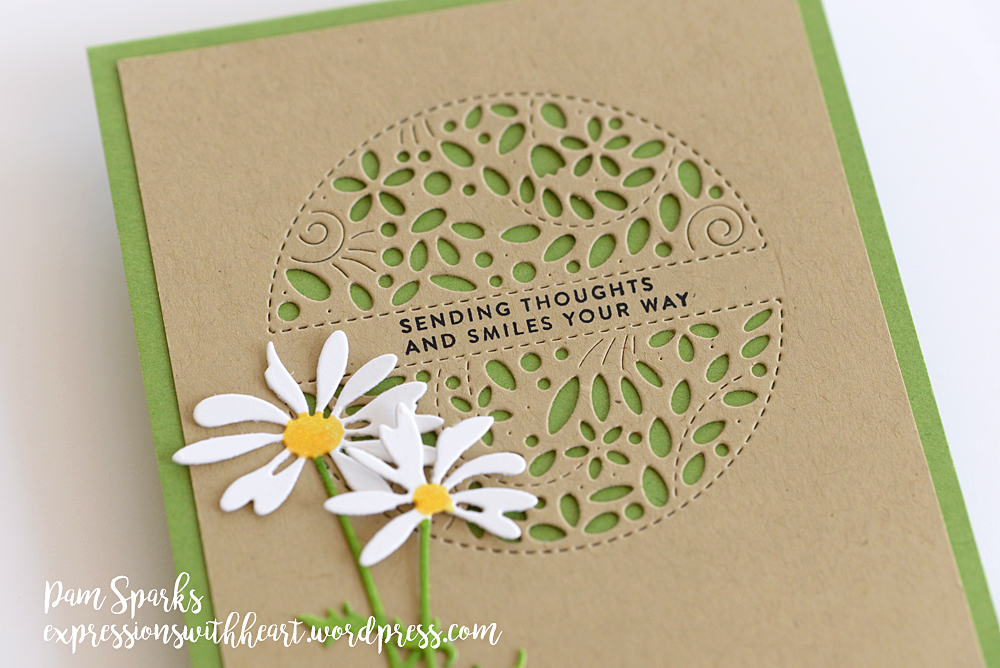
My next card is using the circles from the club set.

I lined up the 3 circle dies in a row on top of an A2 card size panel. Taped them in place with removable tape and die cut…repeated it for the next row. It worked slick. I didn’t even measure this time. eek! lol I had six holes in the panel then.

I used mounting tape on the back of the panel and adhered it to a TE Granny Smith A2 size panel so that color would show through when I pieced in the circles.
I die cut the 3 circle dies from white and Taylored Expressions color cardstock. Adhered them together and glued them into the holes in the panel.
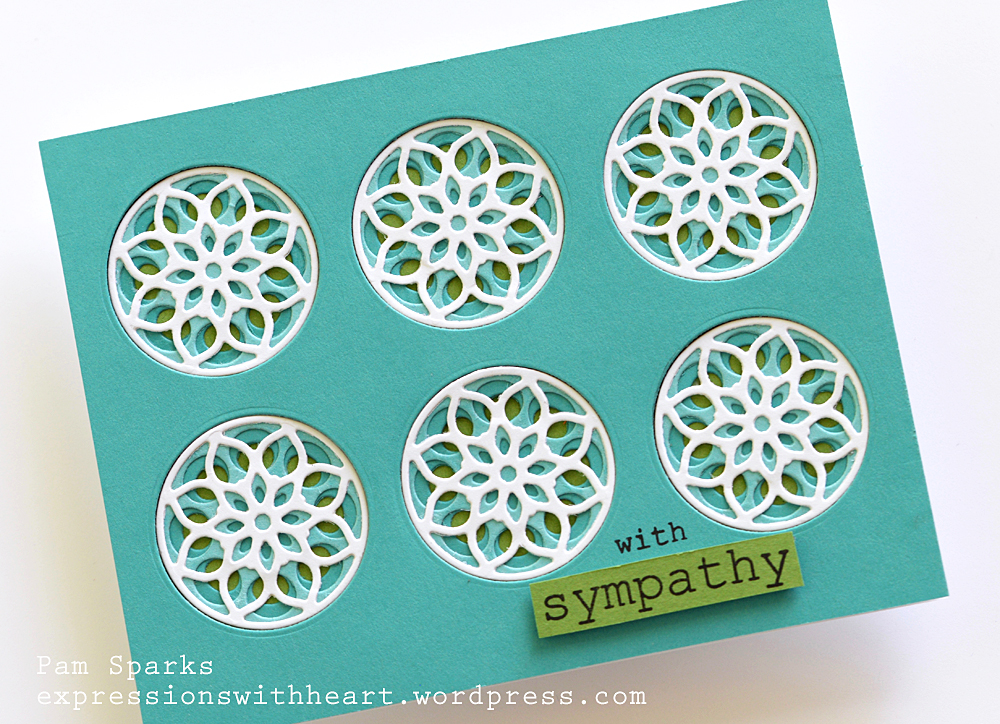
I stamped the sentiment with Archival black ink and the MISTI tool. I cut out the word sympathy with the MISTI Cut Align ruler.
I hope I didn’t make it sound complicated because it’s just a matter of cutting enough pieces, after you decide what colors you want to use, gluing and putting them in place. 😀

I wish you could see them in person… so much better! hehe
Thank you for stopping by and holler if you have any questions!

Here’s the supply list for these two cards…
|


