birch press design · cards · Christmas · Die Piecing · Inlaid Diecutting · Interactive · Memory Box · Ornament · Winter

Memory Box NEW Snowglobe Dies and Sales!

Hi everyone!  I’m so happy to start sharing Christmas creations with the NEW Memory Box and poppystamps release!!!

I love snowglobes and I have 4 ready to share.  I was going to put them all in one post but I got to thinking it might be confusing so I think I’ll do them one at a time.  Rest assured, you will want all four of the dies though. hehe

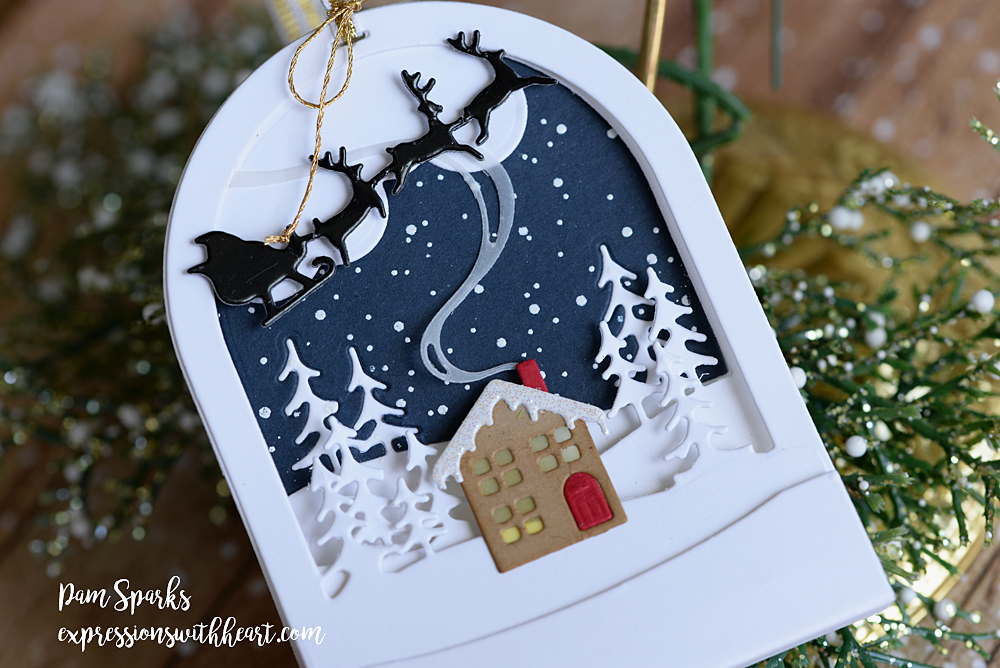
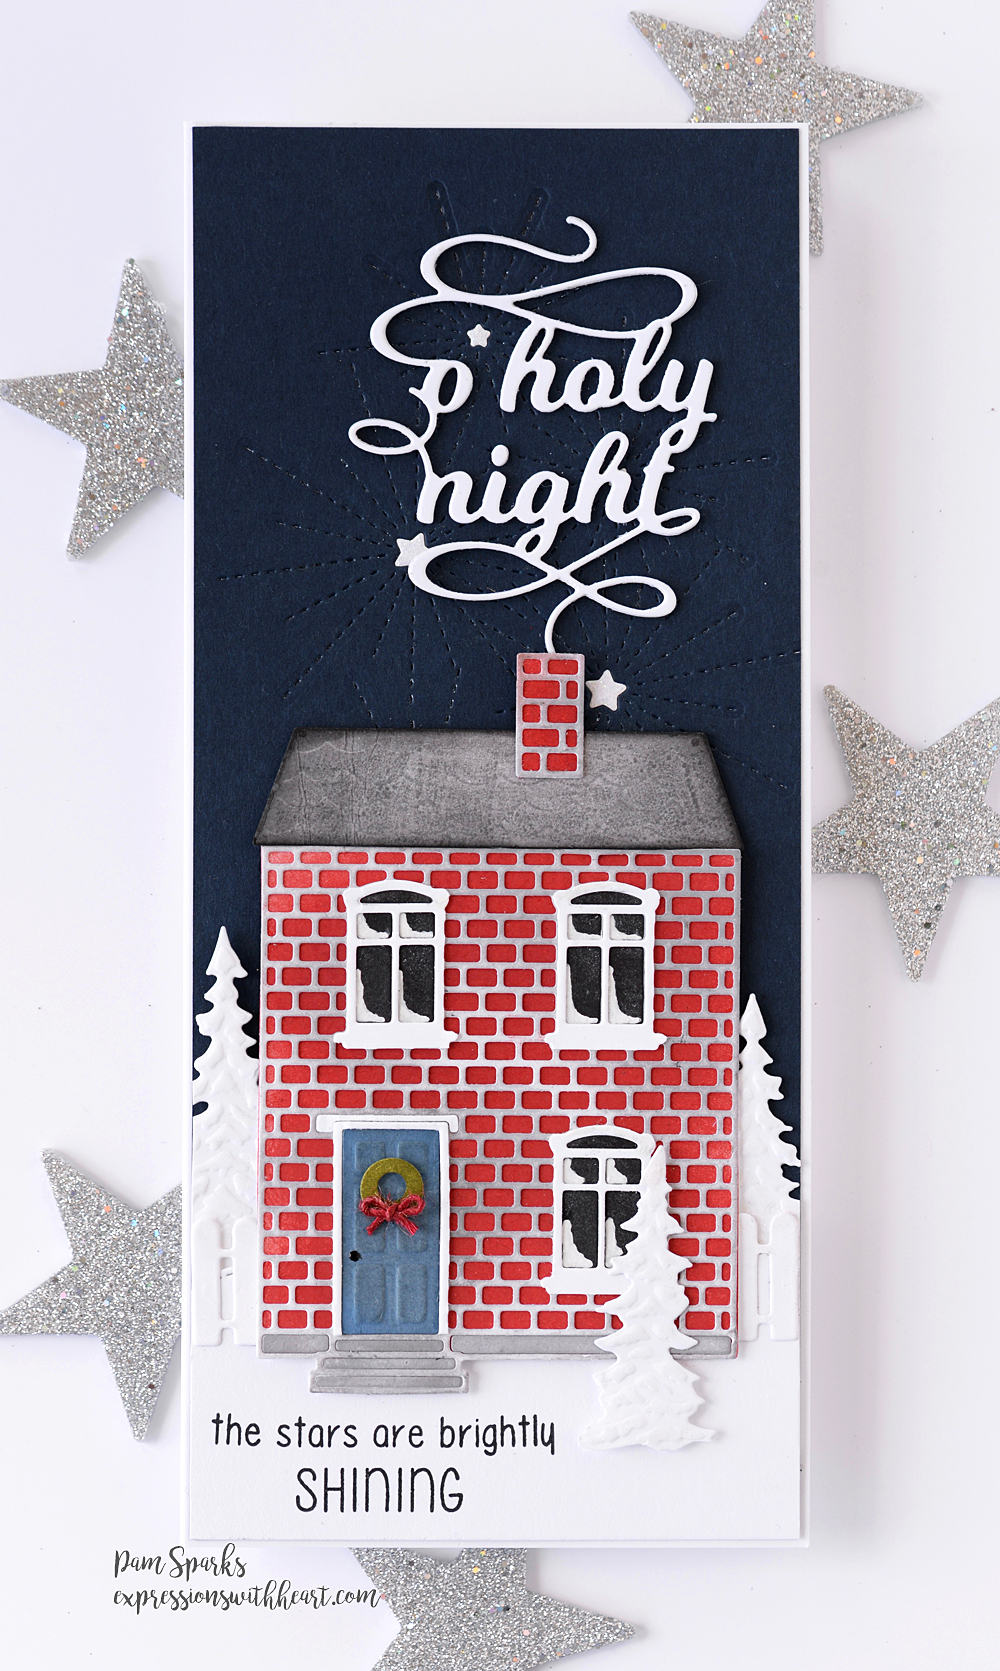
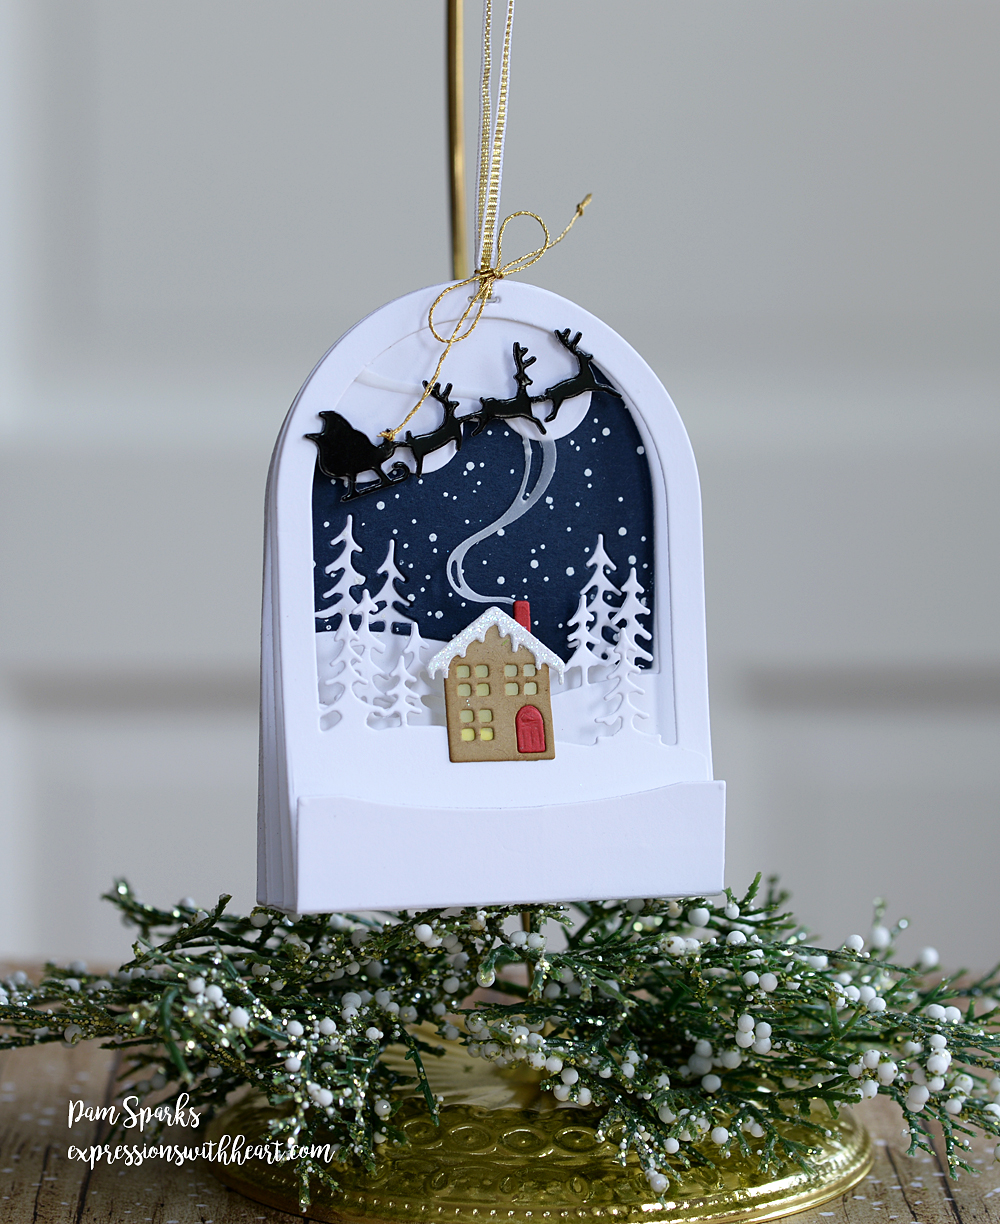
I want to escape to here! The roaring fire, the peaceful snowfall… my soul says yes!

The blog post right before this one, I posted a video on how these dies go together…click HOME and scroll down to see the video in the previous post.  Very easy to put together!

Here’s how I put this together…

*die cut the Snowglobe Backer die in heavy white cardstock

*die cut the Snowmen Snowglobe in heavy white and TE Blue Corn cardstock (back layer)

*stamp and heat emboss in white embossing powder the Birch Press Design Celestial Waves stamp that looks like snow on the Blue Corn sky, then inlay the sky into the white Snowmen background die cut

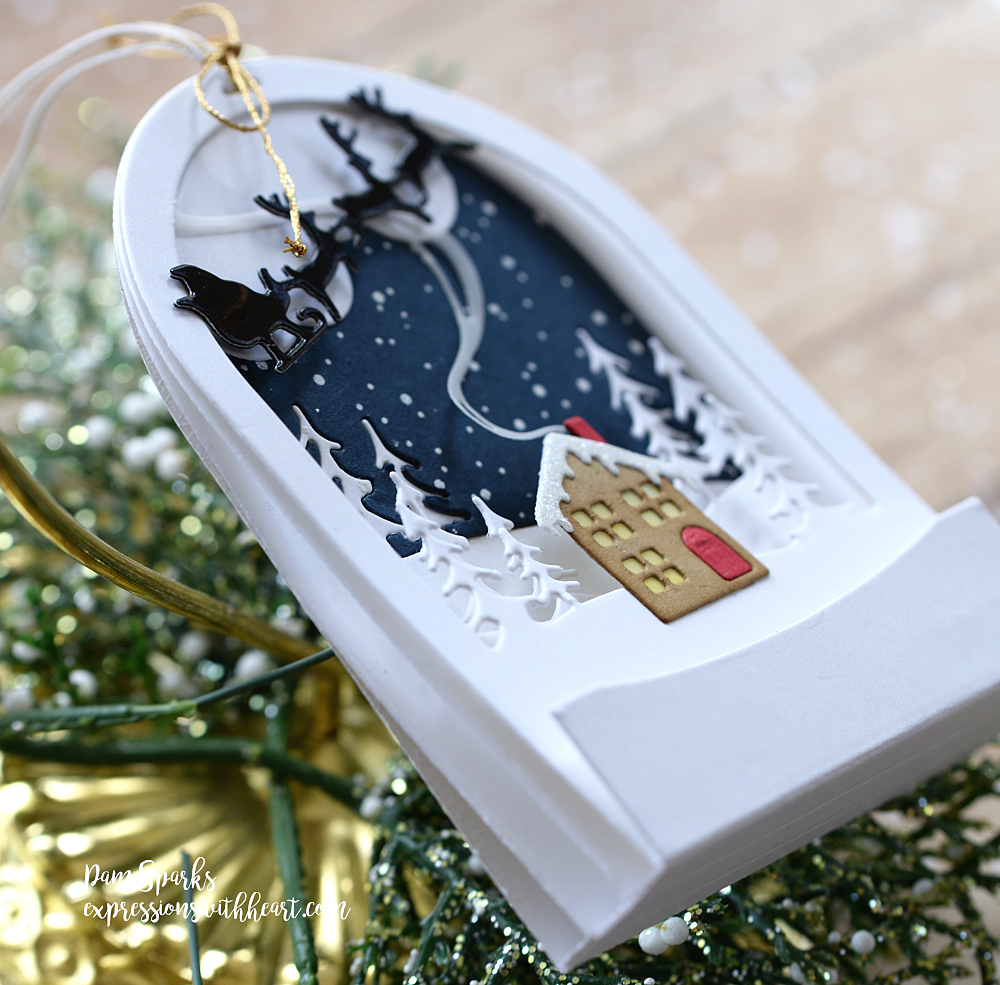
*die cut the Radiant Snowglobe die in heavy white cardstock, I just used the frame part (middle layer)

*die cut the Cabin Snowglobe die in heavy white cardstock (top layer)

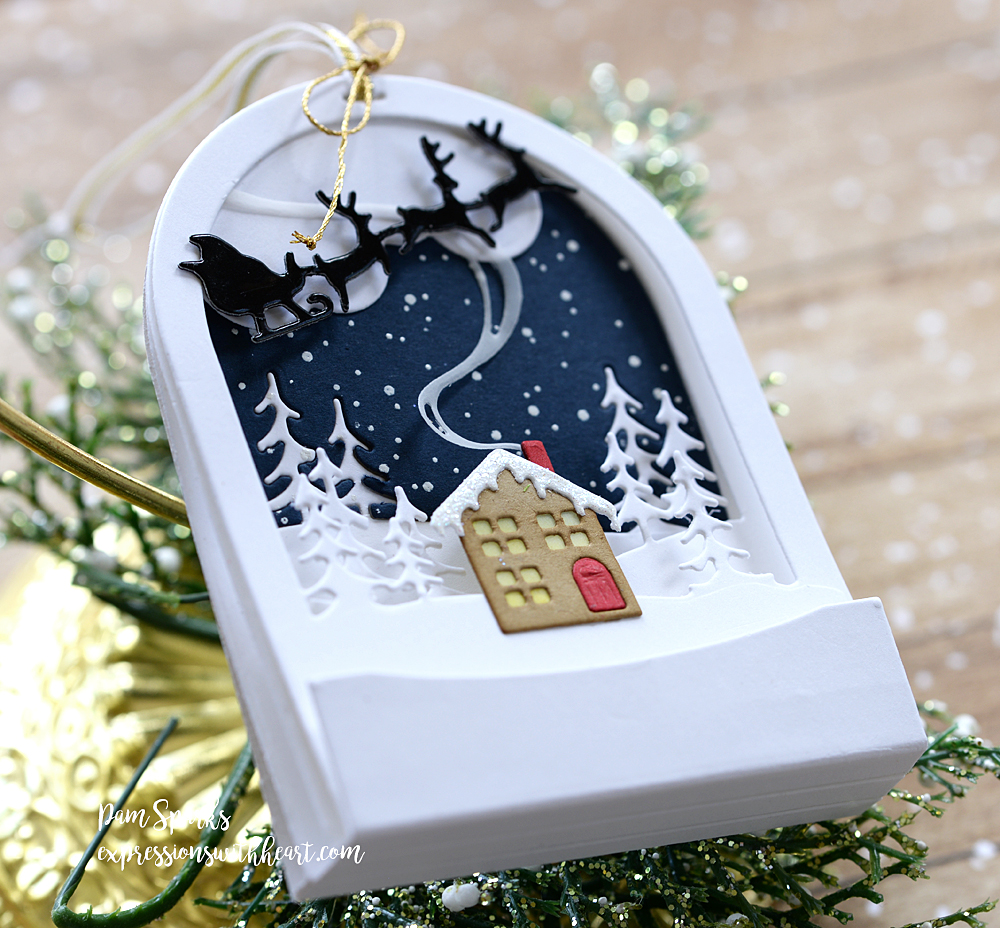
*die cut the cabin from TE Toffee cardstock and the snow from Memory Box glitter cardstock pad

*die cut the smoke from a piece of vellum

*hand cut a square of vellum to go behind the cabin and color it yellow on the backside to mimic light in the windows of the cabin

*I die cut the cabin in TE Cherry Pop to get the door and the chimney

*I die cut Santa and his reindeer in shiny black cardstock, if you don’t have that, you could heat emboss it with black embossing powder or color it with a black glaze pen or cover it with glossy accents to get a shiny die cut

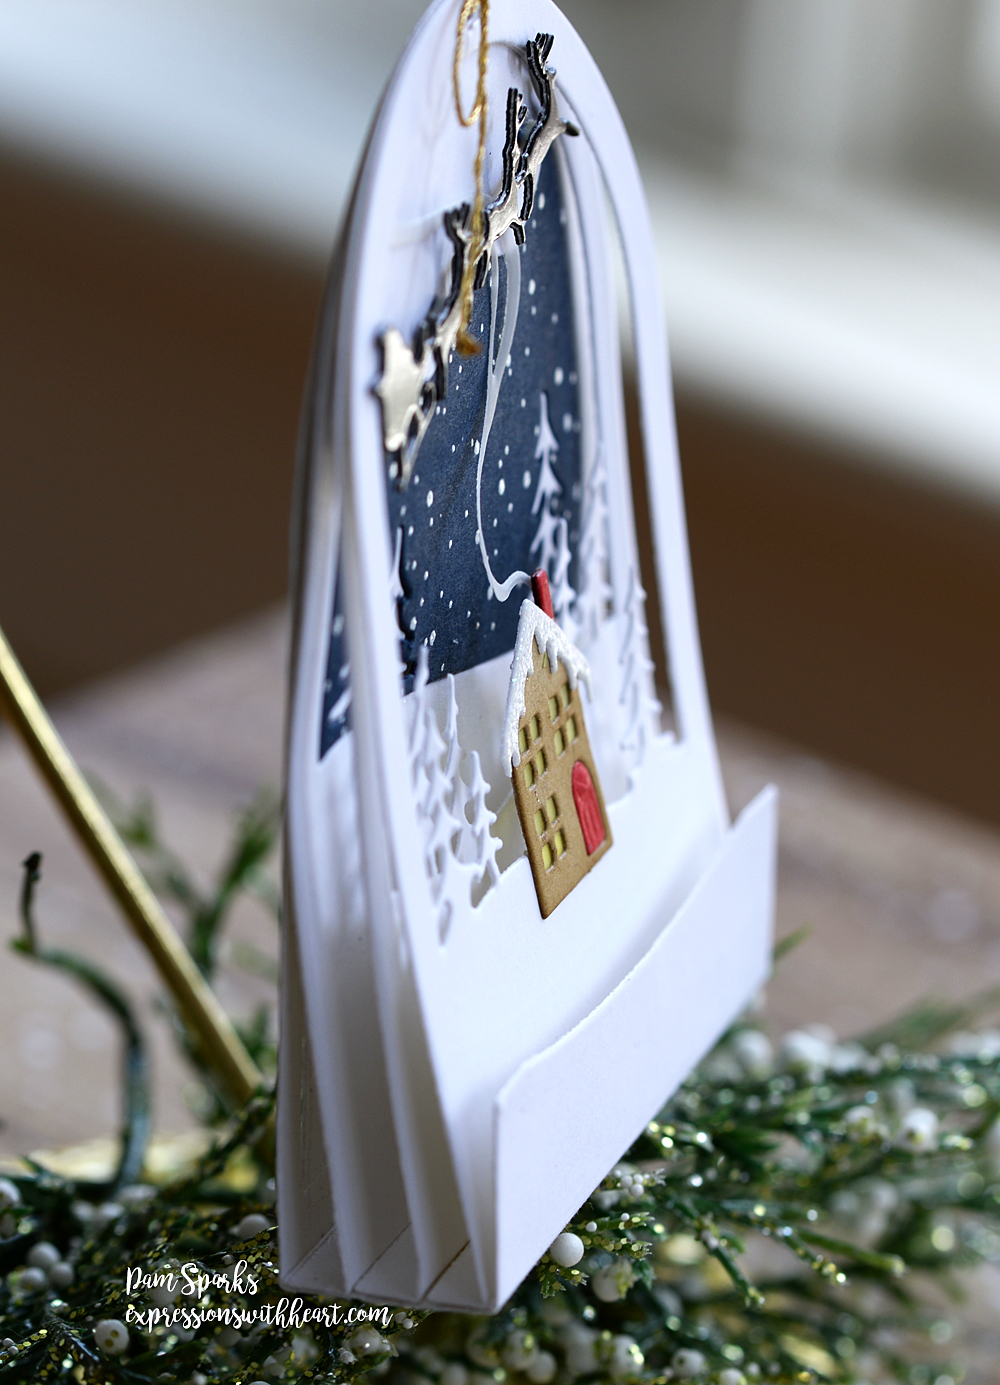
I use a piece of  ⅝  inch scor-tape on the inside bottom of the Snowglobe Backer die cut. That holds each layer in place.

I’m so happy with how this turned out!  Perfect little gift, or tag or I can see these all over the Christmas tree as ornaments!

Thank you for clicking over and I’ll be back with the other three I’ve made so far.  ❤

The dies and supplies I used…sale info below this grid…


Memory Box – 94491 Snowglobe Backer…
[ STR | SSS ]
Memory Box – 94492 Snowmen Snowglobe…
[ STR | SSS ]
Memory Box – 94493 Radiant Snowglobe…
[ STR | SSS ]
Memory Box – 94494 Cabin Snowglobe…
[ STR | SSS ]
Memory Box – GP1005 Holiday Glitter Pad
[ STR | SSS ]
Birch Press – Clear Stamp – Celestial…
[ FRN ]
Scor-Tape; Scor Tape
[ STR | SSS ]
TE Premium Cardstock
[ TE ]
Tombow Mono Multi Liquid Glue
[ STR | SBC | SSS | TE | BLIC ]


Click the ads to shop… thank you!


Christmas · Memory Box · Tags

NEW Memory Box Release for Christmas! A Snowglobe Tag Set!

How about a super short post today! lol  I started this and thought, I better make a quick video to show how it works!  So here’s a little intro video to how this snowglobe tag is going to go together and think about how many variations we can make!  The snowmen, the cabin in the woods, Santa and Sleigh scenes… oh my!  Check it out!

Coming Soon!

Memory Box – 94494 Cabin Snowglobe…
[ STR | SSS ]
Memory Box – 94492 Snowmen Snowglobe…
[ STR | SSS ]
Memory Box – 94493 Radiant Snowglobe…
[ STR | SSS ]
Memory Box SNOWGLOBE BACKER Craft…
[ SSS | STR ]
Memory Box – GP1005 Holiday Glitter Pad
[ STR | SSS ]


I’ll be back soon with lots more!

cards · Christmas · Die Piecing · Inlaid Diecutting · Memory Box · Oxide Inks · Poppystamps · Winter

poppystamps Proper Brick House Card…

Hi everyone! I had fun last week playing with some new dies.  I thought, this house needs smoke!  So it turned into a tall Christmas card!

O Holy Night, Starry Burst and Pine Tree Hill dies came out last year in the Christmas releases.  I did use a little bit of sparkle pen in the burst die cut. The Cottage Picket Fence is from this year.

The house and parts are inked with Distress Oxide inks.  I die cut the house again in white and cut out the door and window frames.

I found the stamped sentiment in an old Memory Box set Wintertime Fairies. Linked below too.

This house makes me smile… I grew up in a red brick house.  ❤

Thank you for stopping by today! Talk to you again soon!

Products I used to make this card…

Poppystamps – 2317 Proper Brick House…
[ STR | SSS ]
Memory Box – 94356 Starry Burst craft…
[ STR | SSS ]
Poppystamps – 2270 O Holy Night…
[ STR | SSS ]
Memory Box – 94295 Pine Tree Hill…
[ STR | SSS ]
Poppystamps – 2351 Cottage Picket…
[ STR ]
Poppystamps – CL458 Wintertime…
[ STR ]


cards · Christmas · Die Piecing · Inlaid Diecutting · Simon Says Stamp · Winter

2 cards for the Simon Says Stamp Blog Party Today…

Welcome to the party! I have two cards to share with you today. I have some new Simon Says Stamp Christmas dies and a few older  that I decided to use for this post. yay!

As I’m typing this, it’s rainy and cold!  Feels a bit like Winter! April Fools! haha

I made this card with the Winter Foliage Frame die cut in green and parts in red and inlaid. The Winter Wishes die cut in red and white. Circle Basics die set for the brown center circle. The May Christmas sentiment is from the Inside Christmas Greetings stamp set.

I cut a green panel ⅛ inch smaller than the A2 white cardbase.  I adhered the frame with glue in the center, then mounting tape to adhere the Winter Wishes circle.  A little white pen for the berries.

I like it!  Festive and bright!

More Christmas cheer on this card! I used the Holly and Berries Tag die, cut in greens and red but I tried to put a big eyelet in the hole and messed it up so now it’s not a tag!  I trimmed that part off.  I didn’t want to start over!  😀

I die cut three RyLynn Snowflakes in my A2 kraft card panel, then die cut three white ones and inlaid them in the kraft panel, taping them ‘in’ on the back.

I stamped the sentiment from the Fa La La stamp set in the bottom corner.

Die cut the Fa La La die in red and white cardstock and adhere together with Tombow Mono Multi liquid glue.

That’s it!  It was fun to get back into some Christmas colors and now I have two cards ready to send! Win!

The list of party participants is on the Simon Says Stamp Blog HERE.  So glad you stopped by my blog!

ttul, ❤

Products I used from Simon Says Stamp on my cards today… thank you for shopping through my affiliate links.  I appreciate it so much!

Simon Says Stamp WINTER FOLIAGE FRAME…
[ SSS ]
Simon Says Stamp WINTER WISHES CIRCLE…
[ SSS ]
Simon Says Clear Stamps INSIDE…
[ SSS ]
Memory Box CIRCLE BASICS SET Open…
[ SSS ]
Simon Says Stamp HOLLY AND BERRIES…
[ SSS ]
Simon Says Stamp RYLYNN SNOWFLAKE…
[ SSS ]
Simon Says Stamp FA LA LA Shadow…
[ SSS ]
Simon Says Clear Stamps FA LA LA…
[ SSS ]
Bazzill PEPPERMINT Card Shoppe Heavy…
[ SSS ]
Neenah Environment 100 LB SMOOTH…
[ SSS ]
Neenah Classic Crest 110 LB SMOOTH…
[ SSS ]
Bazzill APPLE CRUSH Smoothies Paper…
[ SSS ]


cards · Christmas · Die Piecing · Simon Says Stamp

Simon Says Stamp Diecember Shimmer Oval Die Card…

Hi everyone!  I hope you’re starting to receive some handmade cards!  I hope to get mine mailed out this weekend!

Today’s post is about this new die from Simon Says Stamp, Shimmer Oval.  This was so easy to make!

I die cut in 110# Neenah Classic Crest Solar White cardstock.  I do shim but I use copy paper, not the metal shim.  I just add a folded piece of copy paper on top of my top cutting plate and cut with the die blades up.  This one I used two folded pieces of copy paper, so 4 layers.

Then the oval white panel and the gold glitter panel I die cut with Memory Box Rectangle Basics dies.

I heat embossed the sentiment from SSS Inside Christmas Greetings clear stamp set on a piece of vellum with Ranger super fine detail gold embossing powder.

I die cut two of the mistletoe dies from the SSS Christmas Foliage die from Diecember Release also.  I added Ranger Gold glitter stickles to the berries.  I debated adding them but I gave myself a talking to.  I’m always wanting to leave things plain, so I had to ask myself why did I buy gold glitter stickles then?!  So I put them on the berries. ha!

I glued the gold glitter cardstock panel to the white A2 cardbase first.  Then I adhered the white oval panel with strips of foam mounting tape.  The white floral oval is glued flat on the inside of the popped up oval panel.

I prepared the vellum panel by creasing the folds on each end before I stuck the white panel down, making it easier to adhere after I placed the inside floral oval.

Then I just glued the ends of the mistletoe cuts.


I still have to stamp something on the inside.  In fact most of my cards that I need to get mailed still need stamped on the inside.  I am always sorry I don’t do that when I make the card. moan.  Oh well, I’ll set up the platforms and get them stamped!  hehe

Thanks for stopping by!  Happy stamping, shopping, whatever phase you’re in!  Relaxing would be nice! haha

Shopping links below…

Simon Says Stamp SHIMMER OVAL Wafer…
[ SSS ]
Simon Says Stamp CHRISTMAS FOLIAGE…
[ SSS ]
Simon Says Clear Stamps INSIDE…
[ SSS ]
Ranger Embossing Powder SUPER FINE…
[ SSS ]
WOW DUAL SPEED HEAT TOOL WZHT-USA
[ SSS | SSS ]
Tombow MONO MULTI Liquid Glue Two…
[ SSS ]