cards · Memory Box · Perfect Layers Tools · Poppystamps · rubber stamps · Shabby Chic · Spring

Memory Box…NEW stamps and dies!

e.

Memory Box NEW die, Graceful Silhouette…a beauty!

Add some grass…a butterfly… stamps…Memory Box pattern paper…all dies cut out of Memory Box card-stock too!  It’s awesome stuff!  Ask your local stamp store to carry it!  Perfect Layers Rulers used to make the mats/layers. A little Copic coloring on the white puffy flowers…Peeled Paint Distress ink to stamp the Fresh Spring Wreath stamp over the sentiment.

_MG_7204

❤ ❤ ❤ ❤ ❤

Graceful Silhouette card #2 for today!   I was going for a light, delicate look here…

_MG_7222-001

I love the Corner Bow die… I clipped off the part that was extending off the card and used it to attach the tag to the stem of the Graceful Silhouette cut!  I hid the end up the leaf. Memory Box Butterfly pattern paper in the background. Perfect Layers Rulers used to make the mats/layers.

❤ ❤ ❤ ❤ ❤

It’s NEW STAMP Blitz week over on the Memory Box, Outside the Box blog HERE!  click over and comment for a chance to win!

❤ ❤ ❤ ❤ ❤

_MG_7169

White on white with Broken China Distress Ink and Rich Cocoa Memento ink.  The image behind the window is inked with Tumbled Glass and Broken China Distress stain. Memory Box Butterfly pattern paper in the background…

_MG_7160

Happy stamps and dies!

I enjoyed creating these cards to show you today!  Tomorrow I’ll be back with two more cards!   click over to my Memory Box class page,  link/tab under the blog header photo.  I’d love to have you join me for class! It’s great weather for a road trip!  : )

Thanks for stopping by!  I Love it when you visit and comment!  Thank you so much!

Shopping links…

cards · copics · Doohickey's Dies · Magnolia · Martha Stewart · Perfect Layers Tools · punches · rubber stamps · Shabby Chic · Spring · Tilda's Town

Magnolia, Tilda’s Town Challenge…

p

It’s a little bit fussy  and isn’t Tilda fancy!  She makes me smile on this fine Spring day!  Time for a new challenge at Tilda’s Town Challenges!  You get to pick… Fussy and Fancy OR Understated and Elegant!  Take the challenge… Understated is always easier for me so I took the challenge and went for F&F this time! hehe

I’m pretty happy with the card!  Well… I’m wondering about the ribbon but NO, don’t tell me if you don’t like it! I’ve already pulled it apart once! lol

Click over to Tilda’s Town ChallengesHERE and enjoy the inspiration from the Design Team and enter the weekly challenge!  We’d love to have you!  Each week there is a random winner, chosen by Inlinkz, for a $10 gift certificate to Tilda’s Town.com!

logo1

Tilda’s Town is a most magical shop specializing in Magnolia Stamps. Over 1,100 stamps in stock at all times. Tilda’s Town offers FREE worldwide shipping on every order, every day. You can also save up to an additional 20% on your purchase by using one of the famous coupon codes. Shop at Tilda’s Town.com and live the magic.

Great NEWS!  The newest ‘Once Upon A Time‘ collection is in the store now!  So CUTE!

For my card today, I used Tilda in Summer Rain, in the store HERE.

_MG_7154 - Version 2-001

I love this Tilda… so cute!  I stamped her on Copic x-press it card with Memento Tuxedo Black ink and colored her with Copic Sketch markers.

Skin – E000, 00, 21 – Cheeks diluted R20 (with R00)
Hair – E50, YR31, 21, 23, E37
Dress/boots/umbrella – R20, 21, 22
Water/shadow – B0000, 000, 00

I used my Perfect Layers Tools to make the mats for the layers,  Martha Stewart border punches – birds on a line and flourish. Scroll down a couple posts for the Perfect Paper Crafts and Faber Castell blog hop…another Tilda card and you can still comment for a chance to win through today!!!

Ribbon is from May Arts… other links below… THANKS for looking!  I love hearing from you/reading your comments!  They always make my day and are very much appreciated!  Smiles and laughs… thank you!

Challenges…
Live & Love Crafts Challenges – Bingo, Pink, Two designer papers, pearls
Lovely hÄnglar or Magnolia – Butterflies
You, Me and Magnolia – Spring
Magnolia-licious – Spring
Papertake Weekly – Anything Goes

Shopping links…

Blog Hop · cards · Faber Castell · Magnolia · Perfect Layers Tools · rubber stamps · Spring · Watercolor

Perfect Layers and Faber Castell Design Teams Blog Hop…

Welcome to the Hop!

_MG_7121-001

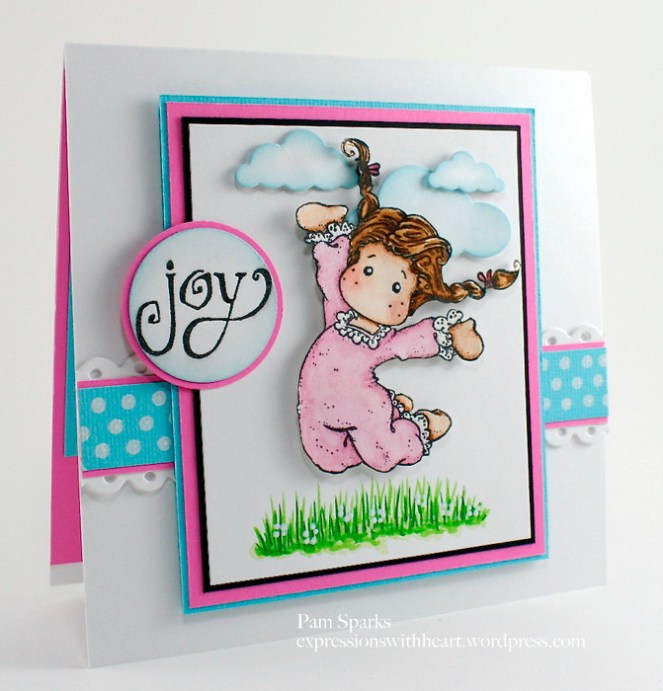
Well,  Tilda insisted on it being a ‘jump’!  hahaha

You’re going to be inspired by the Perfect Layers and Faber Castell Design Teams!  Hop through the list of designers and comment on their posts for a chance at the prizes offered… $50 in product from Faber-Castell and the set of three Perfect Layers rulers and the perfect Square, value $45!!!  The more blogs you comment on, the more chances to win! You have until midnight EST, on April 5th to complete the hop.

6a0134896f7ad2970c017ee906dd35970d-600wi

I used the Faber Castell Pitt Artist pens and the Stampers Big White Pitt Artist pen.  

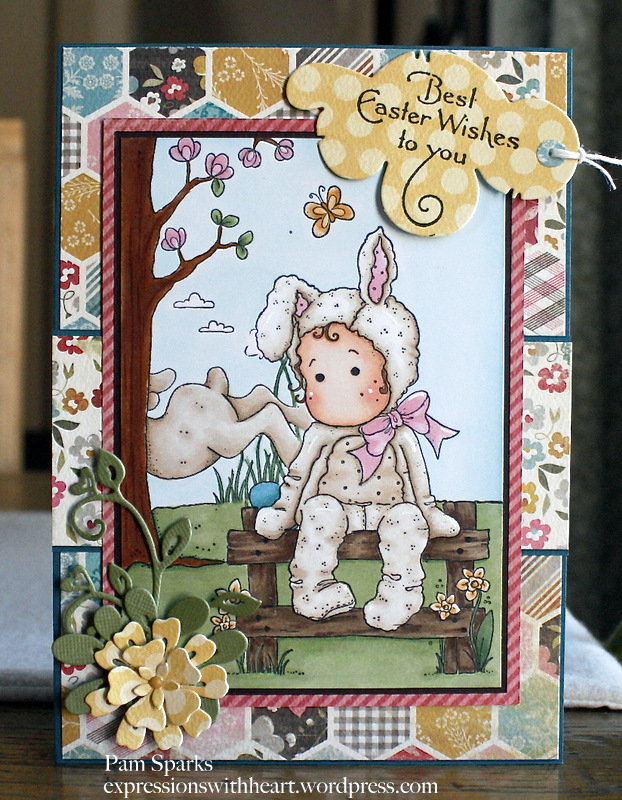
I stamped Tilda on hot press watercolor paper with Ranger Archival Black ink, watercolored her by coloring the pens on my stamp a ma jig imaging sheet and picking up the color with a waterbrush.  I’m delighted with how easy it was and the look I achieved!

Skin – Light Flesh 132
Cheeks – added water to Pale Geranium Lake 121
Hair – Raw Umber 180
Clothes – added water to Magenta 133
I did go in and shade the skin and hair with the markers direct to the paper.  The brush tip is really thin and lends itself to details easily!

After I cut Tilda out,  I went around the cut edge with the black marker.  I LOVE it!  Good coverage and No bleeding!

_MG_7126-004

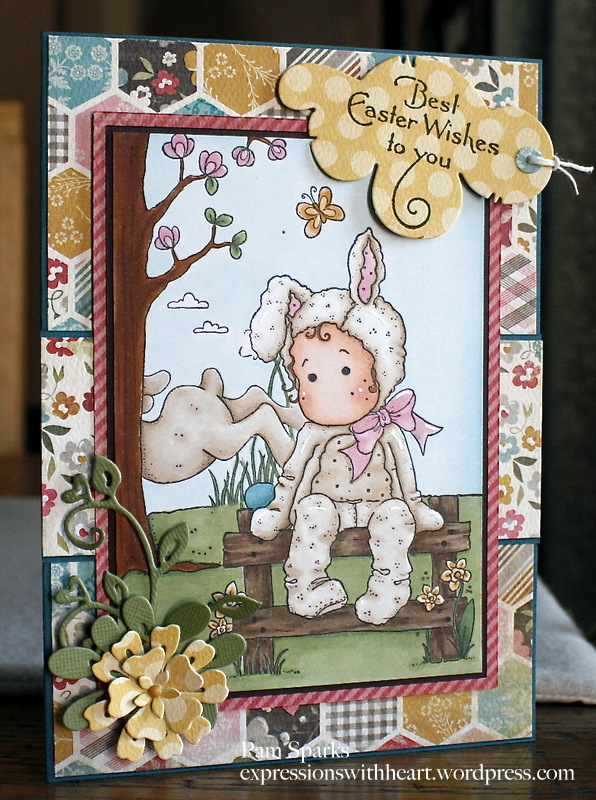
For the grass… this was fun!  I started with Light Green 171, making strokes for the blades of grass with the marker tip and then watercoloring a little under them with the scribbled ink and waterbrush.  Next I added Leaf Green 112 blades of grass and then Permanent Green Olive 167.  Awesome markers for blades of grass!

_MG_7126 - Version 2

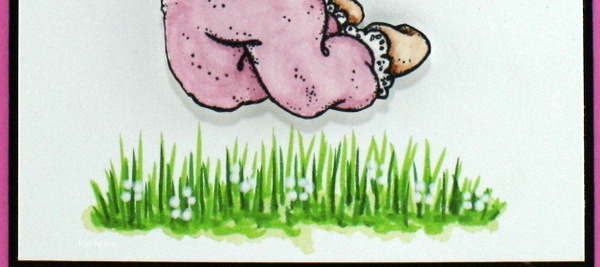
I do have a ‘thing’ for little white flowers! : )   The Stampers Big White pen came in quite handy to add little dots to the patch of grass for flowers!   What a great pen!

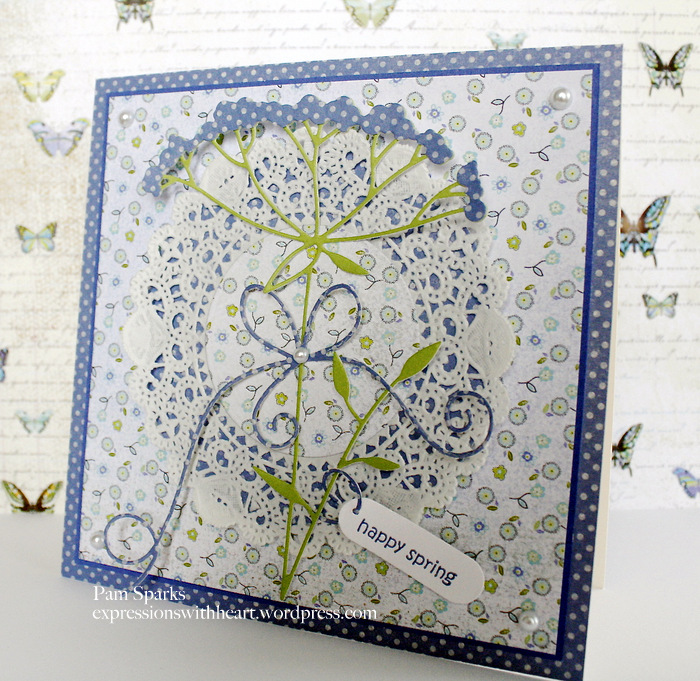
I also made my own polka dot paper!   See the blue strip on the front… cute! Depending on how hard you push down,  is what size of dot you get!  The flower dots are teeny and the dots on the strip are big! Love it!

The Clouds are the Puffy Clouds die from Memory Box, edged with Tumbled Glass Distress ink and the ink blending tool.  Two EK Success Nesting punches for the sentiment… 1 3/8th in and 1 1/2 in.

copy-2011

You all know I LOVE, LOVE, LOVE  the Perfect Layers Tools! (enter code, ‘Sparks5%’ at checkout)
What a time saver!  Mat your creations in a fraction of the time it takes to get them even with a trimmer!  YEA!    I have the set of three… yes… it’s great to have them all!  You just never know when you’ll need them!  On my card today I have the 1/16th inch mat and 1/8 th inch mat.

HERE is a video tutorial I made using Perfect Layers Tools!  A few tips on it…  I cut standing up…works the best for me with the full size x-acto knife blade, #11 size.   I love the Fiskars fingertip knife… link below.

Here’s the inside of my card…I wanted to show you that the Perfect Layers Tools work for a random look too!  I had the piece of blue left but not the right size… oh well… use it, I told myself!  so I did! lol  Worked great to use the larger measurements on the rulers.  This is a 5  1/2 inch square card.

_MG_7127-001

So glad you stopped by!  I love sharing the coloring mediums and tools I love to work with!  I hope you’ll try these tools too!  You won’t be disappointed!

Here’s a list of the other blogs with posts for the HOP!  Enjoy! Comment and good luck!
(winners posted on the two store blogs on April 6th)


Pam Sparks (me) 

Supplies I used on my card… 

B3548 Joy, F4302 Celebrate and C2874 Hope your wishes stamps are from Printworks Collection, HERE.

cards · copics · Memory Box · Paper Smooches · Perfect Layers Tools · rubber stamps · Spring

Paper Smooches, Memory Box and Perfect Layers Tools News…

_MG_7000

With ME!

That’s what I need to put on the inside! : ) and Happy Spring!  Super cute Paper Smooches stamps and dies.  Graffiti Alphabet stamps and Alphawhimsy Alphabet dies… the stamps don’t quite work perfectly with the dies but with a little ‘adjusting’  I used them together for ‘Tulips’!  I stamped on Hammermill 80# Color Copy Cover card-stock with Memento Tuxedo Black ink and colored with Copic Sketch Markers.   I stamped the tulip letters in Tumbled Glass Distress ink.

I store my Paper Smooches stamps in the sheet protectors I linked to below.  They are 8.5 x 11, fit in a D ring binder and hold three sets on each page (I do have to trim a little of the acetate so they fit, big scissors, whack it off! lol)… so easy to flip through for inspiration!

Sky and Grass are Distress inks… Tumbled Glass and Peeled Paint, applied with the ink blending tool.

Black mat for the main image cut with the Perfect Layers Tools 1/8 inch ruler!  Awesome every time!  Link below or in the sidebar.

❤ ❤ ❤   Happy News!  I’m part of the new Perfect Layers Tools design team!
Every month there will be a couple blog hops with the PLT’s DT and another company… we’re starting this coming Monday, April 1st, no foolin’  with a hop.  Lots of fun and prizes too! woohoo!  Be sure to click ‘follow ‘ in the sidebar so you’ll get my email update right at 8 a.m. when the hop starts!  ❤ ❤ ❤

_MG_7010-001

❤ ❤ ❤ ❤ ❤

I have a Memory Box card to share today too!   It shows the mats/layers cut with the Perfect Layer’s Tools also. I used the 1/16th inch and 1/8th inch rulers.

_MG_6981

Lovely Bella Bouquet die…delicate lines and embossed flowers…an awesome die!  I paired it with Fresh Foliage then added one of the Pastry dies and the Tessatina Border.  The text ‘flowers’ is part of a new Memory Box stamp, inked with Peeled Paint Distress ink!  Sneak Peak! : )

_MG_6971 - Version 2

How about a super close up picture!  Bella Bouquet is cut out of meadow and raspberry Memory Box card-stock.  I cut the raspberry flowers off and glued them with Tombow Mono Multi glue to the meadow cut.  I edged the leaves, stems and label with Peeled Paint Distress ink and the ink blending tool.

I use the Memory Box metal plate to cut the dies that have detail and small lines, like stems. Here’s a three minute You Tube by Dave (MB owner) on using the metal adaptor plate. I’m really glad I purchased the metal plate…cuts the fine detail dies great!

Thanks for stopping by!  See you Monday for the hop!  Holler if you have any questions!

Products I used…

cards · copics · Doohickey's Dies · Magnolia · Masking · Perfect Layers Tools · rubber stamps · Spring · Tilda's Town

Magnolia, Tilda’s Town… Think Spring!

_MG_6925-002

I created a cute little bunny scene for you today!  It’s time for this week’s Tilda’s Town Challenges post…  THINK SPRING!  It’s coming, it really is!

Click over to Tilda’s Town Challenges, HERE and enjoy the inspiration from the Design Team and enter the weekly challenge!  We’d love to have you!  Each week there is a random winner, chosen by Inlinkz, for a $10 gift certificate to Tilda’s Town.com!

logo1

Tilda’s Town is a most magical shop specializing in Magnolia Stamps. Over 1,100 stamps in stock at all times. Tilda’s Town offers FREE worldwide shipping on every order, every day. You can also save up to an additional 20% on your purchase by using one of the famous coupon codes. Shop at Tilda’s Town.com and live the magic.

Magnolia stamps are 30% off and DooHickeys dies are 20% off right now at Tilda’s Town!  An awesome sale!

I stamped Little Bunny Tilda first on Copic X-press it card-stock with Memento Tuxedo Black ink,  masked her with Eclipse masking paper, then stamped the Spring Fence  positioning it with the stamp a ma jig, then masked the fence with Eclipse masking paper  and THEN stamped the Bunny Background over both masked images using the stamp a ma jig to postition it where I wanted it.

whew! stamping fun!  Do you know how to mask?  use the stamp a ma jig?  I have a few tutorials HERE,  HERE and HERE.

I used my Perfect Paper Layers tools to cut the mats for the image and for the pattern papers.  Link below or in the side bar!  LOVE these tools!

Copics…
skin – E0000, 000, 00, 21, 11 – cheeks diluted R20 (diluted with R00)
hair – E27
bunny and bunny body – E40, 41, 42, 43
pink – R81
green – G40, 43, YG91
tree – E35, 37, 39, 27, 29
sky – BG0000, 000
fence – E43, 44, 47, 49
egg – BG53, 57
butterfly  and daffodils – YR 20, 21, 23, 24

_MG_6923

Thanks for stopping by today!  I love having you over and appreciate your comments and friendship!

Here’s some Shopping links…