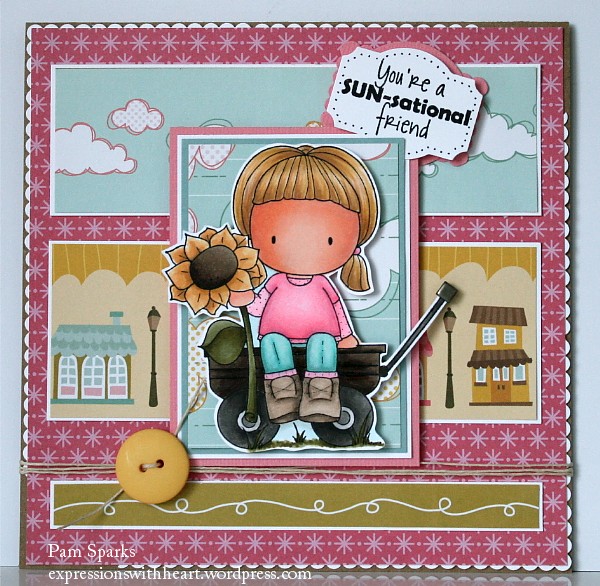
I’m posting a card I made with CC Designs Sugarplums Take A Seat kit. I also made a tutorial for masking with it, so I’ll post it today too!
Here’s Sunflower Emma sitting on the wagon from the kit…Emma says pink is a great Fall color! lol
Here’s the tutorial for masking Emma sitting on the wagon…
Masking an image to create a scene…
#1 – I start out by stamping my focal image on my card-stock and again on a piece of eclipse tape (thin paper with post it note type adhesive on the back side). The eclipse tape image will be my mask.
#2 – I cut out the bottom part of my focal image, cutting inside the stamped line on the eclipse tape. I like to pretty much cut the black line away so I don’t have a halo around the image after I’m done.
#1 #2
#3 – I’ve placed my mask over the stamped image on my card-stock, making sure to keep the mask inside the stamped lines of the main image stamped on the card-stock.
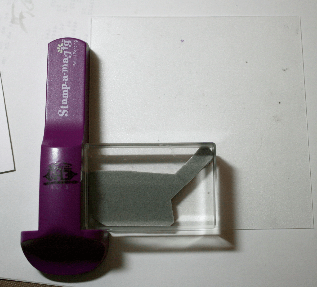
#4 – I have an old Stamp a ma jig! They are an aqua color now but both work exactly the same! Here I’ve placed the imaging sheet on my work surface and aligned the “jig” up against the bottom corner of the imaging sheet. Ink up the stamp and bring it into the corner of the “jig”, making sure nothing moves… very easy! You can touch the “jig” with your stamp/block and then go down to stamp. This leaves a stamped image on the imaging sheet.
#3 #4
#5 – Remove the stamp/block and see the image.
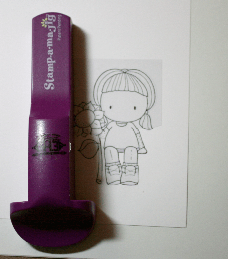
#6 – Move the “jig” away and pick up the imaging sheet and place it over your masked image on the card-stock. You will be able to see where you want to place the wagon in this case for Emma to sit on. Line it up, just how you want it.
#5 #6
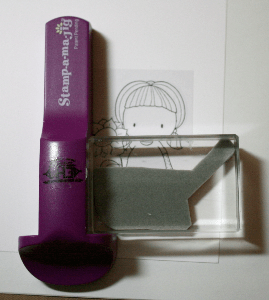
#7 – Bring the “jig” back up to the bottom corner and fit it up against the imaging sheet adjusting to where you want the wagon to end up.
#8 – Holding the “jig” in place, carefully remove the imaging sheet.
#7 #8
#9 – Ink up the wagon stamp. While holding the “jig” in place, bring the stamp/block over to the “jig”, fitting it into the corner. Stamp and lift.
#10 – It looks funny! You’ve stamped over the eclipse tape. Go ahead and remove the mask/eclipse tape
#9 #10
Here she is… Sunflower Emma sitting on her wagon! So CUTE!
My original post for this card is HERE.
Thanks for visiting today! I hope I inspired you to take up masking if you haven’t already! Holler if you have any questions! ttul!
Discover more from
Subscribe to get the latest posts sent to your email.







So cute and I am so glad to have this tutorial – I have never masked and need to learn – you are such a good friend and teacher!!!! Later gator –
Sandy
Awesome card! Thanks for sharing 🙂
Very cute card Pam. Your coloring of this cutie is awesome. thank you for the tuto. very interesting.
Hugs.
So cute Pam, great tut! Have a super weekend!
What a darling card! I love the wagon – haven’t seen it yet!!! Another ‘must have’! Thanks for the inspiration, my friend – hope you are having a good weekend! Hugs…
Too cute – love this little sunflower gal – and the coloring as always is fantastic. Thanks for the tutorial.
I don’t think I have ever seen you make just a “card.” Everything you make is more on the order of “masterpiece” & this one is certainly that. Love the coloring, the layout, it’s all perfect.
You are the master of the “JIG”. I have even used it once or twice since you taught me how to use it. Thanks. Oh, great card as always !!!
Sweet card ♥
She’s adorable Pam!
Love your great use of dp on this creation Pam!
Well, some of us look back and think ugh….then we look back at your cards and think darn why couldn’t I have done that….LOL….your card is adorable and I love the tutorial…you are really becoming the expert at these! Have a wonderful week!
Absolutely delightful Pam!!!!! Those colors on your projects are amazing!!!!!! Wow stunning card!!!!!! Love it!!!!
this card is beautiful pam also your backpapers.
and thank you for the toturial.
greetings karin
Awesome card Pam! Thanks for the tutorial on masking,very helpful
Hugs Julie P
Awe I love your coloring. Thanks for the tutorial on the masking too! Great job on your card!
xoxo
Peggy